Table of Contents
Advertisement
Quick Links
Advertisement
Table of Contents

Related Manuals for Bosch HEA513B 1 Series


Summary of Contents for Bosch HEA513B 1 Series
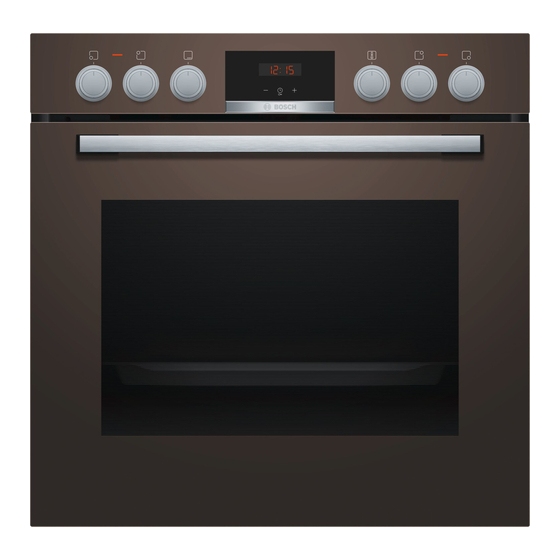
- Page 1 Built-in cooker HEA513B.1 User manual and installation instructions [en]...
-
Page 2: Table Of Contents
en Safety Futher information and explanations are available online: 1.2 Intended use Table of contents This appliance is designed only to be built into kitchen units. Read the special installation instructions. USER MANUAL Only a licensed professional may connect ap- Safety .............. 2 pliances without plugs. -
Page 3: Safety
Safety en Loose food remnants, fat and meat juices WARNING ‒ Risk of injury! may catch fire. Scratched glass in the appliance door may ▶ Before using the appliance, remove the develop into a crack. worst of the food residues and remnants ▶ Do not use any harsh or abrasive cleaners from the cooking compartment, heating ele- or sharp metal scrapers to clean the glass ments and accessories. -
Page 4: Preventing Material Damage
en Preventing material damage 1.5 Halogen bulb WARNING ‒ Risk of suffocation! Children may put packaging material over WARNING ‒ Risk of burns! their heads or wrap themselves up in it and The bulbs in the cooking compartment get suffocate. very hot. There is still a risk of burning for ▶... -
Page 5: Environmental Protection And Saving En- Ergy
Environmental protection and saving energy en 3 Environmental protection and saving energy 3.1 Disposing of packaging When baking multiple dishes, do so in succession or in parallel. The packaging materials are environmentally compat- ¡ The cooking compartment is heated after baking ible and can be recycled. the first dish. -
Page 6: Time-Setting Options
en Familiarising yourself with your appliance Temperature selector Cooking zone control Use the temperature selector to set the temper- You can use the four cooking zone switches to ature for the type of heating and select settings control the output provided by each individual for other functions. -
Page 7: Shelf Supports
Familiarising yourself with your appliance en Symbol Function Rapid heating Rapidly preheat the cooking compartment without accessories. → "Rapid heating", Page 10 Oven light Illuminate the cooking compartment without heating. → "Lighting", Page 7 4.4 Temperature and setting levels There are different settings for the types of heating and functions. Note: For temperature settings above 250 °C, the appliance reduces the temperature to approx. -
Page 8: Appliance Door
en Accessories Appliance door If you open the appliance door during operation, the operation continues. 5 Accessories Use original accessories. These have been made espe- The accessories supplied may differ depending on the cially for your appliance. appliance model. Note: Accessories may become deformed if they get hot. - Page 9 You will find a comprehensive range of products for Wire rack your appliance in our brochures and online: on univer- www.bosch-home.com sal pan Accessories vary from one appliance to another. When purchasing accessories, always quote the exact product number (E no.) of your appliance.
- Page 10 en Rapid heating Use the temperature selector to set the required ▶ temperature. 8 Rapid heating To save time, you can use rapid heating to shorten the 8.1 Setting rapid heating preheat time. To ensure an even cooking result, do not place the Only use rapid heat-up when a temperature of over food in the cooking compartment until rapid heating 100 °C has been set.
- Page 11 Childproof lock en Use the or button to delay the end time. Button Default value a After a few seconds, the appliance applies the set- 10 minutes ting and the display shows the set end time. ...
- Page 12 en Cleaning and servicing To activate the childproof lock, press and hold the 10.1 Activating and deactivating the ▶ button until appears in the display. childproof lock To deactivate the childproof lock, press and hold ‒...
- Page 13 Shelf supports en Cooking compartment Area Suitable cleaning agents Information Enamel surfaces ¡ Hot soapy water Soak any heavily soiled areas and use a brush or steel wool. Leave the appliance door open to dry the cooking compartment ¡ Vinegar water after cleaning it.
- Page 14 en Appliance door Push the rail into the front socket until the rail 12.2 Attaching the shelf supports also rests against the cooking compartment wall, Notes and then press this downwards . ¡ The rails only fit on the right or left. ¡...
- Page 15 Appliance door en Close the appliance door fully . Grab hold of the Open the locking levers on the left- and right-hand appliance door with both hands (on the left and hinges . right) and pull it upwards and out . a The locking levers are open.
- Page 16 en Appliance door If necessary, you can remove the condensate Slide the inner pane into the left- and right-hand trough for cleaning. retainers . Open the appliance door. ‒ Tilt the condensate trough upwards and remove ‒ Push the inner pane upwards until it is in the left- and right-hand retainers ...
-
Page 17: Troubleshooting
Troubleshooting en 14 Troubleshooting You can rectify minor faults on your appliance yourself. WARNING ‒ Risk of electric shock! Read the troubleshooting information before contacting Incorrect repairs are dangerous. after-sales service. This will avoid unnecessary costs. Repairs to the appliance should only be carried out ▶... - Page 18 en Disposal Pull out the halogen bulb without turning it . Insert the new halogen lamp and press it firmly into the socket. Make sure the pins are positioned correctly. Depending on the appliance model, the glass cover may have a sealing ring. Put the sealing ring in posi- tion.
- Page 19 How it works en 17 How it works Here, you can find the ideal settings for various types ¡ Turn the poultry, meat or fish after approx. 1/2 to of food as well as the best accessories and cookware. 2/3 of the time listed. We have perfectly tailored these recommendations to ¡...
- Page 20 en How it works 17.4 Food selection Food Accessories/cookware Shelf pos- Type of Temperature Cooking ition heating in °C/grill time in mins setting Sponge cake, delicate Loaf tin 150-170 60-80 Sponge cake, on 2 levels Loaf tin 140-150 70-85 Fruit tart or cheesecake with shortcrust Springform cake tin, ...
- Page 21 How it works en Recommended settings for yoghurt Food Accessories/cookware Shelf position Type of Temperature in Cooking heating °C time in mins Yoghurt Individual moulds Cooking compartment 1. 100 1. - floor 2. - 2. 8–9 hrs Preheat the appliance.
-
Page 22: Installation Instructions
en Installation instructions Food Accessories/cookware Shelf pos- Type of Temperature in Cook- ition heating °C ing time in mins Hot water sponge cake Springform cake tin, 160–170 30–35 diameter 26 cm Hot water sponge cake, 2 levels Springform cake tin, 3 + 1 ... - Page 23 Installation instructions en ¡ In combination with induction hobs, the gap ¡ Dimensions of the figures in mm. between the worktop and appliance must not be sealed using additional strips. WARNING ‒ Risk of fire! ¡ The worktop must be secured to the built-in unit. It is dangerous to use an extended power ¡...
- Page 24 en Installation instructions Connection 3N~ / 2N~: Use a H05VV-F mains Undo the fastening screws. power cable or one with a higher rating. Lift the appliance slightly and pull it out completely. Connection 1N~: A suitable H07RN-F 3G6 mains power cable (length 1.5m) is available from the after-sales service 18.7 Installing the appliance Slide the appliance in fully and centre it.
- Page 28 Expert advice for your Bosch home appliances, help with problems or a repair from Bosch experts. Find out everything about the many ways Bosch can support you: www.bosch-home.com/service Contact data of all countries are listed in the attached service directory.
Need help?
Do you have a question about the HEA513B 1 Series and is the answer not in the manual?
Questions and answers