Table of Contents
Advertisement
Available languages
Available languages
Quick Links
Use & Care Guide
Manual de Uso y Cuidado
English / Español
Kenmore
Liquid Propane Gas Grill
Parrilla a gas de propane liquido
Models/Modelos:
Items / Artículos:
P/N 41100309A
Sears Brands Management Corporation
Hoffman Estates, IL 60179 U.S.A.
www.kenmore.com
www.sears.com
www.kmart.com
®
®
- Red
146.23678310
- Mocha
146.23679310
- Green
146.20164510
640-05057371-6
640-05057373-2
640-08685396-7
- Rojo
- Mocha
- Verde
Advertisement
Table of Contents

Subscribe to Our Youtube Channel
Related Manuals for Kenmore 146.20164510


Summary of Contents for Kenmore 146.20164510
- Page 1 Kenmore ® Liquid Propane Gas Grill Parrilla a gas de propane liquido Models/Modelos: - Red 146.23678310 - Mocha 146.23679310 - Green 146.20164510 Items / Artículos: - Rojo 640-05057371-6 - Mocha 640-05057373-2 - Verde 640-08685396-7 P/N 41100309A Sears Brands Management Corporation Hoffman Estates, IL 60179 U.S.A.
-
Page 2: Installation Safety Precautions
Installation Safety Precautions DANGER • Please read this User’s Manual in its entirety before using the grill. • Failure to follow the provided instruction can result in If you smell gas: seriously bodily injury and/or property damage. • Some parts of this grill may have sharp edges. Please wear suitable protective gloves. -
Page 3: Table Of Contents
Wash your hands after using this product. Repair Protection Agreements ® Congratulations on making a smart purchase. Your new Kenmore product is designed and manufactured for years of dependable operation. But like all products, it may require repair from time to time That's when having a Repair Protection Agreement can save you money and aggravation. -
Page 4: Kenmore Grill Warranty
WARRANTY WARRANTY KENMORE GRILL WARRANTY Kenmore One Year Limited Warranty When installed, operated and maintained according to all supplied instructions, if this appliance fails due to a defect in ® material and workmanship within one year from the date of purchase, call 1-800-4-MY-HOME to arrange for free repair or replacement if repair is unavailable. -
Page 5: Use And Care
LP Cylinder USE AND CARE • The LP cylinder used with your grill must meet the following requirements: DANGER • Use LP cylinders only with these required measurements: 12" (30.5cm) (diameter) x 18" (45.7 cm) (tall) with 20 lb. (9 kg.) Capacity maximum. - Page 6 LP Tank Exchange Connecting Regulator To The LP Tank • Many retailers that sell grills offer you the option of replacing 1. LP tank must be properly secured onto grill. (Refer to your empty LP tank through an exchange service. Use only those assembly section.) reputable exchange companies that inspect, precision fill, test 2.
- Page 7 Leak Testing Valves, Hose and Regulator 1. Turn all grill control knobs to OFF. 2. Be sure regulator is tightly connected to LP tank. 3. Completely open LP tank valve by turning OPD hand wheel counterclockwise. If you hear a rushing sound, turn gas off immediately.
- Page 8 Safety Tips WARNING ▲ Before opening LP cylinder valve, check the coupling nut for tightness. ▲ When grill is not in use, turn off all control knobs and LP cylinder For Safe Use of Your Grill and to Avoid Serious valve.
- Page 9 Burner Flame Check WARNING • Remove cooking grates and heat diffusers. Light burners, turn knobs from HI to LO. You should see a smaller flame in LO position than seen on HI. Perform burner flame check Turn controls and gas source or tank OFF when not on sideburner, also.
- Page 10 Cleaning the Burner Assembly WARNING CAUTION Follow these instructions to clean and/or replace parts of burner assembly or if you have trouble igniting grill. 1. Turn gas off at control knobs and LP cylinder. SPIDER ALERT! SPIDER ALERT! SPIDER ALERT! 2.
- Page 11 Indirect Cooking Food Safety Poultry and large cuts of meat cook slowly to perfection on the grill Food safety is a very important part of enjoying the outdoor by indirect heat. Place food over unlit burner(s); the heat from lit cooking experience.
-
Page 12: Parts List
PARTS LIST Description Part Number Description Part Number Key Qty Description Side Burner Lid 40200044 Match Holder 40800128 HEAT DIFFUSERS Rotate Rod, Side Burner Lid 40800118 Match Holder Bracket 40800129 COOKING GRATE Side Burner Grid 40800119 Lighting Rod Chain 41100105 SWING AWAY GRATE Side Burner 40800121... -
Page 13: Parts Diagram
PARTS DIAGRAM PARTS DIAGRAM 23678-41100309 • 13... -
Page 14: Before Assembly
BEFORE ASSEMBLY READ AND FOLLOW THE INSTRUCTIONS BELOW TO CORRECTLY UNPACK GRILL PARTS FROM SHIPPING BOX. Step 1: Open shipping box by slicing down its edges with a box cutter, take out hardware pack, manual, bottom shelf, two doors. Next remove the two side panels, warming rack, door bracket, back rail and back panel. - Page 15 BEFORE ASSEMBLY Step 2: With the aid of an assistant, turn grill head over on its side as shown in the first figure below, and Remove the top Styrofoam piece. Lay the Styrofoam piece flat on the floor. With the aid of an assistant, lift the grill head out of the bottom Styrofoam piece.
- Page 16 BEFORE ASSEMBLY Step 3: Open grill lid ,and take out the small boxes packed within the grill head. Remove all packing materials, and remove all parts from boxes as shown in the figures below. 16 • 23678-41100309...
-
Page 17: Assembly
ASSEMBLY CAREFULLY READ AND PERFORM ALL ASSEMBLY INSTRUCTIONS ON THE FOLLOWING PAGES. Tools Required: Adjustable wrench (not provided) Screwdriver (not provided) 7/16” Combination wrench (not provided) The following hardware is provided in blister pack for convenient use. M4X10 screw AA Battery Qty: 28 pcs Qty: 1 pc M5X10 screw... - Page 18 Bottom Shelf Turn bottom shelf upside down. Attach the casters to bottom shelf with (16) M6x13 screws. □ Note: Install each caster into the correct position as shown in the figure below. The standard caster will only install in one direction. □...
- Page 19 Cart □ To attach side panels, align side panel leg holes with leg holes on each side of bottom shelf. Left side panel has match holder attachment. □ Attach left and right side panels to sides of bottom shelf with (4) M6x13 screws. (A) □...
- Page 20 Front Doors □ Remove the (4) M5x15 screws pre-assembled to the door handle ends, and use them to attach handles to doors. □ For each door, insert the bottom hinge pin into the hole in the front bottom of the cart. Push the top hinge pin down into the door, align it with the top hinge pin hole, and let the pin pop back up, securing the door in position.
- Page 21 Grill Head to Cart □ This step requires two people to lift and position grill head onto cart. □ Remove the tie wraps securing regulator hose to underside of grill head. Pull hose and igniter wires out to side of grill head. □...
- Page 22 Left Side Shelf □ Slide 4 hooks onto push bar in orientation shown below. (A). Hook ends must face away from grill in operation position. (D). Remove the (2) M5x10 screws, M5 lock washers and M5 flat washers pre-assembled to the push bar ends, and use them to attach push bar to shelf. (A) □...
- Page 23 Right Side Shelf □ Remove sideburner grate from sideburner before assembling and attaching the right side shelf. □ Attach fascia to right side shelf with (2) M5x10 screws and M5 flat washers.(A) □ Hang right side shelf onto the brackets on right side of firebox. □...
- Page 24 Sideburner □ Loosen side burner in side shelf. (B ). To loosen, unscrew and remove two front screws holding sideburner in place. (A). Note: Do not loosen electrode screw. □ Remove the 2 pre-installed screws from the valve stem and set them aside. (C) Insert valve stem through hole in fascia.
- Page 25 Heat Diffusers, Cooking Grates and Warming Rack □ Place heat diffusers over burners. The two left diffusers will fit in firebox in either direction. The right diffuser must be orientated with the elongated side towards the searing burner. Fit tabs in firebox front through slots in diffuser tips.
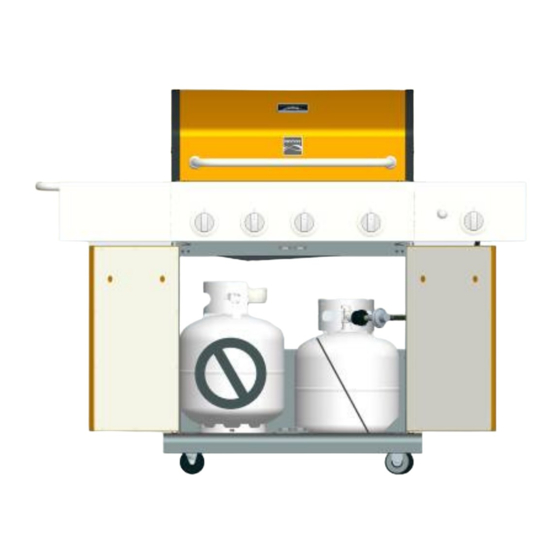
- Page 26 Grease Tray, Grease Cup and LP tank □ Hang grease cup clip from bottom of grease tray. Place grease cup into grease cup clip. □ Feed the regulator and hose through the hole in the right side panel. □ LP tank is sold separately. Use only with an OPD (Overfill Protection Device) equipped LP tank.
-
Page 27: Troubleshooting
EMERGENCIES: If a gas leak cannot be stopped, or a fire occurs due to gas leakage, call the fire department. Problem Possible Cause Prevention/Solution Gas leaking from •Turn off gas at LP cylinder or at source on natural gas systems. •... - Page 28 Troubleshooting (continued) Problem Possible Cause Prevention/Solution Prevention/Solution Burner(s) will not light ELECTRONIC IGNITION: • See Section I of Electronic Ignition System. using igniter. • No spark, no ignition noise. (See Electronic • See Section II of Electronic Ignition System. Ignition •...
- Page 29 Troubleshooting - Electronic Ignition Prevention/Solution Problem Possible Cause Check Item Preventio • Battery not installed SECTION I • Check battery orientation. • Install battery (make sure that “+” and “-” properly. No sparks appear at connectors are oriented correctly, with “+” end any electrodes when up and “-”...
- Page 30 Medidas de seguridad para la instalación PELIGRO • Por favor, lea este manual del usuario en su totalidad antes de usar la parrilla. • El incumplimiento de las enseñanzas impartidas en serio puede resultar en lesiones corporales y / o daños materiales. Si siente olor a gas: •...
- Page 31 Medidas de seguridad para la instalación ..30 PROPOSICION 65 DEL ESTADO DE CALIFORNIA ..31-32 Garantía para la parrilla Kenmore . . . 1. Subproductos de la combustión generados al usar este Uso y mantenimiento ..33-39 producto contienen sustancias químicas conocidas en el...
- Page 32 GARANTÍA Garantía completa de un año para la parrilla Kenmore Garantía limitada de un año de Kenmore Si esta parrilla falla debido a defectos de material o de mano de obra dentro del plazo de un año desde la fecha de compra, llame al 1-800-4-MY-HOME ?ón gratuita (o el cambio si la reparación resulta imposible de realizar)
- Page 33 UOS Y MANTENIMIENTO Tanque de gas propano • El tanque de gas que use con su parrilla debe cumplir los PELIGRO siguientes requisitos: • Use únicamente tanques de gas que tengan las siguientes medidas obligatorias: 12" (30.5 cm) (diámetro) x 18" (45.7 •...
- Page 34 Cambio del tanque de gas Como conectar el regulador al tanque de gas propano • Muchos comerciantes minoristas que venden parrillas, le 1. El tanque de gas debe quedar bien fijado a la parrilla. (Lea la ofrecen la opción de cambiar su tanque de gas vacío mediante sección de ensamblado.) un servicio de recambio.
- Page 35 Prueba para detectar fugas de las válvulas, las mangueras y el regulador 1. Gire todas las perillas de control de la parrilla a la posición deAPAGADO. 2. Cerciórese de que el regulador esté bien conectado al tanque de gas. 3. Abra por completo la válvula del tanque, girando la manilla en sonido sentido contrario a las agujas del reloj.
- Page 36 Consejos de seguridad ADVERTENCIA ▲ Verifique que la tuerca de unión esté bien apretada antes de abrir la válvula del tanque de gas. ▲ Cuando no use la parrilla, cierre todas las perillas de control Para usar su parrilla en forma segura y para evitar y la válvula del tanque de gas.
- Page 37 Control de la llama del quemador ADVERTENCIA • Retire las parrillas de cocción y los reguladores de llama. Encienda los quemadores y gire las perillas, de la graduación ALTA (HI) a la graduación BAJA (LO). Deberá ver una llama más reducida en la Gire los controles y la fuente de gas o OFF tanque cuando graduación baja que en la graduación alta.
- Page 38 Cómo limpiar la unidad del quemador CAUTION Siga estas instrucciones para limpiar o cambiar piezas de la unidad del quemador, o si tiene problemas para encender la parrilla. 1. Cierre el paso de gas en las perillas de control y desde el tanque de gas.
- Page 39 Cocción indirecta Cocción: Cocine bien las carnes y las piezas de ave, para matar las bacterias. Use un termómetro para verificar que los alimentos Las aves y los cortes grandes de carne se cocinan lentamente a la alcancen la temperatura interna adecuada. perfección en la parrilla por calor indirecto.
- Page 40 LISTA DE PIEZAS Clave Descripci ó n Cant Pieza No. Clave Descripci ó n Cant Pieza No. Key Qty Description Tapa Del Quemador Lateral 40200044 Portaf ó sforos 40800128 De Tapa Superior Quemador Lateral 40800118 Portaf ó sforos Del Soporte 40800129 Rejilla Del Quemador Lateral 40800119...
- Page 41 DIAGRAMA DE PARTES 23678-41100309 • 41...
- Page 42 ANTES DE LA ASAMBLEA POR FAVOR LEA Y SIGA LAS INSTRUCCIONES PARA EXTRAER LOS ACCESORIOS PEQUENOS DE UN PAQUETE. Paso 1 : Abrir la caja de envío por rebanar hacia abajo los bordes con un cúter, saque el paquete de hardware, manual, estante inferior, dos puertas.
- Page 43 ANTES DE LA ASAMBLEA Paso 2: Con la ayuda de un asistente, girar la cabeza a la parrilla a su lado como se muestra en la primera figura a continuación, y retire el trozo de espuma de poliestireno superior. Coloque la pieza de espuma de poliestireno en el piso.Con la ayuda de un asistente, levante la rejilla de la cabeza por la pieza de espuma de poliestireno inferior.
- Page 44 ANTES DE LA ASAMBLEA Paso 3: Abrir tapa de la parrilla, y sacar las pequeñas cajas embaladas dentro de la cabeza de la parrilla. Quite todos los materiales de embalaje y retire todas las partes de las cajas como se muestra en las figuras siguientes.
- Page 45 ASAMBLEA POR FAVOR LEA Y SIGA LAS INSTRUCCIONES CUIDADOSAMENTE PASO A PASO. Herramientas necesarias para el armado: Llave inglesa (que no viene incluida) Destornillador (que no viene incluida) Llave mixta de 7/16” (que no viene incluida) Mazo de goma El hardware siguiente se presenta en blister: Tornillos de M4X10 AA Battery Cant.:28 us...
- Page 46 Repisa Inferior □ Gire a la repisa inferior al revés. Fije las ruedas al estante inferior con (16) tornillos de M6x13. Nota: Instale cada rueda en la posición correcta como se muestra en la figura siguiente. La rueda estándar sólo se instalará en una sola dirección. □...
- Page 47 Carrito □ Para colocar los paneles laterales, alinee los agujeros laterales pierna panel con agujeros de la pierna a cada lado del estante inferior. Tablero izquierdo ha partido de apego titular. □ Fije los paneles izquierdo y el lado derecho a los lados del estante inferior con (4) tornillos de M6x13,.
- Page 48 Frente Puertas □ Quite los(4) tornillos de M5x15 pre-montado a la manija de la puerta termina, y los utilizan para conectar las manijas de las puertas. □ Para cada puerta, inserte el pasador de la bisagra inferior en el orificio en la parte frontal inferior del carro.
- Page 49 La parte superior de la parrilla en el carrito □ Este paso requiere de dos personas para levantar la cabeza y la posición de la parrilla en la cesta. □ Quite las abrazaderas de manguera del regulador asegurar a la parte inferior de la cabeza de la parrilla.
- Page 50 Repisa lateral Izquierdo □ Slide 4 ganchos en barra de empuje. Adjuntar barra de empuje de la plataforma lado izquierdo con la pre-ensamblados tornillos a los extremos de la barra de empuje. (A) □ La fascia Adjuntar a la izquierda del lado de la plataforma (2) tornillos de M5x10 y Arandelas de fibra de M5.
- Page 51 Repisa lateral derecha □ Retire la rejilla sideburner de sideburner antes de montar y la asignación de la plataforma lado derecho. □ .(A) Adjuntar a la fascia de la plataforma lado derecho con (2) tornillos de M5x10 y Arandelas de fibra de M5 □...
- Page 52 Quemador lateral □ Afloje quemador lateral en la plataforma lateral. (B). Destornillar y quitar dos tornillos y arandelas frente sideburner mantenga en su lugar. (A). Nota: No afloje el tornillo del electrodo.. □ Quite los 2 pre-instalado tornillos de la válvula y la puso a un lado(C) Inserte la válvula a través del agujero en la fascia.
- Page 53 Termodisipadores ,Parrilla de cocción y rejilla basculante □ Coloque los termodisipadores sobre los quemadores .El difusor con el escudo de calor extendida debe ser colocado en el extremo derecho, con el escudo frente a la derecha. (A) □ Introduciendo las lengüetas en las ranuras de la parte delantera de la cámara de combustión.(B) □...
- Page 54 Presilla, recipiente para la grasa y Tanque de gas □ Cuelgue la presilla para el recipiente para la grasa del fondo de la cámara de combustión, y coloque el recipiente en la presilla. □ Alimentar el regulador y la manguera por el agujero en el panel lateral derecho. □...
- Page 55 EMERGENCIAS: Si no se puede detener una fuga de gas, o si ocurre un incendio debido a una fuga de gas, llame a los bomberos. Emergencias Causas probables Medidas de prevención / solución • Cierre el gas en el cilindro o en la fuente de los sistemas de gas natural. •...
- Page 56 Resolucion de problemas (continuacion) Problema Causas probables Medidas de prevención / solución • Limpie el cable y el electrodo con alcohol de frotar y un hisopo El quemador o los • El cable o el electrodo está cubierto con limpio. quemadores no se restos de comida.
- Page 57 Resolución de problemas – Encendido electrónico Medidas de prevención / solución Problema (encendido) Causas probables Procedimiento de revisión Preventio Causas probables • Revise la orientación de la • Instale la pila (verifique que los polos “+” y “–” • La pila no está SECCIÓN I pila.
- Page 58 Get it fixed, at your home or ours! Your Home For troubleshooting, product manuals and expert advice: www.managemylife.com For repair – in your home – of all major brand appliances, lawn and garden equipment, or heating and cooling systems, no matter who made it, no matter who sold it! For the replacement parts, accessories and owner’s manuals that you need to do-it-yourself.
Need help?
Do you have a question about the 146.20164510 and is the answer not in the manual?
Questions and answers