Table of Contents
Advertisement
Available languages
Available languages
Quick Links
Advertisement
Table of Contents

Related Manuals for Camp Chef SmokePro PG24SE-2


Summary of Contents for Camp Chef SmokePro PG24SE-2
- Page 1 PELLET GRILL AND SMOKER WARNING & INSTRUCTION BOOKLET MODEL NUMBER: PG24SE-2...
-
Page 2: For Outdoor Use Only
WARNING WARNING Wood pellets contain wood dust and other substances known FOR OUTDOOR USE ONLY to the state of California to cause cancer. Avoid inhaling dust generated from wood products or use a dust mask or other safeguards to avoid inhaling dust generated from wood products. WARNING Wood products emit chemicals known to the State of California to •... -
Page 3: Parts List
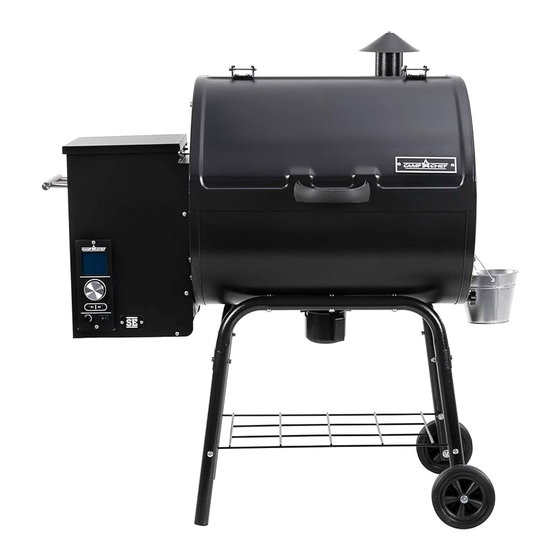
PARTS LIST... - Page 4 PARTS LIST...
-
Page 5: Attach The Legs
1. Do NOT leave this appliance unattended while in use. The user 19. Ashes should be placed in a metal container with a tight must remain in the immediate area of the product and have a fitting lid. The closed container of ashes should be placed clear view of the product at all times during operation. -
Page 6: Install Handle
3. Assemble the wire shelf to the legs as shown in Fig 2 using FIG. 4 Qty (4) M6 x 45 Bolts, Qty (4) M6 Flat Washers, Qty (4) M6 Lock Washers, and Qty (4) M6 Nuts. Finger tighten hardware. M6 FLAT WASHER M6 LOCK WASHER M6 NUT... - Page 7 DRIP TRAY burner. This is done by turning the dial to the FEED position. FIG. 7 The auger will remain on for no more than 7 minutes. This is ample time for the pellets to reach the burner. Once you hear HEAT DEFLECTOR pellets dropping into the burner you can select your cooking temperature.
- Page 8 RED LED – The LED will be red when the dial is turned to the TROUBLESHOOTING shutdown mode or the flame is extinguished in any of the cook GRILL DOES NOT TURN ON. settings. Grill fails to turn on after switching the power button to the LED Flashing Red –...
-
Page 9: Limited Warranty
LIMITED WARRANTY To activate warranty, register on-line at: www.CampChef.com The manufacturer warrants stove components (except paint and finish) to be free from defect in materials and workmanship for 1 year from the date of purchase. All accessories (included with stove or purchased separately) are warranted from defect in materials and workmanship for 90 days from the original purchasing date. - Page 10 RTD Sensor Controller White Black Power Cord MOLEX Connector Hot Rod Burner Auger Motor Blower Fan...
- Page 11 Place in a pan or a cookie sheet to keep your refrigerator clean. Leave overnight. Remove the plastic wrap from the ribs and separate each rack. Place ribs on the grill convex side up and turn smoker on to “High Smoke.” Camp Chef makes a great rib rack that will allow you to fit more racks of ribs on the grill.
- Page 12 2 packets and has very detailed instructions. Once the bird has been brined and rinsed place it on the grill. Camp Chef makes a popular and effective poultry-cooking tool, the Infusion Roaster. Think of beer can chicken for your turkey; it’s a great way to add moisture to the bird while cooking. If you want to cook the turkey turn the grill setting to 375° F and make sure the pellet hopper is filled with food grade pellets.
- Page 13 BARBECUE À GRANULES AVERTISSEMENT & INSTRUCTION BROCHURE Numéro de modèle: PG24SE-2...
- Page 14 AVERTISSEMENT DESTINÉ À UN USAGE EN PLEIN AIR UNIQUEMENT AVERTISSEMENT • À l’attention de l’installateur ou de la personne chargée d’assembler cet appareil : conserver la présente notice d’utilisation avec l’appareil pour un usage ultérieur. • À l’attention du consommateur : conserver la présente notice pour un usage ultérieur.
-
Page 15: Liste Des Pièces
LISTE DES PIÈCES... - Page 16 LISTE DES PIÈCES...
- Page 17 1. NE PAS laisser l’appareil sans surveillance lorsqu’il fonctionne. 17. Ne jamais employer d’essence de carburant de lanterne de L’utilisateur est tenu de rester à proximité du produit et de type essence, de kérosène, de produit d’allumage pour garder celui-ci dans son champ de vision direct pendant toute charbon ou de liquides semblables pour démarrer ou raviver la durée de son fonctionnement.
-
Page 18: Montage De La Poignée
2. Attacher les deux supports des pied à ceux-ci comme illustré MONTAGE DE LA CHEMINÉE ET DE SON CHAPEAU à la Fig. 2 à l’aide de quatre boulons M6 x 45, quatre rondelles 1. Monter la cheminée sur le barbecue comme indiqué à la Fig. 4. plates M6, quatre rondelles freins M6 et 4 écrous M6. - Page 19 DÉFLECTEUR DE CHALEUR ET LÈCHEFRITE NETTOYAGE DU BRÛLEUR 1. Monter le déflecteur de chaleur et la lèchefrite comme indiqué Toutes les 20 heures d’utilisation, enlever la grilles du gril, bac aux Fig. 6 et 7. à graisse, et le déflecteur de chaleur et nettoyer l’intérieur de la LÈCHEFRITE grille à...
- Page 20 FEED - Ce réglage est utilisé pour alimenter les granules vers le CUISSON brûleur en actionnant la vis sans fin de transport. Il sera utilisé la Lorsque la cavité de la vis sans fin est bien remplie, vous pouvez première fois que vous utilisez le barbecue pour remplir la cavité commencer à...
- Page 21 2. Débrancher le barbecue et vérifier le fusible situé sur le panneau avant. Si celui-ci est brûlé, le remplacer par un fusible à fusion lente de 5,0 ampères de 250 volts de 5x20 mm. Le fusible porte habituellement le marquage T5AL250V. S’assurer qu’il s’agit bien d’un fusible à...
- Page 22 Sonde à RTD Panneau de commande Blanc Noir T5AL 250V 5 amp 250V 5 x 20 MM Cordon d'alimentation Fusible à action retardée Connecteur MOLEX Tige d'allumage Brûleur Moteur de la vis sans fin Ventilateur du système de ventilation...
Need help?
Do you have a question about the SmokePro PG24SE-2 and is the answer not in the manual?
Questions and answers