Table of Contents
Advertisement
Quick Links
Advertisement
Table of Contents

Related Manuals for Kodak FLIK X10


Summary of Contents for Kodak FLIK X10
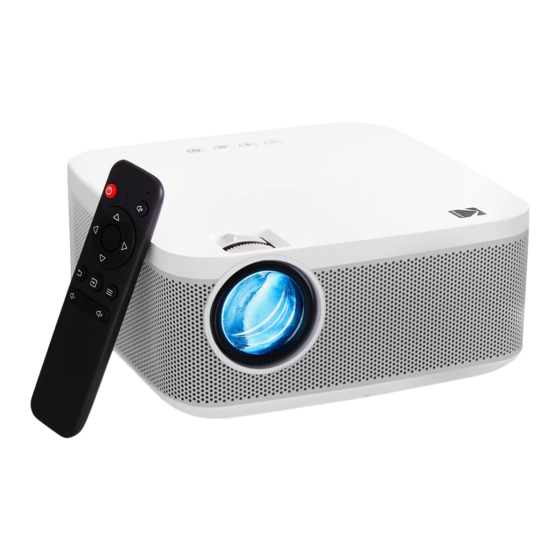
- Page 1 KODAK FLIK X10 FULL HD MULTIMEDIA PROJECTOR KIT User Manual...
- Page 2 1. INTRODUCTION Thank you for purchasing the KODAK FLIK X10 Full HD Multimedia Projector Kit. This User Guide is intended to provide you with guidelines to ensure that operation of this product is safe and does not pose risk to the user.
-
Page 3: Specifications
2. SPECIFICATIONS • Speakers: Dual 3-watt speakers • Product type: Projector • Audio out: 3.5 mm • Product length: 7.7” • Power on mode: ≤ 72 W • Product width: 7.7” • Power o mode: ≤ 0.05 W • Product height: 3.5” •... -
Page 4: Package Contents
3. PACKAGE CONTENTS • KODAK FLIK X10 Full HD Multimedia Projector • Remote control • AC adapter with interchangeable plugs (US, UK, EU plugs) • HDMI® cable • Tripod • 100” screen • Pack of adhesive hooks • Carrying case •... -
Page 5: Product Overview
• Never drop or shake the projector, as this could cause it to malfunction or permanently damage the inside parts. • Do not use the projector while bathing or in a shower. • Do not place or store the projector where it can fall or be pulled into a tub or sink. -
Page 7: Remote Control Overview
6. REMOTE CONTROL OVERVIEW 1. Power 6. Source 2. Mute 7. Setting Menu 3. OK/Confirm 8. Volume Up/Down 4. Navigation Buttons 9. Battery Compartment (Two (2) AAA needed) 5. Return... -
Page 8: Mounting The Projector
7. MOUNTING THE PROJECTOR The KODAK FLIK X10 Full HD Multimedia Projector can be placed on a tabletop, set up on a tripod, or mounted up on the ceiling. When placed on a tabletop, use the adjustable foot on the bottom of the projector to elevate the projector at an angle if needed. -
Page 9: Powering The Projector On/Off
9. POWERING THE PROJECTOR ON/OFF To turn the projector on or o , press the Power button on top of the projector or press the Power button on the remote control. 10. USING DIFFERENT MEDIA SOURCES You can use this projector with: •... - Page 10 11. NAVIGATING YOUR PROJECTOR MAIN PAGE: • The Main Page is your start page for all operations with your projector. • When unit is powered on, the Main Page will load automatically. • To return to the Main Page at any time, press the Back button until the Main Page loads.
-
Page 11: Video Page
HDMI®: Navigate to this icon and press the OK button to select. This will access the HDMI® page, where a HDMI® source can be selected. Setting: Navigate to this icon and press the OK button to select. This will access the Setting page, where you can adjust the settings for your projector, such as Display and Color. - Page 12 PHOTO PAGE: Your photo files will be displayed. Navigate to the file you wish to open and press the OK button to open the desired file. During playback, navigate to the Control Bar at the bottom of the screen and press the OK button to select your desired option. Photo Options on the Control Bar include: Play/Pause...
- Page 13 NOTE: If the projector is powered on with a HDMI device already plugged in, then the projector will automatically go into the HDMI source that is connected. SETTING PAGE: From the Setting Page, you can navigate to other menus using Navigation buttons on the remote. Adjust the language, zoom, display, and more from these menus.
-
Page 14: Language Menu
LANGUAGE MENU: From the Setting Page, navigate to the Language option and press the OK button to confirm. In the Language Menu, di erent languages can be selected. Navigate through the language options and press the OK button to select your desired language. -
Page 15: Adjusting Volume
NOTE: For best performance, the projector must be located a minimum distance of 3.9 feet (1.2 meter) from the screen. ADJUSTING VOLUME: To adjust the projector volume during playback, use the + and – buttons on the top of the projector or the Volume buttons on the remote control. -
Page 16: Display Mode Menu
DISPLAY MODE MENU: From the Setting Page, navigate to the Display Mode option and press the OK button to confirm. In the Display Mode Menu, di erent display modes can be selected. Navigate through the display modes and press the OK button to select your desired display mode. -
Page 17: Rotate Menu
ROTATE MENU: From the Setting Page, navigate to the Rotate option and press the OK button to confirm. In the Screen Rotate Menu, di erent rotate options can be selected. Navigate through the rotate options and press the OK button to select your desired screen rotate option. - Page 18 ZOOM MENU: From the Setting Page, navigate to the Zoom option and press the OK button to confirm. In the Zoom Menu, adjust the zoom of the screen. Use the directional buttons on the remote control and press the OK button to confirm your desired zoom.
- Page 19 12. CONNTECTING EXTERNAL DEVICES USB Drives To access photos or videos stored on any USB drive, simply insert the removable storage device into the USB port on the back of the projector. The projector will read the files directly from the drive. You can access them from the Main Page by selecting the Photo or Video options on the main page.
- Page 20 Streaming devices with HDMI cable to streaming device HDMI port...
- Page 21 13. SETTING UP THE PROJECTOR SCREEN First, find an open space to hang up the projector screen. Unfold the projector screen in clean, clear area. Then, measure the distance between the top corner hole and the second top corner hole with a ruler or measuring tape (not included).
-
Page 22: Customer Service
15. WARRANTY LIMITED WARRANTY TO ORIGINAL CONSUMER This KODAK FLIK X10 Full HD Multimedia Projector Kit (“Product”), including any accessories included in the original packaging, as supplied and distributed new by an authorized retailer is warranted by C&A Marketing, Inc. (the “Company”) to the original consumer purchaser only, against certain defects in material and workmanship (“Warranty”) as follows:... - Page 23 Please contact our customer service for details on obtaining warranty service: USA: kodak@camarketing.com, 844 516 1539 International: kodakintl@camarketing.com, +1 844 516 1540 Shipping expenses to the Company’s Return Facility are not covered by this warranty, and must be paid by the consumer.
- Page 24 (f) A Product or part that has been modi ied to alter functionality or capability without the written permission of the Company; (g) Consumable parts, such as batteries, fuses, and bulbs; (h) Cosmetic damage; or (i) If any KODAK FLIK X10 Full HD Multimedia ProjectorKit serial number has been removed or defaced.
- Page 25 This Warranty is valid only in the country where the consumer purchased the Product, and only applies to Products purchased and serviced in that country. The Company does not warrant that the operation of the Product will be uninterrupted or error-free.
- Page 26 This warranty gives you speci ic legal rights, and you may have other rights that vary from state to state or province to province. Contact your autho- rized retailer to determine if another warranty applies. Kodak does NOT manufacture this Product or provide any Warranty or support.
- Page 27 The Kodak trademark, logo, and trade dress are used under license from Eastman Kodak Company. HDMI, the HDMI logo, and High-De inition Multimedia Interface are trademarks or registered trademarks of HDMI Licensing, LLC in the United States and/or other countries.
Need help?
Do you have a question about the FLIK X10 and is the answer not in the manual?
Questions and answers