
Related Manuals for Oneida Air Systems 10 Gallon


Summary of Contents for Oneida Air Systems 10 Gallon
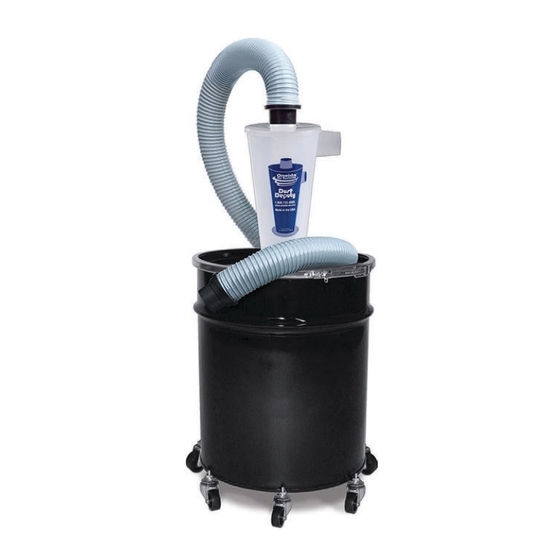
- Page 1 Dust Deputy Deluxe 10 Gallon 10 Gallon SD 10 Gallon SD # AXD000010 # AXD000010SD U.S. Pat. 6833016 RE40048 7282074 Appearance may vary slightly Rev: 12/09/2021 Doc. # ZBM000036DEL10A...
-
Page 2: System Start-Up Information
8. Can be used for collecting non-flammable liquids. 9. Dispose of waste in a FIRE SAFE AREA. SOME DUSTS ARE HIGHLY FLAMMABLE OR EXPLOSIVE. LEARN/ KNOW WHAT YOU ARE DEALING WITH. FOLLOW ALL LOCAL, STATE, FEDERAL & NFPA CODES AND GUIDELINES. Oneida Air Systems... -
Page 3: System Dimensions
System Dimensions Nominal dimensions shown. Dimensions subject to slight variations in manufacturing. 6-3/4" 171 mm 8" Tapered Inlet 203 mm and Outlet 2" O.D. 1-7/8" I.D. 2-1/2" 51 mm O.D. 64 mm 48 mm I.D. 32-1/8" 815 mm 28 -7/16" 721 mm 19 -7/16"... -
Page 4: System Contents
1/4" - 20 x 3/4" Hex Head Bolt AFW025000 1/4" Flat Washer AFT000005 1/4" Whiz-Lock Nut SEX100000 Steel Lid for 10 Gallon Drum SES100000 10 Gallon Steel Drum with Clamp SDD000004 Dolly Legs AFS015800 1/4"-20 x 1/2" Hex Head Bolt AFT000005 1/4"... - Page 5 System Contents (Cont.) Please unpack the parts carefully and confirm you have received each item listed here. ×2 oneida-air.com...
- Page 6 • 7/16" Open End Wrench • 1/2" Nut Driver • Wet/Dry Vacuum • Vacuum Hose • Vacuum hose adapters Arrange the Dolly Legs (F) in a descending stack as shown in [FIG. 1a] and [FIG. 1b]. FIG. 1a FIG. 1b Oneida Air Systems...
- Page 7 Assembly Instructions (Cont.) Secure Dolly Legs (F) together using three Bolts (G) and three Whiz-Lock Nuts (H) as shown in [FIG. 2a] and [FIG. 2b]. FIG. 2a FIG. 2b oneida-air.com...
- Page 8 Assembly (F) and a Retainer Clip (I). Secure together using six Nylock Nuts (J1) [FIG. 3a] [FIG. 3b]. Note: For ease of assembly, hardware should be nger tightened. when connecting the Drum (D). FIG. 1a FIG. 1b Oneida Air Systems...
- Page 9 Assembly Instructions (Cont.) Place the Drum (E) onto the Assembled Dolly [FIG. 4a], then slide the Retainer Clips (I) into position over the bottom lip of the drum to securely hold the container in place. [FIG. 4b] Start by tightening two opposing Nylock Nuts (J1) until the lip of the drum is fully secured.
- Page 10 Gasket (B) and align all the holes. Secure Cyclone, Gasket, and Lid together using six Bolts (C1), six Washers (C2), and six Whiz-Lock Nuts (C3) as shown in [FIG. 5]. Note: oroughly tighten hardware to eliminate air leaks. FIG. 5 Oneida Air Systems...
- Page 11 Assembly Instructions (Cont.) Put Cyclone and Lid (A, D) assembly top of your Drum (E). Seal the Drum closed using the provided clamp and seal it airtight.[FIG. 6]. FIG. 6 oneida-air.com...
- Page 12 Assembly Instructions (Cont.) If you purchased the 10 Gallon SD (#AXD000010SD), continue to step 8. Connect the Cyclone's (A) inlet (sideways facing port) to your dust producing tool with your vacuum's hose or ductwork. Connect Cyclone's outlet (upwards facing port) to your vacuum with Hose (L) [FIG.
- Page 13 Assembly Instructions (Cont.) Attach one Elbow (N) to the top outlet of the Cyclone (A) and a x Hose (M) to the tapered end of the Elbow. Attach the other open end of Hose to the second Elbow (N) and attach to the inlet of your wet dry vacuum.
- Page 14 Note: Any air leak in the Lid (D) or Drum (E) will a ect separation performance. Make sure to check your dust drum frequently so you do not over ll it. Leak Point Leak Point Leak Point Leak Point FIG. 9 Oneida Air Systems...
- Page 15 Optional Grounding Instructions Recommended for fine dust situations or electronically sensitive applications. If you purchased the 10 Gallon SD (#AXD000010SD), continue to step 11. Install the Metal Tape (K) to the Cyclone (A) so that the inlet, outlet, and ange are attached by a continuous, conductive path.
- Page 16 Install the Metal Tape to the Elbow (O) [FIG 11a] and the Hose Adapters (P) [FIG 11b] so that all connections are attached by a continuous, conductive path. e tape should wrap 1/4" around the edge of each opening. FIG. 11a FIG. 11b Oneida Air Systems...
- Page 17 Optional Grounding Instructions For added grounding, attach a self-supplied wire with a ring terminal on one end and a washer tied to the other end when installing one of the bolts in Step 5 on Page 10. wire must be long enough for the washer to lie on the oor [FIG 12].
- Page 18 Same particle e ciency but increases the CFM. Top View 200 CFM 100 CFM 100 CFM Multiple Vacuums More CFM/air ow to larger tools such as Table Saw, Jointer, and Planer. To Tools Top View 2 or More Oneida Air Systems...
-
Page 19: Troubleshooting
Troubleshooting PROBLEM C AUSE SOLUTION Not separating well. Air leaks in the drum 1. Check for leaks between the lid and the dust drum. (Only a tiny amount of 2. Check for holes or leaks in the dust drum. dust should reach the 3. - Page 20 Dust Deputy then we can readily o er you a replacement for any damaged components. Please contact our service department to order. Oneida Air Systems...
- Page 21 FAQ (Continued) What vacuum do you recommend for the Dust Deputy? e Dust Deputy can be used with any make, model, or size wet/ dry vacuum with an inlet ranging from 1.5" to 2.5" in size. We recommend that it has an air ow rating of at least 50 CFM to ensure optimum dust separation performance.
- Page 22 What is the minimum air watts needed for the Dust Deputy? Rather than worrying about what specs your vacuum needs (e.g. air watts, cfm, static li , etc.), we at Oneida Air Systems have a much simpler approach - simply match the size of your vacuum's inlet to the size of the Dust Deputy cyclone's ports.
- Page 23 FAQ (Continued) Can I remove the top portion of the Dust Deputy? No, it is not advised and can cause damage to the cyclone and is not covered under warranty. The top portion of the Dust Deputy is detached. Is there a way to x it? Please contact our customer service department for assistance at 1-866-387-8822 or support@oneida-air.com...
- Page 24 1.5" x 6.5' Dust Extraction Hose Whip #AHE000001 • is highly exible vacuum hose ts onto the dust collection ports of common portable power tools. Includes 2.5" rotating swivel cu . Oneida Air Systems...
- Page 25 Accessories (Continued) 2.5" x 5.5' Wire Reinforced Vacuum Hose #AXD250066 • Crush-resistant, exible hose with a smooth- wall inner lining that minimize air resistance. 1.25" x 1.5" Hose Adapter Kit #AKD000000 • Includes reducers, adapters, and O-rings for connecting smaller vacuum hoses to standard 2"...
-
Page 26: Warranty Information
Limited Warranty – Activate online at oneida-air.com/warranty Oneida Air Systems®, Inc. (OAS) warrants the Dust Deputy for a period of 1 year, to the original purchaser from the date of purchase, unless otherwise speci ed. Items not manufactured by Oneida Air Systems are limited to their own manufacturer’s warranties. All electrical items such as magnetic starters, remotes, sensors, pumps, bin sensors, bag grippers, etc. - Page 27 Notes oneida-air.com...
- Page 28 Regardless of where you purchased your Oneida Air Systems product, if you have any questions or issues with missing / damaged parts, please call Oneida Air Systems rst to let us help resolve your problem. We fully stand behind the quality of our products and place the utmost value on the satisfaction of our customers.
Need help?
Do you have a question about the 10 Gallon and is the answer not in the manual?
Questions and answers