Table of Contents
Advertisement
Quick Links
Advertisement
Table of Contents

Related Manuals for Ivoclar Vivadent Programat EP 5010 G2


Summary of Contents for Ivoclar Vivadent Programat EP 5010 G2
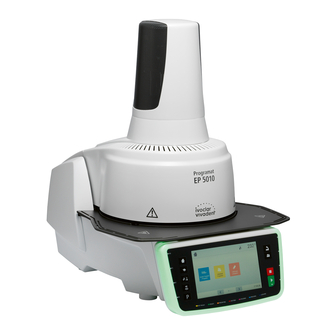
- Page 1 Programat EP 5010 ® Operating Instructions https://stomshop.pro...
- Page 2 Declaration of conformity https://stomshop.pro...
-
Page 3: Table Of Contents
Practical Use Firing procedure with an Ivoclar Vivadent program Firing procedure with an individual program Press procedure with an Ivoclar Vivadent press program Press procedure by means of FPF – fully automatic press function Press procedure using an individual press program... -
Page 4: List Of Parts
List of parts Ventilation grid press drive Press drive cover Air vents furnace head Screw for cooling tray Furnace head housing Warnings Cooling tray Furnace base housing 10 Touch screen Audio ports 11 Keypad (in / out) 12a Optical Status Display (OSD) Speaker Furnace feet... - Page 5 List of parts 25 QTK2 heating muffle 21 Insulation 26 Sealing rims of furnace head 22 Firing plate 23 Firing plate holder 27 Infrared camera 24 Frame plate 28 Sealing surface Screw for press drive cover 36 Covering hood for head opening mechanism 37 Connection cover 38 Screw for connection cover...
- Page 6 List of parts 48 Plug fuse 43 Furnace head mounting 49 Heater plug 50 Heater plug socket 44 Furnace head release 51 Thermocouple plug 52 Thermocouple 45 Heater cable plug socket 46 Thermocouple cable 53 Furnace head vacuum connection 47 Furnace head vacuum hose 54 Press drive plug 55 Press drive socket 56 Press drive cable...
-
Page 7: Introduction / Signs And Symbols
Dental technicians, dental professionals These Operating Instructions facilitate the correct, safe and economic use of the furnace. Should you lose these Operating Instructions, extra copies can be ordered at a nominal fee from your local Ivoclar Vivadent Service Center or downloaded from www.ivoclarvivadent.com. -
Page 8: Notes On The Different Voltage Versions
1. Introduction / Signs and Symbols 1.4 Notes on the different voltage versions The furnace is available in different voltage versions: – 110 – 120 V / 50 – 60 Hz – 200 – 240 V / 50 – 60 Hz In the Operating Instructions, the furnace is described in the 200 –... -
Page 9: Safety First
2.1 Indications The Programat EP 5010 G2 must only be used to press and fire dental ceramic materials and it should be used for this purpose only. Other uses than the ones stipulated, e.g. cooking of food, firing of other materials etc., are contraindicated. - Page 10 2. Safety First The furnace head must not be carried by holding the cables, as there is a risk of damaging the cables and the corresponding connections. The furnace head has an electric drive and must be operated by means of the electronic controls.
- Page 11 2. Safety First Do not touch the thermocouple or the quartz tube in the firing chamber. Avoid contact with the skin (grease contamination), as the parts will be prematurely damaged. Do not insert any foreign objects into the air vents. There is a risk of electric shock.
-
Page 12: Health And Safety Instructions
– The furnace may only be used indoors. – Before leaving the factory, the furnace functions were tested for several hours. It is therefore possible that these tests have caused slight discolouration of the insulation. Nevertheless, your Programat EP 5010 G2 is still a brand new furnace. - Page 13 Information regarding the Safety Data Sheet is also available from your After Sales Service Center. Disposal: The furnace must not be disposed with the common domestic waste. Please correctly dispose of old furnaces according to the corresponding EU council directive. Information regarding disposal can be found on the respective national Ivoclar Vivadent website. https://stomshop.pro...
-
Page 14: Product Description
3.1 General The Programat EP 5010 G2 is a state-of-the-art press and ceramic furnace for dental applications. The firing chamber may be heated up to max. 1200 °C by means of a heating element. The pressure for the press procedure is generated by a press drive. -
Page 15: Installation And Initial Start-Up
There are no special transportation grips on the furnace. Support the bottom of the furnace to carry it. Check the delivery for completeness (see delivery form in Chapter 9) and transportation damage. If parts are damaged or missing, contact your local Ivoclar Vivadent Service Center. We recommend keeping the original packaging for future service and transportation purposes. -
Page 16: Assembly
4. Installation and Initial Start-Up 4.3 Assembly Assembling the furnace is very easy and involves only few steps. Before you start assembling the furnace, make sure that the voltage indicated on the rating plate (32) complies with the local power supply. If this is not the case, the furnace must not be connected! Step 1: Mount the cooling tray (2). - Page 17 4. Installation and Initial Start-Up Step 3: Mount the furnace head. The furnace head is best mounted with the rear panel of the furnace pointing towards the user. Lift the furnace head with both hands (see picture) and carefully position it on the furnace head mounting. Position the furnace head mounting as shown in the picture until the furnace head audibly snaps into place.
- Page 18 Connecting the vacuum pump Connect the vacuum pump plug with the vacuum pump socket. We recommend using only a vacuum pump from Ivoclar Vivadent (VP4 / VP5), since these pumps are especially coordinated with the press furnace. If other pumps are used, please observe and do not exceed the maximum power consumption.
-
Page 19: Removing The Furnace Head
4. Installation and Initial Start-Up 4.4 Removing the furnace head Before the connection cover and the covering hood are removed, the furnace has to be switched off and the power cord disconnected from the power socket. 1. Loosen and remove the knurled screw of the connection cover. 2. - Page 20 4. Installation and Initial Start-Up Step 2: Select the desired temperature unit. The [Next] button is used to reach the next entry screen. Step 3: Set the time zone (UTC). The time zone can be changed by pressing the [Left] and [Right] buttons. Use the [Next] button to confirm the selection and reach the next entry screen.
- Page 21 4. Installation and Initial Start-Up Step 6: Set the date (day, month, year). Confirm the entry with the green button. The [Next] button is used to reach the next entry screen. Step 7: Confirm the privacy policy More information about the privacy policy can be found at http://www.ivoclarvivadent.com/digitalservices The [Next] button is used to reach the next entry screen.
- Page 22 4. Installation and Initial Start-Up The following information is displayed: Information Temperature calibration of the furnace is not required. Temperature calibration Some time has passed since the last calibration. Please conduct a calibration procedure. The power supply voltage is in the acceptable range. Power supply The power supply is outside the acceptable range.
-
Page 23: Operation And Configuration
5.1.1 Control unit The Programat EP 5010 G2 is equipped with a wide-screen colour display. The furnace can be intuitively operated by means of the membrane-sealed keypad and the touch screen. The touch buttons can be actuated by slightly tapping the display with the fingertip and the furnace runs the desired function. - Page 24 5. Operation and Configuration STOP key A program in progress can be paused by pressing the STOP key and stopped by pressing STOP twice. Movement of the furnace head can be stopped at any time by pressing STOP. Acoustic signals can be confirmed by pressing the STOP key. START key (Start LED) Starts the selected program.
- Page 25 Only press programs can be selected. The stand-by temperature of the furnace is set to 700 °C. – Firing: Only firing programs can be selected. For Ivoclar Vivadent programs, the stand-by temperature of the furnace is set to 403 °C.
- Page 26 5. Operation and Configuration 5.1.6 Explanation of the home screen After the furnace is switched on, the display shows the home screen. All functions of the Programat can be selected from this screen. You can switch back to the home screen with the HOME key. By pressing a selection button, you will reach the corresponding menu (e.g.
-
Page 27: Firing Programs And Programming Options
If required, the parameters can be changed and overwritten at any time, if the programs are to be used for other purposes. Therefore, these programs are also available as individual programs. In case of software updates, individually changed parameters in Ivoclar Vivadent programs might be reset to the factory settings or changed! - Page 28 5. Operation and Configuration c) 500 free, individually adjustable programs on a USB stick In a first step, a USB stick must be prepared as program memory (see Chapter 5.4). The programs are designed in such a way that they can be either used as conventional, one-stage programs or as two-stage programs, if required. The programs and program groups can be individually named.
- Page 29 If a program has been selected, the program screen is displayed. The firing programs can be changed or edited in this screen. For Ivoclar Vivadent programs, the write-protection must be deactivated first before any parameters can be changed. The following information is displayed: 1.
- Page 30 5. Operation and Configuration Changing program options Pressing the [Options] button opens the menu for advanced program options. Example 1: Deactivating the write-protection 1. Press the [Options] button. 2. Press the [Deactivate Write-Protection] button. 3. Press the [Close] button to leave the Options menu. 4.
- Page 31 5. Operation and Configuration Example 2: Changing the predrying temperature 1. Press the [Options] button. 2. Press the [Predrying Temperature] button. 3. Enter the desired predrying temperature and confirm by pressing the green button. 4. The predrying temperature was successfully changed. Press the [Close] button to leave the Options menu.
- Page 32 5. Operation and Configuration Selecting the IRT operating mode By pressing the [IRT] button, the menu for selecting the IRT operating mode is opened. 1. Press the [IRT] button. 2. Select the desired IRT operating mode. The menu is automatically closed once the desired operating mode has been selected.
- Page 33 5. Operation and Configuration Two-stage programs A two-stage program permits firing procedures on two temperature levels with different parameters (e.g. Holding time Stage 1, Holding time Stage 2) to be conducted. The function "Two-stage program" can be selected in the Options menu. The program screen now shows the "Two-stage program"...
- Page 34 5. Operation and Configuration 5.2.4 Adjustable parameters in the program screen S – Closing time The closing time controls the duration of the furnace head closing process. Value range: 00:18 – 30:00 (mm:ss) t – Temperature increase rate (for two-stage programs: t The temperature increase rate defines by how many degrees per minute the furnace heats up.
- Page 35 5. Operation and Configuration 5.2.5 Adjustable parameters in the Options menu In addition to the parameters shown in the firing curve, several other options are available that can be activated by pressing the [Options] button (see Chapter 5.2.3). Active options are displayed as icons in the grid next to the [Options] button. The following firing program options are available: Night program If this function is active, the furnace head remains open after the firing process, the heater is switched off...
- Page 36 5. Operation and Configuration Predrying temperature Stage 2 (only available if Infrared Technology "OFF") Predrying for Stage 2 is only available if Stage 1 has also been activated. The parameters are set in the same way. At this stage, the furnace head is half open. Value range °C: OFF or 100 –...
- Page 37 5. Operation and Configuration 5.6 Adjustable parameters in the IRT menu If the infrared technology is activated, the temperature is measured directly on the surface of the object during the predrying or closing process. The furnace regulates the closing and predrying process based on the data measured by the infrared camera.
- Page 38 5. Operation and Configuration 5.2.7 Starting and stopping programs / the operating indicator Once the program is started by pressing START, the firing curve display appears. The following information is displayed: – Information bar The program name and the current furnace temperature are shown in the information bar in the upper margin of the display.
- Page 39 5. Operation and Configuration Changing the operating indicator The active firing program can be displayed in two ways: – operating indicator "firing curve" – operating indicator "remaining time". If the [Display] button is pressed during an active program, the operating indicator can be switched. If the [Display] button is pressed while the firing curve is displayed, the remaining time will be shown.
- Page 40 5. Operation and Configuration 5.2.8 Pausing the active program – Press STOP once to pause a running program (green LED flashing). Press the STOP key twice to completely stop the program or press START to continue. – If the program is paused, the display shows a flashing "Pause" and the indicator changes back to the program screen. –...
- Page 41 Programs copied to a USB flash drive can only be opened with this furnace. PrograBase X10 offers the possibility to copy the programs to other furnaces. Programs and program groups cannot be copied into the sector for Ivoclar Vivadent programs. This sector is protected and reserved for original Ivoclar Vivadent programs.
- Page 42 5. Operation and Configuration 5.2.12 Resetting the program to factory settings This function is used to reset a changed program to factory settings. 1. Press the corresponding [Execute] button in the Admin menu. 2. Enter the user code to confirm that the program is to be reset to factory settings.
- Page 43 5. Operation and Configuration 5.2.14 Renaming the program or program group The current program and current program group can be renamed (only possible for individual programs). 1. Press the corresponding button in the Admin menu and select whether the program or the group should be renamed.
-
Page 44: Press Programs And Programming Options
20 free, individually adjustable press programs. a) Press programs for Ivoclar Vivadent materials When the furnace is delivered ex factory, the Ivoclar Vivadent programs already contain the recommended material para meters. They cannot be deleted or overwritten. The parameters are not shown in the software. - Page 45 5. Operation and Configuration 4. Start or edit the press program. Now, the press program can be started. Individual press programs can be edited. 5. Results panel The following information is displayed at the end of the press program: – press time (mm:ss) –...
- Page 46 – animation (preheating, holding, pressing). 5.3.4 Editing individual press programs For the all-ceramic systems from Ivoclar Vivadent (e.g. IPS e.max, IPS Empress Esthetic), only the original Ivoclar Vivadent press programs must be used as they are especially coordinated with the respective materials.
- Page 47 5. Operation and Configuration Editing parameters Parameters are entered or edited in two steps. Example: Setting the holding temperature 1. Press the [T] button. 2. Enter the desired holding temperature and confirm by pressing the green button. The holding temperature was successfully changed. All the other parameters shown in the firing curve can be changed / edited in the same way.
- Page 48 E – Stop speed This parameter defines the end of the press process. For the layering technique, Ivoclar Vivadent recommends a stop speed of 300 µm/min; for the staining technique a stop speed of 150 µm/min. – Higher values (stop speed of e.g. 300 µm/min) result in the press cycle being stopped sooner.
-
Page 49: Advanced Functions Of The Furnace / Software Update
5. Operation and Configuration 5.4 Advanced functions of the furnace / Software update 5.4.1 Settings To reach the Settings menu, scroll to page 2 in the home screen and press the [Settings] button. Example: Changing the brightness of the display 1. - Page 50 5. Operation and Configuration The following parameters can be changed in the Settings menu: Temperature unit Choose between °C and °F. Setting options: °C / °F Vacuum unit Choose between mbar and hPa. Setting options: mbar and hPa Vacuum quality Set the final vacuum value.
- Page 51 5. Operation and Configuration User code The user code can be individually changed. It is recommended to make a note of the individually changed user code and to keep it separately. If forgotten, the user code may only be reset with the help of the After Sales Service. Setting options: 1000 to 9999 Unit of length Chose between millimetres and inch.
- Page 52 5. Operation and Configuration Preparing USB stick programs If this function is executed, a USB stick is prepared as program memory. Loading an individual start screen This function is used to load an individual start screen from a USB stick. Once an individual start screen has been loaded, it will be shown for a few seconds when the furnace is switched on the next time.
- Page 53 There is a high risk for an incorrect pressing. Ivoclar Vivadent recommends to sufficiently preheat the investment ring. After the note has been acknowledged, the press program may still be started.
- Page 54 5. Operation and Configuration 5.4.2 Information To reach the screen for the furnace information, scroll to page 3 in the home screen and press the [Information] touch button. Example: Displaying information 1. Open the Information menu. Scroll to page 3 in the home screen and press the [Information] button.
- Page 55 5. Operation and Configuration MAC address Indication of the MAC address WLAN MAC address Indication of the WLAN MAC address Press procedures Number of all press cycles Press cycles since last calibration Number of press cycles since the last calibration Video tutorials Display of the QR code to access the video tutorials 5.4.3 Temperature calibration...
- Page 56 5. Operation and Configuration 4. Insert the ATK2 sample. Carefully grip the upper part of the ATK2 using the furnace tongs (Caution: fracture risk of the ceramic) and insert it into the holes designated for this purpose until it snaps into place. 5.
- Page 57 5. Operation and Configuration 5.4.4 Data backup With the data backup function, individual programs and settings can be backed-up on a USB flash drive. We recommend using this feature, e.g. before a software update or before sending in the furnace for maintenance purposes. Moreover, furnace data saved on a USB flash drive can be restored on the furnace.
- Page 58 The furnace has to be switched off and on again by means of the mains switch at the rear of the furnace to complete the software update. Important information Please note that modified Ivoclar Vivadent programs may be overwritten during a software update. Individual programs are not affected and will not be overwritten. https://stomshop.pro...
- Page 59 5. Operation and Configuration 5.4.6 Diagnosis Scroll to page 3 in the home screen and press the [Diagnosis] button. The following programs are available in the Diagnosis menu: – tests (e.g. vacuum test, heater test, etc.) – error table (saved error messages) –...
- Page 60 The saved press protocols in this table can be printed, sent to a PC or deleted. 5.4.6.6 Service menu This menu is code-protected and is only accessible by the Ivoclar Vivadent After Sales Service. https://stomshop.pro...
- Page 61 5. Operation and Configuration 5.4.7 Maintenance programs Scroll to page 3 in the home screen and press the [Maintenance Programs] button. The following programs are available in the Maintenance Programs menu: – dehumidification program – cleaning program. 5.4.7.1 Dehumidification program Condensation in the insulation of the firing chamber or the vacuum pump results in a poor vacuum and thus in poor firing results.
- Page 62 5. Operation and Configuration 3. The status bar shows the progress of the dehumidification program. During an active dehumidification program, the furnace head is automatically opened and closed. 4. Complete the dehumidification program. The following message is displayed: Dehumidification program successful Dehumidification program failed During an active dehumidification program, the furnace head is automatically opened and closed.
- Page 63 5. Operation and Configuration 2. Enter the user code. Enter the user code and confirm the entry with the green button. 3. Select the operating mode. Enter the desired operating mode and confirm the entry with the green button. 4. Program screen in the operating mode "Production" (example) The "Protected"...
- Page 64 5. Operation and Configuration 5.4.9 Setting up a WLAN connection A WLAN connection can be set-up in this Settings menu. This function is only available if the Programat WLAN Stick has been connected with the furnace. The set-up requires only a few steps: 1.
-
Page 65: Multimedia Functions
5.5 Multimedia functions The Programat EP 5010 G2 is equipped with multimedia functions such as photo display, MP3 and video player. The furnace is also equipped with an internal memory. Images can be saved in this memory with the help of the "PrograBase X10"... - Page 66 5. Operation and Configuration 6. Full screen view In the full screen view, you can scroll through the available image files. The image can be rotated by pressing the corresponding buttons and the full screen view can be ended. 7. Zooming image section In the full screen view, the image can be enlarged or downsized.
- Page 67 5. Operation and Configuration 3. Playback elements The corresponding buttons are used to change to the next or previous title, as well as to start or stop (or pause) the playback. At the end of a title, the next title is automatically played. 4.
- Page 68 5. Operation and Configuration 3. Playback elements The corresponding buttons are used to change to the next or previous title, as well as to start or stop (or pause) the playback. At the end of a video, the next one is automatically played. 4.
-
Page 69: Digital Shade Assistant (Dsa) Function
– Determining the reference teeth and imaging involving the patient (clinical part) – Evaluating the image data by means of the DSA function directly with the Programat EP 5010 G2 in the laboratory. These Operating Instructions describe the procedure in the laboratory. Instructions on determining the reference teeth and image taking are enclosed in the DSA Holder Kit and the DSA Starter Kit. - Page 70 5. Operation and Configuration 3. Automatic analysis is conducted This screen is shown during the automatic analysis. 4. Result of the automatic analysis The tooth to be analyzed (green frame) and the three shade guide teeth as well as their orientation (inicisal edge to cervical edge or incisal edge to incisal edge) are automatically recognized.
- Page 71 5. Operation and Configuration 7. Verifying the designations (correcting) If the designations of the shade guide teeth cannot be clearly recognized, this screen is shown. The recognized designations are shown in the three buttons below the image. If necessary, this designation can be corrected by pressing the corresponding button.
-
Page 72: Iot Function
5. Operation and Configuration 10. Log function The current shade analysis can be saved as a log file by tapping the [Disk] button. The log file can be printed via the PrograBase X10 software or stored as a PDF file. The DSA results greatly depend on the determination of the three reference teeth and optimum picture taking. -
Page 73: Practical Use
6. Practical Use The operating procedure for the Programat EP 5010 G2 will be explained with the help of two examples: one Ivoclar Vivadent and one individual program. 6.1 Firing procedure with an Ivoclar Vivadent program Step 1: Switch the furnace on. - Page 74 6. Practical Use Step 4: Load the furnace. Now, open the furnace head using the OPEN FURNACE HEAD key and position the firing tray with the object in the furnace. With the Infrared Technology active, position the objects in such a way that the infrared camera has a wide view of the objects.
-
Page 75: Firing Procedure With An Individual Program
6. Practical Use 6.2 Firing procedure with an individual program Step 1: Switch the furnace on. Switch the furnace on using the mains switch at the back of the furnace. Subsequently, the furnace conducts an automatic self-test. Wait until the furnace has reached the pre-set stand-by temperature. Step 2: Select the operating mode. - Page 76 6. Practical Use Step 4: Enter the parameters. Enter your individual parameters and create the desired firing program (see Chapter 5.2.3 for details). Step 5: Load the furnace. Now, open the furnace head using the OPEN FURNACE HEAD key and position the firing tray with the object in the furnace. With the Infrared Technology active, position the objects in such a way that the infrared camera has a wide view of the objects.
-
Page 77: Press Procedure With An Ivoclar Vivadent Press Program
6. Practical Use 6.3 Press procedure with an Ivoclar Vivadent press program Step 1: Switch the furnace on. Switch the furnace on using the mains switch at the back of the furnace. Subsequently, the furnace conducts an automatic self-test. Wait until the furnace has reached the pre-set stand-by temperature. -
Page 78: Press Procedure By Means Of Fpf - Fully Automatic Press Function
6. Practical Use Step 5: Start the program. Activate the program by pressing the START key. The LED lights up in green. The progress of the program is shown in the display. The furnace head opens automatically at the end of the program. The results panel displays the press time, press distance and the investment ring temperature, if the IRT investment ring analysis is activated, at the time of the loading. - Page 79 6. Practical Use Step 3: Select the program Press the [Fully Automatic Press Function]. Step 4: Load the furnace and start the program Load the furnace with the preheated investment ring. Now press the START button and the program will be started. The LED lights up in green.
-
Page 80: Press Procedure Using An Individual Press Program
6. Practical Use 6.5 Press procedure using an individual press program Step 1: Switch the furnace on. Switch the furnace on using the mains switch at the back of the furnace. Subsequently, the furnace conducts an automatic self-test. Wait until the furnace has reached the pre-set stand-by temperature. Step 2: Select the operating mode. - Page 81 6. Practical Use Step 5: Edit the program. Now enter your individual parameters and create the desired press program. By pressing the [Program] button, the program screen is closed again. Step 6: Start the program. Activate the program by pressing the START key. The LED lights up in green.
-
Page 82: Important Notes On The Use Of The Infrared Technology
Firing trays that are not coordinated with the furnace or fitted firing trays can change the temperature at the objects by +/- 20 °C! Ivoclar Vivadent recommends using only the original Programat firing tray or the special Firing tray firing trays stipulated for the respective materials. If another firing tray is used, make sure that the height of the tray corresponds with that of the original firing tray. -
Page 83: Maintenance, Cleaning And Diagnosis
7. Maintenance, Cleaning and Diagnosis This chapter describes the user maintenance and cleaning procedures for the Programat EP 5010 G2. Only those tasks are listed that may be performed by dental professionals. All other tasks must be performed by qualified service personnel at a certified Ivoclar Vivadent Service Center. -
Page 84: Cleaning
7.5 Power-saving mode If the furnace is not used for longer periods of time, Ivoclar Vivadent recommends to activate the power-saving mode. With the power-saving mode activated, individual components are switched off and the furnace temperature is reduced to 100 °C. -
Page 85: Replacing The Press Plunger
7. Maintenance, Cleaning and Diagnosis 7.6 Replacing the press plunger The press plunger may be replaced if required. In order to facilitate replacing the press plunger, the following procedure must be followed: Step 1: Remove the attachment screw. Remove the screw (C) while the furnace head is closed. Step 2: Remove the press drive cover. - Page 86 7. Maintenance, Cleaning and Diagnosis Step 4: Open the furnace head with the OPEN FURNACE HEAD key. Once the furnace head is wide open, switch the furnace off, disconnect the power plug, and allow the furnace to cool to room temperature.
-
Page 87: What If
During operation, the furnace continuously monitors all the functions. If an error is detected, the respective error message is displayed. The acoustic signal and the error message can be acknowledged with the corresponding buttons. The following error messages may be displayed. If there are any questions, please contact the Ivoclar Vivadent After Sales Service. Error /... - Page 88 8. What If..? The furnace head does not reach The furnace head does not open / close correctly. The furnace head was the target position. manually moved or is obstructed. The furnace head must only be operated using the keys intended for this purpose! Vacuum is not released.
- Page 89 Check if the protective foil has been removed from the sensor or if the sensor has been contaminated. Check if a correct firing tray is used. The height of the firing tray must correspond with the height of the firing trays recommended for the respective materials by Ivoclar Vivadent. https://stomshop.pro...
-
Page 90: Additional Error Messages
*** Error cannot be acknowledged; programs cannot be started! 8.2 Additional error messages If one of the following error numbers appear, contact your local Ivoclar Vivadent Service After Sales Service immediately: 25, 29, 43, 44, 45, 46, 47, 48, 56... -
Page 91: Technical Malfunctions
The IoT function of the furnace does Has the IoT function of the furnace been Activate the IoT function in the settings. not work. activated? More information can be found at www.ivoclarvivadent.com/digitalservices *If there are any questions, please contact the Ivoclar Vivadent After Sales Service. https://stomshop.pro... -
Page 92: Repair
Repairs may only be carried out by a certified Ivoclar Vivadent Service Center. Please refer to the addresses on the last page of these Operating Instructions. If repairs during the warranty period are not carried out by a certified Ivoclar Vivadent Service Center, the warranty will expire immediately. Please refer to the warranty regulations for more details. - Page 93 8. What If..? 5. Complete the "Reset to factory settings". The following message is displayed: Reset to factory settings successful Reset to factory settings failed To return to the home screen, press either the [Home] touch button in the navigation bar or the HOME key on the membrane-sealed keypad.
-
Page 94: Product Specifications
9. Product Specifications 9.1 Delivery form – Programat EP 5010 G2 – Power cord – Vacuum hose – Programat Firing Tray Kit 2 – Automatic Temperature Checking Set ATK2 (test set) – LAN download cable – Cooling grid – Programat WLAN Kit –... -
Page 95: Acceptable Operating Conditions
9. Product Specifications Acceptable operating conditions – Acceptable ambient temperature: +5 °C to +40 °C – Acceptable humidity range: Max. relative humidity 80% for temperatures up to 31 °C, gradually decreasing to 50% relative humidity at 40 °C, condensation excluded –... -
Page 96: Appendix
10. Appendix 10.1 Firing program table A program table (°C / °F) is enclosed in these Operating Instructions. Should this not be the case, please contact the Ivoclar Vivadent Service Center. Important information The current program tables are also available at: www.ivoclarvivadent.com/downloadcenter The program tables can be downloaded from the Internet as PDF files. - Page 97 Tel. +62 21 3003 2932 Leicester LE19 4SD Ivoclar Vivadent Shanghai Fax +62 21 3003 2934 United Kingdom Ivoclar Vivadent Polska Sp. z o.o. Trading Co., Ltd. www.ivoclarvivadent.com Al. Jana Pawła II 78 Tel. +44 116 284 7880 2/F Building 1, 881 Wuding Road,...
Need help?
Do you have a question about the Programat EP 5010 G2 and is the answer not in the manual?
Questions and answers