
Subscribe to Our Youtube Channel
Related Manuals for BRAVILOR BONAMAT Bolero 32


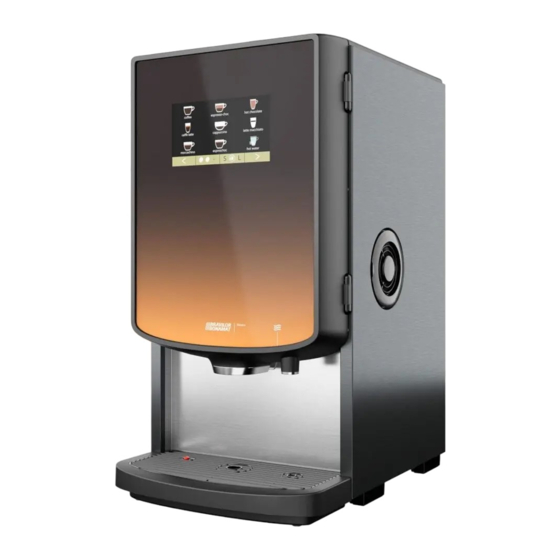
Summary of Contents for BRAVILOR BONAMAT Bolero 32
- Page 1 Bolero 32 / 33 / 43 OPERATING MANUAL HMI: V2.1.0 Model-no: • BLR32-010 • BLR33-010 • BLR43-010 Original document by manufacturer version 2.1 | 2023-05-16...
- Page 2 All rights reserved. No part of this document may be copied and/or published by means of printing, photocopying, microfilming or by any other means whatsoever without the prior written consent of the manufacturer. This also applies to the included drawings and/or diagrams. The information in this document is based on data that was available at the time the design, the material characteristics and the operating methods were published, meaning that this document is subject to change.
-
Page 3: Table Of Contents
Table of contents 1. Parts and functions ............1.1 Parts . - Page 4 5.3 Machine menu ............. . 5.3.1 Date .
-
Page 5: Parts And Functions
1. Parts functions 1.1 Parts 1. descaling cap 10. door‑key 2. canisters 11. drip tray plate 3. canister outlet 12. drip tray with float 4. mixing system 13. ventilation system 5. hot water outlet 14. water inlet 6. beverage outlet 15. electrical connection 7. safety key 16. on/off switch 8. USB connection 9. programming button Backside 1.2 Optional water filter... -
Page 6: Controls
1.3 Controls The basic buttons are described underneath. Overall the Bolero reacts after the release when a button is pressed. ► If no button is pressed within 5 minutes, the Bolero returns to the beverage selection screen. controls function navigate between screens start tart an action confirm (not saved yet) save save adjustments cancel cancel browse the available options on a screen increase and decrease ►All screen shots in this manual are in English. ►The beverages, recipes and settings used are only examples. -
Page 7: Start Up
2. Start up ► The Bolero can display different screens, depending on the model of the Bolero. Initialisation. • wait for the next screen 2a Machine information. • after a few seconds the next screen will appear depending the status of the machine: ► First install already completed, the next screen is 2j. 2b Installation, select your language: • press or to scroll through the available languages •... - Page 8 Read the safety book! • press to go the previous screen • press to confirm 2d Set the current date: • press or to set the current year, month and day • press to confirm 2e Set the current time: • press or to set the current the hour and minutes • press to confirm 2f Information screen: • fill the canisters with ingredients according to the instructions on the screen ► Only use ingredients that are suitable for vending machines.
- Page 9 Information screen • press to confirm ► Calibration is essential for a correct dosage of the ingredients and can be done in the maintenance menu, see §5.1.7 on p.35. 2h Information screen: • press to confirm ► The date, time and language can be changed in §5.3 on p.86. 2i ...
- Page 10 • The machine is ready for use. 2l ...
-
Page 11: Your Beverage
3. Your beverage If you press the image of a beverage, it will be prepared immediately. If you want to personalise the drink, select one of the icons in fig. 3.1a, then press the drink of your choice. 3.1 Personalise your beverage ► These settings are used in preparing a personal beverage and are not saved. 3.1 Options Strength: • press the beans (carousel) to select the beverage strength (to adjust see §5.2.8 on p.83 ) Beverage size: The letters (S=small / M=medium / L=large) represents the three steps in volume • press the “letters” (carousel) to select the beverage cup size 3.1a ... -
Page 12: Cancelling Instant Related Beverages
3.2 Cancelling instant related beverages When a beverage is selected, immediately a cancel button appears. The cancel button may have a limited dimension but the dosing action can always be stopped wherever the screen is touched. The cancel function is enabled by default and can only be turned off in §5.3.11 on p.103 When a beverage is cancelled, the mixer continues to run for a few seconds to clean the mixing system. Hot water is stopped immediately. Cancel a beverage: • touch anywhere on the screen to cancel the beverage 3.2a Information screen: • this screen is displayed to indicate the beverage has been cancelled. 3.2b ... -
Page 13: Screensaver
3.3 Screensaver If the screen has not been touched for a certain time, the screensaver starts. The screensaver timer can be set in §5.3.4 on p.90. Screensaver: • touch anywhere on the screen to return to the beverage selection screen 3.3a 3.4 Energy‑saving mode (ECO) The device is equipped with an energy‑saving mode (ECO) this is used to save energy consumption when the machine is not used (e.g. overnight or during a weekend). When energy‑saving mode becomes active, the following actions are performed: • water level control disabled • boiler heating disabled • backlight display set to low percentage • fan disabled The energy control consist out of a (customised) screensaver with a symbol as semi transparent overlay. The energy‑saving mode has priority over the screensaver. • touch anywhere on the screen to return to the beverage selection screen ► Depending on the switch−off time, it can take a few minutes before the machine is ready for use again. -
Page 14: Cleaning
4. Cleaning It is important that the Bolero is kept clean, what can be cleaned: daily weekly drip tray canister(s) mixing system ventilation system the outside the inside ► Never clean parts of the Bolero in the dishwasher, only if this is explicitly stated. ► Do not use any aggressive cleaning agents. ► See also the cleaning programmes in §5.1 on p.16. 4.1 Daily cleaning ... - Page 15 5. remove the mixer 6. clean the indicated parts, using a damp cloth 7. clean the removed parts (dishwasher proof (<65°C)) 8. remount the mixing system in reverse order ► Pay attention to the flat sides of the shaft and the mixer. 9. reconnect the hose to the mixing system and the outlet 10. replace the ingredient canister(s) in the correct position 11. open the “yellow” slider of the canister(s) 12. close the lid and door The outside: 1. switch off the machine (due to the touchscreen) 2. clean the outside with a damp cloth 3.
-
Page 16: Weekly Cleaning
4.2 Weekly cleaning Ventilation system: 1. switch off the machine 2. open the fan to the back 3. carefully pull the rotor of the motor 4. clean the fan housing and grid, using a damp cloth 5. clean the fan rotor, using hot soapy water 6. dry everything and place the rotor back in place 7. switch the machine back on Canister(s) and fan duct: 1. open the door and lid 2. close the “yellow” slider of the canister outlet(s) 3. take the canister(s) out of the machine... - Page 17 4. turn the fixation ring counter‑clockwise 5. remove the complete mixing system 6. remove the fan duct 7. clean the fan duct, using hot soapy water ► Be aware that everything has been dried very well. 8. clean the inside of the machine with a damp cloth 9. pour the ingredients in a dry bowl 10. unlink the outlet from the canister 11. take apart the canister(s)
- Page 18 12. clean the canister and outlet with a brush ► Do not use water to prevent the ingredients from clumping and clogging the canister. 13. replace the fan duct 14. refill the canister(s) 15. replace the canister(s) in its/their correct position 16. open the “yellow” slider of the canister(s) 17. close the lid and door ► To prevent clogging of ingredient that has fallen into the mixing cup, it is recommended to rinse the machine after the daily cleaning procedure, see §5.1.1 on p.17.
-
Page 19: Programming Menu
5. Programming menu To access the programming menu: • open the door of the Bolero this message appears on the screen • insert the service key (no. 7 on p.1) • press the programming button (no. 9 on p.1) ► All screen shots in this manual are in English. In the programming menu select one of the available options: • press or to select the next option of the “programming menu” • press the “text area” to select the next level for that menu • press to exit the programming menu and return to the beverage selection menu ► If a PIN code is not set, all menu items are available. If a PIN code is set, the user can enter the menu with or without a PIN code. -
Page 20: Maintenance Menu
5.1 Maintenance menu The maintenance menu contains all features that are available regarding the maintenance of the vending machine. Select one of the available options: • press or to select the next option of the maintenance menu • press the “text area” to select the next level for that menu • press to go back to chapter 5. Programming menu on p.15. Maintenance Program menu menu §5.1.1 §5.1.2 §5.1.3 §5.1.4 §5.1.5 §5.1.6 §5.1.7 §5.1.8 §5.1.9 §5.1.10 §5.1.11 §5.1.12... -
Page 21: Rinse The Mixing System
5.1.1 Rinse the mixing system To maintain the correct functioning of the Bolero, the mixing system must be rinsed several times a day and cleaned daily, see §4.1 on p.10. This procedure rinses the mixing systems and the outlet hoses. Necessities: • container (0,5 litre) The rinsing procedure: • press “rinse mixing system” to select • press or to scroll through the maintenance menu 5.1.1 Information screen: • make sure all necessities are available • press to go to the next screen ► The quantity varies per machine » 2 mixing systems: 200 ml » 3 mixing systems: 300 ml 5.1.1a Information screen: • place an empty container under the beverage outlet •... - Page 22 Start rinsing: • press to begin the rinsing start 5.1.1c Rinsing: • wait for the process to finish ► Hot water from the outlet • press to abort cancel 5.1.1d Information screens: • screen 5.1.1 is displayed after a few seconds 5.1.1e ...
-
Page 23: Descale
5.1.2 Descale Descaling the Bolero will remove all lime scale within the water system. This will extend the life‑cycle of the Bolero. Necessities: • descale agent (recommended: “RENEGITE”, our proven descaling agent) • measuring jug (1 litre) • funnel • bucket (10 litre) • average time: ± 40 minutes • safety gloves and goggles ► The descaling process cannot be interrupted after screen 5.1.2c! The descaling procedure: • press “descale” to select • press or to scroll through the maintenance menu 5.1.2 Preparation: • make sure all necessities are available • press to go to the next screen 5.1.2a ... - Page 24 Information screen: • average length of time • press to confirm and continue the descaling procedure • press to go the previous screen ► The descaling process cannot be interrupted after this screen! 5.1.2c Drain the machine: • follow the instructions on the screen ► Wear protecting gloves, hot water! • when the water flows out of the hose, the following screen is displayed 5.1.2d Draining the machine: • time indication needed for draining • when the boiler is empty, the following screen is displayed 5.1.2e ...
- Page 25 Prepare the descaling solution: • follow the instructions on the screen ► Wear safety gloves and safety goggles. ► The descaling agent must be dissolved completely. • press to go to the next screen 5.1.2g Preparation: • follow the instructions on the screen • press to go to the next screen ► Place the bucket also under all the outlets (including the hot water outlet). 5.1.2h ...
- Page 26 Descaling: ► Make sure that the bucket is placed under the outlets, in the next step, water with descaling solution will come out of all the outlets (including the hot water outlet). • press to go to the next screen 5.1.2k Descaling: • the boiler is heating up, wait for the next screen 5.1.2l ...
- Page 27 Descaling: • wait for the next screen ► Hot water with descaling solution flows out all of the outlets. 5.1.2o Descaling ‑ draining: • follow the instructions on the screen ► Wear safety gloves and safety goggles, the water is hot and contains descaling solution. • when the water flows out of the hose, the next screen is displayed 5.1.2p Descaling ‑ draining: • time indication needed for draining •...
- Page 28 Descaling ‑ rinse: • follow the instructions on the screen ► Use an empty bucket. ► Place the bucket also under all the outlets (including the hot water outlet). • press to go to the next screen 5.1.2s Descaling ‑ rinse: • the boiler is filling, wait for the next screen 5.1.2t Descaling ‑ rinse warning screen: • wait for the next screen ► Water will come out of all the outlets. 5.1.2u ...
- Page 29 Descaling ‑ ending: • follow the instructions on the screen • press to confirm every things has been restored 5.1.2w Information screen: • screen 5.1.2 is displayed after a few seconds 5.1.2x Warning screen interrupted descaling process: • press to continue the procedure resume where it was interrupted and to finish the descaling process 5.1.2y ...
-
Page 30: Water Filter Management
5.1.3 Water filter management If a water filter is installed, replaced or removed must be confirmed in the software so that the counter is updated. A water filter lessens lime‑scale deposits and reduces impurities in the water. The Bolero also does not need to be descaled so often, see §7.1 on p.128. Additionally, it ensures a consistent quality of the hot beverage in both taste and aroma. water filter settings default minimum maximum capacity (litre) 10000 months shelf life Install, replace or remove the water filter: • press “water filter management” to select » water filter already installed go to screen 5.1.3c » water filter not yet installed, go to the next screen • press or to scroll through the maintenance menu 5.1.3 Installing: • press “install water filter” to select ► Read the instructions that come with the filter. - Page 31 Replacing: • press “replace water filter” to select and go to the next screen • press or to scroll through the water filter sub‑menu » water filter settings (5.1.3e) » uninstall water filter (5.1.3h) 5.1.3c Replace the water filter (according to its own instructions). • press to confirm and go to screen 5.1.3f 5.1.3d Set notification: • press “water filter settings” to select and go to the next screen • press or to scroll through the water filter sub‑menu » uninstall water filter (5.1.3h) » replace water filter (5.1.3c) 5.1.3e Set the “replace water filter” message: ►...
- Page 32 Information screens: • screen 5.1.3 is displayed after a few seconds 5.1.3g Permanent removal: • press “uninstall water filter” to select and go to the next screen • press or to scroll through the water filter sub‑menu » replace water filter (5.1.3c) » water filter settings (5.1.3e) 5.1.3h Uninstall the water filter: • physically remove the water filter • press to confirm 5.1.3i Information screen: • screen 5.1.3 is displayed after a few seconds 5.1.3j ...
-
Page 33: Hot-Key Rinsing Function
5.1.4 Hot-key rinsing function To prevent clogging, it is necessary to rinse the mixing system several times a day. For this purpose, it is possible to set up a so‑called hot‑key on the screen. In this menu it is possible to put the hot‑key rinsing function active or inactive in the beverage selection screen. Default: OFF ► To use the hot‑key rinsing function press and hold for five seconds the S M L button on the beverage selection screen, the rinsing of the mixing system starts immediately. Availability of hot‑key: •... -
Page 34: Cleaning Management
5.1.5 Cleaning management In this menu, it is possible to set a time for a cup counter to display a warning before rinsing the machine. The warning can always be cancelled without rinsing the machine. Default: OFF Cleaning management • press “message rinse mixing system” to select • press or to scroll through the maintenance menu 5.1.5 Setting rinse message: • press “ON” or “OFF” to set the message » select OFF and save go to the next screen » select ON and : go to screen 5.1.5c 5.1.5a Information screen: • screen 5.1.5 is displayed after a few seconds 5.1.5b ... - Page 35 Set day or time: • press or to set the number of cups or days after which the warning should pop‑up • press to confirm and go to the next screen • press to go back to screen 5.1.5a 5.1.5c Message direct or at a later time: • press “YES” or “NO” to set the message timing » select YES and save go to the second screen of 5.1.5f » select NO and : go to the next screen • press to go to the previous screen 5.1.5d Set the timer: • press or to set the hour and minutes • press to confirm and go to the first save screen of 5.1.5f •...
-
Page 36: Descale Management
5.1.6 Descale management It is important to know the correct hardness of the water at the location where the Bolero is used (for setting the descaling signal). If necessary, ask the local water company for the hardness of the water supplied or measure the hardness of the water supplied on site with a water hardness tester (according to the corresponding instructions). Default: ON (with average water hardness) See also §7.1 on p.128. Descale management • press “descale management” to confirm • press or to scroll through the maintenance menu 5.1.6 Descale message: • press “ON” or “OFF” to set the message » select OFF and save go to the next screen » select ON and : go to screen 5.1.6c 5.1.6a Information screen: •... - Page 37 Water hardness: • press or to set the water hardness ► When a water filter is used, the message can be delayed, select 0‑4 °DH. » select a value between 4/8 and 18/30 °DH; press to confirm and go to screen 5.1.6g » select 0/4 °DH; press to confirm and go to the next screen 5.1.6c Volume override: • press to confirm and go to screen 5.1.6h save • press to adjust the volume for the override notification and go to the next screen ►...
- Page 38 Standard volumes/water hardness: • press to confirm and go to the next save screen 5.1.6g Information screen: • screen 5.1.6 is displayed after a few seconds 5.1.6h ...
-
Page 39: Canister Calibration
5.1.7 Canister calibration In this menu the canisters can be calibrated. The calibration determines the quantity of the ingredient when a canister motor runs at a defined speed for a defined time. When finished the measured weight must be filled in. Necessities: • empty cup • precision scale Canister calibration procedure: • press “canister calibration” to confirm • press or to scroll through the maintenance menu 5.1.7 Make sure all necessities are available. • press to go to the next screen 5.1.7a Canister selection: ► The number of canisters may vary per configuration, see §7.3 on p.128. • press or to select a canister (if more than one) •... - Page 40 Information screen: • turn the fixation ring counter‑clockwise • remove the complete mixing system and the condense reservoir • press to confirm and go to the next screen • press to go to the previous screen 5.1.7c Information screen: • put an empty dry cup under the canister outlet • press to begin the pre‑calibration dosing start • press to go to the previous screen 5.1.7d Pre‑calibration dosing: • wait for the next screen ► The canister motor will turn to fill up the outlet. 5.1.7e ...
- Page 41 Actual calibration: • put a empty dry cup on the balance to calibrate • put the cup under the canister outlet • press to begin the dosing start • press to go to the previous screen 5.1.7g Dosing: • wait for the next screen ► The canister motor starts and stops several times. 5.1.7h Weighing the ingredient: • put the cup with ingredient on the balance • press or to enter the weight on the screen • press to confirm and go to the next save screen •...
- Page 42 Information screens: • screen 5.1.7 is displayed after a few seconds 5.1.7k ...
-
Page 43: Pump Calibration
5.1.8 Pump calibration In this menu the pump can be calibrated. With calibration the volume of the water is determined for a defined flow and time. When finished the measured volume must be filled in. Necessities: • measuring jug (minimal 200 ml) Pump calibration procedure: • press “pump calibration” to confirm • press or to scroll through the maintenance menu 5.1.8 Make sure all necessities are available. • press to confirm and go to the next screen 5.1.8a Information screen: • put a empty measuring jug under water outlet • press to begin the dosing start ► Please note the machine dispenses hot water. • press to go to the previous screen 5.1.8b ... - Page 44 Warning screen: ► The warning screen is displayed for a few seconds. • wait for the next screen 5.1.8c Hot water dosing in progress: • wait for the next screen ► Hot water from water outlet. 5.1.8d Determine volume: • read off the amount of water dosed • press or to enter the volume on the screen • press to confirm and go to the next save screen • press to go back to screen 5.1.8b 5.1.8e ...
-
Page 45: Input Test
5.1.9 Input test For a proper fault analysis a diagnosis should be made first. An input test can be performed for the following components: • touchscreen • floater • NTC1 (low position) and NTC2 (high position) • door switch / safety key • low pressure pump ► Despite the fact that sufficient safety measures are taken working with the systems may entail risks. Our starting point is that people activating this menu are sufficiently skilled and therefore able to properly assess these risks with respect to safety. - Page 46 Door switch/safety key: • remove the service key and replace it resulting in false/true • press or to select another component 5.1.9c Float: • shows current state on screen (true=wet or false=dry) • press or to select another component 5.1.9d Low pressure pump: • shows current state of the sensor on screen (true or false) • press to go to the next screen test • press or to select another component 5.1.9e Test the low pressure pump: • the low pressure pump is turned on for 10 seconds and then stops. ► The pump motor runs slowly, so no water will come out of the outlet.
- Page 47 NTC sensors: • shows current temperature on screen • press to go to the next screen test • press or to select another component 5.1.9g Test the NTC sensors: ► The heating element is on for 10 seconds, so the temperature on the screen should rise. • press to go back to previous screen cancel 5.1.9h ...
-
Page 48: Output Test
5.1.10 Output test For a proper fault analysis a diagnoses should be made first. The output test gives an overview of all parts able to deliver signals (electrical components). Components that can be tested: • buzzer • mixer motor • heating element • fan motor • canister motor • low pressure pump • magnetic inlet valve • water selector motor ► Despite the fact that sufficient safety measures are taken working with the systems may entail risks. Our starting point is that people activating this menu are sufficiently skilled and therefore able to properly assess these risks with respect to safety. - Page 49 Canister motor test: • remove the canister(s) • press pulse result: the canister motor runs briefly at 20% speed • press cycle result: the canister motor runs at 20% speed for 10 seconds • press or to select another canister 5.1.10c Mixer motor test: • press to select a mixer in the next test screen ► The number of mixer motors may vary per configuration, see §7.3 on p.128. • press or to select another component 5.1.10d ...
- Page 50 Heating element test: • press pulse result: the heating element turns on for a moment • press cycle result: the heating element turns on for 10 seconds • press or to select another component 5.1.10g Magnetic inlet valve test: • press pulse result: the valve opens for a moment ► Do not perform the pulse test several times in a row, as this can lead to an overflow of the float tank, for this reason the cycle button is not accessible.
- Page 51 Water selector positions test: • press pulse result: the selector runs from the hot water (position 0) to the selected position and back • press cycle result: the selector runs from the hot water (position 0) to the selected position, press to return cancel • press or to select a different position 5.1.10k ...
-
Page 52: Cleaning Instructions
5.1.11 Cleaning instructions To maintain proper functioning, the Bolero must be cleaned regularly. daily weekly • drip tray • canister(s) • mixing system • ventilation system • the outside • the inside ► The cleaning instructions are also available as an animation by scanning the QR code in this menu. ► See also chapter 4. Cleaning on p.10 for a detailed description. - Page 53 Cleaning the mixing cups: • follow the instructions on the screen • press or to select another daily cleaning instruction 5.1.11c Cleaning the outside: • follow the instructions on the screen • press or to select another weekly cleaning instruction 5.1.11d Weekly cleaning instructions: • press “clean weekly” to go to the next screen ► For detailed instruction see §4.2 on p.12. • press or to go to daily cleaning (5.1.11a) 5.1.11e Cleaning the canisters: • follow the instructions on the screen • press or to select another weekly cleaning instruction 5.1.11f ...
- Page 54 Cleaning the fan: • follow the instructions on the screen • press or to select another weekly cleaning instruction 5.1.11g Cleaning the inside: • follow the instructions on the screen • press or to select another weekly cleaning instruction 5.1.11h ...
-
Page 55: Counters
5.1.12 Counters The counters tell you how many beverages have been prepared. A total counter of all issued beverages is also shown. If a drink is removed, the number of that beverage is still counted in the total machine counter. Counters readings: • press “counters” to select • press or to scroll through the maintenance menu ► The counters sub‑menu consists of the following: » day/total counters 5.1.12a » reset day counters 5.1.12c » reset all counters 5.1.12g » export counters 5.1.12k » machine counter 5.1.12o 5.1.12 Day counters: • press “day/total counters” to select •... - Page 56 Reset all day counters: • press “reset all day counters” to select • press or to scroll through the counters sub‑menu 5.1.12c Start reset: • press to confirm the reset of all reset day counters day counters 5.1.12d Confirmation screen: • press to confirm and continue the reset of all day counters • press to cancel and go to the previous screen 5.1.12e Information screen: • screen 5.1.12c is displayed after a few seconds 5.1.12f ...
- Page 57 Total counters: • press “total counters” to select • press or to scroll through the counters sub‑menu 5.1.12g Start reset: • press to confirm the reset of all reset all counters counters 5.1.12h Confirmation screen: • press to confirm and continue the reset of all counters • press to cancel and go to the previous screen 5.1.12i Information screen • screen 5.1.12g is displayed after a few seconds 5.1.12j ...
- Page 58 Export counters: • place a USB stick ► If there is no USB stick in the machine this option is greyed out. • press “export counters” to confirm • press or to scroll through the counters sub‑menu 5.1.12k Start export counters: • press to begin the export start 5.1.12l Progress screen • wait for the process to finish • press on to interrupt cancel 5.1.12m ...
- Page 59 Machine total counter: • press “machine counter” to select • press or to scroll through the counters sub‑menu 5.1.12o Information screen: • screen 5.1.12o is displayed after a few seconds 5.1.12p ...
-
Page 60: Beverage Menu
5.2 Beverage menu The beverage menu contains all functions to adjust your beverages to your wishes. Select one of the available options: • press or to select the next option of the “beverage menu” • press the “text area” to select the next level for that menu • press to go back to chapter 5. Programming menu on p.15 ► The beverages, recipes and settings used are only examples. Beverage Program menu menu §5.2.1 §5.2.2 §5.2.3 §5.2.4 §5.2.8 §5.2.5 §5.2.6 §5.2.7 §5.2.9... -
Page 61: Add Beverage To Screen
5.2.1 Add beverage to screen In this menu the available beverages (recipes) can be selected and linked to a beverage position. It is possible to replace a beverage, the beverages cannot be dragged to another place. The open spaces where another beverage can be placed are marked with 3 dots. Place a beverage in the beverage selection screen: • press “select beverage” to confirm • press or to scroll through the beverage menu 5.2.1 Available beverages in the beverage selection screen: • press on a beverage to replace or a free place (marked as 3 dots) to add a beverage • press to accept the current exit configuration and go to the previous screen ► If the buttons are visible, multiple screens with beverages are available. 5.2.1a Replace or delete a beverage on the screen ►... - Page 62 Information screens: • screen 5.2.1 is displayed after a few seconds 5.2.1c...
-
Page 63: Change Beverage Name
5.2.2 Change beverage name In this menu the name of the beverage can be changed to a custom defined beverage name. Change beverage name: • press “change beverage name” to confirm • press or to scroll through the beverage menu 5.2.2 Available beverages in the beverage selection screen: • press on a beverage to change the name • press to accept the current exit configuration and go to the previous screen ► If the buttons are visible, multiple screens with beverages are available. 5.2.2a Enter the new custom beverage name: • press or to scroll through the alphabet •... - Page 64 Information screens: • screen 5.2.2 is displayed after a few seconds 5.2.2c...
-
Page 65: Change Beverage Icon
5.2.3 Change beverage icon In this menu, the beverage icon can be changed to a custom beverage icon associated with the selected beverage. ► The standard beverage icons remain always available. ► We recommend to use a transparent background. Change beverage icon: • press “change beverage icon” to confirm • press or to scroll through the beverage menu ► Only files that meet the specifications can be loaded successfully. - Page 66 Information screens: • screen 5.2.3 is displayed after a few seconds 5.2.3c...
-
Page 67: Change Beverage Price
5.2.4 Change beverage price In this menu the price per beverage can be set or modified. Prices can be a token or a currency. Price can be set per cup type (cup, mug, decanter). ► Coins to be used are specified in §5.3.11 on p.103. ► The currency symbol and the currency separator are determined by the external payment system Change beverage price: • press “change beverage price” to confirm • press or to scroll through the “Beverage menu” 5.2.4 ... - Page 68 Information screens: • screen 5.2.4a is displayed after a few seconds 5.2.4c Example screen prices 5.2.4d Example screen tokens 5.2.4e ...
-
Page 69: Recipes
5.2.5 Recipes In this menu the recipes of the beverage can be changed. recipe editor basic recipe editor expert • volume • volume • water flow adjustment • strength • strength • mixer speed • mixer speed • ratio affected by strength • overlap percentage • water ratio ingredients ► Only use ingredients that are suitable for vending machines and use the recommended dosage as indicated on the packaging. - Page 70 Change the recipe of a beverage: • press “recipe” to confirm • press or to scroll through the beverage menu 5.2.5 Recipe carousel: • press “recipe editor” to confirm • press or to scroll through the recipe sub‑ menu: » recipe builder 5.2.5t on p.71 » delete recipe 5.2.5al on p.75 ► The QR‑code in the screen refers to this manual 5.2.5a Recipe editor carousel: • press “recipe editor basic” to confirm •...
- Page 71 Volume: • press or to change the volume for the different cup sizes • press to confirm and go to the next screen ► Most volumes can be set from 0‑30ml to 1000ml (recipe dependent) 5.2.5d Strength: ► Use the to switch between ratio and gram/120ml • press or to change the ratio ingredient/ water • press to confirm ►...
- Page 72 Information screen: • screen 5.2.5aq is displayed after a few seconds to test the recipe 5.2.5h Recipe editor carousel: • press “recipe editor expert” to confirm • press or to go to “recipe editor basic” (5.2.5b on p.66) 5.2.5i Recipe selection: • press or to select a beverage • press to confirm 5.2.5j Volume: • press or to change the volume for the different cup sizes • press to confirm and go to the next screen ► Most volumes can be set from 0‑30ml to 1000ml (recipe dependent) 5.2.5k ...
- Page 73 Strength: ► Use the to switch between ratio and gram/120ml • press or to change the ratio ingredient/ water • press to confirm ► The number of ingredients may vary per beverage. 5.2.5l Ingredient affected by the strength‑buttons: • press on the checkbox ► This determines whether or not an ingredient is modified when the strength setting on the beverage selection screen is changed, see 3.1a on p.7 •...
- Page 74 Mixer speed: • press or to change mixer speed for the selected ingredient • press to confirm » go to the previous screen for the next ingredient » go to the following screen when all ingredients have been defined 5.2.5p Overlap: ► This is a feature that makes it possible to dispense a certain quantity of ingredients at the same time. Only possible when the ingredients are mixed in the same mixing chamber.
- Page 75 Recipe carousel: • press “recipe builder” to confirm • press or to scroll through the recipe sub‑ menu: » delete recipe 5.2.5al on p.75 » recipe editor 5.2.5a on p.66 ► The QR‑code in the screen refers to this manual (online). 5.2.5t Recipe builder carousel: • press “create new recipe” to confirm • press or to go to “copy recipe” (5.2.5aj on p.75) 5.2.5u Recipe name: ►...
- Page 76 Choose a beverage icon (optional): • press or to scroll through the standard beverage icons • press the icon to select • press to confirm ► Confirm is only active if something has changed. ► At a later stage, customer‑specific beverage images can be chosen (§5.2.3 on p.61) 5.2.5x Choose an ingredient: • press or to scroll through the ingredients • press the ingredient name to select •...
- Page 77 Strength: ► Use the to switch between ratio and gram/120ml • press or to change the ratio ingredient/ water • press to confirm ► The number of ingredients may vary per beverage. 5.2.5ab Ingredient affected by the strength‑buttons: • press on the checkbox ► This determines whether or not an ingredient is modified when the strength setting on the beverage selection screen is changed, see 3.1a on p.7 •...
- Page 78 Mixer speed: • press or to change mixer speed for the selected ingredient • press to confirm » go to the previous screen for the next ingredient » go to the following screen when all ingredients have been defined 5.2.5af Overlap: ► A feature that makes it possible to dispense a certain quantity of ingredients at the same time. Only possible when the ingredients are mixed in the same mixing chamber.
- Page 79 Recipe builder carousel: ► A new recipe is created on the basis of an already existing recipe. After the recipe has been copied, it must be given a unique name and further edited in the “recipe editor”. • press “copy recipe” to confirm • press or to go to “create new recipe” (5.2.5u on p.71) 5.2.5aj ...
- Page 80 Confirmation screen: • press to confirm and go to screen 5.2.5ap 5.2.5an Confirmation screen: • press to confirm and go to the next screen ► The beverage will also be removed from the beverage selection screen. 5.2.5ao Information screen: • screen 5.2.5am is displayed after a few seconds 5.2.5ap Test recipe: • press ,depending on the starting point, one of the following screens will appear: » recipe editor basic 5.2.5b on p.66 » recipe editor expert 5.2.5i on p.68 » create new recipe 5.2.5i on p.68 »...
- Page 81 Test volume: • press one of the volumes • press to confirm • press to go to the previous screen 5.2.5ar Information screen: • place an empty container under the beverage outlet • press to begin the dosing start • press to go to the previous screen 5.2.5as Preparing a beverage: • please wait 5.2.5at Testing: • check the volume and the strength/taste • recipe not ok, press , depending on your starting point, one of the following screens will appear: » standard recipe, go to the next screen » new/copied recipe, go to screen 5.2.5k on p.68 •...
- Page 82 Recipe not satisfactory: • press to undo the back to default recipe modifications and go to the next screen • press , depending on your edit recipe again starting point, one of the following screens will appear: » recipe editor basic 5.2.5d on p.67 » recipe editor expert 5.2.5k on p.68 5.2.5av Back to default recipe: • please wait, depending on your starting point, one of the following screens will appear after a few seconds: » recipe editor basic 5.2.5b on p.66 » recipe editor expert 5.2.5i on p.68 5.2.5aw Test another volume: • press go to 5.2.5ar •...
-
Page 83: Select Ingredients Canisters
5.2.6 Select ingredients canisters Default instant ingredients will be available in the machine: • regular coffee • espresso coffee • topping • cacao • sugar • premix ► Only use ingredients that are suitable for vending machines. ► Names of ingredients can be changed in §5.2.7 on p.81. Select an ingredient per canister: • press “select ingredient canister” to confirm • press or to scroll through the beverage menu 5.2.6 ... - Page 84 Next canister(s): ► The screen depends on the configuration of the machine, see §7.3 on p.128. • press or to scroll through the available ingredients • press on an ingredient to select and go to the next screen ► Confirm is only active if something has changed. • press to select the next canister 5.2.6c Control screen: ► This screen appears when is pressed after the last canister.
-
Page 85: Change Ingredient Name
5.2.7 Change ingredient name In this menu the name of the ingredient can be changed to a custom defined ingredient name. Change ingredient name: • press “change ingredient name” to confirm • press or to scroll through the beverage menu 5.2.7 Available ingredient canisters: • press or to scroll through the available ingredient canisters • press on an ingredient to select and go to the next screen 5.2.7a Enter the new custom ingredient name: • press or to scroll through the alphabet • press the character between the to form the new ingredient name » press for capitals » press for special characters à..ç..ê »... - Page 86 Information screens: • screen 5.2.7a is displayed after a few seconds 5.2.7c ...
-
Page 87: Cusomize Beverage Strength
5.2.8 Cusomize beverage strength In this menu, the standard strength on the beverage selection screen can be set. The step size (%) of the strength can also be adjusted (0‑20%). This default setting applies to all beverages in the beverage selection screen. standard strength step size (5.2.8a) setting (5.2.8c) minimum standaard 100% maximum 110% ► Setting the step size to 0% turns off the strength control and the button disappears from the beverage selection screen. Set the beverage strength increase (%): •... - Page 88 Change the default strength: • press or to set the default strength • press or to scroll through the beverage strength menu 5.2.8c Confirm changes: • press to confirm save ► Save is only active if something has changed. 5.2.8d No selectable strength button: ► Setting the step size to 0% (screen 5.2.8a) turns off the strength control and the button disappears from the beverage selection screen.
-
Page 89: Set Default Volume
5.2.9 Set default volume In this menu, the standard volume of the beverage selection screen can be set. This default setting applies to all beverages in the beverage selection screen. The amount of ml per beverage can be adjusted in the recipe menu §5.2.5 on p.65. Change the default volume: • press or to set the default volume • press or to scroll through the beverage menu 5.2.9 Confirm changes: • press to confirm save ► Save is only active if something has changed. 5.2.9a ... -
Page 90: Machine Menu
5.3 Machine menu You can programme the machine settings in the this menu. Select one of the available options: • press or to select the next option of the “machine menu” • press the “text area” to select the next level for that menu • press to go back to chapter 5. Programming menu on p.15 Machine Program menu menu §5.3.1 §5.3.2 §5.3.3 §5.3.4 §5.3.5 §5.3.6 §5.3.7 §5.3.8 §5.3.12 §5.3.9 §5.3.10 §5.3.11... -
Page 91: Date
5.3.1 Date Adjust the year/month/date. Change the date: • press or to set the year, month or date • press or to scroll through the machine menu 5.3.1 Confirm changes: • press to confirm save ► Save is only active if something has changed. 5.3.1a ... -
Page 92: Time
5.3.2 Time Adjust the time. Change the time: • press or to set the current the hour and minutes • press or to scroll through the machine menu 5.3.2 Confirm changes: • press to confirm save ► Save is only active if something has changed. 5.3.2a ... -
Page 93: Language
5.3.3 Language The available languages are: • English • Polish • Spanish • Portuguese • French • Swedish • Italian • Danish • Dutch • German • Norwegian Default: English Change the language: • press or to scroll through the available languages • press the language to set as the current language • press or to scroll through the machine menu 5.3.3 ... -
Page 94: Screensaver Management
5.3.4 Screensaver management In this menu, you can set when the screen saver becomes active. setting screensaver default 15 min. minimum 1 min. maximum 90 min. The screensaver can be set to a custom defined screensaver. You can always return to the default screensaver. ► The screensaver image does not need for a transparent background. Change the screensaver: • press “screensaver” to confirm • press or to scroll through the machine menu 5.3.4 Activate/deactivate the screensaver option: • press “ON” or “OFF” to set the screensaver: » select OFF and save go to the next screen »... - Page 95 Set the time when the screensaver becomes active • press or to select the activation time • press to confirm 5.3.4c Change the screensaver image: • press to go to the next screen • place a USB stick ► If there is no USB stick in the machine this option is greyed out. • press or to select a custom image, see specifications below • press to go to the next screen save 5.3.4d ...
-
Page 96: Background
5.3.5 Background In this menu the background of the beverage selection screen can be set. The background can be set to a custom defined background, see specifications. The default background remains available in the GUI, so you can always return to the default background. ► We recommend not to use a light colour or white because of the readability. Change the background: • press “background” to confirm • press or to scroll through the machine menu 5.3.5 Change the background image: • press to go to the next screen • place a USB stick ► If there is no USB stick in the machine this option is greyed out. -
Page 97: Display Brightness
5.3.6 Display brightness The brightness of the display can be increased or decreased in steps of 5%. setting brightness default minimum maximum 100% Change the display brightness: • press or to select the brightness • press or to scroll through the machine menu 5.3.6 Confirm change: • press to confirm save ► Save is only active if something has changed. 5.3.6a ... -
Page 98: Sound Level Feedback
5.3.7 Sound level feedback The sound level of the feedback can be increased or decreased. setting sound level default minimum 0% (OFF) maximum 100% Sound level feedback: • press or to set the sound level ► When the audio volume is increased or decreased, a beep is generated in that volume for verification. • press or to scroll through the machine menu 5.3.7 ... -
Page 99: Boiler Temperature
5.3.8 Boiler temperature The temperature is set with an absolute temperature setting in degrees Celsius setting temperature default 85°C minimum 80°C maximum 90°C Change the boiler temperature: • press or to set the temperature • press or to scroll through the machine menu 5.3.8 Confirm change: • press to confirm save ► Save is only active if something has changed. 5.3.8a ... -
Page 100: Energy-Saving Mode (Eco)
5.3.9 Energy‑saving mode (ECO) After the set time, the Bolero will automatically go into sleep mode. The system becomes active when the screen is touched. The time of the energy‑saving mode can be set as defined in the table below. 15 min. 30 min. 1 hour 2 hours 4 hours Default: 2 hours When energy‑saving mode becomes active, the following actions are performed: • boiler heating disabled • backlight display set to low percentage. • fan disabled ► Energy control mode is dominant over screensaver mode Change the energy‑saving mode: • press “eco modus” to confirm • press or to scroll through the machine menu 5.3.9 ... - Page 101 Information screen: • screen 5.3.9 is displayed after a few seconds 5.3.9b Set the time when the eco modus becomes active: • press or to select the activation time • press to confirm save • press to go back to screen 5.3.9a 5.3.9c Information screen: • screen 5.3.9 is displayed after a few seconds 5.3.9d ...
-
Page 102: Security Settings
5.3.10 Security settings In this menu the PIN code settings can be defined. There are 2 PIN code: • PIN 1 (general safeguard) • PIN 2 (specific safeguard) §7.4 on p.129 describes which PIN codes protect which options. If a PIN code is entered to access the menu, it remains valid until the user leaves the menu again. Change the security settings: • press “security settings” to confirm • press or to scroll through the machine menu ► If a PIN code is active, it is indicated on this screen. 5.3.10 Change the security settings: • press “PIN 1 for total access”: » PIN 1 already set: go to screen 5.3.10f »... - Page 103 Enter the PIN code: • press or to scroll through the numbers • press on the number to select • press to delete a PIN number, see left corner • press when the 4 digit PIN code is entered ► When four numbers are entered the next screen is displayed to verify the PIN code. 5.3.10c Verify the PIN code: • press or to scroll through the numbers • press on the number to select • press to delete a PIN number, see left corner •...
- Page 104 Enter the PIN code: • press or to scroll through the numbers • press on the number to select • press to delete a PIN number, see left corner • press to verify the PIN code entered and go to the next screen ► When the PIN code does not match, you will receive another attempt to enter the correct code. 5.3.10g Information screen: • the next screen is displayed after a few seconds 5.3.10h Enter the new PIN code: • press or to scroll through the numbers •...
- Page 105 Information screen: • screen 5.3.10a is displayed after a few seconds 5.3.10k Delete PIN 1: • press “delete PIN 1” to confirm and go to the next screen • press or to go to screen 5.3.10f 5.3.10l Enter the PIN code: • press or to scroll through the numbers • press on the number to select • press to delete a PIN number, see left corner • press to verify the PIN code entered and go to the next screen ► When the PIN code does not match, you will receive another attempt to enter the correct code.
- Page 106 Confirmation screen: • press to cancel • press to confirm and go to the next screen 5.3.10o Information screen: • screen 5.3.10a is displayed after seconds 5.3.10p Change the security settings: • press “PIN 2 for limited access” to select: ► The screens that follow are the same as PIN 1 (only PIN 1 is replaced by PIN 2 in the screens 5.3.10b to 5.3.10p).
-
Page 107: Connected Devices
5.3.11 Connected devices In this menu settings of external devices connected to the machine can be set or modified. In case of a connected payment module, the possibility to cancel a beverage can be disabled. Devices that can be connected: • payment devices (with and without coins) Select or configure the connected devices: • press “connected devices” to confirm • press or to scroll through the machine menu ► If no external device is connected to the machine, the text on this screen will remain greyed out. 5.3.11 Payment device: ► The checkbox gives the possibility to decide whether a paid beverage could be cancelled or not (the money is not returned) •... - Page 108 Select which coins can be used: • press or to scroll through the available coins • fill in the checkbox to select the coin • press to confirm and go to the next save screen ► Save is only active if something has changed. 5.3.11c Information screens: • screen 5.3.11b is displayed after a few seconds 5.3.11d ...
-
Page 109: Reset To Factory Settings
5.3.12 Reset to factory settings A factory reset returns the machine to its original state. Exceptions are: • firmware • machine counter (only the day and beverage counters are reset) • descale counter • water filter • firmware history Reset to factory settings: • press “factory settings” to confirm • press or to scroll through the machine menu 5.3.12 Confirmation screen: ► First save the customized data, see §5.4.5 on p.113. • press to confirm 5.3.12a Progress screen • wait until the process is finished 5.3.12b ... - Page 110 Information screen: • the next screen is displayed after a few seconds 5.3.12c Information screen: • the machine starts automatically (this takes a while) 5.3.12d ...
-
Page 111: Software Menu
5.4 Software menu All firmware related items can be read, set or changed in the software menu. Select one of the available options: • press or to select the next option of the “software menu” • press the “text area” to select the next level for that menu • press to go back to chapter 5. Programming menu on p.15 Software Program menu menu §5.4.1 §5.4.2 §5.4.3 §5.4.4 §5.4.5 §5.4.6 §5.4.7 §5.4.8... -
Page 112: Machine And Software Information
5.4.1 Machine and software information This menu shows information that identifies the machine. software hardware (version, other article number) HMI (version) I/O (version) external (version, article number) • bootloader • bootloader • Interface • HMI board • IP information board (if (IP address, Mac present) address, Gateway and DNS) (if connected) • application • application • other devices • I/O board •... -
Page 113: Error Log
5.4.2 Error log In this menu the error history is shown. The following items are displayed: • error code • error message • date and time The error log can contain up to 50 errors messages, the last error code generated is displayed first. ► An overview of the error messages can be found in §6.2 on p.123. Information screens: • press or to retrieve the error history • press or to scroll through the software menu ► The last error code generated is shown first. 5.4.2 ... -
Page 114: Warning Log
5.4.3 Warning log In this menu the warning history is shown. The following items are displayed: • warning code • warning message • date and time The warning log can contain up to 50 warning messages, the last warning code generated is displayed first. ► An overview of the warning messages can be found in §6.1 on p.121. Information screens: • press or to retrieve the warning history • press or to scroll through the software menu ► The last warning code generated is shown first. -
Page 115: Import Machine Settings
5.4.4 Import machine settings In this menu the settings of another machine (or from the Bravilor factory) can be imported. With settings the following is meant: • recipes • machine configuration • security levels ► Only if the identities of both machines are the same the settings can be transferred. Import machine settings: • place a USB stick ► If there is no USB stick in the machine this option is greyed out. - Page 116 Progress screen • wait until the process is finished 5.4.4c Information screen: • screen 5.4.4 is displayed after a few seconds 5.4.4d ...
-
Page 117: Export Machine Settings
5.4.5 Export machine settings In this menu the machine settings are exported to a file. With settings the following is meant: • recipes • machine configuration • security levels • identity (used to check if the new machine has the same identity) ► Keep in mind that the security levels of the machine are also copied. Export machine settings: • place a USB stick ► If there is no USB stick in the machine this option is greyed out. - Page 118 Information screens: • screen 5.4.5 is displayed after a few seconds 5.4.5c ...
-
Page 119: Update Software
5.4.6 Update software In this menu the software can be updated. The software (package) can be selected from the USB stick and after selection the package information will be shown. ► The software can only be updated, a downgrade is not possible. Update the machine software: • place a USB stick ► If there is no USB stick in the machine this option is greyed out. • press “update software” to confirm • press or to scroll through the software menu 5.4.6 ... - Page 120 Progress screen • wait for the process to finish • press on to interrupt cancel ► If the file cannot be imported (earlier version or wrong format) the screen is aborted and screen 5.4.6f appears. 5.4.6c Information screen: • the next screen is displayed after a few seconds 5.4.6d Information screen: • the machine starts automatically (this takes a while) • the next screen is displayed automatically 5.4.6e Information screen: •...
-
Page 121: Export Machine Log
5.4.7 Export machine log In this menu the machine log is exported to a file. The report consists of dispense counters (free and paid), warning and error messages. Export machine log: • place a USB stick ► If there is no USB stick in the machine this option is greyed out. • press “export machine log” to confirm • press or to scroll through the software menu 5.4.7 Export the log file of the machine: • press to begin the export start 5.4.7a Progress screen • wait for the process to finish •... - Page 122 Information screens: • screen 5.4.7 is displayed after a few seconds 5.4.7c ...
-
Page 123: Software Update History
5.4.8 Software update history In this menu software history is shown. The following software history are shown with item number, version, date and time: • product software (HMI) • I/O board software • touch software • Wi‑Fi/Bluetooth • bus devices (if they are connected) The update log can contain up to 50 items, the last update is shown first. Information screens: • press or to retrieve the update history • press or to scroll through the software menu 5.4.8 ... -
Page 124: Online Info
5.5 Online info Online information can be approached via the QR code shown on the screen. Select one of the available options • press or to select the next option of the “machine menu” • press the “text area” to select the next level for that menu • press to go back to chapter 5. Programming menu on p.15 Online information: • press “online info” to confirm • press or to scroll through the machine menu 5.5.1 Online manuals: • press or to scroll through the available QR codes • scan the QR code to get the latest online manual(s) 5.5.1a Online animations: • press or to scroll through the available QR codes •... -
Page 125: Warnings And Errors
6.1 6. Warnings errors 6.1 Warnings Warnings are used to inform you of a state which can prevent the Bolero from working correctly. In general warnings are shown after selecting a beverage. ► The messages/warnings are displayed for 30 seconds then return to the home screen. » a message (Mxxx) is a positive confirmation of a user action. » a warning (Wxxx) indicates a problem or potentially harmful condition. Example display for a warning. These notifications are stored in a log file (§5.4.3 on p.110). 6.1a code description action W001 temperature sensor out of • no action required, disappears after a few seconds, range becomes after 3 incidents E002 W002 temperature too high... - Page 126 code description action W009 water filter must be • reset the message on the screen changed soon » schedule water filter replacement soon W010 water filter must be • reset the message on the screen changed now (the warning will pop‑up after every dispensed beverage) » replace the water filter and confirm in §5.1.3 on p.26 M011 payment device connection • no action required, disappears after a few seconds successful W012 payment device connection • no direct action required, disappears after a few failed seconds » check the connections and restart the payment device » if the error persists, contact your dealer W013 - not used W019 W020 contact your dealer for...
-
Page 127: Error Messages
6.2 6.2 Error messages Error messages appear when an error is detected by the machines operating system. When the error is active and is cancelled by the user, the machine goes out of safe mode and tries to recover. If the error is not cleared by retrying, the error reappears. ► If the error message returned after the appropriate action, please contact your dealer. Example display for error messages. These errors are stored in a log file, see §5.4.2 on p.109. 6.2a code description action E001 temperature rise while • reset the message on the screen relay disengaged » if the error persists, contact your dealer E002 temperature sensor out of • reset the message on the screen range »... - Page 128 code description action E006 water supply failure • reset the message on the screen, if the error repeats verify the following: » check that the water tap is open » check that the water supply hose is not kinked » check whether water comes out of the water tap » if the error persists, contact your dealer E007 not used E008 bus system communication • reset the message on the screen error » if the error persists, contact your dealer E009 pump motor malfunction • reset the message on the screen » if the error persists, contact your dealer E010 mixer motor not detected • reset the message on the screen, if the error repeats verify the following: » check that the mixing bowl is clean and not blocked »...
- Page 129 code description action E014 coin mechanism blocked • reset the message on the screen, if the error repeats verify the following: » check the payment device for any blockages » if the error persists, contact your dealer E015 coin mechanism sabotaged • reset the message on the screen, if the error repeats verify the following: » check the payment device for any damages E016 coin mechanism • reset the message on the screen, if the error communication error repeats verify the following: » check whether the payment device is correctly connected E017 coin mechanism general • reset the message on the screen, if the error error repeats verify the following: » check whether the payment device is correctly connected E018 cashless device general • reset the message on the screen, if the error error repeats verify the following: »...
-
Page 130: Other Problems
6.3 Other problems In addition to the messages and errors present in the machine, a number of other problems may occur; these problems are described below. Problem description Possible cause Check the following drink to weak almost out of powder • Ingredient container in ingredient canister strength not correct • adjust drink settings in the recipe editor » if the error persists, contact your dealer drink to strong strength not correct • adjust drink settings in the recipe editor » if the error persists, contact your dealer no water dosed hose blocked • contact your dealer mixing unit clogs up mixing unit not • clean the mixing unit cleaned to much powder • check the advise dosing of the packaging of the powder, use a scale to weight the amount of powder used powder used which... - Page 131 Problem description Possible cause Check the following no faom on the drink mixer speed not • adjust the mixer speed (availability correct depends on PIN setting) » if the error persists, contact your dealer type of instant • try a different instant ingredient ingredient to much foam on the mixer speed not • adjust the mixer speed (availability drink correct depends on PIN setting) » if the error persists, contact your dealer not enough water scale in the water • descale the machine dosed system » if the error persists, contact your dealer fan rotor does not run fan not cleaned • clean the fan rotor and housing or remove any blockage »...
-
Page 132: Appendix
• appliances that are connected to the 24V safety of the bus system ► When the door switch is activated during dosing of a beverage, the dosing is cancelled and the mixer cup is cleaned by a post flush. 7.3 Basic machine configurations Bolero 33 Bolero 32 1 2 3 Bolero 43... -
Page 133: Pin Code Security Settings
7.4 PIN code security settings The table below lists the available menu options associated with the PIN codes. When a PIN code is not set, all menu items are available and the table must be ignored. Security activated Security not activated Section Menu name PIN 1 PIN 2 without PIN Programming menu Maintenance menu 5.1.1 Rinse the mixing system 5.1.2 Descale ... - Page 134 Section Menu name PIN 1 PIN 2 without PIN Beverage menu 5.2.1 Add beverage to screen 5.2.2 Change beverage name 5.2.3 Change beverage icon 5.2.4 Change beverage price 5.2.5 Recipes recipe editor ...
-
Page 135: Special Functions
7.5 Special functions By using a “secret key combination” special features can be activated. 7.5.1 Cancel beverage on/off See §5.3.11 on p.103. ► Reason of this feature is that the customer can choose if the beverage can be cancelled or not when a payment system is connected. 7.5.2 Quick rinse By pressing the S M L on the beverage selection screen for 5 seconds the quick rinse is immediately activated with 90 ml (hot water) per mixing system. ► To set this function, see §5.1.4 on p.29. - Page 136 © 2023-05-16 VHH...
Need help?
Do you have a question about the Bolero 32 and is the answer not in the manual?
Questions and answers