Table of Contents
Advertisement
Quick Links
Division of
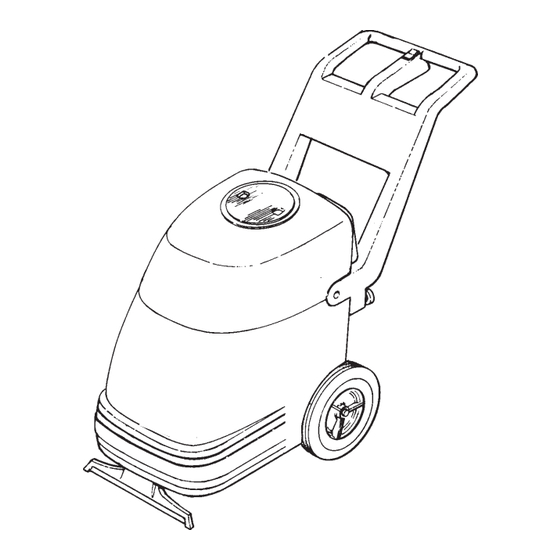
IMAGE 14
Operator's
120V
Manual
READ THIS BOOK
This book has important information for the use and safe operation of this machine. Failure to read this
book prior to operating or attempting any service or maintenance procedure to your Clarke machine
could result in injury to you or to other personnel; damage to the machine or to other property could
occur as well. You must have training in the operation of this machine before using it. If you or your
operator(s) cannot read English, have this manual explained fully before attempting to operate this
machine.
Si Ud. o sus operadores no pueden leer el Inglés, se hagan explicar este manual completamente antes
de tratar el manejo o servicio de esta máquina.
All directions given in this book are as seen from the operator's position at the rear of the machine.
®
For new books write to: Clarke
, 2100 Highway 265, Springdale, Arkansas 72764.
Form No. 70088A 9/02
Printed in the U.S.A.
®
Clarke
Advertisement
Table of Contents

Related Manuals for Alto Clarke IMAGE 14


Summary of Contents for Alto Clarke IMAGE 14
- Page 1 Division of IMAGE 14 Operator's 120V Manual READ THIS BOOK This book has important information for the use and safe operation of this machine. Failure to read this book prior to operating or attempting any service or maintenance procedure to your Clarke machine could result in injury to you or to other personnel;...
-
Page 2: Table Of Contents
Table of Contents Operator Safety Instructions ......................3 Introduction & Machine Specifications ..................... 5 Instructions - Power Supply 120 Volt ....................6 Machine Controls ..........................7 How To Prepare the Machine for Operation ..................7 How to Clean Carpet ........................8 OPERATOR'S MAINTENANCE: How to Empty the Recovery Tank .................... -
Page 3: Operator Safety Instructions
IMPORTANT SAFETY INSTRUCTIONS WARNING AVERTISSEMENT ADVERTENCIA DANGER: Failure to read and observe all DANGER statements could result in severe bodily injury or death. Read and observe all DANGER statements found in your Owner's Manual and on your machine. WARNING: Failure to read and observe all WARNING statements could result in injury to you or to other personnel;... - Page 4 IMPORTANTES MESURES DE SECURITE AVERTISSEMENT Pour réduire les risques d'incendie,de choc électrique ou de blessure: 1. Ne pas laisser l'appareil sans surveillance lorsqu'il est branché. Débrancher lorsque l'appareil n'est pas utilisé et avant l'entretien. 2. Pour réduire les risques de choc électrique, utiliser à l'intérieur seulement. 3.
-
Page 5: Introduction & Machine Specifications
DANGER: Machines can cause an explosion when operated near flammable materials and vapors. Do not use this machine with or near fuels, grain dust, solvents, thinners, or other flammable materials. WARNING: You must have training in the operation of this machine before using it. READ THE INSTRUCTION BOOK FIRST. -
Page 6: Instructions - Power Supply 120 Volt
120 VOLT, 50/60 CYCLE MACHINES GROUNDING INSTRUCTIONS This product must be grounded. If it should malfunction or breakdown, grounding provides a path of least resistance for electric current to reduce the risk of electric shock. This product is equipped with a cord having an equipment- grounding conductor and grounding plug. -
Page 7: Machine Controls
THE CONTROLS The Vacuum/Accessory/Pump Switch This switch is located on the handle. To turn the vacuum motor on, place the switch in the middle position. To turn pump, brush, and vacuum motor on, place the switch in bottom position. (Figure 2, #1) The Vacuum Hose Connector The vacuum hose connector is on the right hand rear of the machine. -
Page 8: How To Clean Carpet
HOW TO CLEAN AN AREA OF CARPET CAUTION: The recovery tank is equipped with a mechanical shut-off float switch. When the recovery tank becomes full the machine will no longer recover water. Turn the vacuum/accessory and spray/brush/switch to the "O" position before emptying the re- covery tank. -
Page 9: Operator's Maintenance
To clean a larger area of carpet, follow this procedure: (See Figure 4) 1. Begin at the right-hand corner of the carpet. 2. Make a pass halfway along the edge of the carpet. Pull the machine backward at a steady speed. 3. -
Page 10: How To Attach The Auxiliary Floor Tool
MAINTENANCE (cont) How To Attach The Auxiliary Floor Tool To attach the auxiliary floor tool, follow this proce- dure: 1. Remove the vacuum hose from the recovery tank. 2. Connect the auxiliary floor tool vacuum hose to the recovery tank and to the auxiliary tool. 3. -
Page 11: How To Prevent Damage From Freezing Temperatures
How to Prevent Damage From Freezing Temperatures To prevent damage from freezing temperatures, follow this procedure: 1. Remove any solution remaining in the solution tank. 2. Make sure the machine and pump are completely dry. 3. Pour windshield-type antifreeze into the solution tank until the screen in the filter is covered. - Page 12 NOTES Page 12 Operator's Manual - Image 14 Clarke ®...
-
Page 13: Section Ii Parts And Service Manual
Division of Image 14 Section II Parts and Service Manual (70088A) Operator's Manual - Image 14 Page 13 ® Clarke... -
Page 14: Authorized Personnel Maintenance
AUTHORIZED PERSONNEL MAINTENANCE To Access Pump/Brush Unit Brush Maintenance 1. Remove six (6) screws in rear plate that secure 1. Remove (6) screws in rear plate that secure solution tank to machine. solution tank to machine. 2. Remove solution tank from machine. 2. -
Page 15: How To Correct Problems In The Machine
HOW TO CORRECT PROBLEMS IN THE MACHINE PROBLEM CAUSE ACTION The machine will not run. 1. Machine does not have power... 1. Make sure the machine is connected to the correct frequency and voltage, and all connections are tight. There is no suction. 1. -
Page 16: Final Assembly Drawing & Parts List Image 14
® Clarke Image 14 Drawing and Parts List Final Assembly 4/98 Ref. Part No. Description Page 15 Handle Assembly Page 16 Recovery Tank Assembly Page 17 Solution Tank Assembly Page 18 Brush/Pump Assembly 80013A Bolt, Shoulder Page 19 Main Frame Assembly 82509A Pin, Clevis 58540A... -
Page 17: Handle Assembly Drawings & Parts List
Clarke ® Image 14 Drawing & Parts List, Handle Assembly 4/98 Form #15347A To main frame assembly Ref. Part No. Description 34811B Handle, Control 57002A Post, Knob 55538A Knob, Handle Lock 49761B Harness, Wiring 56459A Strain Relief (supplied w/item 4) 47411A Switch, Control Operator's Manual... -
Page 18: Recovery Tank Assembly Drawing & Parts List
® Clarke Image 14 Drawing and Parts List, Recovery Tank Assembly 9/02 Form #10450A Ref. Part No. Description 692409 Chain, Cover 86303A Screw, #10-24 x 1.25 81901A Nut, #10-24 30290A Tank, Recovery 962954 Screw, 10-24 x 55670A Lid, Recovery 31803A Chamber, Vac 50805A Ball, Float Shut Off... -
Page 19: Solution Tank Assembly Drawing & Parts List
® Clarke Image 14 Drawing and Parts List, Solution Tank Assembly 9/02 Form #10451A To Vacuum Motor To Recovery Tank Ref. Part No. Description 56476A Strainer, Vacuum 54371A Gasket, Vac 85398A Screw 30288A Tank, Solution 51518A* Bushing 52417A* Connector, x ¼ 52414A Connector, Hose 28205A... -
Page 20: Brush/Pump Assembly Drawing & Parts List
® Clarke Image 14 Drawing and Parts List, Brush/Pump Assembly 9/01 Form #17651A Ref. Part No. Description Ref. Part No. Description 32400A Cover, Brush 63535A Frame, Brush/Pump 920056 Nut, 6 x 32 Elastic 32408A Guard, Pulley 51713A Brush, Carpet 35147A See page 19 ref. -
Page 21: Main Frame Assembly Drawing & Parts List
Clarke ® Image 14 Drawing and Parts List, Main Frame Assembly 9/01 Form #17650A Ref. Part No. Description Ref. Part No. Description 732870 Elbow, ¼ MPT x 170030 Hosebarb, 50248A Clamp, Hose 980603 Washer, #10 Ext. Tooth 41427A Breaker, Circuit w/ Nut 120V 872010 Clamp, Hose 41430A... -
Page 22: Pump Drawing & Parts List
Clarke ® Image 14 115V Drawing and Parts List 10/97 Brush/Pump Unit Ref. Part No. Description 55446A Check Valve Assembly 55447A Kit, Upper Housing 55448A Kit, Bypass Valve Assembly 55449A Kit, Diaphragm 55450A Kit, Drive Assembly 44926A Motor 55174A Head, Pump, 45 psi NOTE: 55174A (includes # 1,2,3,&... -
Page 23: Connection Diagram 120 Volts
Clarke ® Image 14 120 Volt Connection Diagram 3/98 Operator's Manual - Image 14 Page 23 ® Clarke... -
Page 24: Electrical Schematic 120 Volts
® Clarke Image 14 120 Volt Electrical Schematic 03/98 Page 24 Operator's Manual - Image 14 Clarke ®... -
Page 25: Authentic Clarke Products
Authentic Clarke ® Products 9/01 Part No. Description 30108A Adaptor, 2" to 1½ 59231A RM-4P Tool Assembly 59230A RM-8P Tool Assembly 59229A RM-12M Tool Assembly 59232A Hide-A- Hose 10' 59228A RM-4M Tool Assembly 398426 Defoamer *1 case 398425 Extractor, Concentrate *1 case 398427 Traffic Lane/Spot Cleaner... - Page 26 NOTES...
- Page 27 Caringbah NSW 2229 ® Clarke , Carlstadt, New Jersey 07072 +61 2 9524 6122 150 Commerce Road (201) 460-4774 ALTO Cleaning Systems Asia Pte Ltd., Singapore No. 17 Link Road Clarke ® , Elk Grove, Illinois 60007 Singapore 619034 2280 Elmhurst Road...
- Page 28 U.S. WARRANTY ® Clarke This Clarke Industrial/Commercial Product is warranted to be free from defects in materials and workman- ship under normal use and service for a period of one year from the date of purchase, when operated and maintained in accordance with Clarke's Maintenance and Operations Instructions. This warranty is extended only to the original purchaser for use of the product.
Need help?
Do you have a question about the Clarke IMAGE 14 and is the answer not in the manual?
Questions and answers