Table of Contents
Advertisement
Quick Links
BACK
Division of
FUSION
Operator's Manual
20I/20IX
Manuel d'utilisation
Libro de Instrucciones
READ THIS BOOK
CAUTION: Read the Operator's Manual before using the appliance.
This book has important information for the use and safe operation of this machine. Failure to read this
book prior to operating or attempting any service or maintenance procedure to your Clarke machine could
result in injury to you or to other personnel; damage to the machine or to other property could occur as
well. You must have training in the operation of this machine before using it. If operator(s) cannot read
this manual, have it explained fully before attempting to operate this machine.
Si Ud. o sus operadores no pueden leer el Inglés, se hagan explicar este manual completamente antes
de tratar el manejo o servicio de esta máquina.
All directions given in this book are as seen from the operator's position at the rear of the machine.
®
For new books write to: Clarke
, 2100 Highway 265, Springdale, Arkansas 72764.
Clarke
®
Form No. 70646A
4/03
Printed in the U.S.A.
Advertisement
Table of Contents

Subscribe to Our Youtube Channel
Related Manuals for Alto Clarke FUSION 20I


Summary of Contents for Alto Clarke FUSION 20I
- Page 1 BACK Division of FUSION Operator's Manual 20I/20IX Manuel d'utilisation Libro de Instrucciones READ THIS BOOK CAUTION: Read the Operator's Manual before using the appliance. This book has important information for the use and safe operation of this machine. Failure to read this book prior to operating or attempting any service or maintenance procedure to your Clarke machine could result in injury to you or to other personnel;...
-
Page 2: Table Of Contents
Table of Contents Operator Safety Instructions ......................5 Introduction & Machine Specifications ..................11 Procedures For Transporting 20 IX ....................14 Procedures for Transporting 20 I ....................14 Symbols Used On Fusion 20 I and 20 IX ..................17 Machine Control Panel Fusion 20 I ....................20 Machine Control Panel Fusion 20 IX ..................... - Page 3 LEA ESTE LIBRO Contiene información importante para el uso correcto y seguro de la máquina. Lea este libro completamente antes de arrancar la máquina o hacer cualquier operación de mantenimiento. Si no siga las instrucciones, corre el peligro de herirse o causar lesiones al personal, o causar daños importantes a la máquina o a su entorno.
- Page 4 LISEZ CE MANUEL Il contient des informations importantes pour une utilisation correcte de la machine, en toute sécurité. Lisez-le complètement avant de mettre la machine en marche ou d’effectuer un entretien. A défaut, vous risqueriez de vous blesser ou de blesser d’autres membres du personnel, d’endommager sérieusement la machine ou de provoquer des dégâts dans son environnement.
-
Page 5: Operator Safety Instructions
OPERATOR SAFETY INSTRUCTIONS WARNING AVERTISSEMENT ADVERTENCIA DANGER: Failure to read and observe all DANGER statements could result in severe bodily injury or death. Read and observe all DANGER state- ments found in your Owner's Manual and on your machine. WARNING: Failure to read and observe all WARNING statements could result in injury to you or to other personnel;... - Page 6 WARNING: Maintenance and repairs performed by unauthorized personnel could result in damage or injury. Maintenance and repairs must be performed by authorized Clarke personnel only. WARNING: Electrical components of this machine can "short-out" if exposed to water or moisture. Keep the electrical components of the machine dry. Wipe the machine down after each use.
-
Page 7: Instrucciones De Seguridad Para El Operador
INSTRUCCIONES DE SEGURIDAD PARA EL OPERADOR WARNING AVERTISSEMENT AVISO PELIGRO Si no respeta las instrucciones que siguen la palabra PELIGRO, se pueden causar lesiones graves, incluso mortales. Lea y siga todas las indicaciones PELIGRO que se encuentran en este manual y en la máquina. AVISO Si no sigue las indicaciones AVISO, se pueden causar lesiones sea al operador sea a otro personal y/o daños materiales. - Page 8 ¡AVISO! Sólo el personal cualificado y autorizado por Clarke puede efectuar el mantenimiento y las reparaciones de nuestras máquinas. ¡ Se trata de su seguridad ! ¡ AVISO ! El agua o la humedad pueden causar cortocircuitos en el sistema eléctrico. Procure que el sistema eléctrico sea siempre seco.
- Page 9 INSTRUCTIONS POUR LA SECURITE DE L’OPÉRATEUR WARNING AVERTISSEMENT AVISO ! DANGER ! Le non-respect des consignes précédées du mot DANGER peut occasionner des blessures graves, voire entraîner la mort. Lisez et respectez toutes les consignes DANGER figurant dans ce manuel et sur la machine. AVERTISSEMENT Le non-respect des consignes AVERTISSEMENT peut entraîner des blessures pour l’opérateur ou d’autres membres du personnel et/ou occasionner des dégâts...
- Page 10 !AVERTISSEMENT!: Cette machine est lourde. Faites-vous aider avant d'essayer de la transporter ou de la déplacer. Faites appel à deux personnes solides pour la déplacer le long d'une rampe ou d'un plan incliné. Procédez toujours en doucer. Ne retournez pas la machine sur une rampe.
-
Page 11: Introduction & Machine Specifications
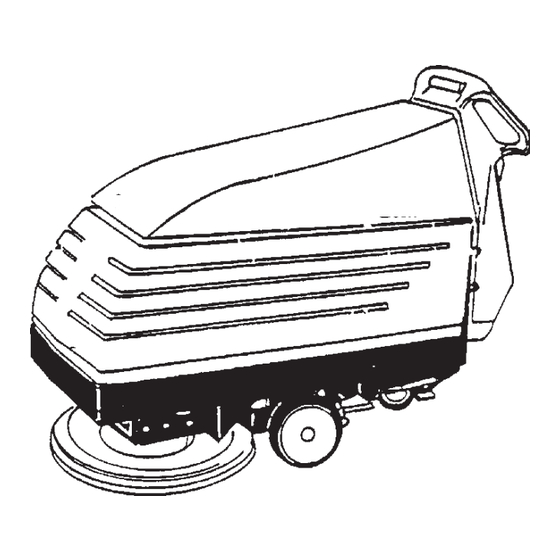
Introduction & Machine Specifications Introduction & Machine Specifications Clarke’s newly designed Fusion 20 I and 20 IX burnishers are efficient and superior floor burnishing machines. The Fusion 20 uses one pad to burnish a path 20 inches wide. The powder created by burnishing is collected by a dust control system in the pad housing. -
Page 12: Introducción Y Características Técnicas
INTRODUCCION Y CARACTERISTICAS TECNICAS Introducción Los últimos modelos de pulidoras Clarke, la Fusion 20I y la Fusión 20IX, procuran un rendimiento superior para el mantenimiento del suelo. La Fusion 20 tiene un disco de 51 cm de anchura. El polvo debido al pulido es recogido por un dispositivo especial que se encuentra en la tapa de protección del portadisco. - Page 13 INTRODUCTION ET CARACTERISTIQUES TECHNIQUES Introduction Les derniers modèles de polisseuses Clarke, la Fusion 20I et la Fusion 20IX offrent un rendement supérieur pour l’entretien des sols. La Fusion 20 est équipée d’un disque de 51 cm de diamètre. La poussière qui se forme lors du polissage est récoltée grâce à...
-
Page 14: Procedures For Transporting 20 Ix
PROCEDURES FOR TRANSPORTING How To Put The Fusion 20 IX In A Van Or Truck WARNING: The machine is heavy. Make sure you use two able persons to assist the machine in climb- ing the ramp. 1. Make sure the loading ramp is at least eight (8) feet long, and strong enough to support the machine. -
Page 15: Procedimiento Para El Transporte 20Ix
PROCEDURE POUR LE TRANSPORT PROCEDIMIENTO PARA EL TRANSPORTE Comment placer la Fusion 20IX dans une ¿ Cómo colocar la Fusion 20IX en una camioneta camionnette ou un camion o un camión ? !AVERTISSEMENT!: Cette machine est ¡ AVISO ! : Esta máquina pesa. Se necesitan lourde. - Page 16 PROCEDURES FOR TRANSPORTING (cont.) 6. Turn the key switch "ON". 7. Release the parking brake. 8. While pushing in the white reverse switch, push in either the right or left forward/reverse switch at the same time. See figure 4. 9. Carefully and slowly, back the machine to the top of the ramp and start down.
-
Page 17: Symbols Used On Fusion 20 I And 20Ix
SYMBOLS USED ON FUSION 20 I AND 20IX Parking Brake Pedal Warning Tie Down or Anchor Hole Power Traverse Speed Control On/Off Key Switch Head Pressure Adjustment Hour Meter Head Lift Pedal Forward and Reverse Switch Brush Pressure Meter Warning Label USE ONLY COMMERCIALLY AVAILABLE FLOOR CLEANERS AND WAXES INTENDED... -
Page 18: Símbolos Utilizados Con Los Modelos Fusion 20I Y 20Ix
SIMBOLOS UTILIZADOS CON LA FUSION 20i Y 20ix Aviso Pedal del freno de estacionamiento Alimentación Agujero de anclaje /sujeción Interruptor I/O Selector de velocidades Reglaje de la presión de la cabeza Contador horaric Pedal de elevación de la cabeza Interruptor marcha adelante / atrás Indicador de presión del cepillo... - Page 19 SYMBOLES UTILISES SUR LA FUSION 20i ET 20 IX Pédale du frein de Avertissement stationnement Alimentation Trou d'ancrage/de fixation Réglage de pression de la tête Sélecteur de vitesse Réglage de la pression de la tête Horamètre Pédale de relevage de la tête Interrupteur marche avant / arrière...
-
Page 20: Machine Control Panel Fusion 20 I
MACHINE CONTROL PANEL (Fusion 20 I) Key Switch (See Figure 9, Item "A") Circuit Breaker (See Figure 9, Item "F) The key switch turns "ON" the power to the control The circuit breaker reset button is located on the rear panel. -
Page 21: Cuadro De Mandos Fusion 20I
CUADRO DE MANDO (Fusion 20I) TABLEAU DE COMMANDE (Fusion 20I) Interruptor principal con llave (Véase figura 9, letra Interrupteur principal à clé (Voir figure 9, item “A”) L’interrupteur principal à clé alimente le tableau de El interruptor principal con llave alimenta el cuadro de commande. -
Page 22: Machine Control Panel Fusion 20 Ix
MACHINE CONTROL PANEL (Fusion 20 IX) Hour Meter (See Figure 11, Item "E") Key Switch (See Figure 11, Item "A") The hour meter indicates the number of hours of the The key switch turns "ON" the power to the control machine has operated. -
Page 23: Cuadro De Mandos Fusion 20Ix
CUADRO DE MANDO (Fusion 20IX) TABLEAU DE COMMANDE (Fusion 20IX) Interruptor principal con llave (Véase figura 11, letra A) Interrupteur principal à clé (Voir figure 11, item “A”) El interruptor principal con llave alimenta el cuadro de L’interrupteur principal à clé alimente le tableau de mando. -
Page 24: How To Prepare The Machine For Operation
BATTERY CONNECTIONS HOW TO PREPARE THE MACHINE FOR OPERATION To machine power plug How To Install The Batteries The Fusion 20 machines use three 12-volt batteries. The batteries are located in the battery compartment under the battery cover. To Install the batteries, follow this procedure: 1. -
Page 25: Preparación De La Máquina Para Trabajar
PREPARACION DE LA MAQUINA PARA PREPARATION DE LA MACHINE AVANT LA TRABAJAR MISE EN SERVICE Colocación de las baterías Installation des batteries Las máquinas Fusion 20 funcionan con tres baterías Les machines Fusion 20 fonctionnent avec trois de 12V. Las baterías se encuentran en el batteries de 12V. -
Page 26: Battery Maintenance
HOW TO PREPARE THE MACHINE FOR OPERATION Battery Maintenance The electrical power to operate the machine comes from Correct fill line the storage batteries. Storage batteries need preventive maintenance. WARNING: Working with batteries can be dangerous. Always wear eye pro- tection and protective clothing when working near batteries. -
Page 27: Mantenimiento De Las Baterías
PREPARACION DE LA MAQUINA PARA PREPARATION DE LA MACHINE AVANT LA TRABAJAR MISE EN SERVICE Entretien des batteries Mantenimiento de las baterías L’alimentation électrique nécessaire au fonctionnement de La alimentación eléctrica necesaria para el la machine est fournie par les accumulateurs. Les funcionamiento de la máquina es proporcionada por batteries à... -
Page 28: How To Charge The Batteries
HOW TO PREPARE THE MACHINE FOR OPERATION How To Charge The Batteries WARNING: Charging the batteries in an area without adequate ventilation could result in an explosion. To prevent an explosion, charge the batteries only in an area with good ventilation. WARNING: Lead acid batteries generate gases which could explode. -
Page 29: Carga De Las Baterías
PREPARACION DE LA MAQUINA PARA TRABAJAR PREPARATION DE LA MACHINE AVANT LA MISE EN SERVICE ¿ Cómo cargar las baterías ? Comment charger les batteries ¡ AVISO ! ¡ Riesgo de explosión ! Cargue siempre las baterías en un local !AVERTISSEMENT! Risque d’explosion ! perfectamente ventilado. -
Page 30: How To Install The Pad
HOW TO PREPARE THE MACHINE FOR OPERATION How To Install The Pads To install or remove pad on the machine, follow this procedure: 1. Engage the parking brake. 2. Turn key switch "Off". 3. Push down on the headlift pedal to raise the Figure 19 housing to its highest position. -
Page 31: Colocación Del Disco
PREPARATION DE LA MACHINE AVANT LA PREPARACION DE LA MAQUINA MISE EN SERVICE PARA TRABAJAR Placement du disque Colocación del disco Pour placer ou déposer le disque, suivre la procédure Para colocar o quitar el disco, sigue el procedimiento ci-après : siguiente : 1. -
Page 32: How To Operate The Fusion 20 I
HOW TO OPERATE THE FUSION 20 I 1. Release the parking brake. See figure 22. 2. Turn the key switch "ON". 3. Put the pad housing in the down position by pulling up on the control handles. See figure 4. Hold the control handles as shown in figure 24. 5. -
Page 33: Funcionamiento Del Modelo Fusion 20I
FUNCIONAMIENTO DE LA FUSION 20I FONCTIONNEMENT DE LA FUSION 20I 1. Afloje el freno de estacionamiento. Véase figura 1. Desserrez le frein de stationnement. Voir figure 2. Gire el interruptor principal con llave en la 2. Tournez l’interrupteur principal à clé en position posición ‘I’. -
Page 34: How To Operate The Fusion 20 Ix
HOW TO OPERATE THE FUSION 20 IX 1. Release the parking brake. See figure 22, page 26. 2. Turn the key switch "ON". 3. Put the pad housing in the down position by pulling up on the control handles. See figure 23, page 26. - Page 35 FUNCIONAMIENTO DE LA FUSION 20IX FONCTIONNEMENT DE LA FUSION 20IX 1. Afloje el freno de estacionamiento. Véase figura 1. Desserez le frein de stationnement. Voir figure 2. Gire el interruptor principal con llave en la 2. Tournez l’interrupteur principal à clé en position posición ‘I’.
- Page 36 NOTES...
-
Page 37: Section Ii - Parts And Service Manual
Division of FUSION 20I/20IX Section II Parts and Service Manual (70646A) -
Page 38: Maintenance
MAINTENANCE Do These Procedures When You End Your Work NOTE: Always engage the parking brake before servicing the machine. Check the batteries and add distilled water as needed. The correct level is within 1/4 inch of the bottom of the tube in each cell. -
Page 39: Mantenimiento
MAINTENANCE MANTENIMIENTO A la fin de chaque travail, effectuez les opérations Después de cada trabajo, efectúa las suivantes operaciones siguientes NOTE: Avant de travailler sur la machine, NOTA : Antes de realizar cualquier assurez-vous que le frein de mantenimiento de la máquina, asegúrese que el stationnement est bien engagé. - Page 40 MAINTENANCE WARNING: Always wear eye protection and protective clothing when working near batteries. Do not put tools or other metal objects across the battery terminals or the tops of the batteries. NO SMOKING! NOTE: Always engage the parking brake before servicing the machine.
- Page 41 MAINTENANCE MANTENIMIENTO !AVERTISSEMENT!: Portez des lunettes et des ¡AVISO! Cuando trabaja cerca de las vêtements de protection baterías, siempre lleve gafas y lorsque vous travaillez à ropas de protección. No ponga proximité des batteries. Ne ninguna herramienta ni otros déposez pas d’outils ou objetos metálicos entre las bornas d’autres objets métalliques o sobre la tapa de las baterías.
-
Page 42: Assembly Drawing #1 4/03
® Clarke Fusion 20 I and 20 IX Assembly Drawing #1 4/03 Page -42- Operator's Manual -Fusion 20 Burnisher Clarke ®... -
Page 43: Parts List
Clarke ® Fusion 20 I and 20 IX Assembly Drawing #1 Parts List 4/01 Item # Part No. Description Qty 20i 20ix 55537A Knob, Head Pressure 980638 Washer, Lock 81301A Nut, Jam, 66868A Rod, Adjustment 920181 Nut, -18 ESNA 962980 Screw, 6-32 x 1 PN 87026A Washer, Flat ¼... -
Page 44: Assembly Drawing #2 10/02
Clarke ® Fusion 20 IX Assembly Drawing #2 10/02 Beginning with Serial No. AJ 1304 ref. frame ref. frame Page -44- Operator's Manual -Fusion 20 Burnisher Clarke ®... -
Page 45: Parts List
Clarke ® Fusion 20 IX Assemby Drawing #2 Parts List 10/02 Beginning with Serial No. AJ 1304 Item # Part No. Description 81104A Nut, ¼-20 ESNA 438360 Spring, Brake 87026A Washer, Flat ¼ 848508 Swivel, Brake Rod 67158A Rod, Brake 836711 Clip 66210A... -
Page 46: Assembly Drawing #3 11/01
® Clarke Fusion 20 I and 20 IX Assembly Drawing #3 11/01 43 12 54 55 40 41 Page -46- Operator's Manual -Fusion 20 Burnisher Clarke ®... -
Page 47: Parts List
® Clarke Fusion 20 I and 20 IX Assemby Drawing #3 Parts List 6/00* Item # Part No. Description Qty 20i 20ix 81104A Nut, ¼-20 ESNA 438360 Spring, Brake 87026A Washer, Flat ¼ 848508 Swivel, Brake Rod 67158A Rod, Brake 836711 Clip 66210A... -
Page 48: Assembly Drawing #4 11/01
® Clarke Fusion 20 IX Assembly Drawing #4 11/01 Beginning with Serial No. XD 59 24 25 44 41 42 Page -48- Operator's Manual -Fusion 20 Burnisher Clarke ®... -
Page 49: Parts List
® Clarke Fusion 20 IX Assemby Drawing #4 Parts List 6/00 Beginning with Serial No. XD Item # Part No. Description 81104A Nut, ¼-20 ESNA 438360 Spring, Brake 87026A Washer, Flat ¼ 848508 Swivel, Brake Rod 67158A Rod, Brake 836711 Clip 66210A Brake Pedal... -
Page 50: Assembly Drawing #5 8/02
Clarke ® Fusion 20 I and 20 IX Assembly Drawing #5 8/02 Page -50- Operator's Manual -Fusion 20 Burnisher Clarke ®... -
Page 51: Parts List
® Clarke Fusion 20 I and 20 IX Assembly Drawing #5 Parts List 2/03 Item # Part No. Description Qty 20i 20ix 39008B Battery Tray 871334 Battery, 195AH 12 Volt 41206A Series Cable 47380A Key Switch 87052A Washer, Key Switch 55413A Key (2 supplied w/#4) 70653A... -
Page 52: Assembly Drawing #6 8/02
® Clarke Fusion 20 I and 20 IX Assembly Drawing #6 8/02 Page -52- Operator's Manual -Fusion 20 Burnisher ® Clarke... -
Page 53: Parts List
170892 Washer, Lock ¼ 87026A Washer, Flat ¼ 60659A Bracket 77265A Label, Head Pressure 77093A Label, Falling Objects 77092A Label, Gases 77273A Label, Battery 70652A Label, 20 70651A Label, Div of ALTO Operator's Manual - Fusion 20 Burnisher ® Clarke... -
Page 54: Pad Drive Motor Drawing And Parts List
Clarke ® Fusion 20 I and 20 IX Pad Drive Motor 2.5 HP / 2000 RPM PN 45001C 9/98 Part No. Description Req'd 833104 Field Assembly 52706A Cover 50628A Board Assembly Brush 50629A Bracket Assembly, Comm. 1 830943 Brush Assembly 627580 Strain Relief 962969... -
Page 55: Traverse Motor Drawing And Parts List
Clarke ® Fusion 20 IX Traverse Motor .25 HP PN 835215 12/95 Prior to Serial #AA Part No. Description Req'd 912325 Lead Assembly 961028 Bolt 831324 Board Assembly Brush 962730 Screw - 10-24 x 1/2 833105 Frame Assembly 902550 Bearing 55400A 830406 Armature Asm. -
Page 56: Transaxle Drawing And Parts List
® Clarke Fusion 20 I and 20 IX Transaxle 11/01 Page -56- Operator's Manual -Fusion 20 Burnisher Clarke ®... -
Page 57: Volt Battery Charger
® Clarke Fusion 20 I and 20 IX 36Volt Battery Charger 12/95 WARNING: All electrical repairs must be performed by qualified personnel only. PARTS LIST FOR BATTERY CHARGERS 40506A - 36 Volt D.C., 25A, 115 Volt A.C., 60 Hz 40507A - 36 Volt D.C., 25A, 230 Volt A.C., 60 Hz Model Number 40506A 40507A... -
Page 58: Fusion 20 I Electrical Schematic
® Clarke Fusion 20 I Electrical Schematic 1/98 Page -58- Operator's Manual -Fusion 20 Burnisher Clarke ®... -
Page 59: Fusion 20 Ix Electrical Schematic
® Clarke Fusion 20 IX Electrical Schematic 5/99 Operator's Manual - Fusion 20 Burnisher ® Clarke... -
Page 60: Diagrama De Las Conexiones Modelo Fusion 20I
® Clarke Fusion 20 IX Connection Diagram 9/98 77269B Page -60- Operator's Manual -Fusion 20 Burnisher Clarke ®... -
Page 61: Fusion 20 Ix Connection Diagrams
® Clarke Fusion 20 I Connection Diagram 1/98 Operator's Manual - Fusion 20 Burnisher ® Clarke... - Page 62 NOTES Page -62- Operator's Manual -Fusion 20 Burnisher Clarke ®...
- Page 63 Caringbah NSW 2229 Clarke ® , Carlstadt, New Jersey 07072 +61 2 9524 6122 150 Commerce Road (201) 460-4774 ALTO Cleaning Systems Asia Pte Ltd., Singapore No. 17 Link Road ® Clarke , Elk Grove, Illinois 60007 Singapore 619034 2280 Elmhurst Road...
- Page 64 ® Clarke LIMITED U.S. WARRANTY This Clarke Industrial/Commercial Floor Product is warranted to be free from defects in materials and work- manship under normal use and service for a period of one year from the date of purchase, when operated and maintained in accordance with Clarke's Maintenance and Operations Instructions.
Need help?
Do you have a question about the Clarke FUSION 20I and is the answer not in the manual?
Questions and answers