Table of Contents
Advertisement
Quick Links
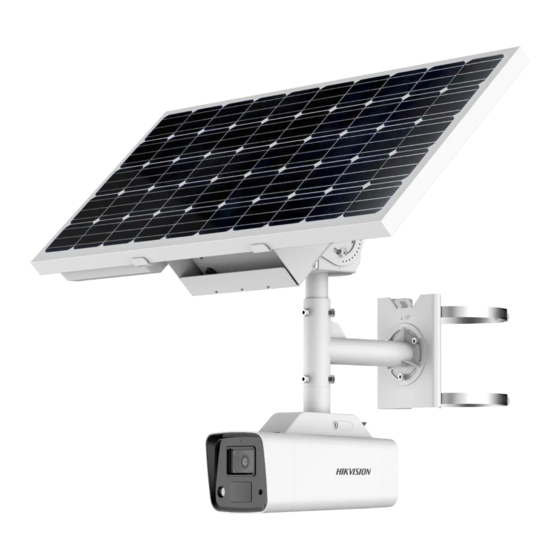
E10-DS-2XS2T47G1 Solar Camera Unpacking and
Attention:
1. Before installation, please ask the customer to place a single power cord. After the power
cord and network port cord are equipped, the equipment can be unpacked.
2. The modular battery is not fully charged due to air transportation. For the first time, after
unpacking, it is necessary to charge the modular battery to 100% with the charging wire,
and then configure the network.
1. Order Necessary wire
(1)
Charging wire (plug+adapter+terminal block)
Plug
Customers are required to order separate plug
(choose the standard type and SAP in your country, see below chart)
Standard Type
SAP
European standard
101500003
Australian standard
101500009
British standard
101500006
American standard
101500002
Korean standard
101504335
Japanese standard
101500004
Chinese standard
101513489
Below picture gives a sample about this part:
Charging Instructions
Description
AC power cord, European standard, bent two plug (CEE7 VII) to C13, 1.5m, black
AC power cord, Australian standard, three plug to C13, 1.8m, black
AC power cord, British standard, bent three plug to C13, 1.5m, black
AC power cord, American standard, three plug (5-15P) to C13, 1.5m, black
AC power cord, Korean standard, two plug to C13, 1.5m, black
AC power line, Japanese standard, two plug to C13, 1.5m, black
AC power cord, national standard, straight triple plug to C13, 1.8m, black
Advertisement
Table of Contents

Summary of Contents for HIKVISION E10-DS-2XS2T47G1
- Page 1 E10-DS-2XS2T47G1 Solar Camera Unpacking and Charging Instructions Attention: 1. Before installation, please ask the customer to place a single power cord. After the power cord and network port cord are equipped, the equipment can be unpacked. 2. The modular battery is not fully charged due to air transportation. For the first time, after unpacking, it is necessary to charge the modular battery to 100% with the charging wire, and then configure the network.
- Page 2 Adapter SAP: 101702593 Description: adapter, KPE150M-VI, desktop, 24V6.25A, 150W, two-wire Remarks: The pure black wire on the left side of the neutral sequence in the above figure is the negative pole, and the one marked in white is the positive pole. Do not connect the wires incorrectly. Connecting terminal SAP: 101300270 Description: Connecting terminal, Plug, 2-position, 3.81mm spacing, reversible,...
- Page 3 2. Unpacking operation instruction (1)Battery installation Take out two batterys, install them into the back solar panel, and fasten the lock catch. (2)Fully charge the battery: Open the left junction box behind the solar panel, unscrew the red part of the wire as shown in the following figure, and pull it out.
- Page 4 Connect the green terminal of the assembled battery charging line to the unplugged battery interface line. After installation, as shown in the figure below Open the body setting cover, turn the switch from OFF to ON, power on to the charger and charge for 5-6 hours until the device is fully charged.
- Page 5 Connect the RS485 cable to the machine body to ensure that the external battery supplies power to the equipment. After the connection, hide the excess wire in the junction box or solar panel back...
- Page 6 3. Active the device Activation can be activated by using the network cable or SIM card. (1)Network cable activation device Prepare the network cable conversion wire, as shown in the figure below: Connect the equipment to the network by using the network cable adapter Scan the QR code on the fuselage with HC After the camera started, the body indicator light is always red.
- Page 7 Press and hold the device Reset key until the indicator light flashes blue, and the device will automatically activate and launch EZVIZ cloud. The default activation password for logging in to Hik-Connect is: HikXXXXXX (XXXXXX is the verification code behind the device body, which can be obtained by scanning the QR code from the device body).
- Page 8 an IP to the device, and modify the password. (2)SIM activation The SIM card activates the device in the same way as the network cable. The password is HikXXXXXX (XXXXXX is the verification code behind the device body, which can be obtained by scanning the QR code of the device body).


Need help?
Do you have a question about the E10-DS-2XS2T47G1 and is the answer not in the manual?
Questions and answers