Chapters
Table of Contents

Subscribe to Our Youtube Channel
Related Manuals for Klarstein KRAFTWERK SMART


Summary of Contents for Klarstein KRAFTWERK SMART
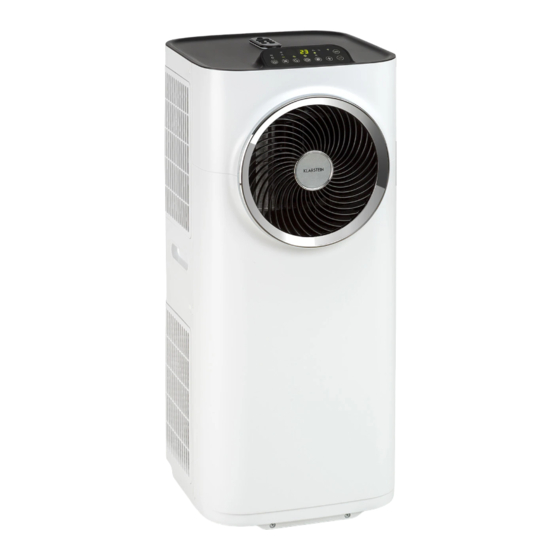
- Page 1 KRAFTWERK SMART Klimaanlage Air Conditioner Aire acondicionado Climatiseur Condizionatore d’aria 10034664 10034665 10034666 10034667 10035737 10035738 10035739 10035740 www.klarstein.com...
-
Page 3: Table Of Contents
Sehr geehrter Kunde, wir gratulieren Ihnen zum Erwerb Ihres Gerätes. Lesen Sie die folgenden Hinweise sorgfältig durch und befolgen Sie diese, um möglichen Schäden vorzubeugen. Für Schä- den, die durch Missachtung der Hinweise und unsach- gemäßen Gebrauch entstehen, übernehmen wir keine Haftung. -
Page 4: Sicherheitshinweise
SICHERHEITSHINWEISE Spezielle Hinweise • Verwenden Sie zum Entfrosten oder zum Reinigen ausschließlich vom Hersteller empfohlene Mittel. • Lagern Sie das Gerät keinesfalls in einem Raum, in welchem sich permanent Zündquellen befinden (beispielsweise: offene Flammen, ein eingeschaltetes Gasgerät oder ein eingeschaltetes elektrisches Heizgerät). •... - Page 5 • Decken Sie das Gerät, zur Vermeidung von Brandgefahr, nicht ab. • Alle Anschlüsse des Lüfters müssen den lokalen Vorschriften für elektrische Sicherheit entsprechen. Falls notwendig, informieren Sie sich über diese Vorschriften. • Beaufsichtigen Sie Kinder, damit diese nicht mit dem Gerät spielen. •...
-
Page 6: Geräteübersicht
GERÄTEÜBERSICHT Vorderseite Rückseite Bedienfeld Lufteinlass Fernbedienung Abluft Luftauslass Lufteinlass Wasserstopfen / Wasserauslass Luftzufuhr Kabelverstauung 10 Lufteinlass... - Page 7 Zubehör 1 1 Abluftschlauch 12 Schlauchadapter - Zwischenstück für Schlauch und Fensterabdichtung 13 Verbindungsstück für Abluftschlauch 14 Wasserablassschlauch für den ständigen Wasserabfl uss 15 Aktivkohlefi lter 16 Fernbedienung...
-
Page 8: Installation
INSTALLATION Dieses Gerät ist eine mobile Klimaanlage, die Sie von Raum zu Raum bewegen können. Verwendung des Verbindungsstücks Sie benötigen ein Loch mit 160 mm Durchmesser in der Wand oder in der Glasscheibe. Führen Sie den Abluftschlauch durch das Fenster oder die Wand und befestigen Sie das Verbindungsstück mit dem Gewinde von Außen. - Page 9 Befestigung des Auslassschlauchs Verwenden Sie ausschließlich den mitgelieferten Schlauch und befestigen Sie den Abluftschauch auf der Rückseite der Klimaanlage. Vermeiden Sie Knicke und Windungen im Abluftschlauch, da dies zur Stauung der Abluft führt, das Gerät überhitzt und es sich abschaltet. RICHTIG RICHTIG FALSCH...
-
Page 10: Aktivkohlefilter Einsetzen
AKTIVKOHLEFILTER EINSETZEN 1. Nehmen Sie den Kunststofffilter vom Gerät ab. 2. Nehmen Sie den Aktivkohlefilter aus der Plastiktüte. 3. Den Aktivkohlefilter in das Gerät einsetzen. 4. Den Kunststoffilter auf das Gerät setzen. -
Page 11: Bedienung 1
BEDIENUNG Bedienfeld Taste Ein/Aus 12 Anzeige Ventilator (niedrige Stufe ) Taste Ventilatorstufe 13 Anzeige Ventilator (mittlere Stufe) Anzeige Timer 14 Anzeige Ventilator (hohe Stufe) Taste Timer 15 IR-Empfänger für Fernbedienung Taste Schlafmodus 16 Display Anzeige Schlafmodus 17 Anzeige automatischer Modus Taste Betriebsart 18 Anzeige Entfeuchtungsbetrieb Taste Temperatur +... - Page 12 Gerät einschalten/ausschalten 1. Drücken Sie die Ein/Aus-Taste. Das Gerät schaltet sich automatisch ein. Wenn die Umgebungstemperatur höher oder gleich 24 °C ist, geht die Klimaanlage in den Kühlbetrieb. Wenn die Umgebungstemperatur unter 24 °C liegt, geht die Klimaanlage in den Ventilatorbetrieb (niedrige Stufe). 2.
- Page 13 2. Im Schlafmodus läuft der Ventilator auf der niedrigsten Stufe. Wenn Sie die Schlafmodus-Taste erneut drücken, kehrt die Temperatureinstellung und die Ventilatonsstufe zu den ursprünglich eingestellten Werten zurück. Beachten Sie, dass der Schlafmodus nicht verfügbar ist, wenn das Gerät sich in den Betriebsarten Auto, Ventilation oder Entfeuchtung befindet.
-
Page 14: Kondenswasserablauf
KONDENSWASSERABLAUF Während des Kühlvorgangs entzieht das Gerät der feuchten Luft Wasser. Wenn der Wassertank voll ist, halten der Kompressor und der Motor an. Das Gerät gibt einen Summton von sich, den Sie mit einem Druck auf eine beliebige Taste beenden können. Die Anzeige für den vollen Wassertank blinkt. - Page 15 Wenn Sie das Gerät benutzen wollen, ohne den Wassertank leeren zu müssen, gehen Sie folgendermaßen vor: • Entfernen Sie den Ablaufverschluss und Ablaufstopfen und bewahren Sie die Teile für die spätere Verwendung auf. • Schließen Sie die den Ablaufschlauch an den Wasserauslass an und führen das andere Ende in einen Abfluss.
-
Page 16: So Bringen Sie Die Fensterdichtung An
SO BRINGEN SIE DIE FENSTERDICHTUNG AN Die Montage der Fensterdichtung ist einfach. Sie können die Dichtung an ein gekipptes Fenster, ein seitlich geöffnetes Fenster oder ein Dachfenster anbringen. Wir haben hier zur Demonstration ein seitlich geöffnetes Fenster gewählt. Es eignet sich besonders gut, weil sich der Abluftschlauch seitlich weit nach unten anbringen lässt. -
Page 17: Reinigung Und Pflege
REINIGUNG UND PFLEGE Ziehen Sie vor der Reinigung immer den Netzstecker der Klimaanlage. Um die Effizienz der Klimaanlage zu maximieren, reinigen Sie das Gerät regelmäßig. Reinigung des Gehäuses Verwenden Sie ein weiches, feuchtes Tuch, um das Gehäuse sauber zu wischen. Verwenden Sie niemals aggressive Chemikalien, Benzin, Reinigungsmittel, chemisch behandelte Tücher oder andere Reinigungslösungen. -
Page 18: Fehlersuche Und Fehlerbehebung
FEHLERSUCHE UND FEHLERBEHEBUNG Problem Kontrollfragen Ist das Klimagerät an die Stromversorgung angeschlossen? Gibt es einen Stromausfall? Das Gerät geht nicht in Betrieb. Blinkt die Anzeige für den vollen Wassertank? Ist die Raumtemperatur unter der eingestellten Temperatur? Besteht eine direkte Sonneneinstrahlung? (Vorhänge zuziehen.) Das Gerät erscheint Sind zu viele Fenster oder Türen geöffnet? -
Page 19: Hinweise Zum Kältemittel R290
HINWEISE ZUM KÄLTEMITTEL R290 Warnhinweise • Die Klimaanlage muss aufrecht aufbewahrt und transportiert werden. Andernfalls können irreparable Kompressorschäden entstehen. Lassen Sie das Gerät im mindestens 24 Stunden stehen, bevor Sie es in Betrieb nehmen. • Schalten Sie den das Gerät vor der Reinigung aus und trennen Sie es von der Stromversorgung. -
Page 20: Gerätesteuerung Per Smartphone
GERÄTESTEUERUNG PER SMARTPHONE Wenn Sie Ihr Klarstein-Gerät in Ihr heimisches WLAN einbinden, können Sie es ganz bequem über die dazugehörige Klarstein-App bedienen. Die App ermöglicht es Ihnen, nicht nur das Gerät über Ihr Smartphone fernzusteuern, sondern bietet Ihnen zudem Zugang zu Rezepten und weiterführenden Informationen. -
Page 21: Technische Daten
Fehlerbebung bei Verbindungsproblemen Wenn Ihr Klarstein-Gerät im WLAN nicht gefunden werden kann, überprüfen Sie Folgendes: • Ist das Gerät eingesteckt? • Ist die WLAN-Funktion des Smartphones aktiviert? • Ist die WLAN-Funktion des Klarstein-Gerätes aktiviert? (Befolgen Sie die Anweisungen in der App.) •... -
Page 22: Produktdatenblatt
PRODUKTDATENBLATT Angaben nach Verordnung (EU) Nr. 626/2011 Warenzeichen des Lieferanten: Klarstein Modellkennung des Lieferanten: 10034666, 10034667, 10035737, 10035738 Schallleistungspegel in lnnenräumen bei Norm- Nennbedingungen im Kühlbetrieb in dB: 65 dB Der Austritt von Kältemittel (R290) trägt zum Klimawandel bei. Kältemittel mit geringerem Treibhauspotenzial tragen im Fall eines Austretens weniger zur Erderwärmung bei als solche mit höherem Treibhauspotenzial. - Page 23 Angaben nach Verordnung (EU) Nr. 206/2012 Modellkennung(en) 10034666, 10034667, 10035737, 10035738 Bezeichnung Symbol Wert Einheit Nenn-Leistung im Kühlbetrieb im Kühlbetrieb rated Nenn-Leistung im Heizbetrieb im Heizbetrieb - rated Nenn-Leistungsaufnahme im Kühlbetrieb Nenn-Leistungsaufnahme im Heizbetrieb Nenn-Leistungszahl im Kühlbetrieb EERd Nenn-Leistungszahl im Heizbetrieb COPd Leistungsaufnahme im Betriebszustand „Temperaturregler aus“...
-
Page 24: Produktdatenblatt
PRODUKTDATENBLATT Angaben nach Verordnung (EU) Nr. 626/2011 Warenzeichen des Lieferanten: Klarstein Modellkennung des Lieferanten: 10034664, 10034665, 10035739, 10035740 Schallleistungspegel in lnnenräumen bei Norm- Nennbedingungen im Kühlbetrieb in dB: 65 dB Der Austritt von Kältemittel (R290) trägt zum Klimawandel bei. Kältemittel mit geringerem Treibhauspotenzial tragen im Fall eines Austretens weniger zur Erderwärmung bei als solche mit höherem Treibhauspotenzial. - Page 25 Angaben nach Verordnung (EU) Nr. 206/2012 Modellkennung(en) 10034664, 10034665, 10035739, 10035740 Bezeichnung Symbol Wert Einheit Nenn-Leistung im Kühlbetrieb im Kühlbetrieb rated Nenn-Leistung im Heizbetrieb im Heizbetrieb - rated Nenn-Leistungsaufnahme im Kühlbetrieb Nenn-Leistungsaufnahme im Heizbetrieb Nenn-Leistungszahl im Kühlbetrieb EERd Nenn-Leistungszahl im Heizbetrieb COPd Leistungsaufnahme im Betriebszustand „Temperaturregler aus“...
-
Page 26: Hinweise Zur Entsorgung
HINWEISE ZUR ENTSORGUNG Wenn es in Ihrem Land eine gesetzliche Regelung zur Entsorgung von elektrischen und elektronischen Geräten gibt, weist dieses Symbol auf dem Produkt oder auf der Verpackung darauf hin, dass dieses Produkt nicht im Hausmüll entsorgt werden darf. Stattdessen muss es zu einer Sammelstelle für das Recycling von elektrischen und elektronischen Geräten gebracht werden. - Page 27 Dear Customer, Congratulations on purchasing this device. Please read the following instructions carefully and follow them to pre- vent possible damages. We assume no liability for dam- age caused by disregard of the instructions and improper use. Scan the QR code to get access to the latest user manual and more product information.
-
Page 28: Safety Instructions
SAFETY INSTRUCTIONS Special notes • Only use agents recommended by the manufacturer for defrosting or cleaning. • Never store the appliance in a room in which there are permanent sources of ignition (e.g. open flames, a switched-on gas appliance or a switched-on electric heater). - Page 29 • To avoid the risk of fi re, do not cover the unit. • All fan connections must comply with local electrical safety regulations. If necessary, refer to these regulations. • Supervise children so that they do not play with the unit. •...
-
Page 30: Device Description
DEVICE DESCRIPTION Front Back Control panel Air inlet Remote control Exhaust air outlet Air outlet Air inlet Water stopper/drainage point Air inlet Cord storage 10 Air inlet... - Page 31 Accessories 1 1 Exhaust hose 12 Adaptor - for insertion over hose and into window spacer (or into hole in the wall/ window). 13 Connector for exhaust pipe 14 Drain tube for continuous drainage 15 Active carbon fi lter 16 Remote control...
-
Page 32: Installation
INSTALLATION Using the connector Have a 160 mm diameter hole in the wall or window. Feed exhaust hose through the window or wall and attach the threaded adaptor from the outside as shown. - Page 33 Mounting of the exhaust pipe Use only the hose provided and clip exhaust hose to the back of the air conditioner Avoid kinks and bends in the exhaust hose as this will cause expelled moist air to build up causing the unit to overheat and shut down. Figure 7 & 8 show correct position The hose may be extended from 300 mm to 1500 mm but for maximum efficiency use the shortest length possible.
-
Page 34: Installation Of The Carbon Filter
INSTALLATION OF THE CARBON FILTER 1. Remove the plastic filter from the unit. 2. Remove the active carbon filter from its plastic bag. 3. Place the active carbon filter onto the unit. 4. Replace the plastic filter on to the unit. -
Page 35: Operation
OPERATION Control panel ON/OFF (power) soft touch button 12 Low ventilation indicator Speed (ventilation) soft touch button 13 Middle ventilation indicator “Timer” indicator 14 High ventilation indicator “Timer” soft touch button 15 Receiver for remote control “Sleeping” model soft touch button 16 Display window “Sleeping”... - Page 36 Turning ON/OFF 1. Press ON/OFF soft touch button, the unit will start automatically. If the ambient temperature is higher or equal to 24 °C, the unit will work in cooling mode. If it is below 24 °C, the unit will work in ventilation mode (low fan). 2.
- Page 37 5. When the machine is in Sleep function, the Fan Speed would turn to be LOW speed. Dehumidify (DRY) mode In dehumidify (DRY) mode, the temperature cannot be adjusted, the ventilation will fix at low speed. When the unit is operating in Dehumidify ( DRY) mode, humidity extracted from the air is collected in an internal tank.
-
Page 38: Drainage
DRAINAGE During the process of cooling, some water will be extracted from the air into the unit. If the reservoir is full, both of the compressor and motor will stop and the units would buzz (you can press any button to stop the buzz). The W.F. indicator will flash to show you. - Page 39 If you wish to operate the unit without the need to empty the water tank, please: • Remove the drain knob and rubber plug and retain for future use. • Connect the drain tube supplied to the water outlet as shown and locate the other end into a drain.
-
Page 40: How To Install The Window Seal
HOW TO INSTALL THE WINDOW SEAL Installing the window sealing is easy. You can attach it to a tilted window or to a laterally opened window. Our demonstration is performed on a laterally opened window. It is especially suitable for low positions of the exhaust pipe. The velcro tape must be attached on three sides. -
Page 41: Cleaning And Care
CLEANING AND CARE Always unplug the air conditioner from the mains before cleaning. To maximize the efficiency of the air conditioner, clean regularly. Cleaning the housing Use a soft, damp cloth to wipe the body clean. Never use aggressive chemicals, gasoline, detergents, chemically treated cloths, or other cleansing solutions. -
Page 42: Troubleshooting
TROUBLESHOOTING Problem Check these issues Is the air conditioner plugged in? Is there a power failure? The air conditioner does not run. Is the comp / ‘full water’ indicator flashing? Is the room temperature below the set temperature? Is there direct sunshine? (Please put down the curtain.) Are too many windows or doors open? The machine seems to do little. -
Page 43: Notes On Refrigerant R290
NOTES ON REFRIGERANT R290 Warning • The air conditioning system must be kept and transported upright. Otherwise, irreparable compressor damage may occur. Leave the unit for at least 24 hours before putting it into operation. • Switch off the device and disconnect it from the power supply before cleaning. •... -
Page 44: Device Control By Smartphone
2. Make sure your smartphone is connected to the same WiFi network that your Klarstein device is to be connected to. 3. Open the Klarstein app. 4. Sign in to your account. If you do not have an account, sign up in the Klarstein app. 5. Follow the instructions from the app. -
Page 45: Technical Data
If your Klarstein device cannot be found in the WLAN, check the following: • Is the device plugged in? • Is the WiFi feature of my phone enabled? • Is the WiFi function of the Klarstein device activated? (Follow the instructions in the app) • Has the WLAN password been entered correctly? •... -
Page 46: Product Data Sheet
PRODUCT DATA SHEET Information according to regulation (EU) No. 626/2011 Supplier‘s trademark: Klarstein Supplier‘s model identifier: 10034664, 10034665, 10035739, 10035740 Inside sound power levels at standard rating conditions on cooling mode in dB: 65 dB Refrigerant (R290) leakage contributes to climate change. Refrigerant... - Page 47 Information according to regulation (EU) No. 206/2012 Model identifier(s) 10034664, 10034665, 10035739, 10035740 Description Symbol Value Unit Rated capacity for cooling for cooling 3,4 rated Rated capacity for heating for heating - rated Rated power input for cooling Rated power input for heating Rated Energy efficiency ratio EERd Rated Coefficient of performance...
-
Page 48: Product Data Sheet
PRODUCT DATA SHEET Information according to regulation (EU) No. 626/2011 Supplier‘s trademark: Klarstein Supplier‘s model identifier: 10034666, 10034667, 10035737, 10035738 Inside sound power levels at standard rating conditions on cooling mode in dB: 65 dB Refrigerant (R290) leakage contributes to climate change. Refrigerant... - Page 49 Information according to regulation (EU) No. 206/2012 Model identifier(s) 10034666, 10034667, 10035737, 10035738 Description Symbol Value Unit Rated capacity for cooling for cooling 2,9 rated Rated capacity for heating for heating - rated Rated power input for cooling Rated power input for heating Rated Energy efficiency ratio EERd Rated Coefficient of performance...
-
Page 50: Disposal Considerations
DISPOSAL CONSIDERATIONS If there is a legal regulation for the disposal of electrical and electronic devices in your country, this symbol on the product or on the packaging indicates that this product must not be disposed of with household waste. Instead, it must be taken to a collection point for the recycling of electrical and electronic equipment. - Page 51 Chère cliente, cher client, Toutes nos félicitations pour l’acquisition de ce nouvel ap- pareil. Veuillez lire attentivement et respecter les instruc- tions de ce mode d’emploi afin d’éviter d’éventuels dom- mages. Nous ne saurions être tenus pour responsables des dommages dus au non-respect des consignes et à la mauvaise utilisation de l’appareil.
-
Page 52: Consignes De Sécurité
CONSIGNES DE SÉCURITÉ Consignes particulières • Pour le dégivrage ou le nettoyage, utilisez uniquement les produits recommandés par le fabricant. • Ne rangez jamais l‘appareil dans une pièce avec des sources d‘inflammation présentes en permanence (par exemple : flammes nues, appareil à gaz allumé ou chauffage électrique allumé). - Page 53 • Ne couvrez pas l‘appareil pour éviter tout risque d‘incendie. • Tous les raccordements du ventilateur doivent être conformes à la réglementation de sécurité électrique locale. Si nécessaire, informez-vous sur ces réglementations. • Surveillez les enfants pour qu‘ils ne jouent pas avec l‘appareil. •...
-
Page 54: Aperçu De L'appareil
APERÇU DE L‘APPAREIL Face avant Dos de l‘appareil Panneau de commande Admission d‘air Télécommande Echappement Sortie d‘air Admission d‘air Bouchon d‘eau / vidange d‘eau Alimentation en air Logement du câble 10 Admission d‘air... - Page 55 Accessoires 1 1 Tuyau d‘extraction 12 Adaptateur de tuyau – raccord entre le tuyau et le joint de fenêtre 13 Raccord de tuyau d‘extraction 14 Tuyau de vidange d‘eau pour drain permanent 15 Filtre à charbon actif 16 Télécommande...
-
Page 56: Installation
INSTALLATION Cet appareil est un climatiseur mobile que vous pouvez déplacer de pièce en pièce. Utilisation du raccord Vous devez disposer d‘un trou de 160 mm de diamètre dans le mur ou dans la vitre. Passez le tuyau d‘échappement à travers la fenêtre ou le mur et fixez le connecteur avec le filetage de l‘extérieur. - Page 57 Fixation du tuyau d'évacuation Utilisez uniquement le tuyau fourni et fixez le tuyau d‘échappement à l‘arrière du climatiseur. Évitez les plis et les vrilles avec le tuyau d‘échappement, car cela entraînerait une stagnation de l‘air extrait, suite à quoi l‘appareil surchaufferait et s‘arrêterait.
-
Page 58: Installation Des Filtres À Charbon Actif
INSTALLATION DES FILTRES À CHARBON ACTIF 1. Retirez le filtre en plastique de l‘appareil 2. Retirez le filtre à charbon actif du sac en plastique. 3. Insérez le filtre à charbon actif dans l‘appareil 4. Placez le filtre en plastique sur l‘appareil. -
Page 59: Utilisation
UTILISATION Panneau de commande Touche de marche/arrêt 13 Indicateur de ventilateur (vitesse Touche de vitesse du ventilateur moyenne) Indicateur de minuterie 14 Indicateur de ventilateur (vitesse Touche de minuterie élevée) Touche mode nuit 15 Capteur IR de la télécommande Indicateur de mode nuit 16 Ecran Touche mode de fonctionnement 17 Témoin de mode automatique... - Page 60 Pour allumer/éteindre l‘appareil 1. Appuyez sur la touche de marche / arrêt. L‘appareil s‘allume automatiquement. Lorsque la température ambiante est supérieure ou égale à 24°C, le climatiseur passe en mode de refroidissement. Lorsque la température ambiante est inférieure à 24°C, le climatiseur passe en mode ventilateur (basse vitesse). 2.
- Page 61 2. En mode veille, le ventilateur fonctionne au niveau le plus bas. Si vous appuyez à nouveau sur la touche du mode veille, le réglage de la température et la vitesse du ventilateur reviennent aux valeurs initiales. Notez que le mode veille n‘est pas disponible lorsque l‘appareil est en mode automatique, ventilation ou déshumidification.
-
Page 62: Évacuation De L'eau De Condensation
ÉVACUATION DE L‘EAU DE CONDENSATION Pendant la climatisation, l‘appareil élimine l‘eau de l‘air humide. Lorsque le réservoir d‘eau est plein, le compresseur et le moteur s‘arrêtent. L‘appareil émet un bourdonnement que vous pouvez arrêter en appuyant sur n‘importe quelle touche. L‘indicateur de réservoir d‘eau plein clignote. - Page 63 Si vous souhaitez utiliser l‘appareil sans avoir à vider le réservoir d‘eau, procédez comme suit : • Retirez le verrou et le bouchon de vidange et conservez les pièces pour une utilisation ultérieure. • Raccordez le tuyau de vidange à la sortie d’eau et faites couler l’autre extrémité dans un drain.
-
Page 64: Comment Installer Le Joint De Fenêtre
COMMENT INSTALLER LE JOINT DE FENÊTRE L’installation du joint de fenêtre est simple. Vous pouvez fixer le joint à une fenêtre inclinée, à une fenêtre à ouverture latérale ou à une fenêtre de toit. Nous avons choisi une fenêtre à ouverture latérale pour la démonstration. Il est particulièrement adapté, car le tuyau d’échappement peut être fixé... -
Page 65: Nettoyage Et Entretien
NETTOYAGE ET ENTRETIEN Débranchez toujours le climatiseur avant de le nettoyer. Pour optimiser l’efficacité du climatiseur, nettoyez-le régulièrement. Nettoyage du boîtier Utilisez un chiffon doux et humide pour nettoyer le boîtier. N‘utilisez jamais de produits chimiques agressifs, d‘essence ou de produits de nettoyage, de chiffons traités chimiquement ou d‘autres solutions de nettoyage. -
Page 66: Identification Et Résolution Des Problèmes
IDENTIFICATION ET RÉSOLUTION DES PROBLÈMES Problème Questions tests Le climatiseur est-il branché sur l'alimentation ? Y a-t-il une panne de courant ? L'appareil ne Le témoin de réservoir plein clignote-t-il ? démarre pas. La température ambiante est-elle inférieure à la température de consigne ? L'appareil est-il exposé... -
Page 67: Remarques Sur Le Réfrigérant R290
REMARQUES SUR LE RÉFRIGÉRANT R290 Mises en garde • Le climatiseur doit être conservé et transporté debout. Sinon, le compresseur pourrait être irrémédiablement endommagé. Laissez l’appareil reposer au moins 24 heures avant de l’utiliser. • Éteignez l‘appareil avant de le nettoyer et débranchez-le de l‘alimentation électrique. -
Page 68: Contrôle De L'appareil Par Smartphone
à distance l‘appareil via votre smartphone, mais vous donne également accès à des recettes et à des informations supplémentaires. Procédez comme suit pour connecter votre smartphone avec votre appareil Klarstein : 1. Téléchargez d‘abord l‘application Klarstein en scannant le code QR avec votre smartphone (voir ci-dessous) ou téléchargez-le directement depuis l‘App Store ou... -
Page 69: Fiche Technique
Dépannage des problèmes de connexion Si votre appareil Klarstein ne se trouve pas dans le WLAN, vérifiez les points suivants : • L‘appareil est-il branché ? • La fonction WiFi de mon téléphone est-elle activée ? • La fonction WiFi de l‘appareil Klarstein est-elle activée ? (Suivez les instructions dans l‘application) -
Page 70: Fiche De Données Produit
FICHE DE DONNÉES PRODUIT Informations conformément au règlement (UE) n° 626/2011 Marque du fournisseur : Klarstein Référence du modèle donnée par le fournisseur : 10034664, 10034665, 10035739, 10035740 Niveaux de puissance acoustique intérieur dans les conditions nominales, pour les fonctions de... - Page 71 Informations conformément au règlement (UE) n° 206/2012 Référence (s) du produit 10034664, 10034665, 10035739, 10035740 Description Symbole Valeur Unité Puissance frigorifique nominale frigorifique rated Puissance calorifique nominale calorifique rated Puissance frigorifique absorbée nominale Puissance calorifique absorbée nominale Coefficient d‘efficacité énergétique EERd nominal Coefficient de performance nominal...
-
Page 72: Fiche De Données Produit
FICHE DE DONNÉES PRODUIT Informations conformément au règlement (UE) n° 626/2011 Marque du fournisseur : Klarstein Référence du modèle donnée par le fournisseur : 10034666, 10034667, 10035737, 10035738 Niveaux de puissance acoustique intérieur dans les conditions nominales, pour les fonctions de... - Page 73 Informations conformément au règlement (UE) n° 206/2012 Référence (s) du produit 10034666, 10034667, 10035737, 10035738 Description Symbole Valeur Unité Puissance frigorifique nominale frigorifique rated Puissance calorifique nominale calorifique rated Puissance frigorifique absorbée nominale Puissance calorifique absorbée nominale Coefficient d‘efficacité énergétique EERd nominal Coefficient de performance nominal...
-
Page 74: Informations Sur Le Recyclage
INFORMATIONS SUR LE RECYCLAGE S‘il existe une réglementation pour l‘élimination ou le recyclage des appareils électriques et électroniques dans votre pays, ce symbole sur le produit ou sur l‘emballage indique que cet appareil ne doit pas être jeté avec les ordures ménagères. - Page 75 Estimado cliente: Le felicitamos por la adquisición de este producto. Lea atentamente el siguiente manual y siga cuidadosamente las instrucciones de uso con el fin de evitar posibles daños. La empresa no se hace responsable por los daños causados por el incumplimiento de las instrucciones y el uso indebido.
-
Page 76: Indicaciones De Seguridad
INDICACIONES DE SEGURIDAD Indicaciones especiales • Para descongelar o limpiar, utilice solamente los productos recomendados por el fabricante. • En ningún caso almacene el aparato en una estancia donde se encuentren fuentes de ignición de manera permanente (por ejemplo: llamas abiertas, un aparato a gas conectado o un radiador eléctrico encendido). - Page 77 • No tape el aparato para evitar peligro de incendio. • Todas las conexiones del ventilador deben cumplir con la normativa local de seguridad eléctrica. Si fuera necesario, infórmese sobre dicha normativa. • Los niños no deben jugar con el aparato. •...
-
Page 78: Descripción Del Aparato
DESCRIPCIÓN DEL APARATO Parte frontal Parte posterior Panel de control Entrada de aire Mando a distancia Extracción de aire Salida de aire Entrada de aire Tapón de salida de agua/punto de desagüe Ventilación Compartimento de cable 10 Entrada de aire... - Page 79 Accesorio 1 1 Conducto de salida de aire 12 Adaptador de conducto (para conectar el conducto y el aislamiento para ventana) 13 Conector para el conducto de salida de aire 14 Conducto de desagüe para una salida de agua permanente 15 Filtro de carbón activo 16 Mando a distancia...
-
Page 80: Instalación
INSTALACIÓN Este aparato es un aire acondicionado portátil que puede moverse de una estancia a otra Uso del conector Necesita un orificio de 160 mm de diámetro en la pared o ventana. Pase el conducto de salida de aire a través de la ventana o la pared y fije el conector desde el exterior con la rosca. - Page 81 Fijación del tubo de extracción de aire Utilice exclusivamente el conducto de salida de aire suministrado en el envío y conéctelo en la parte posterior del aire acondicionado. Evite doblar o retorcer el conducto de salida de aire, ya que esto hará que el aire extraído retroceda, lo que provocaría un sobrecalentamiento y posterior apagado del aparato.
-
Page 82: Instalación Del Filtro De Carbón Activo
INSTALACIÓN DEL FILTRO DE CARBÓN ACTIVO 1. Retire la cubierta de plástico del filtro del aparato. 2. Retire el filtro de carbón activo de su embalaje. Monte el filtro de carbón activo en el aparato. 3. Coloque la cubierta de plástico del filtro del aparato. -
Page 83: Funcionamiento
FUNCIONAMIENTO Panel de control Botón ON/OFF 13 Indicador de ventilador (nivel medio) Botón de velocidad del ventilador 14 Indicador de ventilador (nivel alto) Indicador de temporizador 15 Receptor IR para el mando a Botón de temporizador distancia Botón «Modo Nocturno» 16 Pantalla Indicador «Modo Nocturno»... - Page 84 Encender/apagar el aparato 1. Pulse el botón ON/OFF. El aparato se enciende automáticamente. Cuando la temperatura ambiente es superior o igual a 24 °C, el aparato cambia automáticamente al modo de refrigeración. Cuando la temperatura ambiente es inferior a 24 °C, el aparato cambia automáticamente al modo ventilador. 2.
- Page 85 2. En el modo nocturno, el ventilador funciona a la velocidad más baja. Si pulsa de nuevo el botón de modo nocturno, los ajustes de temperatura y velocidad se restablecerán automáticamente a los seleccionados anteriormente. Tenga en cuenta que el modo nocturno no está disponible cuando el aparato se encuentra en modo Automático, Ventilación o Deshumidificación.
-
Page 86: Desagüe Del Agua Condensada
DESAGÜE DEL AGUA CONDENSADA Cuando el aparato se encuentra en modo refrigeración, extrae el agua del aire. Cuando el depósito de agua se llena, el compresor y el motor se apagan automáticamente. El aparato emite un zumbido que puede detenerse pulsando cualquier botón. - Page 87 Si desea utilizar el aparato sin tener que vaciar regularmente el depósito de agua, realice los siguientes pasos: • Quite el tapón y la tapa de desagüe y guárdelos para usos futuros. • Conecte el tubo de desagüe a la salida del agua y coloque el otro extremo en un sumidero.
-
Page 88: Indicaciones Sobre El Aislamiento De La Ventana
INDICACIONES SOBRE EL AISLAMIENTO DE LA VENTANA El montaje del aislamiento para la ventana es sencillo. Puede aplicar el aislamiento a una ventana basculante, una ventana de apertura lateral o una claraboya. Hemos elegido una ventana de apertura lateral para la demostración. Es particularmente adecuada porque el conducto de salida de aire puede montarse abajo en la parte lateral. -
Page 89: Limpieza Y Cuidado
LIMPIEZA Y CUIDADO Desconecte el aparato de la toma de corriente antes de limpiarlo. Limpie el aparato regularmente para aumentar su eficacia. Limpieza de la carcasa Utilice un paño suave y húmedo para limpiar la carcasa. No utilice productos químicos agresivos, gasolina, detergentes, paños tratados químicamente u otras soluciones de limpieza, ya que podrían dañar el aparato. -
Page 90: Detección Y Reparación De Anomalías
DETECCIÓN Y REPARACIÓN DE ANOMALÍAS Anomalía Preguntas de control ¿Está el aire acondicionado conectado a la red eléctrica? ¿Se ha producido un corte de luz? El aparato no se ¿Parpadea el indicador «Depósito de agua lleno»? pone en marcha. ¿La temperatura ambiente es más baja que la temperatura configurada? ¿Está... -
Page 91: Indicaciones Sobre El Refrigerante R290
INDICACIONES SOBRE EL REFRIGERANTE R290 Advertencias • Transporte y guarde el aparato en posición vertical. De lo contrario, podría dañar de forma irreparable el compresor. Deje el aparato en posición vertical durante al menos 24 horas antes de ponerlo en marcha. •... -
Page 92: Control Del Aparato A Través Del Teléfono Inteligente
CONTROL DEL APARATO A TRAVÉS DEL TELÉFONO INTELIGENTE Si conecta el aparato Klarstein a su red wifi doméstica, podrá controlarlo cómodamente mediante la aplicación correspondiente de Klarstein. La aplicación no solo permite controlar el aparato a distancia a través del teléfono inteligente, sino que también da acceso a recetas y a más información. -
Page 93: Datos Técnicos
• ¿Se ha introducido correctamente la contraseña de la red wifi? • ¿Están el router, el aparato Klarstein y el teléfono inteligente muy cerca durante el intento de emparejamiento? (Lo ideal es que no haya más de 5 m de distancia entre ellos). -
Page 94: Ficha Técnica Del Producto
FICHA TÉCNICA DEL PRODUCTO Información de conformidad con el reglamento (UE) Núm. 626/2011 Marca comercial del proveedor: Klarstein Identificador del modelo del proveedor: 10034666, 10034667, 10035737, 10035738 Nivel de potencia acústica interior en condiciones nominales estándar, en el modo 65 dB de refrigeración en dB:... - Page 95 Información de conformidad con el reglamento (UE) Núm. 206/2012 Denominación del modelo 10034666, 10034667, 10035737, 10035738 Descripción Símbolo Valor Unidad Potencia nominal de refrigeración rated refrigeración Potencia nominal de calefacción rated calefacción Potencia nominal utilizada para refrigeración Potencia nominal utilizada para calefacción Potencia nominal en modo EERd...
-
Page 96: Ficha Técnica Del Producto
FICHA TÉCNICA DEL PRODUCTO Información de conformidad con el reglamento (UE) Núm. 626/2011 Marca comercial del proveedor: Klarstein Identificador del modelo del proveedor: 10034664, 10034665, 10035739, 10035740 Nivel de potencia acústica interior en condiciones nominales estándar, en el modo 65 dB de refrigeración en dB:... - Page 97 Información de conformidad con el reglamento (UE) Núm. 206/2012 Denominación del modelo 10034664, 10034665, 10035739, 10035740 Descripción Símbolo Valor Unidad Potencia nominal de refrigeración rated refrigeración Potencia nominal de calefacción rated calefacción Potencia nominal utilizada para refrigeración Potencia nominal utilizada para calefacción Potencia nominal en modo EERd...
-
Page 98: Indicaciones Sobre La Retirada Del Aparato
INDICACIONES SOBRE LA RETIRADA DEL APARATO Si en su país existe una disposición legal relativa a la eliminación de aparatos eléctricos y electrónicos, este símbolo estampado en el producto o en el embalaje advierte que no debe eliminarse como residuo doméstico. Debe depositarse en un punto de recogida de reciclaje de aparatos eléctricos y electrónicos. - Page 99 Gentile Cliente, La ringraziamo per aver acquistato il dispositivo. La preghiamo di leggere attentamente le seguenti istruzioni per l’uso e di seguirle per evitare possibili danni. Non ci assumiamo alcuna responsabilità per danni scaturiti da una mancata osservanza delle avvertenze di sicurezza e da un uso improprio del dispositivo.
-
Page 100: Avvertenze Di Sicurezza
AVVERTENZE DI SICUREZZA Avvertenze speciali • Utilizzare solo il prodotto consigliato dal produttore per pulire o sbrinare. • Non riporre assolutamente il dispositivo in un locale in cui ci sono fonti di ignizione (ad es. fiamme libere, un dispositivo a gas acceso o un dispositivo elettrico di riscaldamento acceso). - Page 101 • Per evitare incendi, non coprire il dispositivo. • Tutti i collegamenti del dispositivo devono essere conformi alle normative locali per la sicurezza elettrica. Se necessario, informarsi su queste normative. • Tenere sotto controllo i bambini, in modo che non giochino con il dispositivo. •...
-
Page 102: Descrizione Del Prodotto
DESCRIZIONE DEL PRODOTTO Lato Lato posteriore anteriore Pannello di controllo Ingresso dell'aria Telecomando Scarico dell'aria Uscita dell'aria Ingresso dell'aria Tappo dell'acqua/Uscita dell'acqua Afflusso d'aria Stivaggio per il cavo 10 Ingresso dell'aria... - Page 103 Accessori 1 1 Tubo di scarico dell'aria 12 Adattatore per tubo fl essibile - pezzo intermedio per tubo e guarnizione della fi nestra 13 Connettore per il tubo di scarico dell'aria 14 Tubo di scarico per il drenaggio permanente dell'acqua 15 Filtro ai carboni attivi 16 Telecomando...
-
Page 104: Installazione
INSTALLAZIONE Questo dispositivo è un climatizzatore che può essere spostato da una stanza all'altra. Utilizzare il connettore È necessario un foro di 160 mm di diametro sul muro o sulla lastra di vetro. Far passare il tubo di scarico dell'aria attraverso la finestra o la parete e fissare il connettore con la filettatura dall'esterno. - Page 105 Fissare il tubo di scarico Utilizzare solo il tubo di scarico in dotazione e fissarlo al lato posteriore del climatizzatore. Evitare piegature e torsioni nel tubo di scarico, dato che causano ristagni nello scarico dell'aria, con conseguente surriscaldamento e spegnimento del dispositivo. GIUSTO GIUSTO SBAGLIATO...
-
Page 106: Posizionare Il Filtro Ai Carboni Attivi
POSIZIONARE IL FILTRO AI CARBONI ATTIVI 1. Rimuovere il filtro di plastica dal dispositivo. 2. Togliere il filtro ai carboni attivi dal sacchetto di plastica. 3. Inserire il filtro ai carboni attivi nel dispositivo. 4. Posizionare il filtro di plastica sul dispositivo. -
Page 107: Utilizzo
UTILIZZO Pannello di controllo Tasto on/off 12 Indicazione ventola (livello basso) Tasto livello ventola 13 Indicazione ventola (livello medio) Indicazione timer 14 Indicazione ventola (livello alto) Tasto timer 15 Ricevitore IR per il telecomando Tasto modalità notturna 16 Display Indicazione modalità notturna 17 Indicazione modalità... - Page 108 Accendere/spegnere il dispositivo 1. Premere ON/OFF per avviare il dispositivo. Il dispositivo si accende automaticamente. Se la temperatura ambiente è superiore o uguale a 24 °C, il climatizzatore passa alla modalità di raffreddamento. Se la temperatura ambiente è inferiore a 24 °C, il climatizzatore passa alla modalità di ventilazione (livello basso).
- Page 109 dopo la seconda ora. 2. In modalità notturna, la ventola funziona al livello minimo. Se si preme di nuovo il tasto della modalità notturna, l'impostazione della temperatura e il livello di ventilazione tornano ai valori impostati in origine. Tenere presente che la modalità notturna non è disponibile quando il dispositivo si trova nelle modalità...
-
Page 110: Scarico Della Condensa 1
SCARICO DELLA CONDENSA Durante il processo di raffreddamento, il dispositivo estrae acqua dall'aria umida. Quando il serbatoio dell'acqua è pieno, il compressore e il motore si arrestano. Il dispositivo emette un segnale acustico, che può essere spento premendo un tasto a piacere. - Page 111 Se si desidera utilizzare il dispositivo senza dover svuotare il serbatoio, procedere come segue: • Rimuovere la chiusura dello scarico e il tappo e conservarli per futuri utilizzi. • Collegare il tubo di scarico all'uscita dell'acqua e condurre l'altra estremità in uno scarico.
-
Page 112: Come Fissare La Guarnizione Della Finestra 1
COME FISSARE LA GUARNIZIONE DELLA FINESTRA L'installazione della guarnizione della finestra è semplicissima. La guarnizione può essere installata su una finestra inclinata, una finestra aperta lateralmente o un lucernario. Per la dimostrazione, abbiamo scelto una finestra aperta lateralmente. È particolarmente adatta, dato che il tubo di scarico dell'aria può essere montato molto in basso sul lato. -
Page 113: Pulizia E Manutenzione 1
PULIZIA E MANUTENZIONE Staccare sempre la spina dalla presa prima di pulire il climatizzatore. Per massimizzare l'efficienza del climatizzatore, pulirlo regolarmente. Pulire l'alloggiamento Usare un panno morbido e umido per pulire l'alloggiamento. Non usare mai prodotti chimici aggressivi, benzina, detergenti, panni trattati chimicamente o altre soluzioni detergenti. -
Page 114: Ricerca E Correzione Degli Errori 1
RICERCA E CORREZIONE DEGLI ERRORI Problema Domande di controllo Il climatizzatore è collegato all'alimentazione? C'è un black out? Il dispositivo non entra in funzione. L'indicazione del serbatoio dell'acqua pieno lampeggia? La temperatura del locale è inferiore a quella impostata? Il dispositivo è esposto a luce del sole diretta? (Chiudere le tende.) Il dispositivo Ci sono troppe porte o finestre aperte? -
Page 115: Note Sul Refrigerante R290 1
NOTE SUL REFRIGERANTE R290 Avvertenze • Il climatizzatore deve essere conservato e trasportato in posizione verticale. Altrimenti possono risultare danni irreparabili al compressore. Lasciare in posizione il dispositivo per almeno 24 ore prima di metterlo in funzione. • Prima della pulizia, spegnere il dispositivo e scollegarlo dall'alimentazione. •... -
Page 116: Controllo Del Dispositivo Con Smartphone 1
CONTROLLO DEL DISPOSITIVO CON SMARTPHONE Se si collega il dispositivo Klarstein con la rete Wi-Fi di casa, è possibile utilizzarlo comodamente con l’apposita app di Klarstein. La app non permette solo di controllare il dispositivo a distanza con lo smartphone, ma offre anche accesso a utili informazioni. -
Page 117: Dati Tecnici 1
• La funzione Wi-Fi del dispositivo Klarstein è attiva? (seguire le indicazioni nell’app) • La password per la rete Wi-Fi è stata inserita correttamente? • Router, dispositivo Klarstein e smartphone si trovano vicini tra loro mentre si cerca di stabilire la connessione? (idealmente a non più di 5 metri l’uno dall’altro) •... -
Page 118: Scheda Informativa Del Prodotto
SCHEDA INFORMATIVA DEL PRODOTTO Informazioni secondo il regolamento (UE) N. 626/2011 Marchio del fornitore: Klarstein Contrassegno del modello del fornitore: 10034666, 10034667, 10035737, 10035738 Livello di potenza sonora in dB in locali interni in condizioni nominali standard in modalità di... - Page 119 Informazioni secondo il regolamento (UE) N. 206/2012 Contrassegno/i del modello 10034666, 10034667, 10035737, 10035738 Denominazione Simbolo Valore Unità Potenza nominale in modalità di in modalità di rated raffreddamento raffreddamento Potenza nominale in modalità di in modalità di rated riscaldamento riscaldamento Potenza assorbita nominale in modalità...
- Page 120 SCHEDA INFORMATIVA DEL PRODOTTO Informazioni secondo il regolamento (UE) N. 626/2011 Marchio del fornitore: Klarstein Contrassegno del modello del fornitore: 10034664, 10034665, 10035739, 10035740 Livello di potenza sonora in dB in locali interni in condizioni nominali standard in modalità di...
- Page 121 Informazioni secondo il regolamento (UE) N. 206/2012 Contrassegno/i del modello 10034664, 10034665, 10035739, 10035740 Denominazione Simbolo Valore Unità Potenza nominale in modalità di in modalità di rated raffreddamento raffreddamento Potenza nominale in modalità di in modalità di rated riscaldamento riscaldamento Potenza assorbita nominale in modalità...
-
Page 122: Avviso Di Smaltimento
AVVISO DI SMALTIMENTO Se nel vostro Paese sono vigenti regolamenti legislativi relativi allo smaltimento di dispositivi elettrici ed elettronici, questo simbolo sul prodotto o sull'imballaggio indica che non è consentito smaltire questo prodotto nei rifi uti casalinghi. Il dispositivo deve invece essere portato in un centro di raccolta per il riciclaggio di dispositivi elettrici ed elettronici.
Need help?
Do you have a question about the KRAFTWERK SMART and is the answer not in the manual?
Questions and answers