
Related Manuals for Klarstein Skytower Grand Smart


Summary of Contents for Klarstein Skytower Grand Smart
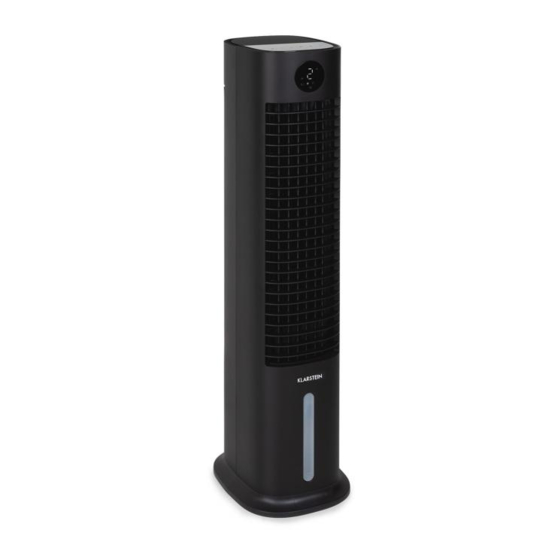
- Page 1 SKYTOWER GRAND SMART Luftkühler Air Cooler Enfriador de aire Rafraîchisseur d’air Raffreddatore d’aria 10035816 10035817 www.klarstein.com...
- Page 3 Sehr geehrter Kunde, wir gratulieren Ihnen zum Erwerb Ihres Gerätes. Lesen Sie die folgenden Hinweise sorgfältig durch und befolgen Sie diese, um möglichen Schäden vorzubeugen. Für Schäden, die durch Missachtung der Hinweise und unsachgemäßen Gebrauch entstehen, übernehmen wir keine Haftung. Scannen Sie den folgenden QR-Code, um Zugriff auf die aktuellste Bedienungsanleitung und weitere Informationen rund um das Produkt zu erhalten.
- Page 4 SICHERHEITSHINWEISE • Prüfen Sie vor der Benutzung die Spannungsangabe auf dem Typenschild. Schließen Sie das Gerät nur an Steckdosen an, die der Spannung des Geräts entsprechen. • Halten Sie das Kabel fern von heißen Oberflächen und scharfkantigen Gegenständen. • Verlegen Sie das Kabel nicht unter einem Teppich und decken Sie es auch nicht mit anderen Gegenständen oder Stoffen ab.
- Page 5 • Während des Betriebs befeuchtet das Gerät die Umgebungsluft. Vermeiden Sie jedoch zu hohe Luftfeuchtigkeit. Wir empfehlen Ihnen eine Luftfeuchtigkeit zwischen 40-50 %. Zu hohe Luftfeuchtigkeit kann zu Schimmel oder gesundheitlichen Problemen führen. • Stellen Sie das Gerät nur auf Untergründe, die unempfindlich gegenüber Nässe und hoher Luftfeuchtigkeit sind.
- Page 6 GERÄTEÜBERSICHT Obere Abdeckung Horizontale Lüftungsschlitze Hinteres Gehäuse Fernbedienung Vorderes Gehäuse Hintere Abdeckung Gerätebasis Kabelaufwicklung Anzeigefenster Wassertank Vertikale Lüftungsschlitze Netzkabel Hinweis zur Benutzung des Wassertanks Prinzipiell können Sie Ihren Luftkühler jederzeit ohne Wasser im Tank nutzen. Er funktioniert dann wie ein ganz normaler Ventilator. Wasser im Tank wird nur für die Kühl-Funktion benötigt.
- Page 7 ZUBEHÖR Fernbedienung Eisbehälter Verwendung der Fernbedienung 1. Öffnen Sie das Batteriefach der Fernbedienung und legen Sie eine 3 V CR2032 Batterie ein. Drücken Sie zum Öffnen des Batteriefachs die Abdeckung in Pfeilrichtung (1) herunter und ziehen Sie das Batteriefach in Pfeilrichtung (2) heraus.
- Page 8 BEDIENFELD UND FERNBEDIENUNG Bedienfeld (Tasten) Wind- Kühl-/Luft- Windmodus/ Schwing- EIN/AUS geschwin - Timer befeuchtungs- WLAN funktion digkeit modus Fernbedienung (Tasten) EIN/AUS Schwingfunktion Bildschirm Aus Windgeschwindigkeit Timer Kühl-/Luftbefeuchtungsmodus Windmodus...
- Page 9 DISPLAYANZEIGEN EIN/AUS Natürlicher Windmodus Windgeschwindigkeit Kühl-/Luftbefeuchtungsmodus WLAN-Funktion Schwingfunktion Timer Negativ-Ionen-Funktion Schlaf-Windmodus...
- Page 10 INBETRIEBNAHME UND BEDIENUNG Vor der Verwendung • Entnehmen Sie das Gerät aus der Verpackung und entfernen Sie alle Verpackungsmaterialien. • Stellen Sie das Gerät auf eine stabile und ebene Oberfläche. • Stecken Sie den Netzstecker in die Steckdose. Das Gerät kann dann direkt verwendet werden und es ist keine Installation erforderlich.
- Page 11 Wenn die Funktion 20 Minuten lang aktiviert war, schaltet sich das Gerät automatisch aus und geht in den Standby-Modus über. Windmodus auswählen Drücken Sie nach dem Einschalten des Geräts zur Einstellung des gewünschten Modus mehrfach die Windmodus-Taste . Durch mehrfaches Drücken der Windmodus-Taste werden die Modi in der nachfolgenden Reihenfolge durchlaufen: Normaler Wind >...
- Page 12 Schlaf-Wind: Wenn der Schlaf-Windmodus aktiviert wird, läuft das Gerät zunächst mit der zuvor eingestellten Windgeschwindigkeit weiter. Nach 30 Minuten wird in Intervallen von 30 Minuten reduziert. Dieser Modus soll verhindern, dass Personen, die einschlafen, sich durch eine zu hohe Geschwindigkeitseinstellung des Geräts unwohl fühlen. a) Wenn der Schlaf-Windmodus bei hoher Geschwindigkeit aktiviert wurde, wechselt das Gerät nach 30 Minuten zur mittleren Geschwindigkeit.
- Page 13 • Bei der Verwendung der WLAN-Funktion, muss die WLAN-Anzeige (3) schnell blinken. Ein Router (muss mit externen Netzwerken verbunden werden können) und ein mobiles Endgerät (z. B. Smartphone) sind zur Verwendung der Klarstein-App erforderlich. Die Klarstein-App muss auf dem mobilen Endgerät, das ebenfalls mit dem WLAN-Netzwerk verbunden ist, installiert werden.
- Page 14 GERÄTESTEUERUNG PER SMARTPHONE Wenn Sie Ihr Klarstein-Gerät in Ihr heimisches WLAN einbinden, können Sie es ganz bequem über die dazugehörige Klarstein-App bedienen. Die App ermöglicht es Ihnen, nicht nur das Gerät über Ihr Smartphone fernzusteuern, sondern bietet Ihnen zudem Zugang zu Rezepten und weiterführenden Informationen.
- Page 15 Fehlerbehebung bei Verbindungsproblemen Wenn Ihr Klarstein-Gerät im WLAN nicht gefunden werden kann, überprüfen Sie Folgendes: • Ist das Gerät eingesteckt? • Ist die WLAN-Funktion des Smartphones aktiviert? • Ist die WLAN-Funktion des Klarstein-Gerätes aktiviert? (Befolgen Sie die Anweisungen in der App.) •...
- Page 16 WASSERTANK BEFÜLLEN Füllen Sie bei Verwendung der Kühl- und Luftbefeuchtungsfunktion Wasser in den Wassertank. Drehen Sie vor dem Befüllen die Kabelaufwicklung um 90 Grad. Ziehen Sie den Wassertank zur Hälfte heraus. Schütten Sie das Wasser langsam in den Wassertank. Schieben Sie den Wassertank nach dem Befüllen wieder in das Gerät hinein.
- Page 17 REINIGUNG UND PFLEGE Reinigung • Schalten Sie das Gerät vor der Reinigung aus und ziehen Sie den Netzstecker aus der Steckdose. • Verwenden Sie zur Reinigung des Geräts keine Chemikalien, Benzin, Verdünnungsmittel oder andere Substanzen, durch welche die Geräteoberfläche beschädigt werden könnte. •...
- Page 18 HINWEISE ZUR ENTSORGUNG Wenn es in Ihrem Land eine gesetzliche Regelung zur Entsorgung von elektrischen und elektronischen Geräten gibt, weist dieses Symbol auf dem Produkt oder auf der Verpackung darauf hin, dass dieses Produkt nicht im Hausmüll entsorgt werden darf. Stattdessen muss es zu einer Sammelstelle für das Recycling von elektrischen und elektronischen Geräten gebracht werden.
- Page 19 Dear Customer, Congratulations on purchasing this device. Please read the following instructions carefully and follow them to prevent possible damages. We assume no liability for damage caused by disregard of the instructions and improper use. Scan the QR code to get access to the latest user manual and more product information.
- Page 20 SAFETY INSTRUCTIONS • Check the voltage on the rating plate before use. Only connect the appliance to sockets which correspond to the voltage of the appliance. • Keep the appliance and cable away from sources of heat, sharp objects or anything that may cause damage.
- Page 21 • When in operation, evaporative coolers moisturize the ambient air. Over- humidification of residential rooms should be avoided. Recommendation: 40-50 % relative humidity. Excessive humidity of the air can damage the home and cause health problems. • The appliance may only be set up on water- and moisture-proof flooring materials (spilling some drops of water is unavoidable when the content of the tank is changed).
- Page 22 DESCRIPTION Top cover Horizontal blade Rear case Remote control Front case Rear cover Base Winding frame Display window Water tank Vertical blade Power cord Note on using the water tank In principle, you can use your air cooler at any time without water in the tank. It will then work like a normal fan.
- Page 23 ACCESSORIES Remote control Ice box Use of the remote control 1. Open battery cover in the rear of remote control and install a 3 V CR2032 battery for use. To open the battery compartment, press down the cover in the direction of the arrow (1) and pull out the battery compartment in the direction of the arrow (2).
- Page 24 CONTROL PANEL AND REMOTE CONTROL Control panel (buttons) Cooling/ POWER Wind mode/ Swing Wind speed Timer humidification (ON/OFF) WIFI function mode Remote control (buttons) POWER (ON/OFF) Swing function Screen off Wind speed Timer Cooling/humidification mode Wind mode...
- Page 25 DISPLAY INDICATORS POWER Natural wind mode Wind speed Cooling/humidification mode WIFI function Swing function Timer Negative ion function Sleep wind mode...
- Page 26 COMMISSIONING AND OPERATION Before use • Remove the appliance from its packaging and remove all packaging materials. • Place the appliance on a stable and level surface. • Insert the mains plug into the socket. The appliance can then be used directly and no installation is required.
- Page 27 Selecting wind mode After switching on the appliance, press the wind mode button several times to set the desired mode. Pressing the wind mode button several times cycles through the modes in the following order: Normal wind > Natural wind > Sleep wind > Normal wind. The corresponding indicator lights up.
- Page 28 Sleep wind: When the sleep wind mode is activated, the appliance initially continues to run at the previously set wind speed. After 30 minutes, it is reduced at 30-minute intervals. This mode is intended to prevent people who fall asleep from feeling uncomfortable due to the appliance‘s speed setting being too high.
- Page 29 (must be able to connect to external networks) and a mobile device (e.g. smartphone) are required to use the Klarstein app. The Klarstein app must be installed on the mobile end device that is also connected to the WIFI network.
- Page 30 Klarstein device is to be connected to. 3. Open the Klarstein app. 4. Sign in to your account. If you do not have an account, sign up in the Klarstein app. 5. Follow the instructions from the app. App Download Use the scan function of your smartphone to scan the QR code and save the app on your smartphone.
- Page 31 If your Klarstein device cannot be found in the WLAN, check the following: • Is the device plugged in? • Is the WiFi feature of my phone enabled? • Is the WiFi function of the Klarstein device activated? (Follow the instructions in the app) • Has the WLAN password been entered correctly? •...
- Page 32 FILLING THE WATER TANK Fill water into the water tank when using the cooling and humidifying function. Before filling, rotate the winding frame 90° respectively. Pull out the water tank halfway. Pour the water slowly into the water tank. After filling, push the water tank back into the appliance.
- Page 33 CLEANING AND CARE Cleaning • Before cleaning the appliance, switch it off and disconnect the mains plug from the socket. • Do not use chemicals, petrol, thinners or other substances that could damage the surface of the appliance to clean it. •...
- Page 34 DISPOSAL CONSIDERATIONS If there is a legal regulation for the disposal of electrical and electronic devices in your country, this symbol on the product or on the packaging indicates that this product must not be disposed of with household waste. Instead, it must be taken to a collection point for the recycling of electrical and electronic equipment.
- Page 35 Estimado cliente: Le felicitamos por la adquisición de este producto. Lea atentamente las siguientes instrucciones y sígalas para evitar posibles daños. No asumimos ninguna responsabilidad por los daños causados por el incumplimiento de las instrucciones y el uso inadecuado. Escanee el siguiente código QR para obtener acceso a la última guía del usuario y más información sobre el producto.
- Page 36 INDICACIONES DE SEGURIDAD • Antes de utilizar el aparato, compruebe la tensión en la placa técnica del mismo. Conecte el aparato a tomas de corriente que se adecuen a su tensión. • Mantenga el cable lejos de las superficies calientes y de los objetos afilados. •...
- Page 37 • Cuando el aparato está en marcha, humedece el aire ambiente. Evite que la humedad del aire sea demasiado elevada. Recomendamos mantener una humedad del aire entre 40-50 %. Una humedad del aire demasiado elevada puede provocar la aparición de moho y problemas de salud. •...
- Page 38 VISTA GENERAL DEL APARATO Tapa superior Lámina de ventilación horizontal Carcasa posterior Mando a distancia Carcasa frontal Tapa posterior Base Recogedor de cable Ventana de visualización Depósito de agua Lámina de ventilación vertical Cable de alimentación Indicaciones sobre el uso del depósito de agua: Normalmente, puede utilizar el enfriador de aire incluso si el depósito de agua está...
- Page 39 ACCESORIOS Mando a distancia Recipiente para hielo Uso del mando a distancia 1. Abra el compartimento de pilas e introduzca una pila CR2032. Para abrir el compartimento de pilas, presione la tapa (1) y extráigala en dirección de la fecha (2). 2.
- Page 40 PANEL DE CONTROL Y MANDO A DISTANCIA Panel de control (botones) Refrige- ración/ ENCENDER/ Velocidad del Modo de Función Temporizador Humidi- APAGAR ventilador aire/wifi «Oscilación» ficación Mando a distancia (botones) Encender/Apagar Función «Oscilación» Apagar pantalla Velocidad del ventilador Temporizador Modo Refrigeración/ Modo de aire Humidificación...
- Page 41 INDICADORES EN LA PANTALLA Encender/Apagar Modo «Viento natural» Velocidad del ventilador Modo «Refrigeración/ Humidificación del aire» Wifi Función «Oscilación» Temporizador Función «Iones negativos» Modo «Nocturno»...
- Page 42 PUESTA EN FUNCIONAMIENTO Antes del primer uso • Retire el aparato del embalaje y extraiga cualquier envoltorio. • Coloque el aparato en una superficie estable y plana. • Introduzca el cable de alimentación en la toma de corriente. Puede empezar a utilizar el aparato directamente, ya que no requiere ninguna instalación.
- Page 43 Si la función estuvo activa durante 20 minutos, el aparato se apaga automáticamente y pasa al modo de reposo. Seleccionar un modo de aire Después de encender el aparato, pulse varias veces el botón «Modo de aire» para configurar el modo deseado. Pulse varias veces el botón «Modo de Aire» para cambiar el modo en el siguiente orden: Viento normal >...
- Page 44 Modo «Nocturno» Cuando se activa el modo «Nocturno», el aparato funciona primero a la velocidad de viento previamente ajustada. Luego, reduce la velocidad cada 30 minutos. Este modo está diseñado para evitar que las personas que se quedan dormidas se sientan incómodas debido a la velocidad demasiado alta del aparato.
- Page 45 • Al utilizar la función wifi, el indicador wifi (3) debe parpadear rápidamente. Para utilizar la aplicación de Klarstein, se necesita un rúter (debe poder conectarse a redes externas) y un dispositivo móvil (por ejemplo, un teléfono inteligente). La aplicación de Klarstein debe instalarse en un dispositivo móvil conectado a la...
- Page 46 CONTROLAR EL APARATO A TRAVÉS DE UN SMARTPHONE Si conecta su aparato Klarstein a la red wifi de su hogar, podrá controlarlo cómodamente a través de la aplicación «Klarstein». La aplicación no solo le permite manejar el aparato desde la distancia, sino acceder a las recetas y otra información.
- Page 47 Resolución de problemas de conexión Si en la lista de la red wifi no encuentra su aparato Klarstein, compruebe lo siguiente: • ¿Está el aparato enchufado? • ¿Está activada la función wifi en su smartphone? • ¿Está activada la función wifi en su aparato Klarstein? (Siga las indicaciones de la aplicación).
- Page 48 LLENAR EL DEPÓSITO DE AGUA Llene el depósito de agua cuando utilice la función de refrigeración y humidificación de aire. Antes de rellenar el depósito, gire el recogedor de cable en 90°. Saque el depósito de agua hasta la mitad. Vierta el agua lentamente en el depósito de agua. Tras el llenado, vuelva a introducir el depósito de agua en el aparato.
- Page 49 LIMPIEZA Y CUIDADO Limpieza • Apague el aparato y desconecte el enchufe de la toma de corriente antes de limpiarlo. • Para limpiar el aparato, no utilice productos químicos, gasolina, diluyente u otras sustancias que puedan dañar la superficie del mismo. •...
- Page 50 RETIRADA DEL APARATO Si en su país existe una disposición legal relativa a la eliminación de aparatos eléctricos y electrónicos, este símbolo estampado en el producto o en el embalaje advierte que no debe eliminarse como residuo doméstico. En lugar de ello, debe depositarse en un punto de recogida de reciclaje de aparatos eléctricos y electrónicos.
- Page 51 Chère cliente, cher client, Toutes nos félicitations pour l’acquisition de ce nouvel appareil. Veuillez lire attentivement et respecter les instructions de ce mode d’emploi afin d’éviter d’éventuels dommages. Nous ne saurions être tenus pour responsables des dommages dus au non-respect des consignes et à...
- Page 52 CONSIGNES DE SÉCURITÉ • Vérifiez les informations de tension sur la plaque signalétique avant utilisation. Ne connectez l‘appareil qu‘à des prises qui correspondent à la tension de l‘appareil. • Éloignez le câble des surfaces chaudes et des objets tranchants. • Ne faites pas passer le cordon sous un tapis et ne le couvrez pas avec d‘autres objets ou tissus.
- Page 53 • L‘appareil humidifie l‘air ambiant. Cependant, évitez une humidité excessive. Nous recommandons une humidité comprise entre 40 et 50 %. Une humidité excessive peut entraîner des moisissures ou des problèmes de santé. • Placez l‘appareil uniquement sur des surfaces insensibles à l‘eau et à une humidité...
- Page 54 APERÇU DE L‘APPAREIL Cache supérieur Fentes de ventilation horizontales Boîtier arrière Télécommande Boîtier avant Cache arrière Base de l'appareil Enroulement du câble Fenêtre d'affichage Réservoir d'eau Fentes de ventilation verticales Câble d'alimentation Remarques sur l‘utilisation du réservoir d‘eau En principe, vous pouvez utiliser votre rafraîchisseur d‘air à tout moment sans eau dans le réservoir.
- Page 55 ACCESSOIRES Télécommande Récipient à glace Utilisation de la télécommande 1. Ouvrez le compartiment à piles de la télécommande et insérez une pile 3 V CR2032. Pour ouvrir le compartiment à pile, appuyez sur le couvercle dans le sens de la flèche (1) et tirez le compartiment à...
- Page 56 PANNEAU DE COMMANDE ET TÉLÉCOMMANDE Panneau de commande (touches) Rafraîchis- Mode de sement / MARCHE/ Vitesse de Fonction ventilation / Minuterie Humidi- ARRÊT ventilation oscillation Wifi fication Télécommande (touches) Marche/arrêt Fonction oscillation Ecran éteint Vitesse de ventilation Minuterie Mode rafraîchissement / Mode ventilation humidification...
- Page 57 VOYANTS DE L‘AFFICHAGE Marche/arrêt Mode vent naturel Vitesse de ventilation Mode rafraîchissement / humidification Fonction Wifi Fonction oscillation Minuterie Fonction ions négatifs Mode de ventilation nuit...
- Page 58 MISE EN MARCHE ET UTILISATION Avant l‘utilisation • Sortez l‘appareil de son emballage et retirez tous les matériaux d‘emballage. • Placez l‘appareil sur une surface stable et plane. • Insérez la fiche d‘alimentation dans la prise. L‘appareil peut alors être utilisé directement et aucune installation n‘est requise.
- Page 59 Si la fonction a été activée pendant 20 minutes, l‘appareil s‘éteint automatiquement et passe en mode veille. Choix du mode de ventilation Après avoir allumé l‘appareil, appuyez plusieurs fois sur la touche de mode vent pour régler le mode souhaité. Appuyez plusieurs fois sur le bouton de mode vent pour choisir l‘un des modes dans l‘ordre suivant : Vent normal : En mode vent normal, l‘appareil fonctionne sans aucun changement au niveau de...
- Page 60 Vent de nuit : Lorsque le mode vent de nuit est activé, l‘appareil continue initialement à fonctionner à la vitesse du vent définie précédemment. Après 30 minutes, il est réduit par intervalles de 30 minutes. Dès que la minuterie a expiré, l‘appareil passe automatiquement en mode veille.
- Page 61 Un routeur (il doit être possible de se connecter à des réseaux externes) et un appareil mobile (par exemple un smartphone) sont nécessaires pour utiliser l‘application Klarstein. L‘application Klarstein doit être installée sur l‘appareil mobile également connecté au réseau WiFi.
- Page 62 CONTRÔLE DE L‘APPAREIL PAR SMARTPHONE Si vous intégrez votre appareil Klarstein dans votre WiFi domestique, vous pouvez le contrôler très facilement à l‘aide de l‘application Klarstein associée. L‘application vous permet non seulement de contrôler l‘appareil à distance depuis votre smartphone, mais vous donne également accès à...
- Page 63 Résolution des problèmes de connexion Si votre appareil Klarstein est introuvable sur le Wifi, vérifiez les points suivants : • L‘appareil est-il branché ? • Le Wifi est-il activé sur votre smartphone ? • Le Wifi de l‘appareil Klarstein est-il activé ? (Suivez les instructions de l‘application.) •...
- Page 64 REMPLISSAGE DE RÉSERVOIR D‘EAU Pour utiliser les fonctions de rafraîchissement et d‘humidification, remplissez le réservoir d‘eau. Avant le remplissage, tournez le rembobinage du câble de 90°. Sortez le réservoir d‘eau à moitié. Versez lentement l‘eau dans le réservoir. Après le remplissage, repoussez le réservoir dans l‘appareil.
- Page 65 NETTOYAGE ET ENTRETIEN Nettoyage • Avant de nettoyer l‘appareil, éteignez-le et débranchez la fiche de la prise. • N‘utilisez pas de produits chimiques, de benzène, de diluants ou d‘autres substances pour nettoyer l‘appareil qui pourraient endommager la surface de l‘appareil. •...
- Page 66 CONSEILS POUR LE RECYCLAGE S‘il existe une réglementation pour l‘élimination ou le recyclage des appareils électriques et électroniques dans votre pays, ce symbole sur le produit ou sur l‘emballage indique que cet appareil ne doit pas être jeté avec les ordures ménagères.
- Page 67 Gentile cliente, La ringraziamo per aver acquistato il dispositivo. La preghiamo di leggere attentamente le seguenti istruzioni per l’uso e di seguirle per evitare possibili danni. Non ci assumiamo alcuna responsabilità per danni scaturiti da una mancata osservazione delle avvertenze di sicurezza e da un uso improprio del dispositivo.
- Page 68 AVVERTENZE DI SICUREZZA • Prima dell’uso controllare la tensione sulla targhetta del dispositivo. Collegare il dispositivo solo a una presa che corrisponda alla tensione indicata. • Tenere lontano il cavo d’alimentazione da superfici calde e da oggetti appuntiti. • Non sistemare il cavo d’alimentazione sotto un tappeto e non coprirlo con altri oggetti o tessuti.
- Page 69 • Durante l’uso il dispositivo umidifica l’ambiente. Tuttavia bisogna evitare un’umidità troppo elevata. Si consiglia un’umidità compresa tra il 40-50%. Un’eccessiva umidità può causare muffa o problemi di salute. • Collocare il dispositivo solo su superfici resistenti all’umidità. Durante l’installazione e la rimozione del serbatoio potrebbero cadere alcune gocce.
- Page 70 DESCRIZIONE DEL PRODOTTO Coperchio superiore Feritoie di ventilazione orizzontali Scocca posteriore Telecomando Scocca anteriore Copertura posteriore Base del dispositivo Avvolgicavo Display Serbatoio Feritoie di ventilazione verticali Cavo d’alimentazione Avvertenza sull’utilizzo del serbatoio Come linea di principio è possibile usare il raffrescatore evaporativo senz’acqua nel serbatoio in qualsiasi momento.
- Page 71 ACCESSORI Telecomando Portaghiaccio Come utilizzare il telecomando 1. Aprire il vano pile del telecomando e inserirvi una pila CR2032 da 3 V. Per aprire il vano premere sul coperchio in direzione della freccia (1) ed estrarre il vano in direzione della freccia (2).
- Page 72 PANNELLO DI CONTROLLO E TELECOMANDO Pannello di controllo (tasti) Raffredda- Modalità mento/ Velocità ON/OFF ventilazione/ Timer Oscillazione Umidi- ventilazione WIFI ficazione Telecomando (tasti) ON/OFF Oscillazione Display off Velocità di ventilazione Timer Modalità di raffreddamento/ Modalità di ventilazione umidificazione...
- Page 73 VISUALIZZAZIONI A DISPLAY ON/OFF Modalità di ventilazione naturale Velocità di ventilazione Modalità di raffreddamento/ umidificazione Funzione WiFi Oscillazione Timer Funzione ioni negativi Modalità di ventilazione sleep...
- Page 74 MESSA IN FUNZIONE E UTILIZZO Prima dell’utilizzo • Estrarre il dispositivo dalla confezione e rimuovere tutti i materiali d’imballaggio. • Posizionare il dispositivo su una superficie piana e stabile. • Inserire la spina nella presa elettrica. Il dispositivo può essere utilizzato direttamente e non è...
- Page 75 Se la funzione è stata attiva per 20 minuti, il dispositivo si spegne automaticamente ed entra in modalità standby. Selezionare la modalità di ventilazione Per impostare la modalità desiderata premere più volte il tasto di ventilazione dopo aver acceso il dispositivo. Premendo più volte questo tasto vengono visualizzate le modalità...
- Page 76 Ventilazione sleep: Quando si attiva la modalità di ventilazione sleep, il dispositivo funziona inizialmente alla velocità precedentemente impostata. Dopo 30 minuti si riduce in intervalli di 30 minuti. Questa modalità impedisce alle persone che si addormentano di non sentirsi male se la ventilazione è troppo elevata. a) Se la modalità...
- Page 77 • Quando si utilizza la funzione WiFi, la spia WiFi (3) lampeggia velocemente. Per poter usare l’app Klarstein sono necessari un router (da collegare a reti esterne) e un dispositivo mobile esterno (p. es. smartphone). L’app Klarstein deve essere...
- Page 78 GESTIONE DEL DISPOSITIVO TRAMITE SMARTPHONE Se si collega il dispositivo Klarstein al proprio WiFi domestico, lo si può comodamente gestire tramite l’app Klarstein, che consente di telecomandare il dispositivo tramite il proprio cellulare e offre l’accesso a ricettari e altre informazioni.
- Page 79 • È attivata la funzione WiFi del dispositivo Klarstein? (Seguire le istruzioni nell’app.) • La password del WiFi è stata digitata correttamente? • Il router, il dispositivo Klarstein e il cellulare sono vicini durante il tentativo di accoppiamento? (L’ideale sarebbe a non più di 5 m di distanza l’uno dall’altro.) •...
- Page 80 RIEMPIMENTO DEL SERBATOIO Durante la funzione di raffreddamento/umidificazione riempire il serbatoio d’acqua. Girare l’avvolgicavo di 90 gradi prima di riempire il serbatoio. Estrarlo fino a metà e versarvi dentro l’acqua lentamente. Dopodiché spingerlo nuovamente nel dispositivo. Rimettere l’avvolgicavo nella posizione originaria. Il dispositivo di sicurezza Il dispositivo di sicurezza Estrarre il serbatoio per versarvi...
- Page 81 PULIZIA E MANUTENZIONE Pulizia • Spegnere il dispositivo prima della pulizia e togliere la spina dalla presa elettrica. • Non usare sostanze chimiche, benzina, diluenti o altre sostanze che potrebbero danneggiare la superficie del dispositivo. • Rimuovere la polvere con un panno morbido. Utilizzare l’acqua (sotto i 50 °C) e un detergente neutro per togliere le macchie ostinate.
- Page 82 SMALTIMENTO Se nel proprio paese si applicano le regolamentazioni inerenti lo smaltimento di dispositivi elettrici ed elettronici, questo simbolo sul prodotto o sulla confezione segnala che questi prodotti non possono essere smaltiti con i rifiuti normali e devono essere portati a un punto di raccolta di dispositivi elettrici ed elettronici.
Need help?
Do you have a question about the Skytower Grand Smart and is the answer not in the manual?
Questions and answers