Table of Contents
Advertisement
Available languages
Available languages
Quick Links
Advertisement
Chapters
Table of Contents

Related Manuals for Klarstein 10028189


Summary of Contents for Klarstein 10028189
- Page 1 Zitruspresse orange Mobiles Klimagerät 10008166 10008167 10008168 10028189...
-
Page 2: Table Of Contents
Sehr geehrter Kunde, wir gratulieren Ihnen zum Erwerb Ihres Klarstein-Gerätes. Lesen Sie die folgenden Anschluss- und Anwendungshinweise sorgfältig durch und befolgen Sie diese, um möglichen technischen Schäden vorzubeugen. Für Schäden, die durch Missachtung der Sicherheitshinweise und unsachgemäßen Gebrauch entstehen, übernehmen wir keine Haftung. -
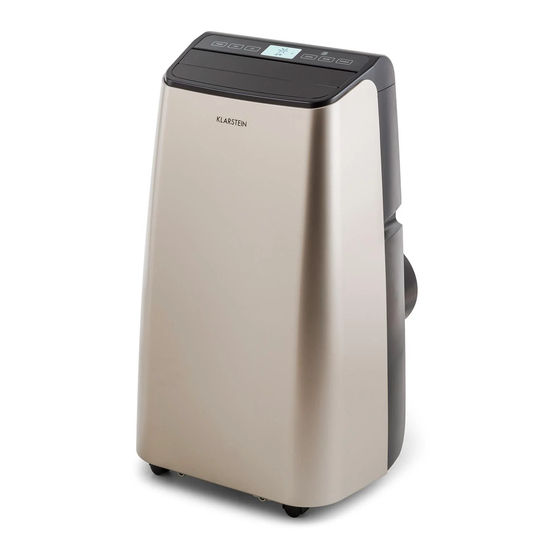
Page 3: Geräteübersicht Und Funktionstasten
sich an den Hersteller oder Fachleute wegen einer Reparatur, um Gefahren bei einer Fehlfunktion abzuwenden. • Ziehen Sie nicht den Stecker, um das Gerät auszuschalten. • Stellen Sie keine Tassen oder andere Gegenstände auf das Gehäuse, um Verschütten von Wasser oder anderen Flüssigkeiten auf dem Gerät zu verhindern. - Page 4 Fernbedienung Griff Durchgehender Ablauf Luftzufuhr Netzkabel (1,80 m) Ablauf CON-Schutzfilter Abluft Kabelaufwicklung EVA-Filter Rückseite Abluftschlauch Dichtungsrahmen Bedienelemente Fernbedingung: Links: nur mit Kühlfunktion Rechts: mit Kühl- und Heizfunktion...
-
Page 5: Installation
Installation Vorsicht: Stellen Sie während des Umstellens sicher, dass die Klimaanlage sich in aufrechter Lage befindet. Sie muss auf einer geraden Oberfläche aufgestellt werden. Stellen Sie die Klimaanlage nicht in einem Bad oder in feuchten Umgebungen auf. Befestigung des Dichtungsrahmens in einem Schiebefenster Öffnen Sie das Fenster halb und bringen Sie den Dichtungsrahmen am Fenster an.Der Rahmen kann senkrecht oder waagerecht angebracht werden. -
Page 6: Inbetriebnahme
Vorsicht: Die Länge des Abluftschlauchs sollte 28-150 cm betragen. Diese Länge basiert auf den Spezifikationen von Klimaanlagen. Verwenden Sie keine Verlängerungsschläuche. Wechseln Sie den Schlauch nicht gegen einen anderen aus. Dies kann zu einer Fehlfunktion führen. Der Abzug muss frei sein. Sonst kann es zu Überhitzungen führen. Inbetriebnahme Steuerung über das Display am Gerät Empfangsanzeige der Fernbedienung... - Page 7 Stärke des Ventilators Drücken Sie im Kühl- und Belüftungsmodus diese Taste, um die Stärke des Ventilators einzustellen. Im Heizmodus drücken Sie diesen Knopf, um niedrige, mittlere oder hohe Ventilatorstärke einzustellen. Je nach Hitzebedingungen könnte der Ventilator nicht nach auf der einstellten Stufe laufen. Im Entfeuchtungsmodus hat die Taste keine Funktion und der Ventilator wird standardmäßig auf die niedrigste Stufe gestellt.
-
Page 8: Reinigung Und Pflege
Reinigung und Pflege Wassertank entleeren Manuelle Entleerung Wenn das Gerät sich ausschaltet, weil der Wassertank voll ist, schalten Sie es aus und ziehen Sie den Netzstecker. Stellen Sie unter den seitlichen Ablauf einen Eimer. Schrauben Sie die Verschlusskappe für den Ablauf auf und ziehen Sie den Stopfen. - Page 9 Den Filter reinigen Reinigen Sie den Filter, wenn er mit Staub verunreinigt ist und die Leistung des Geräts sich dadurch verschlechtert. In der Regel ist das alle zwei Wochen. Den oberen Filterrahmen reinigen Greifen Sie den Filterrahmen des EVA-Filters mit den Händen.
-
Page 10: Fehlersuche Und Fehlerbehebung
Fehlersuche und Fehlerbehebung Problem Grund Behebung Die Klimaanlage funktioniert Es gibt keinen Strom. Schalten Sie das Gerät ein, nicht. nachdem Sie es mit dem Stromnetz verbunden haben. Die Überlaufanzeige zeigt "FL" Entleeren Sie den Wassertank. Die Umgebungstemperatur ist zu Verwenden Sie das Gerät bei niedrig oder hoch. -
Page 11: Entsorgung
Schutzfunktionen Frostschutz Wenn die Temperatur im Abluftschlauch während des Kühlens, der Entfeuchtung oder im Energiesparmodus zu niedrig ist, tritt das Gerät automatisch in den Schutzmodus. Wenn die Temperatur im Abluftschlauch wieder über eine bestimmte Temperatur steigt, kehrt das Gerät zum Normalbetrieb zurück. -
Page 12: Technical Data
Dear Customer, Dear Customer, Congratulations on purchasing this Klarstein equipment. Please read this manual carefully and take care of the following hints on installation and use to avoid technical damages. Any failure caused by ignoring the mentioned items and cautions mentioned in the operation and installation instructions are not covered by our warranty and any liability. -
Page 13: Product Description
• Do not place cups or other objects on the body to prevent water or other liquids from spilling into the air conditioning. • Do not use insecticide sprays or other flammable substances near the air conditioning. • Do not wipe or wash the air conditioning with chemical solvents such as gasoline and alcohol. When you need to clean the air conditioning, you must disconnect the power supply, and clean it with a half-wet soft cloth. - Page 14 Remote Control Handle Continuous drainage hole Air inlet grill Power cord (1,80 m) Water outlet CON filter screen Air vent Power cord hook EVA-filter Rear housing Exhaust pipe assembly Window sealing plate assembly Remote controls Remote control: Left: cooling function only Right: cooling and heating function...
-
Page 15: Installation
Installation Caution: In the moving process, ensure that the air conditioning is in the upright position and the air conditioning should be placed on a flat surface. Do not install and use the air conditioning in the bathroom or other humid environments. Install the window sealing plate assembly Half open the window, and mount the window sealing plate assembly to the window (as shown in Figure 2 and Figure 3);... -
Page 16: Use And Operation
Caution: The length of the exhaust hose shall be 280~1,500mm, and this length is based on the specifications of the air conditioning. Do not use extension tubes or replace it with other different hoses, or this may cause a malfunction. Exhaust must be unobstructed; otherwise it may cause overheating. - Page 17 Wind speed selection key In cooling and air supply mode, press the key to select high, medium or low wind speed operation. In heating mode, press the key to select high, medium and low wind speed operation. But limited by anti-cold conditions, under certain conditions, it may not run according to the set wind speed.
-
Page 18: Cleaning And Care
Cleaning and Care Drainage Instructions Manual drainage When the machine stops after the water is full, turn off the machine power and unplug the power plug.Stellen Sie den Wassertank unter den seitlichen Ablauf. Place the water container below the side water outlet behind the body. - Page 19 Clean the filter screen If the filter screen is clogged with dust, and the effectiveness of the air conditioning is reduced, be sure to clean the filter screen once every two weeks. Clean the upper filter screen frame Clasp the wedging block of the EVA filter screen frame with hands.
-
Page 20: Troubleshooting
Troubleshooting Problems Reasons Solutions The air conditioning does not There is no electricity. Turn it on after connecting it to a work. socket with electricity. The overflow indicator displays Discharge the water inside. „FL“. in at the temperature of 7-35 ℃ The ambient temperature is too Recommend to use the machine (44-95 ℉). -
Page 21: Disposal
Protection Functions Frost Protection Function: In cooling, dehumidification or economic power saving mode, if the temperature of the exhaust pipe is too low, the machine will automatically enter protection status; if the temperature of the exhaust pipe rises to a certain temperature, it can automatically revert to normal operation. Overflow Protection Function: When water in the water pan exceeds the warning level, the machine will automatically sound an alarm, and the LDC temperature display area will show „FL“. -
Page 22: Dati Tecnici
Installazione 25 Messa in funzione 26 Pulizia e manutenzione 28 Ricerca e risoluzione dei problemi 30 Smaltimento 31 Dichiarazione di conformità 31 Dati tecnici Numero articolo 10028189 Alimentazione 220-250 V 4,5 A ~50Hz Potenza 1050 W Dimensioni 350x430x730 mm Potenza refrigerante... -
Page 23: Descrizione Del Prodotto E Tasti Funzione
• Non poggiare tazze o oggetti simili sul dispositivo, per evitare che acqua o altri liquidi si rovescino sopra. • Non utilizzare spray per insetti o sostanze infiammabili nelle vicinanze del climatizzatore. • Non pulire il dispositivo con sostanze infiammabili come benzina e alcool. Staccare sempre il cavo di rete prima di pulire il dispositivo e utilizzare un panno morbido e umido. - Page 24 Telecomando Impugnatura Foro per il drenaggio Fessure di aereazione Cavo di rete (1,80 m) Scarico dell’acqua Filtro protezione condensa Uscita di scarico aria Avvolgi cavo Filtro dell’evaporatore Pannello posteriore Tubo di scarico dell’aria Piastra sigillante per finestra Tasti funzione Telecomando: Sinistra: per dispositivi con funzione di raffreddamento Destra: per dispositivi con funzione di...
-
Page 25: Installazione
Installazione Attenzione: Spostare il climatizzatore sempre in posizione verticale. Il climatizzatore deve essere collocato su una superficie piana. Non collocare il climatizzatore in bagno o in ambienti umidi. Fissare la piastra sigillante alla finestra scorrevole Aprire la finestra a metà e fissare la piastra sigillante verticalmente oppure orizzontalmente. Regolare la piastra in base alla grandezza della finestra, allineando e fissando le estremità... -
Page 26: Messa In Funzione
Attenzione: La lunghezza del tubo di scarico dell’aria deve essere compresa tra i 28 e i 150 cm. Questa lunghezza si basa sulle specifiche dei climatizzatori. Non utilizzare prolunghe. Non adoperare un tubo diverso, poiché potrebbero verificarsi dei malfunzionamenti. Lo scarico non deve essere ostruito per evitare il pericolo di surriscaldamento. - Page 27 FAN (Potenza del sistema di ventilazione) In modalità di raffreddamento,di ventilazione e di riscaldamento, premere questo tasto per impostare la potenza del sistema di ventilazione (bassa, media, alta). A seconda della temperatura ambiente, il ventilatore potrebbe funzionare nella potenza impostata. In modalità...
-
Page 28: Pulizia E Manutenzione
Pulizia e manutenzione Istruzioni per svuotare il serbatoio dell’acqua Manualmente Se il dispositivo si arresta, poiché il serbatoio è pieno, spegnerlo e staccare la spina. Riporre un secchio sotto lo scarico laterale. Rimuovere la calotta dello scarico dell’acqua ed estrarre il tappo. L’acqua defluisce automaticamente nel secchio. - Page 29 Pulizia del filtro Effettuare la pulizia del filtro ogni due settimane, poiché la polvere influisce negativamente sulle prestazioni del dispositivo. Pulire il telaio superiore Afferrare il telaio del filtro dell’evaporatore e tirarlo verso il basso. Svitare le 4 viti che fissano il filtro. Mettere il filtro in acqua calda (circa 40 °...
-
Page 30: Ricerca E Risoluzione Dei Problemi
Ricerca e risoluzione dei problemi Problema Causa possibile Soluzione Il climatizzatore non funziona. Non c’è corrente elettrica. Accendere il dispositivo solo dopo averlo collegato alla corrente elettrica. Si accende la spia “FL” del Il serbatoio è pieno, svuotarlo. serbatoio. La temperatura ambiente è Utilizzare il dispositivo ad una troppo bassa o troppo alta. -
Page 31: Smaltimento
Funzioni di protezione Funzione antigelo Se in modalità raffreddamento, deumidificazione o di risparmio energetico la temperatura del tubo di scarico è troppo bassa, il dispositivo passa automaticamente in modalità antigelo. Quando la temperatura nel tubo di scarico dell’aria sale nuovamente, il dispositivo torna a funzionare normalmente. -
Page 32: Données Techniques
Chère cliente, cher client, Toutes nos félicitations pour l’acquisition de ce nouvel appareil Klarstein. Veuillez lire attentivement les instructions de branchement et d’utilisation afin d’éviter d’éventuels dommages techniques. Le fabricant ne saurait être tenu pour responsable des dommages dus au non-respect des consignes de sécurité... -
Page 33: Aperçu De L'appareil Et Touches De Fonction
• Ne pas poser de tasses ou autres objets similaires sur l‘appareil afin d’éviter que des liquides ne se renversent dessus. • Ne pas utiliser de sprays insecticides ou de produits inflammables à proximité du climatiseur. • Ne pas nettoyer le climatiseur à l’aide de produits chimiques dissolvants tels que l’essence ou l’alcool. - Page 34 Télécommande Poignée Orifice de drainage continu Entrée d’air Câble d’alimentation (1,80 m) Évacuation Filtre condensateur Sortie d’air Enrouleur pour câble d’alimentation Filtre évaporateur Face arrière Conduit d’évacuation de l’air Cadre d’étanchéité Touches de fonction Télécommande : À gauche : seulement climatiseur À...
-
Page 35: Installation
Installation Attention : Lorsque l‘appareil est déplacé, s’assurer qu’il est en position verticale. Installer le climatiseur sur une surface plane. Ne pas installer l‘appareil dans une salle de bain ou dans un environnement humide. Installation du cadre d’étanchéité dans une fenêtre coulissante Ouvrir la fenêtre de moitié... -
Page 36: Mise En Route
Remarque : La longueur du conduit d’évacuation d’air doit être de 28 à 150 cm. Cette longueur est impartie conformément aux spécificités du climatiseur. Ne pas utiliser de conduits de rallonge. Ne pas utiliser un autre conduit que celui fourni, cela peut entraîner un dysfonctionnement. - Page 37 FAN (puissance du ventilateur) Appuyer sur cette touche en mode climatisation, ventilation ou chauffage pour régler la vitesse du ventilateur sur élevée, moyenne ou faible. En mode chauffage, il est possible que le ventilateur n’atteigne pas la vitesse réglée en fonction des conditions de température.
-
Page 38: Nettoyage Et Entretien
Nettoyage et entretien Vider le réservoir d’eau Vidange manuelle Si l‘appareil s’arrête, car le réservoir d’eau est plein, l’éteindre et le débrancher. Placer un récipient sous la sortie d’eau sur le côté de l‘appareil. Dévisser le bouchon et retirer le capuchon de la sortie d’eau. L’eau s’évacue dans le récipient. - Page 39 Nettoyage du filtre Nettoyer le filtre s’il est bouché par la poussière : ceci peut gêner le bon fonctionnement de l‘appareil. Nettoyer le filtre deux fois par mois environ. Nettoyage du cadre de filtre supérieur Attraper le cadre du filtre évaporateur avec les mains. Tirer vers le bas.
-
Page 40: Résolution Des Problèmes
Résolution des problèmes Problème Causes possibles Solutions Le climatiseur ne fonctionne L’appareil n’est pas alimenté en Allumer l'appareil une fois qu’il pas. courant électrique. est branché. L’écran affiche « FL ». Vider le réservoir d’eau. La température ambiante est Utiliser l'appareil dans une pièce trop basse ou trop élevée. -
Page 41: Informations Sur Le Recyclage
Fonctions de sécurité Sécurité antigel Si la température dans le conduit d’évacuation d’air est trop faible pendant les modes climatisations, déshumidification ou économie d’énergie, l‘appareil passe automatiquement en sécurité antigel. Lorsque la température dans le conduit d’évacuation d’air remonte à un niveau acceptable, l‘appareil reprend son fonctionnement normal. -
Page 42: Datos Técnicos
Estimado cliente: Le felicitamos por la adquisición de este producto Klarstein. Lea atentamente el siguiente manual y siga cuidadosamente las instrucciones de uso con el fin de evitar posibles daños técnicos. La empresa no se responsabiliza de los daños ocasionados por un uso indebido del producto o por haber desatendido las indicaciones de seguridad. -
Page 43: Vista General Del Aparato Y Teclas De Función
• No desconecte el enchufe para apagar el aparato. • No coloque tazas u otros objetos encima del aparato para evitar que se filtre agua u otros líquidos a su interior. • No utilice sprays insecticidas o sustancias inflamables cerca del aparato de aire acondicionado. •... - Page 44 Mando a distancia Desagüe permanente Rejillas de entrada de aire Cable de alimentación (1,80 m) Desagüe Filtro de protección Rejilla de ventilación Soporte para enrollar el cable Filtro EVA Carcasa trasera Tubo de salida del aire Marco ajustable para ventana Controles Mando a distancia: Izquierda: solo con función de refrigeración...
-
Page 45: Instalación
Instalación Advertencia: durante la instalación, asegúrese de que el aparato de aire acondicionado está colocado verticalmente. El aparato debe instalarse en una superficie plana. No coloque el aparato de aire acondicionado en el baño o en habitaciones similares con mucha humedad. Encaje el marco ajustable en una ventana corredera Abra la ventana por la mitad y coloque el marco ajustable. -
Page 46: Puesta En Funcionamiento
Advertencia: La longitud del tubo de salida de aire puede ajustarse entre 28 y 150 cm. Esta longitud está diseñada de acuerdo con las características del aparato de aire acondicionado. No utilice tubos alargadores ni cambie el tubo por otro, pueden producirse fallos en el funcionamiento del aparato. - Page 47 Potencia del ventilador Pulse este botón durante el modo refrigeración y ventilación para ajustar la potencia del ventilador. Si pulsa este botón en el modo calefacción podrá seleccionar entre la velocidad baja, media o alta del ventilador. Dependiendo de las condiciones de temperatura, el ventilador podría no funcionar a la velocidad programada.
-
Page 48: Vaciar El Depósito De Agua
Vaciar el depósito de agua Vaciado del depósito Vaciado del depósito Cuando el aparato se detenga porque el depósito de agua esté lleno, apáguelo y desenchúfelo. Coloque un recipiente en el desagüe lateral. Desenrosque el cierre del desagüe y retire el tapón. El agua se verterá... - Page 49 Limpieza del filtro Limpie el filtro cuando el polvo acumulado impida que el aparato funcione a su máximo rendimiento. Normalmente necesitará realizar esta actividad cada dos semanas. Limpiar el marco superior del filtro Agarre el marco del filtro EVA con las manos. Tire de él de arriba abajo.
-
Page 50: Limpieza Y Cuidado
Detección y resolución de problemas Problema Causa Solución El aparato de aire El aparato no está conectado a la Encienda el aparato tras acondicionado no funciona. red eléctrica. conectarlo a la red eléctrica. El indicador del depósito muestra Vacíe el depósito de agua. “FL”. -
Page 51: Indicaciones Para La Retirada Del Aparato
Funciones de protección Protección contra escarcha Si la temperatura en el tubo de desagüe durante el modo de refrigeración, deshmudificación o ahorro de energía es demasiado baja, el aparato activa automáticamente el modo de protección. Cuando la temperatura del tubo de desagüe alcance de nuevo una temperatura determinada, el aparato volverá al modo normal de funcionamiento.
Need help?
Do you have a question about the 10028189 and is the answer not in the manual?
Questions and answers