Launch Creader VII+, Creader VIII - Car Code Reader Quick Start Guide
Also See for Creader VII+:
- Manual to register & upgrade (2 pages) ,
- Upgrade (6 pages)
Advertisement
Table of Contents
Contents
Launch Creader VII+, Creader VIII - Car Code Reader Quick Start Guide
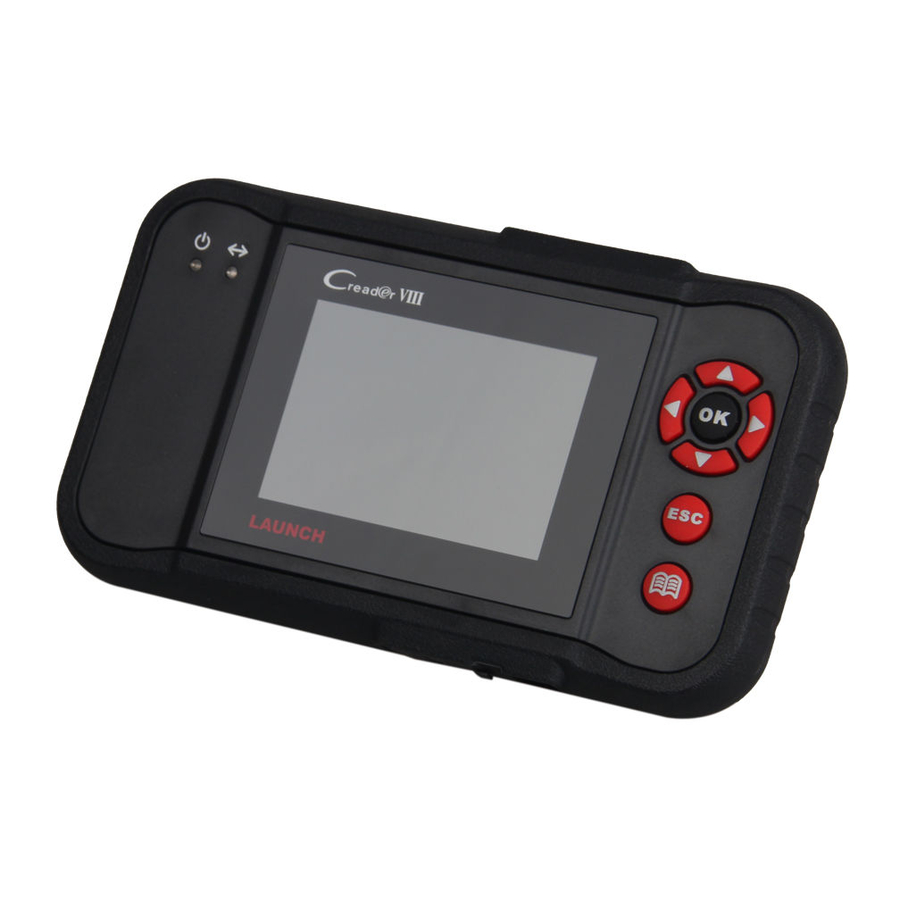
About Creader VII+ / Creader VIII
Creader VIII features same appearance as Creader VII+. Here we only take Creader VII+ for example.

| No. | Name | Descriptions |
| 1 | Power indicator | It will light up while Creader VII+ is energized. |
| 2 | Communication indicator | It will flash when Creader VII+ is communicating with ECU. |
| 3 | LCD | Indicates test results. |
| 4 |  | Move cursor up or down for selection. |
 | Move cursor left or right for selection; Or turn page up or down when more than one page is displayed. | |
 | Confirms a selection (or action) from a menu list. | |
 | Exit the current program or return to the previous screen; or confirm to display the selected datastream in Data Stream. | |
 | To retrieve the DTCs in the database. | |
| 5 | USB port | To connect on PC to upload data or upgrade your device. |
| 6 | TF card slot | Insert the TF card into it to read or write the data/file stored in TF card. |
| 7 | OBD-16 connector | To connect on vehicle's DLC(Data Link Connector) via diagnostic cable. |
LAUNCH
How to Update Creader VII+ / Creader VIII
Follow the steps described as below to proceed registration and update:
- Go to http://mycar.x431.com/pad/landingPageIndexCrv.action and click Updating Tool Download icon. See Figure 1.
Note: Creader VIII shares the same URL with Creader VII+.

Figure 1
- Download and install the Creader VII+ / Creader VIII Update Tool (only under Windows XP and Window 7 operating system) and launch the program when installed, a screen similar to Figure 2 will appear:

Figure 2
- In Figure 2, type in the Product Serial Number, which is located at the back of the Creader VII+ / Creader VIII.
- After the serial number is entered, click Update to jump to the registration page. Enter the following information and click Submit (refer to Figure 3).

Figure 3
(If you need the Register Code, please refer to steps 5~8.)
(If you have the Register Code, directly proceed to step 9.) - The Register Code can be found in your Creader VII+ / Creader VIII. Connect one end of the supplied USB cord to Creader VII+ / Creader VIII, and the other end on the computer.
- After Creader VII+ / Creader VIII has powered up and entered the main menu screen, move the highlight bar on the Help icon (See Figure 4) and press the
![]() button.
button.

Figure 4 - Select Tool Information (refer to Figure 5) and press the
![]() button to enter.
button to enter.

Figure 5
- The Register Code shown in Figure 6 is the Register Code needed in step 4.

Figure 6
(Return to step 4 and input the Register Code and then proceed) - Install the TF card from the tool into the supplied USB TF card adaptor and insert into the USB port of the computer.
- Reopen the Creader VII+ / Creader VIII update tool, select the updates you would like to perform or click "Select All", and then click Download to start downloading. See Figure 7.

Figure 7 - Once all steps are complete, reinsert the TF card into the tool and power the tool via USB cable or via OBD II cable (one end to OBD II connector of Creader VII+ / Creader VIII and the other end on the vehicle's DLC). A dialog box (Note: If only diagnostic softwares are updated and no firmware packages are downloaded in Figure 7, this box will not appear) prompting you to upgrade will pop up on the screen (See Figure 8), select OK to proceed.
![]()
Figure 8
- The registration process is now complete, your Creader VII+ / Creader VIII is now ready for use (See Figure 9).
![]()
Figure 9


 button.


Note: All pictures illustrated here are for reference and demonstration purpose only and this Quick Start Guide is subject to change without prior notice.
Documents / ResourcesDownload manual
Here you can download full pdf version of manual, it may contain additional safety instructions, warranty information, FCC rules, etc.
Download Launch Creader VII+, Creader VIII - Car Code Reader Quick Start Guide
Advertisement


Need help?
Do you have a question about the Creader VII+ and is the answer not in the manual?
Questions and answers