Table of Contents
Advertisement
Quick Links
Advertisement
Table of Contents

Related Manuals for Defy GEMINI HOB 820 TC BV


Summary of Contents for Defy GEMINI HOB 820 TC BV
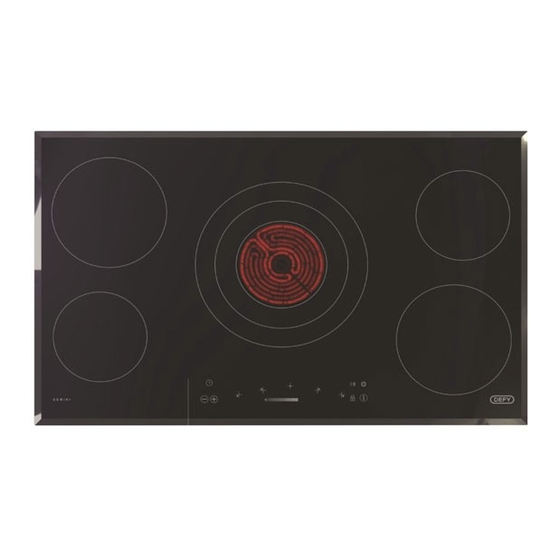
- Page 1 DHD414 GEMINI HOB 820 TC BV Page 1 Cooking Instruction manual Part number: 070384...
-
Page 2: Table Of Contents
Dear Customer, Your new Defy hob was manufactured in a state of the art facility and has passed strict quality control procedures. Please read this manual carefully before using your hob for the first time and then store it within easy reach for future reference. -
Page 3: Technical Specifications
Technical Specifications Model DHD414 GEMINI 820 TC BEVEL Volts 220V –240V 50/60Hz~ Amperes 38.5 A Plate power rating (ø, mm/ W) Middle cooking zone 270 mm 3 Stage Vitroceramic Plate 2700 W Front cooking zone left 140 mm Vitroceramic Plate 1200 W Front cooking zone right 175 mm Vitroceramic Plate 1800 W Rear cooking zone right... -
Page 4: Important Safety Instructions
Defy Young children should be shall not be liable for any supervised to ensure that they problems arising due to the do not play with the appliance. -
Page 5: Product Safety
Never use the product when If the power connection cable for the product is damaged, it your judgment or coordination is impaired by the use of must be replaced by the alcohol and/or drugs. manufacturer, its service agent Be careful when using or similarly qualified persons in alcoholic drinks in your dishes. -
Page 6: Intended Use
This appliance is not intended Do not spray aerosols in the to be operated by means of vicinity of this appliance while external timer or separate it is in operation. remote control system Do not modify this appliance Where this appliance is Intended use installed in a marine craft or in This product is designed for... -
Page 7: Package Information
Package information DANGER Broken Packaging materials of the glass! hob are manufactured from Do not let any objects recyclable materials in fall onto the hob. Even accordance with small objects may Environmental Regulations. damage the hob. Do not use glass ceramic hobs Do not dispose of the with cracks. -
Page 8: Installation
Installation The hob must be installed by a qualified Cupboard design electrician in accordance with national Cooking appliances generate considerable regulations. Installation is the buyer’s heat. The layout and materials of the responsibility. The manufacturer accepts no mounting cabinet should take account of liability for this service. -
Page 9: Electrical Connection
Earth leakage This hob should not be connected through an earth leakage system. Refer to S.A.N.S. 10142 Connection to the power supply must be carried out by a qualified electrician, who will ensure that the hob is correctly connected and safely earthed. The rated current is printed on the serial number label attached to the base cover. -
Page 10: Preparation
Preparation Tips for energy saving Only use clean pots with an even flat base to prevent cracking on glass due to hot The following information will help you to use spots. your hob in an ecological way, and to save Initial use energy: First cleaning of the appliance... -
Page 11: Controls
Controls Basic functions Displays and LED’s The control allows different layout 5 7-segment displays [HEATERn_DISPLAY] configurations: n=1..5 to show the actual set on each heater, - Control for up to 5 Radiant heaters. show heater and cooktop special statuses KeyLock function. and show errors. -
Page 12: Switching On/Off The Cooktop
Switching On/Off the Cooktop. The Cooktop is switched ON by touching the [ON_OFF_KEY] key for 1 sec. A beep sounds and all the heater displays show a ‘0’. Switching ON the cooktop If the selection of a cook set for a heater is not done in 10 seconds, the Cooktop will be turned off automatically. - Page 13 Selecting a power level for a heater To switch on a heater it is necessary to actuate every cooking zone by means of two operations: Select a heater Select the desired cookset Selecting a heater A heater is selected by touching the heater [HEATER_n_KEY] key for 160 ms, a beep sounds and the heater display shows the power level.
-
Page 14: Selecting A Power Level For The Heater
Selecting a power level for a heater Once the heater is selected, the power level can be selected by touching the [SLIDER]. Each position over the slider surface corresponds to a cooking level. The power level selection is done by sliding the finger or by placing the finger on a specific position of the slider surface. -
Page 15: Selecting An Extension Zone For A Radiant Heater
Selecting an extension zone for a radiant heater To switch on a heater it is necessary to actuate every cooking zone by means of two operations: Select a heater Select the for enabling/disabling extensions the [DOUBLE_ZONE_KEY] key. Selecting a an extension zone Once the heater is selected, the extension zones can be enable/disable by touching the [DOUBLE_ZONE_KEY] key. -
Page 16: Key Lock
Key lock The key-lock is always activated at the start up of the control. The locking function can be activated every time if the Stop&Go function is OFF. Touching the [KEYLOCK_KEY] key for 1 second, the key lock function is activated or deactivated. -
Page 17: Residual Heat
Residual Heat Stop & Go function The Stop and Go function allows temporary Radiant Heaters Residual Heat pausing of the cooking process, allowing the Once cooking has finished, the user user to answer the door or the telephone interface indicates if there is remaining heat without having to be concerned about in the corresponding heater. - Page 18 Stop & Go Page 18...
- Page 19 The stop function will finish: if the [STOP_GO_KEY] is touched for more than 120 milliseconds a beep sounds and the heaters actual power setting is restored, or if the cooktop is stopped for more than 10 minutes the cooktop is switched off automatically.
-
Page 20: Operating The Timer
Operating the timer The timer value can be selected between 1 and 99 minutes. It is possible to set the time for any heater at any power level, including power level 0. The user can select only one heater at a time on which the timer function is to operate. -
Page 21: Selecting The Time
Selecting the time The timer display flashes whilst the timer is awaiting a time selection . The timer value can be selected between 1 and 99 minutes touching the [+TIMER] or [-TIMER] keys,. If the key [+TIMER] or [-TIMER] associated with the timer is held down, the change speed is increased automatically. - Page 22 Timer countdown end The timer alarm can be cancelled at any time, even during the first minute of the alarm. When the timer is in the alarm status, by pressing any key of the touch control the timer is switched off. Switching off the timer To cancel the operation of the timer, select the time value of “00”...
- Page 23 When selecting a heater power level and the If any heater is timed then the Minute Minute minder is running, the selected Minder cannot be selected. heater can not be temporised. Remember it is possible to set the time for any heater at power level 0.
-
Page 24: Errors/Alarms
Errors/Alarms Appliance errors Appliance errors are the errors which generate the deactivation of the whole cooktop. When an appliance error is detected, all heaters are switched off, a beep sounds (only if one or more heaters are active) and all displays show an ‘F’ letter and the error code alternately. - Page 25 Heater control errors Heater control errors are the errors which generate the switch off of one or more heaters. When a heater error is detected, the involved heaters are switched off, a beep sounds (only if one or more heaters are active) and the displays corresponding to these heaters show an ‘F’...
-
Page 26: Maintenance And Care
10 minutes before the end of a lengthy suitable smooth top cleaning solution, cooking period. The Vitroceramic hob will which is available from all Defy Service retain sufficient residual heat to complete Centres. Remove calcium stains (yellow the cooking process. -
Page 27: Branches
P.O. Box 33681 50 Monument Road Lusaka, 10101, Zambia Oranjesig Tel: +260 0211 242332/3 Bloemfontein Fax: +260 0211 242933 Bloemfontein.Service@defy.co.za sgiservicecentre@microlink.zm CAPE TOWN NAMIBIA: ATLANTIC DISTRIBUTORS (PTY) 5A Marconi Rd. Montague Gardens, 7441 CapeTown.Service@defy.co.za 10 Tienie Louw Street, Northern Industrial Area P.O. -
Page 28: Warranty
Warranty This certificate is issued by DEFY APPLIANCES (PTY) LIMITED manufacturers of Defy and Ocean products, hereinafter the Company, to the original purchaser only, of the appliance described on the certificate and shall constitute the only warranty given in respect of this appliance.
Need help?
Do you have a question about the GEMINI HOB 820 TC BV and is the answer not in the manual?
Questions and answers