Table of Contents
Advertisement
Quick Links
Advertisement
Table of Contents

Related Manuals for Doro 8210


Summary of Contents for Doro 8210
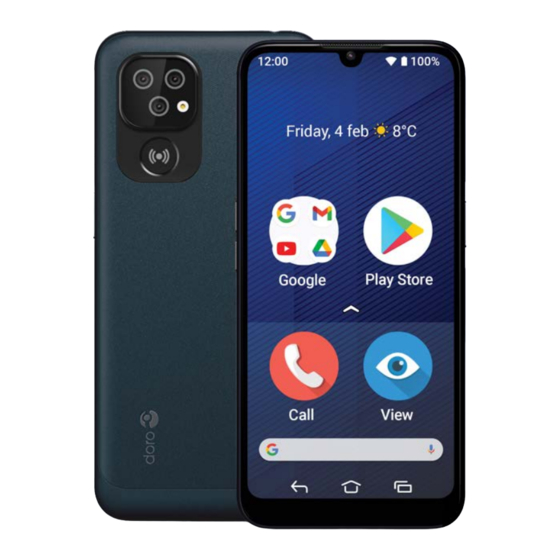
- Page 1 Doro 8210 English...
- Page 2 Your local Doro dealer provides addi- tional accessories. The supplied accessories provide the best performance with your phone.
- Page 3 Overview Headset port, for standard Light indicators, lights up for headset with 3.5 mm phone different notifications jack 11. Power button, press and hold Earpiece, for phone calls to turn phone on/off with the phone by the ear 12. USB port Type-C, for battery Front camera, selfie camera charging or connection to other device like a computer...
-
Page 4: Table Of Contents
English Contents How to set up your Doro 8210 ..............1 Unbox your new phone ................. 1 Getting started ..................2 Insert SIM card and memory card ............3 Charge your phone................. 4 Turn on the phone ................. 7 Get to know your phone................8 Screen protection................... - Page 5 Add a contact shortcut to the home screen........51 Import and export contacts ..............51 How to find the ICE contacts ............... 52 Assistance options..................52 My assistance button ..............52 Response by Doro ................53 ICE (In Case of Emergency) ............. 56...
- Page 6 English The remote help ................56 Google search....................57 To use the web browser ..............57 Applications....................58 Messages....................58 Email..................... 59 Camera ....................60 Handle pictures in the Gallery ............. 62 Internet (Web browser) ............... 62 Dock mode ................... 63 Music ....................
- Page 7 English Specifications ....................75 Copyright and other notices ..............76 Hearing aid compatibility..............78 Specific Absorption Rate (SAR) ............78 Recycle....................78 Correct disposal of this product ............79 Correct disposal of batteries in this product ........79 EU Declaration of Conformity.............. 79 UK Declaration of Conformity..............
-
Page 8: How To Set Up Your Doro 8210
Make sure to read through the quick start guide and manual so you can familiarise yourself with the equipment and the ba- sic functions. For more information about accessories or other Doro prod- ucts please visit www.doro.com... -
Page 9: Getting Started
English Getting started Before you start using your new phone you may need: nano-SIM card. To take full advantage of your new smartphone’s ca- • pabilities, you should install a SIM card. The SIM card will enable you to place calls or use mobile data to connect to various Internet serv- ices. -
Page 10: Insert Sim Card And Memory Card
English Insert SIM card and memory card SIM card is not included and memory card is optional and not included CAUTION Turn off the phone and disconnect the charger before removing the SIM/ memory card tray. Pull out the SIM/memory card tray Use your fingernail or other similar object, to gently pull out the SIM/memory card tray. -
Page 11: Charge Your Phone
English CAUTION This device accepts nano-SIM or 4FF SIM card. Using a modified incompatible SIM card that is thicker than a nano-SIM card may damage the card itself, the card slot and corrupt any data stored on the card. Use only compatible memory cards with this device. Compatible card type: microSD, microSDHC, microSDXC. - Page 12 English A. Insert the small end of the included USB cable into the charging port on the phone. B. If included, you can charge the phone using the charging cradle. Insert the small end of the included USB cable into the charging port on the backside of the cradle and place the phone in the cradle.
- Page 13 Note! The charging cradle may or may not be included in your package, depending on the region or service provider. If not, it can be purchased as an additional accessory from your local Doro retailer or at www.doro.com. The charging cradle can be used in two ways, both without and with a phone protection cover such as a wallet case.
-
Page 14: Turn On The Phone
English Fit the phone in the phone protection cover and place it in the charging cradle. CAUTION You can damage the charging port on the phone or in the charging cradle if the insert is incorrectly fitted. Always ensure that the phone can be placed in the cradle without unnecessary force and without strain on the contacts. -
Page 15: Get To Know Your Phone
Already at the age of 50 it is normal to have a hearing loss at the high frequencies, so why not try our optimised sound profile called Doro ClearSound, see My audio setup for voice calls , p.35. You will also get some quick tutorials of how to handle your phone. Find more tutorials at Help, p.30. -
Page 16: Sign In To Google
• Android™ interface, if you have used a Smartphone previously and don’t need the simplified Doro interface. Note! Once the navigation mode is chosen it will not be possible to change it back from the settings. You can still organise the apps as you wish by drag and drop from the app drawer. -
Page 17: Android And Google
English ™ ™ Android and Google ™ ™ Your new phone runs on Android . Android is a mobile operating system developed by Google ™ . It is based on a version of Linux and other open source software, and is designed primarily for touchscreen mobile devices such as smartphones and tablets. - Page 18 English Tap an item, such as a button or a program icon, to select it or to open • it. Tap can be used to select or deselect a relevant tick box in a list of options. Double tap • Touch the same item twice to zoom in on a map or an image.
-
Page 19: Sensors
Home screen The Home screen is your start screen on your Doro 8210, and here you can collect the apps and your favourite contacts that you use most often. You ™ can also set your favourite picture as wallpaper. Use the Google search bar to quickly find what you are looking for. -
Page 20: Screen Lock
English Activate the screen Briefly press the Power button. • Lock the screen Briefly press the Power button. • Screen lock The screen lock prevents unwanted actions on the touch screen when you are not using the phone. Screen lock settings You can change the way that you unlock the screen to prevent others from accessing your personal information. -
Page 21: Face Recognition (Face Unlock)
English Note! You can also use face recognition (Face Unlock) to unlock your device. The face recognition unlock method requires an additional way of securing your device, like Pattern, PIN or Password as well. See more at Face recognition (Face Unlock), p.14. This option is less secure than Pattern, PIN or Password. - Page 22 English IMPORTANT! Before using the face recognition to unlock your device, keep the following precautions in mind. Your device could be unlocked by someone or something that looks • like your image. Face recognition is less secure than Pattern, PIN, or Password. •...
-
Page 23: To Use The Phone Keys
English Delete face unlock Advanced settings Security Face Unlock. Enter your pattern, PIN or password. Tap Face unlock settings Clear face data to permanently delete your face unlock data and confirm with Clear. After removal, you will need your PIN, pattern, or password to unlock your phone, sign in to apps, and confirm payments. - Page 24 English Recents key (overview key) • to view recently used applications. To open an application, tap it. Tap the app icon on top for app information. Double tap to switch to the previous used app. • Volume keys The volume keys are placed on the left side of your phone. During a call the volume keys adjusts the call volume.
-
Page 25: My Applications Screen
Soft keys Android smart phones like your Doro 8210, as well as most Android appli- cations, feature common icons. Many icons that you see on-screen are ac- tually buttons on the touchscreen. If you don’t see the text, images or information that you want, try to touch the screen or to tap an icon for a pick list or to reach another menu. -
Page 26: Quick And Easy Way To Quiet Your Phone
English Quick and easy way to quiet your phone Use the volume keys on the left side of your phone to adjust the media (music, video) volume. When pressed, you get can also do the following: • Drag the on-screen slider to adjust the sound level. Tap the icon on the top switch the phone’s ring mode: •... - Page 27 English Open and close the notification panel To open the notification panel, swipe the status bar down. To close the notification panel, swipe up twice, or tap twice, or tap to return to the Home screen. Clear the notifications To clear all the notifications, tap Clear all. •...
-
Page 28: Quick Settings Panel
English Quick settings panel Use the quick setting buttons Swipe the status bar down to open the Quick settings panel. Tapping an icon enables you to manage the feature directly within the Quick Settings panel, like toggling the flashlight on and off, or enable/disable the Wi-Fi. Long pressing an icon jumps into the corresponding page within Android’s Settings for full control. - Page 29 English Select the desired character or select =\< to view additional characters. To return, select ABC. Move the cursor within text • Tap somewhere in the text to get the marker. Put your finger on the marker to move the cursor within the text. As you move your finger, the marker is dragged over the text.
-
Page 30: Capture A Screenshot
Connect to the Internet Your smartphone Doro 8210 is just like any other mobile phone - you can make calls and send texts. But you can also access the Internet, send and receive emails, install apps and games, and check your social networking... - Page 31 English Internet. Unless you configured an internet access in the startup wizard, when first starting your phone, here are the instructions on how to do it. Connect to Internet using wireless networks (Wi-Fi) Use Wi-Fi to connect your phone to the Internet instead of the mobile net- work.
- Page 32 English From the Home screen, tap My internet connection My mobile data settings. Switch to enable or disable. Note! You can easily turn on and off Mobile data from the quick settings in the notification panel. To open the notification panel, swipe the status bar down.
-
Page 33: Battery
English Turn Data roaming On or Off From the Home screen, tap Advanced settings Net- work and Internet Mobile network. Use the Roaming switch to enable/disable. Battery Increase the charging speed To increase the charging speed, turn the device or its screen off when you charge the battery. -
Page 34: Navigate Your Phone
Meet “EVA” – ”Enkel, Vänlig och för Alla” (Swedish) (Easy, friendly and for everyone) While Doro smartphones offer as true an Android experience as there is, we take simplicity even further thanks to our intuitive, action-based inter- face, EVA. EVA makes using a smartphone even easier. It’s like having... -
Page 35: Call
She’s also the perfect companion when starting up the phone for the first time, guiding the user every step of the way. And because she is designed by Doro, EVA makes the technology fun, available and easy for everyone, whether new to Android, or a long-time user and fan. -
Page 36: Send
English My pictures and videos to view stored images and videos, see Handle pictures in the Gallery, p.62 My contacts to see and handle your ICE card (In Case of Emergency), see Contacts, p.50 My calendar to see the calendar and your events, see Calendar, p.64 My notes to see your notes, see My notes, p.66. -
Page 37: Add
English To add new contacts, notes, alarms, events etc. A contact to create a new contact, see Add new contact, p.50. A note to write a note, see My notes, p.66. An alarm to set an alarm or reminder, see Alarm, p.65. A timer to set timer, see Timer, p.65. -
Page 38: Phone Settings
English My audio setup for voice calls to set the ringtone, the volume and to manage phone audio settings. You can configure the audio settings with your hearing aid, see My audio setup for voice calls , p.35. My messaging apps to enable or disable the display of additional messaging apps in Send/View messages actions. -
Page 39: Homepage/Display Settings
English Note! Switch to disable and manually set time zone. Homepage/display settings My Wallpaper Wallpaper is the background on the Home screen and on the Lock screen. You can change the wallpaper image into any image, such as a picture you've taken or pre-loaded images. - Page 40 English My home settings Notification dots Some apps show a dot, a small marking above the individual app icon, when you get notifications. From the Home screen, tap My homepage My home settings Notification dots. by Notification dot on app icon to enable/disable notifica- tion dots.
-
Page 41: Sound Settings
English Screen timeout You can set the length of time the device waits before turning off the dis- play backlight. From the Home screen, tap Advanced settings Dis- play Screen timeout. Tap to set the length of time. Font size Adjust the text size to make your screen easier to see. - Page 42 My audio setup for voice calls. Tap to select: Normal for normal hearing in normal conditions. • Doro ClearSound (optimised) for moderate hearing impairment • or use in noisy environment. HAC mode for use with hearing aid. • Hearing aid compatible (HAC) This telephone is hearing aid compatible.
-
Page 43: Improve Accessibility Further
English your hearing aid—for example, placing the receiver slightly above the ear may result in better performance for hearing aids with micro- phones positioned behind the ear. T: To use your hearing aid in this mode, make sure that your hearing •... -
Page 44: The Bluetooth Connection
English Note! All colours on your screen are inverted and you may get some pretty odd colour combinations. Colour inversion is currently an experimental feature, so it might not work correctly in all apps. ® The Bluetooth connection ® You can connect wirelessly to other Bluetooth compatible devices such as headsets or other phones. -
Page 45: Aeroplane Mode
English Unpair devices From the Home screen, tap My other connections The Bluetooth connection. Tap Previously connected devices. next to the device name that you want to unpair. Tap Forget. Note! To disconnect you can turn off the other unit or disable Bluetooth on that device. - Page 46 English Connect the phone to a computer and start transferring pictures, music and other file types. All you have to do is connect a USB cable between the phone and computer. From your computer's file explorer, you can drag and drop content between your phone and the computer.
-
Page 47: My Phone Information
Phone status to check system and software versions and more. • Device update to check for available software updates. See Up- dating your device, p.40. Doro apps legal information to see a list of related software • licences. Backup Your Google account information is set to back up automatically. Follow... -
Page 48: Reboot The Phone
• In some cases, regular OS upgrades may cause delays to planned se- curity updates. Doro will always do our best to deliver the security updates at earliest • possible time to applicable models. Delivery time of security patches may vary depending on the regions, S/W variants and models. -
Page 49: Reset The Phone
English • Should you need to reboot the phone, press and hold the Power button and the Volume up key simultaneously for more than 8 seconds to reboot it. After the reboot, the phone will restart automatically. Reset the phone IMPORTANT! Resetting the phone means that most information, such as downloaded and installed applications, accounts, system and application data and... -
Page 50: Memory And Storage
English Reset Wi-Fi, mobile & Bluetooth to reset all network settings, includ- ing Wi-Fi, Mobile data, Bluetooth.. Carefully read the on-screen infor- mation, it is important! Reset app preferences to reset app preferences for: Disabled apps. • • Disabled app notifications. •... - Page 51 English External memory You can use an external memory card to get more storage space or as a portable memory. There are many different media card standards, use only compatible memory cards. Compatible card type for this device: microSD, microSDHC, microSDXC max 512 GB. SD stands for Secure Digital. Lower-ca- pacity cards store less information.
-
Page 52: Change The Sim Pin Code
English You are presented with some suggestions of memory cleaning. Select the cleaning method that would suit you best. It’s always a good start to clean out the Junk files Tap Internal or SD card (if installed) to see the different types of data on your memory. -
Page 53: Google Play Store
English Enter new PIN and tap OK. Enter new PIN again and select OK once more. When done, SIM PIN changed successfully will appear. Activate/deactivate SIM card lock From the Home screen, tap Advanced settings Secur- SIM card lock. At Lock SIM card: •... -
Page 54: Uninstall Applications
English Find an item you wish to download by browsing categories or by using the search function. Tap the item to view its details, and follow the instructions to com- plete the installation/purchase. Tip: All downloaded applications can be found in Play Store. -
Page 55: Calls
English Calls Make a call To call a contact that is currently not available in your contact book, see al- Call, p.28. From the Home screen, tap Call. A number. Enter the phone number, you are offered suggestions as you type. to call or tap directly on the suggested contact. -
Page 56: End A Call
English From unlocked screen Answer the call tap Answer • • Reject the call tap Decline • Silence the ringer press the volume button (up or down) to si- lence the ringer End a call to end. • Options during a call Volume control Use the side volume keys to adjust the call volume, the selected level •... -
Page 57: Call Log
English Call log From the Home screen, select View My call history Tap a number or a contact to: To call, tap • • Tap and hold a number/contact for more options. To call, tap For more general call log options tap . •... -
Page 58: Manage Your Contacts
English From the Home screen, tap A contact. You may have to select the account where to save contacts to. Enter contact information and continue to fill in the information you know. Tap More fields to add additional information for the contact. Your new contact is created when you tap Save. -
Page 59: How To Find The Ice Contacts
English Note! For best performance, import your SIM contacts and save them to your Google account. By storing your contacts on your Google account, you minimise the risk of losing them in case of a SIM card failure or a lost phone. -
Page 60: Response By Doro
You need an Internet connection to use this service. Contact your service provider for detailed data subscription costs before activating. Before the assistance button can be used, the user of the Doro 8210 (called Senior) need at least one relative/helper (called Responder) that has created an account and connected with you. - Page 61 Admin for the Group of Responders. Start the app and grant the required privileges. Note! If needed, you should also grant Response by Doro access when your phone is set to “Do Not Disturb”. Tap back to return.
- Page 62 The Senior will receive an invitation text message/SMS SMS explaining the service Response by Doro and how to set it up and ac- cept your invitation. Always inform the Senior user that you will start the service as it will require actions from the Senior user also.
-
Page 63: Ice (In Case Of Emergency)
English Senior and Responder are now connected and the Senior can make an alarm with the assistance button on the back of the Doro phone to test the service. The Responder can now also use the app Response to check the status of the Doro phone and quickly assist with some basic phone settings, like sound and display settings. -
Page 64: Google Search
English To connect a remote support session From the Home screen, tap An assistance option The remote help. To use the remote help app you have to agree to Teamviewer’s terms and conditions. Browse through a short introduction. Share Your ID with your personal tech support to allow remote con- trol. -
Page 65: Applications
To go back, tap Applications Applications can be a program or game that you can use on your Doro 8210. Depending on market and service provider, the pre-installed applica- tions can vary. Some applications need Internet access. Contact your serv- ice provider for detailed subscription costs before activating. -
Page 66: Email
English or tap a suggested contact. Compose your message. When done, tap to send. Note! If you choose to add multiple recipients, you may be charged for each recipient. You may also incur additional charges for sending messages when you are roaming. It is recommended to use Wi-Fi connections when available to reduce costs for data traffic. -
Page 67: Camera
English From the Home screen, tap Send An email. To contact. Alternatively tap To email address. Tap to select one or several contacts. Compose your text. Enter a subject. to attach files to the email. Tap for more options. When done, tap to send. - Page 68 English How to take a selfie Selfie means to take a picture of yourself. You can use the front camera to take self-portraits. On the camera preview screen, tap to switch to the front camera for self-portraits. Face the front camera. Move the camera around until you find a pleasing pose.
-
Page 69: Handle Pictures In The Gallery
English to let the camera app automatically choose whether to use the • flash or not. to force the camera app to use the flash. • • to force the camera app to not use the flash. More Tap More to access the list of different shooting modes. Camera settings to access camera/video settings. -
Page 70: Dock Mode
Dock mode will activate the screen saver that turns your Doro 8210 into a side-table clock unless set otherwise. The screen will dim and turn off after a while. Press the home or power button to wake up the screen. -
Page 71: Fm Radio
English Tip: While you're listening to music you can start and pause the music from the quick settings in the Notification panel. To open the Notification panel, swipe the status bar down. You can also use other features and apps while listening to music. -
Page 72: Alarm
English Add an event An event. Follow the on-screen instructions to complete the event. Tap Save to confirm. To edit or delete events View My calendar. Browse the calendar to select an entry or tap . to search for the wanted entry. -
Page 73: My Notes
English Tip: The timer will sound even in silent mode. Add a timer From the Home screen, tap A timer. Set the duration of the timer and tap to start the countdown. to pause and to stop. My notes This feature uses Google Keep ™... -
Page 74: Google Apps
English Google apps IMPORTANT! You need an Internet connection to use this service. It is recommended to use Wi-Fi connections when available to reduce costs for data traffic. Contact your service provider for detailed subscription costs before activating. ™ All pre-installed Google applications can be found in the Google folder. -
Page 75: Location Based Services
English drive. However, when you upload the photos to Instagram, you are upload- ing it to the cloud. So remember: The Cloud is a network of servers. Some servers provide an online service, and others allow you to store and access data, like Insta- gram or Dropbox. -
Page 76: Safety Instructions
English Error occurred or caution Silent mode required Flight mode Alarm active Google Play Store software System update available updates available Unread email (in the gmail New text message or multi- media message app) GPS activated SIM card not inserted Headset connected (without Battery level microphone) -
Page 77: Medical Units
English The 5150 - 5350 MHz band is restricted to indoor use only in the following countries: (NI) Medical units The use of equipment that transmits radio signals, for example, mobile phones, can inter- fere with insufficiently protected medical equipment. Consult a doctor or the manufac- turer of the equipment to determine if it has adequate protection against external radio signals, or if you have any questions. -
Page 78: Li-Polymer Battery
• Doro does not accept liability for any damage or loss if these warnings and instruc- tions are not followed. Protect your hearing This device has been tested to comply with the Sound Pressure Level requirement laid down in the applicable EN 50332-1 and/or EN 50332-2 standards. -
Page 79: Vehicles
English Please note that functionality may be reduced or prevented in certain environments such as building interiors or areas adjacent to buildings. CAUTION Do not use GPS functionality in a manner which causes distraction from driving. Vehicles It is your responsibility to drive your vehicle safely. Never use your handheld device while driving, if it is prohibited by law. -
Page 80: Malware And Viruses
English Malware and viruses To protect your device from malware and viruses, follow these usage tips. Failure to do so may result in damages or loss of data that may not be covered by the warranty service. • Do not download unknown applications. •... -
Page 81: Warranty
This guarantee does not apply if batteries other than DORO original batteries are used. Device OS software warranty By using the device, you accept to install any OS software updates provided by Doro, at earliest possibility after notification. By updating your device, you help to maintain your device secure. -
Page 82: Specifications
In some cases, regular OS upgrades may cause delays to planned security updates. • Doro will always do our best to deliver the security updates at earliest possible time • to applicable models. Delivery time of security patches may vary depending on the regions, S/W variants and models. -
Page 83: Copyright And Other Notices
Doro reserves the right to revise this document or withdraw it at any time without prior notice. - Page 84 Malmö, Sweden. To be valid, such a request must be made within three (3) years from the date of the distribution of this product by Doro AB, or in the case of code licensed under the GPL v3 for as long as Doro AB offers spare parts or customer support for this product...
-
Page 85: Hearing Aid Compatibility
Recycle Doro takes responsibility for the entire life cycle of our products including how they are recycled at end of their life. Your previous product can still be useful for someone else and, if it has reached its end of life, materials that can be used for new products. We rec- ommend to first-hand reuse, repair or refurbish your device, and if this is not possible leave it for recycling according to local regulations. -
Page 86: Correct Disposal Of This Product
EU Declaration of Conformity Hereby, Doro declares that the radio equipment type DSB-0440 (Doro 8210) is in compli- ance with Directives: 2014/53/EU and 2011/65/EU including delegated Directive (EU) 2015/863 amending Annex II. -
Page 87: Ecodesign Declaration, Energy Efficiency For External Power Supply
English Ecodesign declaration, energy efficiency for external power supply Hereby, Doro declares the external power supply for this device is in compliance with Commission Regulation (EU) 2019/1782 regarding ecodesign requirements for external power supplies pursuant to Directive 2009/125/EC. The full information regarding the ecodesign requirements is available at the following in- ternet address: www.doro.com/ecodesign... - Page 88 DSB-0440 (Doro 8210) (1021) English Version 1.0 ©2023 Doro AB. All rights reserved. www.doro.com REV 20691 — STR 20211102...
Need help?
Do you have a question about the 8210 and is the answer not in the manual?
Questions and answers