Table of Contents
Advertisement
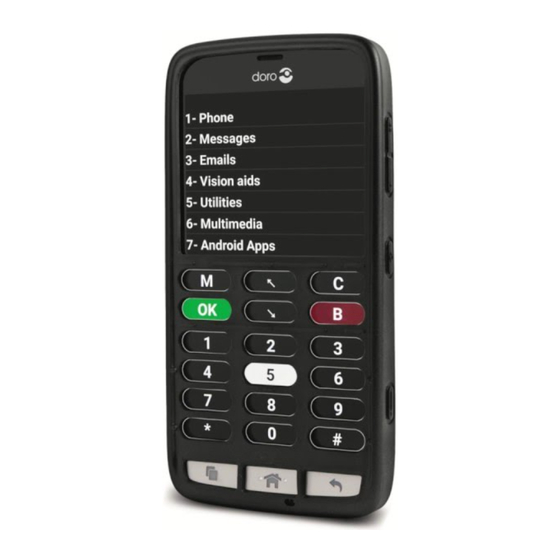
Doro 824c
User Guide
English – Version 4.3
Two documents are available to help you learn how to use your new phone:
1. The main features become very clear thanks to the audio CD that is included in the box, designed
for a listening experience in actual operating condition.
2. This user guide is divided in four parts: first, a list of the 10 must-know preliminary points and 5
advanced points, then the table of contents, followed by chapters 2 to 6 explaining how to use the
interface and make calls, and finally chapters 7 to 16 describing how to use the different
applications.
Despite this phone being relatively simple to use, we strongly advise you to carefully read this guide to
master all of its features (especially the 10 must-know key-points) and to go back to it whenever you have a
question. Make sure to keep your cell phone, its elastomer keypad overlay and your SIM card close at hand
while you go through our guide.
1
Advertisement
Table of Contents

Subscribe to Our Youtube Channel
Related Manuals for Doro 824c


Summary of Contents for Doro 824c
-
Page 1: User Guide
Doro 824c User Guide English – Version 4.3 Two documents are available to help you learn how to use your new phone: 1. The main features become very clear thanks to the audio CD that is included in the box, designed for a listening experience in actual operating condition. - Page 2 1- List of the 10 must-know and 5 advanced points To make navigating through this list easier, each point starts with a hyperlink: Here are the 10 must-know points to use your phone: 1- Master the physical buttons : “Sleep-Wake” button to switch on your phone, turn it off, reboot it, and go in and out of sleep mode, as well as the “Home”...
- Page 3 And here are the 5 more advanced key-points, to help make sure you use phone’s full potential. A- With the numbers keys, navigate quickly through the menus you use most often. For example, open the contacts list by pressing 1 then 2 from the Home screen or dial a number after having pressed 1 twice. B- Use the Home screen to its full potential with the keyboard shortcuts (by holding the keys longer) or voice shortcuts (accessed by pressing the Home key) to make calling or sending a text to your contacts...
- Page 4 2. 2- Your phone’s keys and connections 2.1. The physical buttons of your phone: On, Off, Sleep, Go back to the Home screen 2.1.1. Position your phone and locate the Home button. If your elastomer keypad overlay is already on the phone: the Home button will be easy to find as it is the closest to the bottom edge in the centre.
- Page 5 2.2. The keypad and its elastomer overlay: 6 navigation keys and 12 numbers keys 2.2.1. The 6 navigation keys are on the 2 first lines at the top of the keyboard. The 6 navigation keys of the 2 top lines of the keyboard are enough to navigate throughout the interface menus.
- Page 6 2.4. Supplied equipment and connections 2.4.1. Equipment supplied with your phone The box you have received contains different items: The phone itself with its elastomer keypad overlay The battery. A mains supply adapter to charge your phone. Be careful with the micro-USB connector, it is asymmetrical to help you connect it the right way and should not be forced into place ...
- Page 7 You should also note that: Except for passwords and numerical fields, the first character of the entry field or the first character after a period is a capital letter by default; the following characters are automatically typed as small letters.
- Page 8 Note that this way you can dictate a text in several takes by repeating the voice recognition several times in a row. 3.3. Change the enunciation level to read a text while writing In the next chapter the paragraph “change the enunciation level” in the chapter “Control the voice synthesis”...
-
Page 9: Discover The Home Screen
The interface has 2 reading speeds that you can control independently: one for the menus and another one for the text display screens. 4.4. Change the reading language of a text (text message, email, etc.) If you receive an SMS, an email or read a book in a foreign language, you can directly change the language of the voice synthesis within a user-defined set of three reading languages. - Page 10 It reads the network information first: Wi-Fi and Wi-Fi signal strength if the Wi-Fi is connected to a network, then the mobile network type (3G means you have access to internet) and reception strength. Then it gives you the battery charge percentage and tells you if the GPS and Bluetooth are activated. Finally, it reads the name of your mobile network.
-
Page 11: Make Phone Calls
father has a home number and a cell phone number, you can associate the words “call dad at home” to his home number, and ”call dad cell phone” to his cell phone. To get the best results, you might have to record 2 or 3 voice shortcuts for some of your contacts, to cover the involuntary variations of your pronunciation. - Page 12 To accept this call, you need to press the OK key. To turn it down, just press the Back key. To switch from one call to the other, you can press the Up arrow and Down arrow keys. 6.2. Browse the call log, missed calls and delete a call The call log keeps track of the last calls you received, made or missed.
- Page 13 Select “1-Create” to create a new contact entry or “2-Edit” to edit the entry you are on. The contact entry form will then open. The available fields for a contact entry are the following: First Name, Last Name and Phone number. They appear as a form with a vertical list of items you can fill in.
- Page 14 If you don’t have many contacts, copy them from the internal memory of your previous phone to your SIM card then insert your SIM card in your phone and use the import function described above. To copy the contacts of your old phone to the SIM card, go to the contact list, press the Options key and look for an item named “save all contacts”...
- Page 15 If you wish to send one message to several recipients simultaneously, select the option “4- Multi-recipient” from the Choose recipient menu. You can then choose successively the recipients of your message. Once those are selected, choose option “4- Write message” to edit your text message, then press OK. On that last screen, you can choose to send the message, check the recipients list or add a new recipient.
- Page 16 9- Check and send emails On the Home screen select “3-Emails” then press OK. The screen that will appear is your email inbox displayed as a list. On the first line the possibility you can choose to write a new message, and on the following lines you will find the list of all the emails you received by chronological order (most recent on top).
-
Page 17: Delete An Email
To get the list of the attachments contained in an email, press the Menu key then “9-Attachments”. The number of attachments is read along with the menu title. You can then press OK to display the selected attachment. The formats handled by the mail application are: PDF, RTF, TXT, DOC, DOCX. For the files formats that are not yet supported (as per PPTX and XLSX for now), you can still download them in the Download folder of your phone to access them through the File manager application in the Utilities section or access them through a computer or another android app. -
Page 18: Camera Application
and you will have to enter the email server parameters. You can check that information on the internet and find your account parameters. An example of such a configuration is available on the audio user guide. Once that information is filled in, you can to choose the name you want for your account and add a description. - Page 19 Please note that we are using the same technologies as the other barcodes readers available on smartphones. Our tests suggest that our application is as efficient as the best ones we tested. To launch the Barcode Scanner, open “4- Codes Scanner” from the main screen of the Camera application. The scanner is immediately running.
- Page 20 6- The Optical Character Recognition will then read out loud your document, turning it around by itself if it is upside down. The processing usually lasts less than 5 seconds. If nothing happens after 10 seconds, go back to the previous screen by pressing the Back key and take another picture. To maximize the quality of the OCR, there are three main guidelines to follow: The optical parts of the camera being very light sensitive, it is important to have enough light on your page and not too much shadow (flash can be used by pressing 1 to overcome this difficulty).
-
Page 21: Alarm Application
11- utilities 11.1. Drag and drop files from your Computer Some applications are made even more interesting by the possibility of transferring files from your computer to your phone and the other way around. This is possible of course for Notes and Voice memos applications, but also for the MP3 player and Book reader. - Page 22 Finally, on the Home screen, press the Star (*) button under the 7 to check the number of activated alarms. This number is given after the date. It is also possible to add new Alarm ringtones. To do so, just connect your phone to your computer (as explained in paragraph 11.1.
- Page 23 - “2- Current location during navigation”: to activate the “Current location”/”Where am I” function during your journey. The app will give you the closest address to your location while you move. - “3-Update itinerary”: to update your itinerary if you think your path changed from the initial itinerary (you will need an internet connection).
- Page 24 Other navigation options are available in the Settings menu. You can set the alert radius in “2-Alert radius” – this calibrates how long before a change of direction you wish to be informed by your GPS (e.g. 20 or 25 meters before intersections).
- Page 25 11.6. 11.7. eather Application The interface includes a Weather Application, enabling to consult weather forecasts up to 10 days. When opening the application, it automatically detects your current location and gives you information on your city: date, weather forecast, minimal and maximal temperature and wind speed. Using the Up and Down arrows, you can move chronologically to get forecasts for the following days (up to 10 days).
-
Page 26: File Manager
When your note is entered, press OK to save it. You can also prepare your notes on your computer, save them as .txt files and transfer them to the ClariaNote file on your phone (see the 15 of the key points to know how to transfer files) To read your notes, go through them using the Up and Down arrow keys in the list, it will read them as you go. - Page 27 You can start the song you want to listen to by placing yourself on the song in the list and pressing OK. Supported audio files formats are: .mp3, .wav, .aac, .flac, .ogg, .mid, .3gp, .mp4, .m4a. 12.1.2. Options available while listening to music Once you are listening to a song, you can: - Control the volume with the Volume button on the left side of your phone - Stop or restart the music at any moment by tapping on the screen with your finger.
- Page 28 12.2.2. Actions available in the Book Menu When selecting a book, the book menu screen will be displayed. On this screen you can choose to start reading from your last position, go to your bookmarks, start reading from the beginning, display the chapters list if your book is a Daisy file, delete the book or control reading speed.
- Page 29 - # key: where am I The browsing modes for a Daisy 2.02 audio file are: - n°1 key: add bookmark - n°2 key: + or – 1 minute - n°3 key: + or – 5 minutes - n°4 key: + or – 30 minutes - n°5 key: change chapters - # key: where am I The browsing modes for an ePub file are:...
- Page 30 - # key: where am I 12.3. Read written press articles The News application that you can reach from the Home screen by selecting “6- Multimedia” and choosing “3- News” gives you complete and easy access to free content from newspapers directly on your phone. You can find various newspapers from different countries by pressing the Menu key then Choose Country.
-
Page 31: Web Browser
The fifth option in the application-specific menu is “5-Update stations list”. This should be done regularly so that you can always access up-to-date and accurate stations links. 12.5. Web browser To start the Web browser application from the Home Screen, go “6- Multimedia” and select the line Web Browser. -
Page 32: Assistance Button
OK to leave the entry mode. 8. Press again the down arrow to reach the Continue button; press OK to enter. 9. A message like “Do you wish to remember this password” might pop up, press OK. 13- Specific Doro features 13.1. Assistance button The Assistance button is at the rear of your device, just under the camera. -
Page 33: Audio Features
To ensure that a specific hearing aid is compatible with the Doro phone, please try them together before purchasing the device. - Page 34 Note that when you restart your phone, you will automatically be brought back to the Voice Mode default interface. 14.1. Use TalkBack to navigate through the standard Android interface TalkBack is the screen reader designed by Google for Android. In the default settings, when you go from the Voice Mode interface to the Android interface, TalkBack is already activated and reads all of the Android screens.
- Page 35 Pressing OK will then start the selected application and Talkback will take over the Voice Mode interface. The screens will then no longer be optimized for the elastomer keypad overlay and you will need to use the tactile screen to interact with your apps (using the gestures described above). You should therefore remove the overlay to use the Android standard platform.
- Page 36 You then need to download the right application on your phone and install the synthesis of your choice. You will need to indicate your credit card information to buy the new voice. We would advise you to get some help from someone for the next steps. For example, to install an Acapela voice, here are the steps to follow: 0) With a new device, you will need to create a Google account in order to access the PlayStore and enter a payment card if needed.
-
Page 37: Connection Settings
16- Change your Phone settings according to your needs To change your phone settings according to your needs go to the settings by selecting “9-Settings” on the Home screen. In this settings menu, you will also find all the advanced software options that you can modify. Let’s browse through the available settings. - Page 38 The compatible Braille displays are in principle similar to those compatible with Android’s BrailleBack solution. For instance, the following Braille devices are compatible: APH Refreshabraille ; EuroBraille Esys range ; Freedom Scientific Focus Blue (14 and 40 characters); HandyTech Ranges Basic Braille, Active Braille and Braille Star, Braille Wave, Braillino and Easy Braille;...
- Page 39 16.2. Control your interactions with the standard Android interface In the menu “9- Settings”, press “2- Android interactions” to access the following parameters: 16.2.1. Home button double click For experienced users who wish to switch regularly between Voice Mode and standard Android interfaces, this parameter simplifies the way you can move from one interface to the other.
- Page 40 16.3.1. Main Voice In “1- Main voice”, you have the possibility to choose the language of the menus, then the text-to-speech engine of your choice. Text-to-speech voices you might have downloaded on the Play Store will be set up at this level. 16.3.2.
- Page 41 16.4.1. Repeat delay You can change the repeat delay needed to type two letters on the same key to make it more comfortable for you. See “9-Settings” then “4- Keyboard” and “1- Repeat delay”. If you increase this repeat delay between two letters, it will increase the time between your pressing a key to type a letter and the vibration confirming this letter, which means your phone is ready for the next letter.
- Page 42 If it exists, the Menu key corresponds to pressing the Menu key F1 enables you to put your phone in sleep mode (to get out of sleep mode, press any key then Enter) Numerical keys enable you to browse through menus like you would do with the keyboard In text inputs fields: Backspace corresponds to pressing the Correction key Control+Enter or Control+Right arrow corresponds to pressing the OK key...
- Page 43 16.5.2. Locking the screen On this screen you can choose whether to lock your screen or not when it goes into sleep mode to avoid pushing the buttons on the screen if you activate the screen unknowingly. Two lock modes are available: Slide: this mode implies that you will need to slide one finger on the screen to exit sleep mode Passcode: this mode implies that you will need to enter a numerical code (in general 4 digits) to exit sleep mode...
-
Page 44: About Your Phone
16.7.2. Set the date manually If you have decided to set the date manually, you will get to a 4 line form with on the first line the year field (ex: 2013), on the second line the month field (enter a number between 1 and 12); on the third line the day field (enter a number between 1 and 31) and on the fourth line the Submit button.
Need help?
Do you have a question about the 824c and is the answer not in the manual?
Questions and answers