Table of Contents
Advertisement
Advertisement
Table of Contents

Related Manuals for Doro 8040


Summary of Contents for Doro 8040
- Page 1 Doro 8040 English...
- Page 2 Your local Doro dealer provides additional accessories. The supplied accessories provide the best performance with your phone.
-
Page 3: Table Of Contents
English Contents How to set up your Doro 8040 ..............1 Step 1 — Unbox your new phone ............1 Step 2 — Getting started............... 2 Step 3— Insert SIM card and memory card......... 3 Step 4— Charge ..................5 Step 5—... - Page 4 English Phone settings.....................29 Where to find the settings ..............29 The date and time ................29 Vibrate on touch (vibrate on touch)............30 Screen timeout ..................30 My wallpaper..................30 Home screen shortcuts............... 31 My widgets ................... 31 The text size..................32 The screen brightness.................32 The text contrast..................32 The colour inversion ................33 The colour correction ................33 Improve accessibility further ..............33...
- Page 5 Applications ....................54 Beginners guide - Discover your phone ..........54 Doro Selection ..................54 Messages.....................55 Email ....................56 Camera....................57 Handle pictures in the Gallery ............59 Doro Connect & Care ................60 My Doro Manager................63 Google search..................65 Internet (Web browser) ...............65 Dock mode...................66 Magnifier....................67 Music....................67 Listen to the radio ................68...
- Page 6 English Operating environment ...............75 Medical units ..................76 Areas with explosion risk ..............76 Li-Polymer battery................77 Protect your hearing ................77 Emergency calls...................77 GPS/Location based functions ............77 Vehicles....................78 Protect your personal data ..............78 Malware and viruses ................78 Care and maintenance ................79 Warranty.......................80 Specifications ....................80 Copyright and other notices..............
-
Page 7: How To Set Up Your Doro 8040
The first step is to unbox the phone and assess the items and equipment included in the delivery. Make sure to read through the manual so you can familiarise yourself with the equipment and the basic functions.For more information about accessories or other Doro products please visit www.doro.com or contact our Helpline. -
Page 8: Step 2 - Getting Started
English Step 2 — Getting started Before you start using your new phone you may need: • nano-SIM card. To take full advantage of your new smartphone’s ca- pabilities, you should install a SIM card. The SIM card will enable you to place calls or use mobile data to connect to various Internet services. -
Page 9: Step 3- Insert Sim Card And Memory Card
English Step 3— Insert SIM card and memory card IMPORTANT! Turn off the phone and disconnect the charger before removing the battery cover. Remove the back cover IMPORTANT! Be careful not to damage your fingernails when you remove the battery cover. Do not bend or twist the battery cover excessively as it may get damaged. - Page 10 English Insert the memory card (optional and not included) Tip: Take care not to scratch or bend the contacts on the memory or SIM card when inserting them into the card holders. You may also optionally insert a memory card. Make sure that the memory card’s contacts are facing as shown.
-
Page 11: Step 4- Charge
English Step 4— Charge Charge your phone. While it's possible that your phone will already come with enough charge to be powered on right out of the box, we recom- mend to fully charge it before first use. CAUTION Only use batteries, chargers and accessories that have been approved for use with this particular model. - Page 12 English • You can also plug the included USB cable into a USB port on your computer. Generally charging is quicker if plugged directly into the wall socket. If the phone is turned off during charging, the phone is still charging. Press the Power button to view charging status.
-
Page 13: Step 5- Turn On The Phone
English Step 5— Turn on the phone Note! When turning on your phone, the installed applications may need to be updated. Application updates requires Internet connection and can take a few minutes. A Wi-Fi connection is preferable. The phone may appear a bit slow during the update. -
Page 14: Get To Know Your Phone
English Get to know your phone ™ Sign in to Google ™ Unless you already created a Google account as part of the Start-up wizard. IMPORTANT! You need an Internet connection to use this service. It is recommended to use Wi-Fi connections when available to reduce costs for data traffic. Contact your service provider for detailed subscription costs before activating. -
Page 15: Touchscreen Motion And Gestures
English Touchscreen motion and gestures • Tap an item, such as a button or a program icon, to select it or to open it. Tap can be used to select or deselect a relevant tick box in a list of options. Double tap •... -
Page 16: Sensors
English Zoom • Place two fingers together on the screen and spread them to zoom in. This function is not always applicable. Rotate view in maps • Using two fingers, rotate the map clockwise or counterclockwise. Touch the Compass Pointer icon to reorient the map with north at the top of the screen. -
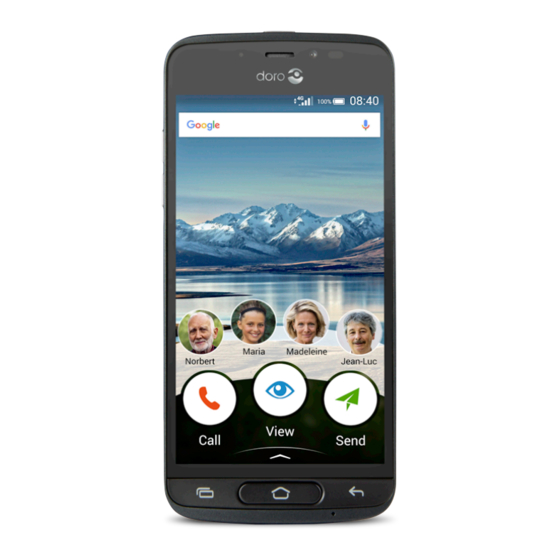
Page 17: Home Screen
English Home screen The Home screen is your start screen on your Doro 8040, and here you can collect the apps and your favourite contacts that you use most often. ™ You can also set your favourite picture as wallpaper. Use the Google search bar to quickly find what you are looking for. -
Page 18: Lock Screen
English Lock screen The screen turns off and locks when you are not using the phone. The lock screen can show time and date as well as notifications like missed calls or messages. Note! Your phone continues to run while it’s sleeping. Mail is received, social networking updates are made, and so on. -
Page 19: To Use The Phone Keys
English • Password to unlock you type a password. A password can con- sists of characters and/or numbers. Enter at least four charac- ters including numbers and symbols, and then enter the password again to verify it. High security. IMPORTANT! It makes sense to choose a PIN code or a pattern that is easy to remember, but try to make it difficult enough so that others can’t guess it. -
Page 20: My Applications Screen
To zoom in Camera mode. Soft keys Android smart phones like your Doro 8040, as well as most Android appli- cations, feature common icons. Many icons that you see on-screen are actually buttons on the touchscreen. If you don’t see the text, images or information that you want, try to touch the screen or to tap an icon for a pick list or to reach another menu. - Page 21 Tip: You can also swipe up or down to open and close the extended Home screen. Close the application screen • Press To install applications, see Doro Selection, p.54. Add applications From the Home screen swipe up or tap the arrow at the bottom of the Home screen.
-
Page 22: Quick And Easy Way To Quiet Your Phone
English Tap Yes to confirm. Quick and easy way to quiet your phone • Use the volume keys to adjust the ringtone volume. • Drag the on-screen slider to adjust the sound level. • to enable or disable Silent. Once enabled, your phone will not ring when you receive an incoming call or message, but the screen will still turn on. -
Page 23: Quick Settings Panel
English Clear the notifications • To clear all the notifications, tap Clear all. If many notifications Clear all is at the bottom of the screen, i.e. not always visible. • To close one by one, swipe to the left or right. Notifications on lock screen All app notifications appear on the lock screen ready for viewing. -
Page 24: Enter Text
Enter text You can enter text, numbers and other characters using the on-screen keyboard. Your phone is preloaded with the Doro keyboard. Select a text field to open the on-screen keyboard. You can adjust your on-screen key- board in various ways to improve readability. - Page 25 English • Tap Shift key twice to type ALL CAPS. • to type only lower case letters. • to type with capitalisation. Smileys for a list of smileys. Select the desired smiley. To return, select ABC. Enter text with word predictions Start entering text and the dictionary suggests words based on the keys you have selected.
-
Page 26: Capture A Screenshot
Connect to the Internet Your smartphone Doro 8040 is just like any other mobile phone - you can make calls and send texts. But you can also access the Internet, send and receive emails, install apps and games, and check your social net- working sites, like Facebook and Twitter, for this you need to be con- nected to Internet. - Page 27 English workplaces. Take advantage of free networks in coffee shops, hotels, trains and libraries. Connecting to the Internet with Wi-Fi doesn’t incur additional data traffic costs, unless you have to pay to get on the wireless network. From the Home screen, tap My Internet connection Wi-Fi.
- Page 28 English Note! You can easily turn on and off Mobile data from the quick settings in the notification panel. To open the notification panel, swipe the status bar down. Tip: Contact your service provider for detailed subscription costs before activating. Network services and costs Your device is approved for use on the 4G LTE FDD 1 (2100), 3 (1800), 7 (2600), 8 (900 MHz), 20 (800) MHz / WCDMA 1 (2100), 2 (1900), 5...
-
Page 29: Battery
English Turn Data roaming On or Off From the Home screen, tap My Internet connection My Mobile data settings More… . Use the Data roaming switch to enable/disable and confirm. Battery Increase the charging speed To increase the charging speed, turn the device or its screen off when you charge the battery. -
Page 30: Navigate Your Phone
Navigate your phone Select on-screen actions Doro's unique telephone menu is action-based and allows you to navigate your phone, by just asking yourself, What do I want to do? For example, send an email to a contact that is available in your contact book. -
Page 31: Call
English You are asked To whom? and responds by tapping A contact. Tap to select a contact. Enter subject. Tap Send to compose your email. If desired, tap I want to to access more options. When done, tap Write a message here. Call To call someone. -
Page 32: Send
English My location to go to Google maps and find your location, search for addresses, find your way and more. My applications to reach your apps, see My applications screen, p.14 My tools to reach your tool apps. The magnifier to magnify text and small parts etc, see Magnifier, p.67. -
Page 33: Add
A voice record to record and send a recorded sound, see Recorded sounds, p.71. An application to add new applications, see Doro Selection, p.54. My home screen shortcuts to select the shortcuts you want access to from the Home screen. -
Page 34: Listen
English New applications to view your apps and add new ones, see Doro Se- lection, p.54. My phone to find learn more about the basic functions of your phone, see Beginners guide - Discover your phone, p.54. Around me to find useful facilities nearby your current position. -
Page 35: Phone Settings
My phone infor- mation, p.39. My Doro Manager is a convenient web service that makes owning a Doro phone even easier. The Doro phone owner and his relatives can just log into the website and easily manage the phone’s settings and content from anywhere. -
Page 36: Vibrate On Touch (Vibrate On Touch)
English From the Home screen, tap A general option. Tap The date and time. • Auto time to automatically update the time, date and time zone. Auto time is enabled by default. Note! Switch to disable and manually set time, date and time zone. -
Page 37: Home Screen Shortcuts
English • Doro wallpaper Tap an image to select it and confirm with Note! You can also reset to the default wallpaper, to reset tap Reset. Home screen shortcuts What is a shortcut? A shortcut can be a fast track to a contact or an application. -
Page 38: The Text Size
English event countdowns, auction-tickers, stock market tickers, flight arrival in- formation, daily weather etc.. Find and add a widget in the menu You can place even more widgets on the Home screen by following these steps. From the Home screen, swipe left to get to the next Home screen. Tap I want to. -
Page 39: The Colour Inversion
English Switch to enable. Confirm with The colour inversion From the Home screen, tap A display option The colour inversion. To switch to white text on dark background. When done, tap Note! All colours on your screen are inverted and you may get some pretty odd colour combinations. -
Page 40: My Ringtone
English From the Home screen, tap An audio option The volume. Drag the slider to adjust the volume (or press the minus or plus icon). • Ringtone & Notifications. • Music, videos, games. • Alarms. • Also vibrate for calls. When done, tap Tip: You can also press the volume keys to adjust the volume. -
Page 41: The Bluetooth Connection
English From the Home screen, tap An audio option audio setup for voice calls. Tap Normal to select: • Normal for normal hearing in normal conditions. • High for moderate hearing impairment or use in noisy environment. • HAC mode for use with hearing aid. When done, tap Hearing aid compatible (HAC) This telephone is hearing aid compatible. -
Page 42: Aeroplane Mode
English Note! Bluetooth can use a lot of battery power. Don’t forget to turn off when not using. Pair with other Bluetooth devices From the Home screen, tap My other connections The Bluetooth connection. Switch to enable. Tap to select the unit that you want to connect to. Note! If you can’t spot the unit that you want to connect with, tap Refresh, to refresh the list. -
Page 43: Connect The Phone To A Computer
English to prevent disturbance to sensitive equipment. You can still play games, listen to music, watch videos and other content, as long as all this con- tent is saved on your memory card or internal storage. When you take your phone abroad, you can keep it in flight mode. If you do that, there’s no chance of data roaming charges, and you can still en- able Wi-Fi. - Page 44 English the phone and computer. From your computer's file explorer, you can drag and drop content between your phone and the computer. Note! You might not be able to transfer some copyright-protected material. Tip: If default storage location is set to memory card, all photos and videos taken by the phone are stored in the DCIM/Camera folder on the memory card.
-
Page 45: My Phone Information
English My phone information To access device information such as the current software version, bat- tery status or to update device software. From the Home screen, tap View My phone information. • Battery info access information and statistics about battery sta- tus and battery usage history. -
Page 46: Reboot The Phone
English Scroll to and select Backup & reset and select Back up my data. Make sure that the switch is ON There are many apps that allow you to backup your photos, applications and much more. Some apps even offer cloud storage that allows mobile uploading, and others that allow you to restore your data should you need ™... -
Page 47: Memory And Storage
English • Information you have stored in any cloud storages (or on a computer, see Connect the phone to a computer, p.37). IMPORTANT! Remember the Google account your phone last logged in to. During a reset Google's anti-theft mechanism requires you to enter the Google account your phone last logged in to on the startup navigation screen for identity authentication. - Page 48 English External memory You can use an external memory card to get more storage space or as a portable memory. There are many different media card standards, use only compatible memory cards. Compatible card type for this device: mi- croSD, microSDHC max 32 GB. SD stands for Secure Digital. Lower-ca- pacity cards store less information.
-
Page 49: Change The Sim Pin Code
English Clear the cache memory What is cache? When you are surfing the web or using apps on your phone’s browser, those websites that you visit will be stored on your phone in an area of memory called cache. The reason is that the next time you visit the same website or app the phone will load it from cache memory instead of downloading everything again from the server which, take up time and bandwidth. -
Page 50: Google ™ Play Store
English Require PIN code at startup From the Home screen, tap A general option Advanced settings. Select Security. Select Set up SIM card lock Require PIN to use phone. • Switch to activate PIN code. You need to enter the PIN code every time the phone is started. -
Page 51: Uninstall Applications
English Find an item you wish to download by browsing categories or by us- ing the search function. Tap the item to view its details, and follow the instructions to com- plete the installation/purchase. Tip: All downloaded applications can be found in Play Store. -
Page 52: End A Call
English Note! The sound you hear when the phone rings is known as the ringtone, see My ringtone, p.34. You can set your phone to play a number of ringtones, for example depending on who's calling, or you can set a universal ringtone. The touchscreen display lights up, giving you more information about the call. -
Page 53: Headset
English Loudspeaker During a voice call, tap Speak clearly into the microphone at a maximum distance of 1 m. Use the volume keys to adjust the loudspeaker volume. To disable, tap once again. Note! During a voice call more actions are available. Tap I want to to view your selectable actions. -
Page 54: Sos Calls
English A number I want to Open settings • Avoid making accidental calls by disabling Direct calls. A confir- mation dialog appears prior to outgoing phone call. The confir- mation dialog is helpful to double check that you really want to make the call. -
Page 55: Contacts
I want to to tap Remove as favourite. Import and export contacts If you have a Doro service such as My Doro Manager or Doro Connect & Care, you can use that service to import and export to/from SIM/SD card. -
Page 56: How To Find The Ice Contacts
English Import contacts from storage services to your device From the Home screen, tap View My contacts. Tap I want to. Tap Import/Export to select an import option from the pick list. to confirm. How to find the ICE contacts In case of emergency (ICE) enables first responders to contact your next of kin or any of your stored contacts. - Page 57 Cancel is pressed. Assistance button settings You can select to use your Assistance button together with Connect & Care, see Doro Connect & Care, p.60. Below we describe how to set up the Assistance button. From the Home screen, tap An assistance option My assistance button.
- Page 58 English • Long press (On normal) to activate by pressing and holding the but- ton for approximately 3 seconds, or press it twice within 1 second. Set the volume level for the assistance calls Select the signal type for the assistance sequence. Note! This sets the signal of your device, NOT the receiver's signal.
-
Page 59: Ice (In Case Of Emergency)
How to use Remote help Let somebody you trust manage your phone remotely, for example, this can be requested when you contact Doro support. Allow access so they can remotely administrate and transfer files, help you to perform mainte- nance tasks and help with problems should they occur. -
Page 60: Applications
TeamViewer, see the security statement at http://www.teamviewer.com/en/products/security.aspx. Applications Applications can be a program or game that you can use on your Doro 8040. Depending on market and service provider, the pre-installed appli- cations can vary. Some applications need Internet access. Contact your service provider for detailed subscription costs before activating. -
Page 61: Messages
English Messages Write messages You can send different types of messages from your phone. Here we will explain how to send a text message, but you can also send other mes- sage types from the Send menu. Tip: Text messages (sms) are delivered immediately to a device that most of us have with us at all times, a text message also represents a more personal and intimate connection. -
Page 62: Email
English Note! Message settings are normally already set and should not need to be altered by you, unless, of course you want to make changes. Some features are network services and you may need to subscribe to them first. For more information contact your service provider. Email Set up email account When opening email the first time you are prompted to set up an email... -
Page 63: Camera
English Tap to select a contact. Enter subject. Tap Write a message here to compose your email. If desired, tap I want to to access more options. When done, tap Send. Read emails From the Home screen, tap View My emails. Tap to read an mail. - Page 64 English From the Home screen From the Home screen, tap Camera. From the menu From the Home screen, tap Snap • A photo • A video • A selfie How to take a selfie Selfie means to take a picture of yourself. You can use the front camera to take self-portraits.
-
Page 65: Handle Pictures In The Gallery
English More options to access the list of shooting modes. Tap or slide to reach the three different sub menus: • to access camera settings. • to access video settings. • to access general settings. Tap to reach and select the different settings. You can always tap Restore defaults. -
Page 66: Doro Connect & Care
(remote help). Note! In order to use some of the features of Connect & Care, either the Doro 8040 user or the helper needs to have a Care service subscription with Doro. Connect & Care can override the normal assistance button behaviour. - Page 67 Note! You can also use this method to update your Connect and Care app to the latest version. Connect a helper to the Doro 8040 The request can be sent from either the 8040 user’s or the helper’s device. Send a connection request From the Doro Connect &...
- Page 68 Doro 8040 user. How to activate Care service subscription This can be done either from the Doro 8040 phone if the Doro 8040 user will pay for the subscription, or from a helper's phone if the helper will pay for the subscription.
-
Page 69: My Doro Manager
English The Doro 8040 user then has to Accept the Care service offer on their phone. Both the Doro 8040 user and the helper can now access additional features via the services tab and the user profiles. From the Doro 8040 From the Doro Connect &... - Page 70 English website. On the website you can also watch tutorials and discover a lot of possibilities in your Doro 8040. Note! The Doro 8040 user needs to have both a Connect & Care profile ™ and a Google —account to use My Doro Manager. To be able to use the...
-
Page 71: Google Search
English Google search IMPORTANT! You need an Internet connection to use this service. It is recommended to use Wi-Fi connections when available to reduce costs for data traffic. Contact your service provider for detailed subscription costs before activating. Note! The available options may vary depending on your device settings. To use the web browser ™... -
Page 72: Dock Mode
Note! The first time you are asked if you want to Sign in with your Google account. Dock mode You may think of the dock mode as a screensaver that turns your Doro 8040 into a side-table clock, a photo frame, a music player and more. Turn Dock mode on and off Dock mode is launched automatically when the device is placed in the charging cradle. -
Page 73: Magnifier
English Note! If you like to fall asleep to music you can set the Sleep timer when playing music. Tap the to select how many minutes you want the music to play. • Alarm to set alarms and to handle already set alarm (mirrors from the Alarm app, see Alarm, p.69). -
Page 74: Listen To The Radio
English Tip: While you're listening to music you can start and pause the music from the quick settings in the Notification panel. To open the Notification panel, swipe the status bar down. Listen to the radio The FM radio has a frequency range from 87.5 to 108.0 MHz. Turn on the radio Connect a headset to the headset socket. -
Page 75: Alarm
English For more options tap I want to. • To select view mode tap Display. • To delete an event tap Delete to confirm. Alarm Set alarms The phone must be powered on in order for the alarm to function properly. -
Page 76: My Notes
English My notes Add a note View My tools My notes Add note. Enter required information. For more options, tap I want to: • Send this note to share. • Delete this note to delete. Save to confirm. Torch Turn on the lamp View My tools In the dark. -
Page 77: Recorded Sounds
English Recorded sounds Use the sound recorder to record memos and messages. Add a sound recording From the Home screen, tap A voice record. Select the button to start recording. Select the button to pause recording. Select the button to stop recording. Listen to recording After you have recorded your first memo you can select: From the Home screen, tap... -
Page 78: Google Apps
English Tap Add. Enter your note and tap when done. • To edit a note, select the note, tap on the white writing area to get the keyboard. Edit the note and tap when done. To delete safe note or change password Tap I want to to select: •... -
Page 79: The Cloud
English • Drive store your content on the cloud, access it from anywhere, and share it with others. • Play Music discover, listen to, and share music on your phone. You can upload music collections stored on your device to the cloud and access them later. -
Page 80: Status Icons
English Note! Turning off location for your device also turns it off for Google apps and other non-Google apps. This means that apps can’t use your phone's location, and many useful features will be turned off. How to turn off GPS location services From the Home screen, open the notification panel, tap My other connections The geolocation options. -
Page 81: Safety Instructions
English Examples of soft keys Validate Take photo Discard Add current location Advanced Add template text Record video Call contact Write text or picture Voice recording message (SMS/MMS) Write email Bring up the keypad Handle attachments Safety instructions CAUTION The unit and the accessories can contain small parts. Keep all of the equipment out of the reach of small children. -
Page 82: Medical Units
English The 5150 - 5350 MHz band is restricted to indoor use only. Medical units The use of equipment that transmits radio signals, for example, mobile phones, can in- terfere with insufficiently protected medical equipment. Consult a doctor or the manu- facturer of the equipment to determine if it has adequate protection against external radio signals, or if you have any questions. -
Page 83: Li-Polymer Battery
• Doro does not accept liability for any damage or loss if these warnings and instruc- tions are not followed. Protect your hearing This device has been tested to comply with the Sound Pressure Level requirement laid down in the applicable EN 50332-1 and/or EN 50332-2 standards. -
Page 84: Vehicles
English uninterrupted or error free and may additionally be dependent on network service avail- ability. Please note that functionality may be reduced or prevented in certain environ- ments such as building interiors or areas adjacent to buildings. CAUTION Do not use GPS functionality in a manner which causes distraction from driving. Vehicles Radio signals can affect electronic systems in motor vehicles (for example, electronic fuel injection, ABS brakes, automatic cruise control, air bag systems) that have been in-... -
Page 85: Care And Maintenance
English • Do not download unknown applications. • Do not visit untrusted websites. • Delete suspicious messages or email from unknown senders. • Set a password and change it regularly. • Deactivate wireless features, such as Bluetooth, when not in use. •... -
Page 86: Warranty
Please note that this is a voluntary manufacturer’s warranty and provides rights in addi- tion to, and does not affect statutory rights of end-users. This guarantee does not apply if batteries other than DORO original batteries are used. Specifications Network bands (MHz) -
Page 87: Copyright And Other Notices
English Bluetooth (MHz) 4.0, (2402 - 2480) [10] [maximum radio-frequency power/ dBm]: GPS receiver: Category 3 Operating system: Android 7 Nougat SIM card size: nano-SIM (4FF) Dimensions: 149 mm x 70 mm x 10 mm Weight: 164 g (including battery) Battery: 3.8 V / 2920 mAh Li-Polymer battery... -
Page 88: Content Copyright
Doro does not provide a warranty for or take any responsibility for the functionality, con- tent, or end-user support of third-party apps provided with your device. By using an app, you acknowledge that the app is provided as is. -
Page 89: Hearing Aid Compatibility
226 43 Lund, Sweden. To be valid, such a request must be made within three (3) years from the date of the distribution of this product by Doro AB, or in the case of code li- censed under the GPL v3 for as long as Doro AB offers spare parts or customer support for this product model. -
Page 90: Correct Disposal Of This Product
English Tests for SAR are conducted using standard operating positions with the device trans- mitting at its highest certified power level in all tested frequency bands. The highest SAR values under the ICNIRP guidelines for this device model are: Head SAR: 0.57 W/kg Body SAR: 1.19 W/kg During normal use, the SAR values for this device are usually well below the values sta- ted above. -
Page 91: Declaration Of Conformity
Declaration of Conformity Hereby, Doro declares that the radio equipment type DSB-0090 (Doro 8040) is in com- pliance with Directives: 2014/53/EU and 2011/65/EU. The full text of the EU declara- tion of conformity is available at the following internet address: www.doro.com/dofc. - Page 92 DSB-0090 (Doro 8040) (1011) English Version 1.0 © 2017 Doro AB. All rights reserved. www.doro.com REV 17702 — STR 20170530...
Need help?
Do you have a question about the 8040 and is the answer not in the manual?
Questions and answers