
Related Manuals for Alpine Spas Copenhagen


Summary of Contents for Alpine Spas Copenhagen
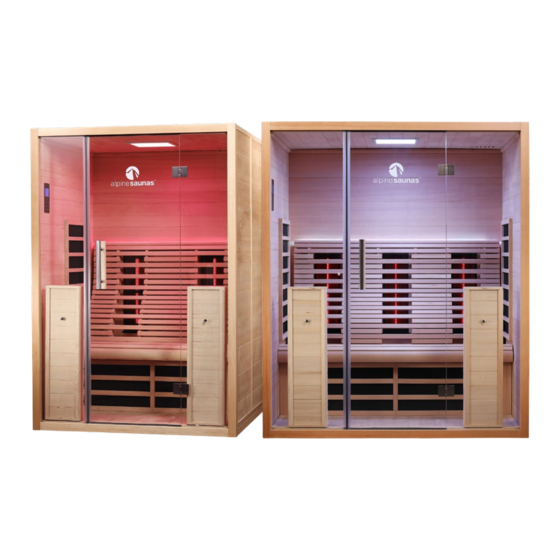
- Page 1 Copenhagen & Helsinki Assembly & User Manual 0800 99 33 88 | service@alpinespas.co.nz | www.alpinespas.co.nz 1800 99 33 88 | service@alpinespas.com.au | www.alpinespas.com.au...
- Page 2 BEFORE YOU START IMPORTANT! READ THIS SECTION ENTIRELY BEFORE PROCEEDING WITH INSTALLATION. SAFETY Read and follow all instructions carefully. When installing and using this electrical equipment, basic safety precautions should always be followed. Do not allow children to use the sauna unless they are closely supervised at all times.
-
Page 3: Electrical Requirements
ELECTRICAL REQUIREMENTS COPENHAGEN - 10AMPS The Copenhagen sauna is provided with a pre-connected 10A lead and plug. This can be plugged into a regular household socket and will draw close to 10A. We recommend trying to install on a electrical circuit that does not share with other large electrical appliances. - Page 4 ASSEMBLY INSTRUCTIONS Place the base close to the desired end location. You will While one person holds the front wall in place, position need to leave space around each side for access. Locate the left hand side in place and lower it onto the front the front glass wall and position this into place.
- Page 5 Position the back wall in place and secure it to the left Install the 2x metal brackets using the 3*30mm screws and right side walls using 3x 6*55mm bolts on each side. to secure the front panel to the side walls. Secure the bench seat over the bench heater and fix each side down using 2x 4*40mm screws. A long screw driver may be required to screw downwards as the side panel heater can get in the way.
- Page 6 ASSEMBLY INSTRUCTIONS Attach the door handles together (through the glass Connect the front heaters to the sauna at the front door frame) using the 6*75mm door screws provided. left and right of the glass (on the inside) by joining the The wooden handle should be on the inside of the door corresponding plugs together.
- Page 7 Plug in the control panel cable into the ‘CONTROL’ input. Carefully attach the white LED cable in the back right hand corner, into the black LED cable. TIP: Make sure the arrows on the plugs are facing each other. Before moving forward, it’s advised to plug in your sauna and make sure all heaters and lights work as expected. Position the roof cover in place, making sure the vent &...
-
Page 8: Wiring Diagrams
WIRING DIAGRAMS Copenhagen: LED LIGHTING A1 A2 B1 TEMPERATURE SENSOR B2 C CONTROL PANEL LED LIGHTING LED LIGHTING CONTROL PANEL Helsinki: LED LIGHTING A1 A2 B1 TEMPERATURE SENSOR C1 C2 CONTROL PANEL LED LIGHTING LED LIGHTING CONTROL PANEL... -
Page 9: Overview Of Control Panel
OVERVIEW OF CONTROL PANEL Health Mode Detoxification Mode Sport Mode Power ON/OFF Inactive Buttons Temperature Heater A Arrow UP/DOWN Heater B Timer Heater C Preset Program Light Celcius/Fahrenheit... -
Page 10: Powering On/Off
1. POWERING ON/OFF Plug the main power cord into the wall outlet. Press the “Power” ( ) button once. The control panel should beep and is now in standby mode, but the heaters are not on by default. To turn the sauna off, hold the power button down for 5 seconds. 2. - Page 11 4. ADJUSTING THE HEATER STRENGTH All the heaters are divided into 3 groups and the power of each group can be controlled at 100%, 75%, 50%, 25%. To change the heater power level, press the corresponding ( ) button to cycle through the levels. The levels of the heaters provide different infrared wavelengths.
- Page 12 7. PRESET PROGRAM MODE The system has 3 preset programmes which automatically set the time and the percentage of the heaters. Each mode is specially designed to gain the most out of the sauna depending on your intended use. To turn on a ‘Preset Program’, press the “Program” ( ) button to cycle through each mode.
-
Page 13: Recommendations For Use
RECOMMENDATIONS FOR USE: Set up the desired session temperature and time using the control panel. Allow approximately 20-30 minutes for the sauna to warm up before beginning a session. Make sure to hydrate yourself & have cold water on hand. Enjoy the Sauna. - Page 14 Sketch...
- Page 15 Notes...
-
Page 16: Contact Information
CONTACT INFORMATION If you need assistance, please get in touch via phone or email. service@alpinespas.co.nz 0800 99 33 88 service@alpinespas.com.au 1800 99 33 88 For a digital copy of this guide and also the outdoor sauna user guide visit: http://alpinespas.co.nz/support/...
Need help?
Do you have a question about the Copenhagen and is the answer not in the manual?
Questions and answers