Table of Contents
Advertisement
Available languages
Available languages
Quick Links
Opening your life
MANUAL DE USUARIO
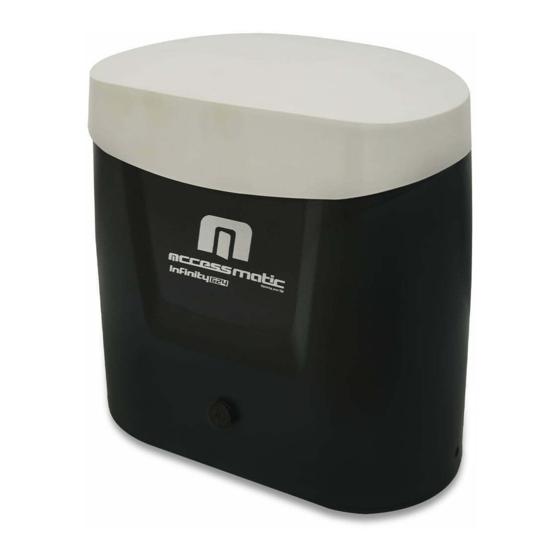
Motor para puerta corrediza
Infinity
624
ADVERTENCIA
Por favor lea el manual detenidamente antes de la instalación el uso del producto. La instalación de su nueva puerta debe ser realizada
por una persona técnicamente calificada o licenciada. Tratar de instalar o reparar el motor sin tener la calificación técnica puede resultar
en severas lesiones personales, muerte y/o daños a la propiedad.
Advertisement
Chapters
Table of Contents

Related Manuals for Accessmatic InFinity 624


Summary of Contents for Accessmatic InFinity 624
- Page 1 Opening your life MANUAL DE USUARIO Motor para puerta corrediza Infinity ADVERTENCIA Por favor lea el manual detenidamente antes de la instalación el uso del producto. La instalación de su nueva puerta debe ser realizada por una persona técnicamente calificada o licenciada. Tratar de instalar o reparar el motor sin tener la calificación técnica puede resultar en severas lesiones personales, muerte y/o daños a la propiedad.
-
Page 2: Table Of Contents
Conexión por medio de cables Transmisor proceso de memorización y borrado Aprendizaje del sistema, proceso de reinicio y pantalla LED Advertencias Con guración de funciones programables Con guración de funciones Reconocimiento de LED Característica técnica AccessAgent Conectar a Accessmatic Soluciones de problemas frecuentes... - Page 3 Infinity Opening your life Advertencia 1) Todos los procedimientos de instalación, conexiones eléctricas, ajustes y pruebas deben realizarse una vez se hayan entendiendo todas la instrucciones de operación de este producto. 2) Desconecte la fuente de alimentación mediante el interruptor de apagado o la magneto térmica con la conexión ascen- dente, y el área de peligro requerida por las regulaciones pertinentes.
-
Page 4: Descripción Del Dispositivo
Infinity Opening your life Descripción del dispositivo Figura 2 a) Engranaje de operación b) Dispositivo de n de carrera c) Respado de baterías (Opcional) e) Dispositivo de liberación f) Panel de control g) Terminales de dispositio Dimensiones del despositivo Figura 3... - Page 5 Infinity Opening your life Brida de montaje Figura 4 Instalación del engranaje del motor y del estante del engranaje Figura 5 Figura 6...
- Page 6 Infinity Opening your life Esta posición es privilegiada porque protege al operador de cualquier agua estacada. 1) Instale las 2 tapas de tuerca en la brida (Figura 5) 2) Coloque la brida sin ajustarla en la ubicación exacta Debe estar perfectamente alineada (Figura 6) 3) Marque los 4 puntos de jación al suelo 4) Retire la placa 5) Perfore el concreto e instale 4 anclajes metálicos con varillas roscadas de 8 mm en los 4 sellos químicos...
-
Page 7: Fijación Del Motor En Las Almoadillas De Hormigón
Infinity Opening your life Fijación del motor en las almoadillas de hormigón Esta instalación se recomienda en áreas con fuertes nevadas y donde haya riesgo de inundación. El principio es el mismo que el anterior ejemplo, pero esta vez el motor se eleva desde el suelo. La altura de las almohadillas de concreto se decide bajo su criterio. - Page 8 Infinity Opening your life Apoyo Soporte base Engranaje impulsor Soporte base Figura 12 B) Retire la rejilla. C) Perfore el ori cio en la parte superior de todos los rastros marcados. (Figura 13) D) Fije el estante, para obtener el espacio necesario entre la rueda y el estante, levante el estante ligeramente en su posición, de este modo obtendra el espacio deseado entre la rueda de estrella del operador y el estante.
- Page 9 Infinity Opening your life Conexión de cables Si la pantalla LED está en funcionamiento normal, consulte la sección "4.2.1", usted puede controlar la puerta con cualquiera de los transmisores o con el botón: "UP " mover en el sentido de las agujas del reloj, "SET" – Detener y "DOWN" – Mover en sentido anti horario.
- Page 10 Infinity Opening your life Memorización del transmisor y proceso de borrado 1) Memorización del transmisor: Presione el botón "RF Learn" durante 2 segundos, la pantalla LED mostrara "CS"; luego presione el botón izquierdo del transmisor (A); la pantalla LED parpadeará dos veces y luego será apagara. La memorización del transmisor estará...
-
Page 11: Advertencias
Infinity Opening your life 2) Para restablecer la con guración de fábrica: Presione UP y DOWN durante 3 segundos, la pantalla LED mostrara "CL" Figura 18 3) Auto detección de la corriente del motor La pantalla LED muestra el consumo del motor "0,4": durante el procedimiento de memorización del sistema, el panel de control detectará automáticamente el consumo de corriente de cada motor, indica el nivel de resistencia de la puerta que hace girar el motor. -
Page 12: Con Guración De Funciones
Infinity Opening your life Ajustes de funciones programables PANTALLA LED DEFINICIÓN FUNCIÓN VALOR DESCRIPCIÓN Opciones de Puerta Apertura a la derecha 1. La función puede ajustar la dirección de Dirección de apertura apertura de la puerta. Apertura anti horario 2. La con guración de fábrica es "1 -1". Cierre automático Sin cierre automático 1. - Page 13 Infinity Opening your life DEFINICIÓN VALOR DESCRIPCIÓN 3 Segundos 1. La función puede ajustar el tiempo de (Modo peatonal) apertura parcial. 6 Segundos 2. La con guración de fábrica es "8 -2". 9 Segundos 12 Segundos 15 Segundos 18 Segundos La luz intermitente Pre intermitente parpadea cuando la...
- Page 14 Infinity Opening your life Con guraciones de función F3-1 Función Lógica Reacciones de las fotoceldas al detectar obstáculos Estado de la puerta Fotocelda 2 Fotocelda 1 Cerrado Detener la apertura Sin efecto Abierto Sin efecto Recarga el tiempo de cierre automático Detención durante el movimiento Detener la apertura Recarga el tiempo de cierre automático...
-
Page 15: Característica Técnica
Infinity Opening your life Prueba y veri cación • Asegúrese de que las notas incluidas en las Advertencias se hayan leído y entendido. • Libere el moto reductor con la llave adecuada. • Asegúrese de que la puerta se pueda mover de forma manual manualmente durante las fases de apertura y cierre con una fuerza máxima de 390N (40 kg aprox.) •... -
Page 16: Accessagent
Accessmatic APP Accessmatic es un sistema que conecta la automatización de puerta a los smart phones, lo que le permite operar su automa- tización de puerta simplemente en su smart phone. Accessmatic permite que múltiples usuarios controlen las puertas en cualquier lugar y en cualquier momento. -
Page 17: Conectar A Accessmatic
7) Elija el dispositivo en la página (Con gurar nuevo Accessmatic!) 8) Cree un código PIN de seguridad. El dispositivo se mostrará en la página principal de Accessmatic 9) El PIN se ultiliza como contraseña para otros usuarios que solicitan accesos al dispositivo... - Page 18 Infinity Opening your life Figura 24 Figura 25 Figura 26 Figura 27...
- Page 19 1) Siga los pasos 1 a 4 en Conexión de primer usuario 2) Elija el dispositivo en la página (Buscar dispositivo) 3) Ingrese el código PIN establecido por el primer usuario Funciones de Accessmatic Página de operación 1) Modo abrir/parar/cerrar 2) Deslizar para múltiples dispositivos...
- Page 20 2) El código PIN se puede cambiar 3) La versión de Firmware - Se puede actualizar el software cuando publique una versión nueva 4) La versión de Accessmatic - Por favor siempre actualice la última versión de Accessmatic 5) Con guración de noti cación 6) Cada dispositivo tiene su própio y único UID (identi-...
- Page 21 1) Vaya a la Con guración del sistema iOS 2) Elija Accessmatic, Noti caciones, Active (Permitir noti caciones) 3) Vaya a la página de cuenta de Accessmatic 4) Elija (noti cación) y active noti cación de los dispo- sitivos 1) Toque el icono del dispositivo en la página principal durante 3 segundos y elimine el dispositivo 2) Abra el AccessAgent, presione el botón (P) durante 5...
-
Page 22: Soluciones De Problemas Frecuentes
Volver a la con guración de fábrica Volver a la con guración de fábrica se usa cuando pierde su código PIN para compartir el dispositivo. Después de volver a la con guración de fábrica, siga las indicaciones anteriores para volver a conectar al Accessmatic... - Page 23 Infinity Opening your life 1) Toque el icono del dispositivo en la página principal durante 3 segundos y elimine el dispositivo 2) Abra el AccessAgent, presione el botón (P) durante 5 segundos y suéltelo 3) Desenchufe y vuelva a conectar el conector blanco para reiniciar el AccessAgent 4) Realice la (C1.
- Page 24 Opening your life USER MANUAL Sliding gate openers Infinity WARNING Please read the manual carefully before installation using the product. The installation of your new door must be carried out by a technically quali ed or licensed person. Attempting to install or repair the motor without technical quali cation can result in severe personal injury, death, and / or property damage.
- Page 25 Fixing by screwing the motor on concrete pads Base of support Wire connection Transmitter memorizing and erasing process System learning, reset process, and led display Warnings Programmable function settings Function settings Recognition of LED Technical feature AccessAgent Connecting to Accessmatic Troubleshooting...
-
Page 26: Warnings
Infinity Opening your life Warnings 1) All procedures of the installations, electrical connections, adjustments and testing must be followed after understanding the instruction and operation. 2) Disconnect the power supply via switching o the magneto thermic with upstream connected, and the hazard area required by relevant regulations. -
Page 27: Description Of Device
Infinity Opening your life Description of device Figure 2 a) Operation gear b) Limit switch device c) 24Vdc motor d) Back-up batteries (Optional) e) Release device f) Control panel g) Terminals of devices Dimenstion of device Figure 3... -
Page 28: Mounting Plate
Infinity Opening your life Mounting plate Figure 4 Installation of motor gear and gear rack Figure 5 Vertical view Point of Point of xation xation support support distance Passage cable 230V Gate Figure 6... -
Page 29: Checking For Installation
Infinity Opening your life This pose is privileged because it protected the operator from any standing water. 1) Install the 2 nut covers on the plate. (Figure 5) 2) Position the plate without xing at its precise location. It must be perfectlyparallel to the date (Figure 6) Mark the 4 xing points on the ground. -
Page 30: Fixing By Screwing The Motor On Concrete Pads
Infinity Opening your life Fixing by screwing the motor on concrete pads The installation is recommended in areas with heavy snowfall and where there is a risk of ooding. The principle is the same as above, but this time the motor is raised from the ground. The height of concrete pads is decided with your judgement Please note that in all cases, the height of the rack is directly related to the nal height of the operator. - Page 31 Infinity Opening your life Support holding Base support Base support Drive gear Figure 12 B) Remove the rack. C) Pierce your fate on the top of all remarks of tracking. (Figure 13) D) Fix your rack. To obtain the necessary gap between the wheel and the rack, raise the rack slightly in its xation. You can thus obtain the desired gap between the star wheel of operator and the rack.
-
Page 32: Wire Connection
Infinity Opening your life Wire connection If the LED display is in normal performing refer to “4.2.1”, you can control the gate by either transmitters or the button on the board: “UP”-clockwise moving, “SET”- stop and “DOWN”- Counterclockwise moving. KEY SELECTOR Flashing Light Antenna Figure 15... -
Page 33: Transmitter Memorizing And Erasing Process
Infinity Opening your life Transmitter memorizing and erasing process 1) Transmitter Memorizing: Press “RF Learn” button for 2 seconds, and the LED display shows “CS”; then press the transmitte- left button (A); the LED display will blink twice and then be o . The transmitter learning is completed. 2) Erasing Memory: Press "RF Learn"... -
Page 34: Warnings
Infinity Opening your life 2) To Reset Factory Setting: Press UP and DOWN for 3 seconds, and the LED display shows “CL” Figure 18 3) Motor current auto-detection The LED display shows the current consumption of the motor "0.4" : During the system learning procedure, the control panel will automa- tically detect the current consumption from each motor, indicate the resistance level of the gate whiling the motor operation. -
Page 35: Programmable Function Settings
Infinity Opening your life Programmable function settings FUNCTION VALUE DESCRIPTION LED DISPLAY DEFINITION Clockwise Opening The function can adjust the direction of gate Options of gate opening. Opening direction Counterclockwise Opening The factory setting is "1-1". No automatic closing Automatic closing 1. - Page 36 Infinity Opening your life LED DISPLAY DEFINITION FUNCTION VALUE DESCRIPTION 3 seconds 1. The function can adjust the time of Open Partially opening 6 seconds (Pedestrian mode) partially. 9 seconds 2. The factory setting is "8-2". 12 seconds 15 seconds 18 seconds The ashing light 1.
-
Page 37: Function Settings
Infinity Opening your life Function settings: Logic F3-1 The reactions when safety devices got activated Gate Status Photocell 2 Photocell 1 Closed Stop opening No Effect Open No Effect Reloads automatic closing time Stop during moving Stop opening Reloads automatic closing time Closing No Effect Open... -
Page 38: Recognition Of Led
Infinity Opening your life Testing and checking • Make sure the notices included in Warnings has been carefully observed. • Release the gearmotor with the proper release key. • Make sure the gate can be moved manually during opening and closing phases with a force of max. 390N (40 kg approx.) •... -
Page 39: Accessagent
Accessmatic_Smart phone controlled gate opener Accessmatic is a system connecting gate opener to smart phones, allowing you to operate your gate automation by smart phones. Accessmatic allows multiple users to operate the gate openers anywhere any time. Camera is recommended to be installed with Accessmatic to have a view during your operation. -
Page 40: Connecting To Accessmatic
7) Choose the device on the (Setup New Accessmatic!) page 8) Entering a PIN code twice to con rm. The device will show on the main page of Accessmatic 9) The PIN code is used a password for other users who is asking for access to Accessmatic... - Page 41 Infinity Opening your life Figure 24 Figure 25 Figure 26 Figure 27...
- Page 42 3. Plug out the and reconnect the wire to restart the AccessAgent 4) Do the (C1. Connecting to Accessmatic by the rst user) to get a new PIN NOTE: Code Please refer to troubleshooting ( page 21) for more information...
- Page 43 - Software can be updated when new version is relea- 4) The version of Accessmatic - Please use the latest version of the Accessmatic 5) The setting of the noti cation can be changed 6) The UID is a unique identi cation for each device...
- Page 44 Figure 31 Setting of noti cation 1) Go to the setting App of the iOS system 2) Tap on the Accessmatic and turn on the (Allow noti cation) 3) Go the Account page of Accessmatic 4) Tap the (Push noti cation) and turn on the noti ca-...
-
Page 45: Troubleshooting
RED LED ON indicates a system error. Please Return to the factory setting as mentioned below How should I change my PIN code Enter the operation page of the device in Accessmatic-> Click the (Device information) in the setting page -> Tap (PIN Code Setting) - Page 46 2) Open the AccessAgent, press the (P) button for 5 seconds and release it 3) Plug out the and reconnect the wire to restart the AccessAgent 4) Do the (C1. Connecting to Accessmatic by the rst user) to get a new PIN code Figure 36...
- Page 47 Infinity Opening your life...
- Page 48 Infinity Opening your life Opening your life Opening your life Opening your life Opening your life Opening your life www.accessmatic.com www.accessmatic.com www.accessmatic.com...
Need help?
Do you have a question about the InFinity 624 and is the answer not in the manual?
Questions and answers