Table of Contents
Advertisement
Quick Links
Advertisement
Table of Contents

Related Manuals for National Instruments Compact FieldPoint cFP-1808


Summary of Contents for National Instruments Compact FieldPoint cFP-1808
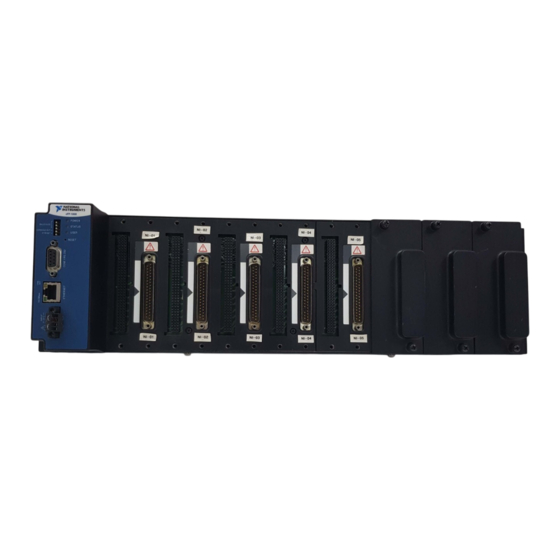
- Page 1 cFP-1808...
- Page 2 Quick Start Guide Compact FieldPoint cFP-1808 ™ What You Need to Get Set Up • cFP-1808 Network Interface • Ethernet or serial cable • Mounting hardware (DIN rail, • 11–30 VDC power supply panel-mount, or rack-mount • Accessories: Ethernet cable,...
- Page 3 (1.6 mm) wire with a ring lug. Use the 5/16 in. panhead screw shipped with the backplane to secure the ring lug to the PE ground terminal. Caution Keep in mind these requirements for space and cabling clearance: • Allow at least 51 mm (2 in.) all around the cFP-1808 for air circulation.
- Page 4 If you are using UL Recognized I/O modules with the Compact FieldPoint system, you must install the entire system in a suitably rated, UL Listed NEMA or IP enclosure. Refer to the Compact FieldPoint section for more information. Safety Information © National Instruments Corporation cFP-1808 Quick Start Guide...
- Page 5 104.78 mm (4.1 in.) 63.50 mm 127.00 mm (2.5 in.) (5.0 in.) 22.23 mm (0.9 in.) 440.94 mm (17.4 in.) Caution NI recommends that you use one of the mounting systems described in this document. If you decide to use a custom mounting solution, make sure that the screws you use are short enough to fit in the holes in the backplane.
- Page 6 1. Fasten the panel-mount plates to the back of the cFP-1808 using a number 2 Phillips screwdriver and the 8-32 × 5/16 in. countersunk screws shipped with the kit. Do not use screws longer than 5/16 in. to fasten the Caution panel-mount plates to the backplane. © National Instruments Corporation cFP-1808 Quick Start Guide...
- Page 7 102 mm 127 mm (4 in.) (5 in.) 457 mm (18 in.) 476 mm (18.7 in.) 2. Bolt or screw the panel-mount accessory to a panel. 3. Connect the PE ground terminal on the cFP-1808 to safety ground. Caution Disconnect power before removing the backplane from the panel.
- Page 8 Use the connector socket to the right of each I/O module socket. Do not insert or remove connector blocks or other connectivity Caution accessories while power is applied to them. © National Instruments Corporation cFP-1808 Quick Start Guide...
- Page 9 1. Wire field devices as described in the I/O module and connector block operating instructions. Caution Hazardous voltage wiring should be performed by qualified personnel and in accordance with local electrical standards. 2. Align the captive screws on the connector block with the holes on the backplane.
- Page 10 To prevent data loss and to maintain the integrity of your Ethernet installation, do not use a cable longer than 100 m. If you are using a 100 Mbps Ethernet, National Instruments recommends using a Category 5 shielded twisted-pair Ethernet cable.
- Page 11 Table 1. DIP Switch Positions and Corresponding Serial Baud Rates DIP Switches 3–5 Serial Baud Rate DIP Switches 3–5 Serial Baud Rate 2,400 1,200 9,600 cFP-1808 Quick Start Guide ni.com...
- Page 12 The serial interface on the cFP-1808 always uses the following parameters: 1 start bit, 8 data bits, 1 stop bit, and no parity. © National Instruments Corporation cFP-1808 Quick Start Guide...
- Page 13 RS-232 specifies a maximum cabling distance of 50 ft, but improvements in line drivers and cabling technology often allow you to design your network beyond the recommendations of the specification. The RS-232 connector is a 9-pin female D-SUB connector. Figure 1 shows the pinout.
- Page 14 Refer to the operating instructions for the power requirements of each I/O module. 2. Use a separate power supply for each module that needs external power. Caution Cascading power defeats isolation between the cascaded modules. © National Instruments Corporation cFP-1808 Quick Start Guide...
- Page 15 6. Power Up the cFP-1808 Check the DIP switches on the controller, making sure that the RESET IP switch and CONSOLE OUT switches are in the OFF position. Plug in each power supply to the Compact FieldPoint system. The cFP-1808 runs a power-on self test (POST), during which the POWER and STATUS LEDs are steadily lit.
- Page 16 LabWindows/CVI instrument driver only if it finds the corresponding development software installed. 2. Close all other applications. 3. Insert the National Instruments FieldPoint Software CD into the CD-ROM drive on your computer. 4. Follow the onscreen instructions to complete the installation.
- Page 17 Misuse of the product can result in a hazard. You can compromise the safety protection built into the product if the product is damaged in any way. If the product is damaged, return it to National Instruments for repair.
- Page 18 Do not remove or add connector blocks when power is connected to the Compact FieldPoint system. Avoid contact between your body and the connector block signal wiring when hot-swapping modules. © National Instruments Corporation cFP-1808 Quick Start Guide...
- Page 19 Operate Compact FieldPoint products at or below the measurement category marked on the hardware label. Measurement circuits are subjected to working voltages and transient stresses (overvoltage) from the circuit to which they are connected during measurement or test. Measurement categories establish standard impulse withstand voltage levels that commonly occur in electrical distribution systems.
-
Page 20: Specifications
Maximum power to I/O modules..9 W Maximum number of banks....Determined by network topology Serial Port One RS-232 (DCE) serial port Baud rate ........300 to 115,200 bps Data bits........8 Stop bits........1 © National Instruments Corporation cFP-1808 Quick Start Guide... -
Page 21: Power Requirement
Parity .......... None Flow control ....... None Power Requirement Power supply range......11–30 VDC Recommended power supply.... 20 W Power consumption ......6.1 W + 1.1(I/O module power requirements) Safety Isolation Voltage Isolation voltage is verified by a dielectric withstand test. Module to backplane Continuous ......... -
Page 22: Shock And Vibration
Sinusoidal (IEC 60068-2-6) ..10–500 Hz, 5 g Operating shock (IEC 60068-2-27)......50 g, 3 ms half sine, 18 shocks at 6 orientations; 30 g, 11 ms half sine, 18 shocks at 6 orientations © National Instruments Corporation cFP-1808 Quick Start Guide... -
Page 23: Electromagnetic Compatibility
Safety This product is designed to meet the requirements of the following standards of safety for electrical equipment for measurement, control, and laboratory use: • IEC 61010-1, EN 61010-1 • UL 61010-1 • CAN/CSA-C22.2 No. 61010-1 Note For UL, hazardous location, and other safety certifications, refer to the product label or visit , search by model ni.com/certification... - Page 24 Connector 1 Connector 2 Pin 1 Pin 8 Pin 1 Pin 8 white/green white/green white/orange blue blue blue white/blue white/blue white/blue green green green white/brown white/brown white/brown brown brown brown © National Instruments Corporation cFP-1808 Quick Start Guide...
-
Page 25: Where To Go For Support
United Kingdom 44 0 1635 523545 National Instruments, NI, ni.com, and LabVIEW are trademarks of National Instruments Corporation. Refer to the Terms of Use section on ni.com/legal for more information about National Instruments trademarks. Other product and company names mentioned herein are trademarks or trade names of their respective companies.
Need help?
Do you have a question about the Compact FieldPoint cFP-1808 and is the answer not in the manual?
Questions and answers