Table of Contents
Advertisement
Quick Links
Advertisement
Table of Contents

Subscribe to Our Youtube Channel
Related Manuals for QNAP ES1686dc


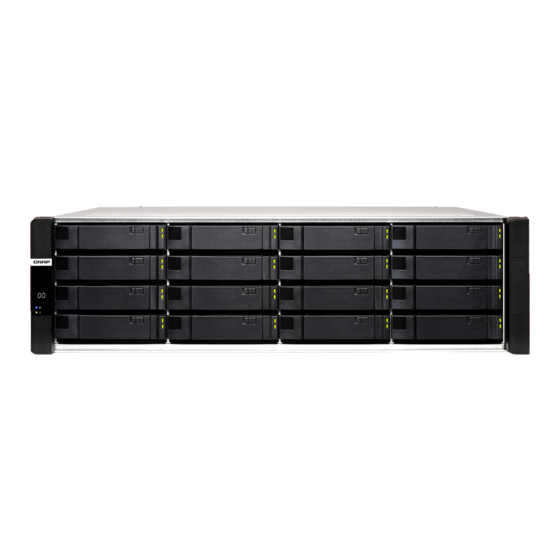
Summary of Contents for QNAP ES1686dc
- Page 1 ES1686dc User Guide Document Version: 8 02/06/2020...
-
Page 2: Table Of Contents
ES1686dc User Guide Contents 1. Preface About This Guide............................3 Audience...............................3 Document Conventions..........................3 2. Product Overview About the ES1686dc.............................4 Hardware Specifications..........................4 Package Contents............................7 Components..............................7 Front Panel............................... 8 Front Panel Buttons..........................8 Front Panel LEDs............................. 9 Front Panel OLED Display........................10 Rear Panel..............................13... - Page 3 5. Glossary QES................................58 Qfinder Pro..............................58 6. Notices Limited Warranty............................59 Disclaimer..............................59 BSMI Notice..............................59 CE Notice..............................60 FCC Notice..............................60 SJ/T 11364-2006............................60 VCCI Notice..............................61...
-
Page 4: Preface
ES1686dc User Guide 1. Preface About This Guide This guide provides information on the QNAP ES1686dc NAS and step-by-step instructions on installing the hardware. It also provides instructions on basic operations and troubleshooting information. Audience This document is intended for storage administrators. This guide assumes that the user is knowledgeable and qualified to install, maintain, and troubleshoot issues involving servers, server components, and storage systems. -
Page 5: Product Overview
This chapter provides basic information about the QNAP ES1686dc NAS. About the ES1686dc The ES1686dc is designed to deliver a scalable platform for enterprise-level solutions. It is equipped with a powerful multi-core processor, AES-NI hardware encryption engine, and both USB 3.0 and 10GbE ports, allowing it to deliver optimal performance for enterprise users. - Page 6 ES1686dc-2142IT-128G Memory slots 8 x DDR4 RDIMM or LRDIMM slots per controller Important • Use only QNAP memory modules to maintain system performance and stability. For NAS devices with more than one memory slot, use QNAP modules with identical specifications.
- Page 7 ES1686dc User Guide ES1686dc-2142IT-96G Component ES1686dc-2123IT-64G ES1686dc-2142IT-128G PCIe slots 2 x PCIe 3.0 x8 slots per controller For the list of compatible expansion cards, go to https://www.qnap.com/compatibility. USB ports 2 x USB 3.0 Type-A ports per controller Note For engineering purposes only.
-
Page 8: Package Contents
ES1686dc User Guide ES1686dc-2142IT-96G Component ES1686dc-2123IT-64G ES1686dc-2142IT-128G Sound level 55.8 db(A) Note The sound level was tested at a bystander position, which is within one meter of the NAS. The test NAS operated at low speed with the maximum number of drives installed. -
Page 9: Front Panel
ES1686dc User Guide Front Panel Component Component OLED panel Drive status LED System power LED Drive activity LED Status LED Front Panel Buttons Note Pull the panel cover to access the front panel buttons. Product Overview... -
Page 10: Front Panel Leds
ES1686dc User Guide Component Component OLED panel power button Power button Operation User Action Result Power on NAS Press the power button. • Both storage controllers power on. • All storage and management services are disabled. • System startup takes 10 to 15... -
Page 11: Front Panel Oled Display
ES1686dc User Guide Status Description System status Green System operating normally • System errors or warnings (e.g. degraded RAID mode, memory failure, fan/power supply failure, system/disk temperature too high, storage pool reaching threshold value) were detected. Refer to the QES User Guide for details. - Page 12 ES1686dc User Guide Icon name Icon Description Controller fan status • On: The fan modules of both controllers are operating normally • Flashing: The fan modules of both controllers are operating incorrectly or are not installed If both controllers are installed: •...
- Page 13 ES1686dc User Guide Icon name Icon Description Controller battery • On: The BBUs of both controllers are operating backup unit normally • Flashing: The BBUs of both controllers are operating incorrectly • Highlighted: The BBUs of both controllers are charging •...
-
Page 14: Rear Panel
ES1686dc User Guide Icon name Icon Description Two-digit display The two-digit display shows the booting status of each storage controller. The left digit is controller A, and right is controller B. • No Display: BIOS booting • 1: Detecting device •... - Page 15 ES1686dc User Guide Component Component Power supply unit 1 Battery backup unit Ethernet port 6 (10GbE SFP+) Power button Ethernet port 4 (10GbE SFP+) Service port Note This port is only for engineering purposes. Ethernet port 2 (GbE RJ45) Ethernet port 5 (10GbE SFP+)
-
Page 16: Rear Panel Leds
One or more of the following conditions exist: • AC power unavailable • Power supply failed Battery backup Green Functioning normally unit Malfunctioning Orange Charging or learning Not correctly attached to the ES1686dc Status Green System operating normally Flashing green System booting System powered off Product Overview... - Page 17 ES1686dc User Guide Status Description Green Functioning normally Orange Malfunctioning Fans not detected Battery backup Green Functioning normally unit status Orange Writing buffer for Copy-to-Flash For details, see Battery Backup Unit. One or more of the following conditions exist: • Storage controller is powered off •...
-
Page 18: Storage Controller Power Button
ES1686dc User Guide Storage Controller Power Button Operation User Action Result Power on Press the button once. The storage controller powers on. Power off Press and hold the button for 5 seconds. The storage controller powers off. Force power off Press and hold the button for 10 seconds. -
Page 19: System Board
ES1686dc User Guide Warning During a power outage, do not remove storage controllers while their BBU status LEDs are orange. Removing a storage controller during this period interrupts the Copy-to-Flash process and may result in data loss. System Board Component... - Page 20 ES1686dc User Guide General Instructions • The NAS should be stored in a secure location with restricted access, controlled through the use of a tool, lock and key, or any means of security. • Only qualified, skilled, and authorized persons with knowledge of all restrictions, safety precautions, and installation and maintenance procedures should have physical access to the NAS.
-
Page 21: Installation Requirements
Installing 3.5-inch Hard Drives on 3.5-inch Trays • Installing 2.5-inch Hard Drives or Solid State Drives on 3.5-inch Trays For a list of compatible drives and expansion cards, go to http://www.qnap.com/compatibility. 3. Optional: Install expansion cards. For details, see Installing Expansion Cards. - Page 22 ES1686dc User Guide 4. Connect the NAS to the network. For details, see the following topics: • Management Port Configuration • Multipath I/O Network Configuration 5. Optional: Connect the SAS Expansion Units. For details, see Connecting SAS Expansion Units. 6. Connect the power cord and all applicable cables.
-
Page 23: Installation And Configuration
ES1686dc User Guide 3. Installation and Configuration This chapter provides specific hardware and firmware installation and configuration steps. Hardware Installation This section provides information on removing or installing the storage controller, drives, expansion cards, power supply units, fan modules, memory modules, and battery backup units. -
Page 24: Installing A Storage Controller
ES1686dc User Guide Installing a Storage Controller 1. Load the controller into the NAS. a. Insert the controller into the chassis. b. Push the handle up. 2. Tighten the screw. Installation and Configuration... -
Page 25: Drive Installation
When using a hybrid configuration, QNAP recommends installing SSDs in drive bays 1 to 4. Drive bays 1 to 4 are reserved for system configurations. QNAP recommends using drive bays 5 to 16 for data storage. This setup prevents data storage operations from interfering with the basic operation of the NAS system. - Page 26 Other moving components: Keep your hands and other body parts away from other moving components. Note • A QNAP QDA-SA or QDA-SA2 drive adapter is required for installing a SATA HDD or SSD onto the drive tray. • The QDA-SA or QDA-SA2 drive adapter allows SATA 6 Gbps drives to be installed into 3.5-inch SAS drive bays on QNAP Enterprise ZFS NAS devices.
- Page 27 ES1686dc User Guide b. Push the button to release the handle. c. Pull the tray out. 3. Install a drive on the tray. a. Place the drive on the tray so that the holes on the sides of the drive are aligned with the holes on the sides of the tray.
- Page 28 Push the handle. c. Slide the lock to the right. 5. Power on the NAS. Installing 2.5-inch Hard Drives or Solid State Drives on 3.5-inch Trays For the list of compatible drive models, go to https://www.qnap.com/compatibility. Installation and Configuration...
- Page 29 Note • A QNAP QDA-SA or QDA-SA2 drive adapter is required for installing a SATA HDD or SSD onto the drive tray. • The QDA-SA or QDA-SA2 drive adapter allows SATA 6 Gbps drives to be installed into 3.5-inch SAS drive bays on QNAP Enterprise ZFS NAS devices.
- Page 30 ES1686dc User Guide b. Push the button to release the handle. c. Pull the tray out. 3. Install a drive on the tray. a. Place the drive on the tray so that the holes on the bottom of the drive are aligned with the holes on the bottom of the tray.
- Page 31 ES1686dc User Guide 4. Load the tray into the bay. a. Insert the tray into the bay. b. Push the handle. c. Slide the lock to the right. 5. Power on the NAS. Installation and Configuration...
-
Page 32: Installing Expansion Cards
ES1686dc User Guide Installing Expansion Cards The ES1686dc supports selected expansion cards, some of which require QNAP PCIe brackets. QNAP- branded expansion cards purchased from the company website are shipped with the brackets necessary to fit the ES1686dc. Warning • Only qualified personnel should perform the following steps. Failure to follow instructions can result in serious injury or death. - Page 33 4. Optional: Attach the QNAP bracket to the expansion card. a. Remove all screws of the existing bracket. b. Carefully pull the bracket away from the card. c. Attach the QNAP bracket to the card using the same screws. Installation and Configuration...
- Page 34 ES1686dc User Guide d. Verify that the bracket does not move. 5. Install the expansion card. a. Hold the card by the edges. b. Insert the card into the slot. c. Attach the screw. 6. Install the storage controller. For details, see Installing a Storage Controller.
-
Page 35: Replacing Memory Modules
Each storage controller has eight memory slots. You can increase the memory capacity of the NAS by upgrading the memory module. Use only QNAP modules of the same type and capacity to maintain system performance and stability. You can purchase QNAP memory modules from authorized resellers. - Page 36 ES1686dc User Guide Warning Attempting to remove a module that is not completely released may damage the module and the motherboard. b. Hold the module by the edges and then carefully slide it out of the slot. 3. Install a new module.
-
Page 37: Replacing The Fan Module
Go to Control Panel > System > System Status > Hardware Information . c. Check the values for each memory slot. Replacing the Fan Module The fan module of the ES1686dc contains three fans to ensure adequate cooling. Warning •... -
Page 38: Hot-Swapping Redundant Power Supply Units
ES1686dc User Guide 3. Install a new fan module. a. Insert the module into the chassis. b. Push the handle down to lock the module in place. 4. Install the storage controller. For details, see Installing a Storage Controller. Hot-swapping Redundant Power Supply Units 1. - Page 39 ES1686dc User Guide Warning The NAS may have one or more power supply unit (PSU) cords. To avoid serious injuries, a trained service technician must disconnect all PSU cords before installing or replacing system components. 3. Firmly press the latch toward the handle and then pull the PSU out.
-
Page 40: Replacing The Battery Backup Unit
2. Insert the new BBU into the slot until it locks in place. Expansion Unit Installation The ES1686dc supports SAS expansion units and is compatible with the EJ1600 v2. When connecting to the EJ1600 v2, some storage expansion accessories are required. Refer to the following table for details. - Page 41 • Supports SAS HDD/SSD • Mini-SAS SFF-8644 cable • RAIL-E02 rail kit You can purchase storage expansion accessories from QNAP or an authorized reseller. For details, go to https://shop.qnap.com/. Connecting SAS Expansion Units 1. Install a storage expansion card on the PCIe slot.
- Page 42 ES1686dc User Guide Dual-path configuration Installation and Configuration...
- Page 43 ES1686dc User Guide Single-path configuration 3. Power on the expansion units. 4. Verify that the expansion units are recognized by the NAS. a. Log on to QES as administrator. b. Go to Main Menu > Storage Manager > Overview > System .
- Page 44 ES1686dc User Guide Dual-path configuration Single-path configuration 1. Mount the new expansion unit on the rack. 2. Install the drives in the new expansion unit. 3. If you are using a dual-path configuration, disconnect the loop cables from the SAS ports on the last expansion unit.
- Page 45 ES1686dc User Guide 8. Log on to QES as administrator. 9. Go to Main Menu > Storage Manager > Storage > Disks . 10. Click Recover, and then select Reinitialize enclosure ID. QES scans for and detects the new expansion unit and installed disks.
- Page 46 ES1686dc User Guide Dual-path configuration Installation and Configuration...
-
Page 47: Qes Installation
QES scans for and detects the new expansion unit and installed disks. 15. Bring all offline storage pools back online. QES Installation The ES1686dc uses the QNAP QES operating system. If the NAS is connected to your local area network, you can install QES using Qfinder Pro. Mode... -
Page 48: Installing Qes Using A Static Ip Address
2. Connect the NAS to your local area network. 3. Run Qfinder Pro on a computer that is connected to the same local area network. To download Qfinder Pro, go to https://www.qnap.com/utilities. 4. Locate the IP address of the storage controller from the device list. -
Page 49: Installing Qes Using A Dynamic Ip Address
2. Connect the NAS to your local area network. 3. Run Qfinder Pro on a computer that is connected to the same local area network. To download Qfinder Pro, go to https://www.qnap.com/utilities. 4. Locate the NAS in the device list. -
Page 50: Installing Qes Using Manual Setup
2. Connect the NAS to your local area network. 3. Run Qfinder Pro on a computer that is connected to the same local area network. To download Qfinder Pro, go to https://www.qnap.com/utilities. 4. Locate the NAS in the device list, and then double-click the name or IP address. - Page 51 7. Click Next. The Set the date and time screen appears. 8. Specify the time zone, date, and time. QNAP recommends connecting to an NTP server to ensure that the NAS follows the Coordinated Universal Time (UTC) standard. 9. Click Next.
-
Page 52: Service Port Configuration
The service port is the main point for hardware installation, configuration, and maintenance activities. Important Only use the service port when directed by QNAP technical support personnel. Storage Controller Service Port The storage controller service port is a RS-232 port with an RJ-11 connector. Use the appropriate cable/ adapter (i.e.RJ-11 to DB9/DB9 to USB or RJ-11 to USB) to connect this port with your computer. -
Page 53: Expansion Unit Service Port
ES1686dc User Guide • Default username/password: admin/admin Expansion Unit Service Port The expansion unit service port is a RS-232 port with an DB-9 (or DE-9) connector. The pin-outs are defined as the following: Pin Number Signal Description No Connection Receive Data... -
Page 54: Management Port Configuration
169.254.100.100:8080. If the NAS has been configured to use DHCP, you can use the QNAP Qfinder Pro to check the IP address of the NAS. Make sure the NAS and the computer that runs the QNAP Qfinder Pro are connected to the same subnet. -
Page 55: Multipath I/O Network Configuration
NAS. If any one network path goes down due to the failure of a switch, cable, or network card, the server can route I/O through the remaining network paths with no storage downtime. The ES1686dc supports MPIO on iSCSI connections using standard Ethernet infrastructure. - Page 56 • Use dedicated network switches or VLANs to separate iSCSI traffic from other network traffic. Platform QNAP Application Note Name Windows Configuring Microsoft iSCSI Storage with QNAP Enterprise-Class ES NAS Linux Configuring Linux iSCSI Storage with QNAP ES For further information, see the following user guide: https://download.qnap.com/Storage/ TechnicalDocument/ES1640dc-v2/ESNAS-UG1102-20180103-en.pdf Installation and Configuration...
-
Page 57: Troubleshooting
ES1686dc User Guide 4. Troubleshooting This chapter describes basic troubleshooting information. Forcing Qfinder Pro to Locate the NAS If Qfinder Pro is unable to locate the NAS during QES installation, the drives or data may be faulty. 1. Power off the NAS. -
Page 58: Support And Other Resources
ES1686dc User Guide 11. Locate the volume that contains the new drive and then verify that the status is Rebuilding. Support and Other Resources QNAP provides the following resources: Resource Documentation https://docs.qnap.com Service Portal https://service.qnap.com Downloads https://download.qnap.com Community Forum https://forum.qnap.com... -
Page 59: Glossary
ES1686dc User Guide 5. Glossary QNAP NAS operating system Qfinder Pro QNAP utility that lets you locate and access QNAP NAS devices in your local area network Glossary... -
Page 60: Notices
No license, express or implied, by estoppels or otherwise, to any intellectual property rights is granted by this document. Except as provided in QNAP's terms and conditions of sale for such products, QNAP assumes no liability whatsoever, and QNAP disclaims any express or implied warranty, relating to sale and/or use of QNAP products including liability or warranties relating to fitness for a particular purpose, merchantability, or infringement of any patent, copyright or other intellectual property right. -
Page 61: Ce Notice
Important Any modifications made to this device that are not approved by QNAP Systems, Inc. may void the authority granted to the user by the FCC to operate this equipment. SJ/T 11364-2006 本产品符合中国... -
Page 62: Vcci Notice
ES1686dc User Guide 部件名称 有毒有害物质或元素 铅 汞 镉 六价铬 多溴联苯 多溴二苯醚 (Pb) (Hg) (Cd) (CR(VI)) (PBB) (PBDE) 壳体 显示 印刷电路板 金属螺帽 电缆组装 风扇组装 电力供应组装 0 电池 O: 表示该有毒有害物质在该部件所有物质材料中的含量均在 SJ/T11363-2006 标准规定的限量要求以下。 X: 表示该有毒有害物质至少在该部件的某一均质材料中的含量超出 SJ/T11363-2006 标准规定的限量要求。 VCCI Notice この装置は、クラス A 情報技術装置です。この装置を家庭環境で使用すると電波 妨害を引き起こすことがあります。この場合には使用者が適切な対策を講ずるよう要求されることがありま...
Need help?
Do you have a question about the ES1686dc and is the answer not in the manual?
Questions and answers