Sign In
Upload
Download
Table of Contents
Contents
Add to my manuals
Delete from my manuals
Share
URL of this page:
HTML Link:
Bookmark this page
Add
Manual will be automatically added to "My Manuals"
Print this page
×
Bookmark added
×
Added to my manuals
Manuals
Brands
Arkray Manuals
Measuring Instruments
PocketChem UA
Operating manual
Arkray PocketChem UA Operating Manual
Compact urine analyzer
Hide thumbs
1
2
3
4
5
6
Table Of Contents
7
8
9
10
11
12
13
14
15
16
17
18
19
20
21
22
23
24
25
26
27
28
29
30
31
32
33
34
35
36
37
38
39
40
41
42
43
44
45
46
47
48
49
50
51
52
53
54
55
56
57
58
59
60
61
62
63
page
of
63
Go
/
63
Contents
Table of Contents
Troubleshooting
Bookmarks
Table of Contents
Premise
Introduction
Symbols and Signages
Installation Precautions
Table of Contents
Chapter 1 Before Use
Outline of the Pocketchem UA
Features
Specifications
Measurement Principle
Rank Table
Unpacking
Components
Instrument and Printer
Instrument Setup
For Battery Operation
For Use with the Printer
For AC-Power Operation
Loading Printer Paper
Changing the Direction of the Test Strip Feeding
Basic Operations
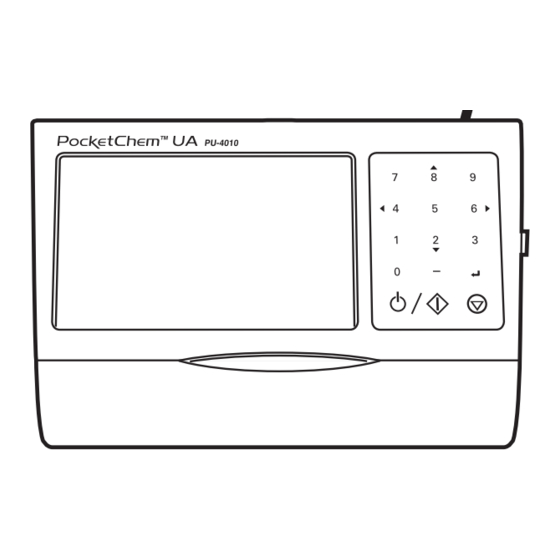
Display
Operator Panel
Measurement
Operation Flow Chart
Cautions in Measurement
Handling Samples
Handling Test Strips
Start up
Turning on the Power
Turning off the Power
Test Conditions Setup
Selecting Test Strip Type
Setting Measurement Number
Setting Patient ID
Preparing Samples
Preparing Test Strips
Testing Samples
Press Button
Check Measurement
Examples of Results
On the Display
On Printouts
Auxiliary Operations
Setting the Date
Setting the Time
Reviewing Results
Deleting a Specific Result from Memory
Clearing All Results from Memory
Transferring a Specific Result to an External Device
Transferring All Results to an External Device
Reprinting a Specific Result
Reprinting All Results
Customizing the Instrument
Date Format
Print Format
Display Format
Chapter 4 Maintenance
Daily Cleaning: Test Strip Holder, Holder Base and Guide Rails
Cleaning the Reading Unit
Exterior Cleaning
Chapter 5 Troubleshooting
When an Error Occurs
Chapter 6 Appendix
Addendum
Performance Characteristics
Analytical Performance
Clinical Performance
Advertisement
Quick Links
1
Daily Cleaning: Test Strip Holder, Holder Base and Guide Rails
2
When an Error Occurs
Download this manual
Table of
Contents
Previous
Page
Next
Page
1
2
3
4
5
Advertisement
Table of Contents
Need help?
Do you have a question about the PocketChem UA and is the answer not in the manual?
Ask a question
Questions and answers
Related Manuals for Arkray PocketChem UA
Measuring Instruments Arkray PU-4010 Operating Manual
Compact urine analyzer (63 pages)
Measuring Instruments Arkray PocketChem BA PA-4140 Operating Manual
Blood ammonia meter (57 pages)
Measuring Instruments Arkray AUTION MAX AX-4030 Operating Manual
Fully automated urine analyzer (206 pages)
Measuring Instruments Arkray SPOTCHEM EZ SP-4430 Operating Manual
(139 pages)
Measuring Instruments Arkray AUTION ELEVEN AE-4022 Operating Manual
Semi-automatic urine analyzer (161 pages)
Measuring Instruments Arkray AUTION ELEVEN AE-4022 Quick Reference Manual
Semi-automated urine analyzer (26 pages)
Measuring Instruments Arkray ADAMS A1C HA-8180V Operating Manual
Automatic glycohemoglobin analyzer (246 pages)
Measuring Instruments Arkray ADAMS A1c Operating Manual
Automatic glycohemoglobin analyzer (288 pages)
Measuring Instruments Arkray Lab 004 Operating Manual
(8 pages)
Measuring Instruments ARKRAY SPOTCHEM EZ Quick Instruction Manual
Clia waived bench top chemistry analyzer (2 pages)
Measuring Instruments Arkray SPOTCHEM EL Operating Manual
Electrolyte measuring system (91 pages)
Measuring Instruments Arkray SPOTCHEM D-01 Operating Manual
Measurement unit for immunity nephelometry (78 pages)
Measuring Instruments Arkray SPOTCHEM D-02 Operating Manual
Measurement unit for automated dry chemistry system (114 pages)
Measuring Instruments Arkray Lab 004 Operating Instructions Manual
(9 pages)
This manual is also suitable for:
Pu-4010
Table of Contents
Print
Rename the bookmark
Delete bookmark?
Delete from my manuals?
Login
Sign In
OR
Sign in with Facebook
Sign in with Google
Upload manual
Upload from disk
Upload from URL


Need help?
Do you have a question about the PocketChem UA and is the answer not in the manual?
Questions and answers