
Related Manuals for Asko TDC177XV


Summary of Contents for Asko TDC177XV
- Page 1 USER MANUAL TD75.C17X Tumble dryer TDC177XV Carefully read the instructions for use before using the dryer.
-
Page 2: Table Of Contents
Contents Introduction ..........Cleaning and maintenance ....... Safety precautions ....................................Errors what to do? ........Dryer description ....................................Service ............Before using the appliance for the first ..............time .............. Technical information ..................................Installation and connection ...... Program chart .......... -
Page 3: Introduction
Introduction Dear Customer, We thank you for purchasing this quality ASKO product. We hope it meets all your expectations. Scandinavian design combines pure lines, everyday functionality, and high quality. These are the key characteristics of all our products, and the reason why they are highly appreciated across the globe. -
Page 4: Safety Precautions
• Instructions for use are available on our website at www.asko.com. • Appliance is intended to be used in an area open to the public. - Page 5 Safety precautions • WARNING! The appliance shall not be supplied through an external switching device, such as a timer, or connected to a circuit that is regularly switched on and off by a utility. • After the drying process, unplug the dryer power cord from the power outlet.
- Page 6 Safety precautions • Do not use any solvents, abrasive cleaners, glass cleaners, or all-purpose cleaners. • Do not place the dryer behind lockable or sliding door, or door with a hinge on the opposite side of the dryer door hinge. Install the dryer in such way that the door can always be freely opened.
- Page 7 Safety precautions • Maximum drying capacity in kg is indicated on the rating plate. Safety • DANGER OF FIRE! Only use the dryer to dry laundry that was washed with water. Do not dry any laundry that was washed or cleaned with flammable cleaners or substances (such as gasoline, trichloroethylene etc.) as this may result in an explosion.
- Page 8 Safety precautions • HOT SURFACE! Never stop a drying cycle or do not open the door before the end of the program. If you do so for any reason, be careful when taking the laundry from the drum as it can still be very hot and there is a risk of burning.
-
Page 9: Dryer Description
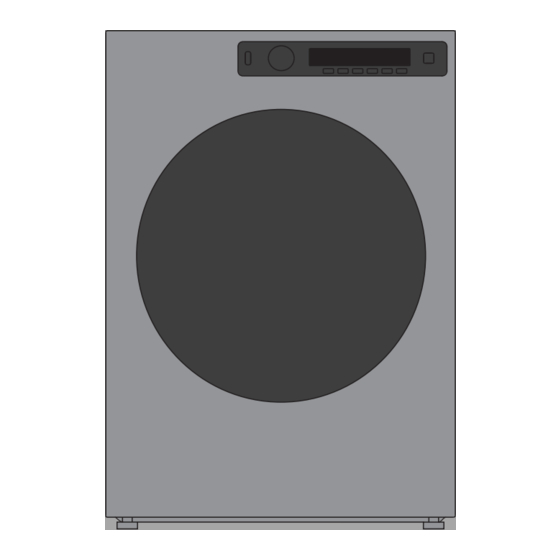
Dryer description 1. Main switch (ON/OFF) 2. Program selector knob 3. Display unit 4. Program settings buttons 5. Button (start/pause) 6. Rating plate with information about the dryer (on the inside of the drying machine door) 7. QR and AUID code (on the inside of the drying machine door) 8. -
Page 10: Before Using The Appliance For The First Time
Before using the appliance for the first time Packaging Remove all packaging. Please sort the materials in compliance with local recommendations (see chapter "Disposal"). Cleaning Disconnect the dryer from the power mains and open the door towards you. Before using the dryer for the first time, clean the dryer drum using a soft damp cotton cloth and water. -
Page 11: Installation And Connection
Installation and connection Dryer placement The dryer can be either free standing or installed on top of a washing machine. INFORMATION! At least two persons are required to install the tumble dryer on top of a washing machine. The dryer emits heat. Therefore, do not place it in a very small room, as the drying process may be longer due to limited amount of ambient air. - Page 12 INFORMATION! If the appliance is installed on a plinth or a similar structure, then the appliance must be fixed to it, to avoid the risk of falling. ASKO original accessories are available for this purpose, complete with fixing instructions. Free-standing appliance The dryer may be placed adjacent to a washing machine.
- Page 13 (A+B), supplied in the cardboard box in the dryer drum. Tipping guard part B is designed to fit on ASKO washing machines and it may be hard or impossible to mount on appliances of other brands. If the washing machine and dryer are not of matching dimensions or if you have installed a hidden helper between the two appliances, then binding plates are available as optional accessories at the service center (…...
- Page 14 Installation and connection All ASKO washing machines can bear the weight of the dryer. INFORMATION! Washing machine on which you wish to install the dryer must be able to bear the weight of the dryer (see washing machine’s rating plate or technical information).
- Page 15 Installation and connection How to stack a dryer onto the washing machine (ASKO): There is a cardboard box in the dryer drum, containing the vacuum feet and the tipping guard. The tipping guard consists of two metal parts (A + B).
- Page 16 Installation and connection Table continued from last page Set the dryer feet: 1. Tighten the front two feet all the way 2. Undo the back feet by 3.5 turns or 5 mm; then, fasten the jam nuts towards the bottom of the appliance Place the dryer onto the washing machine:...
- Page 17 Installation and connection Changing the door opening direction To change the direction of door opening, proceed as follows: Open the door fully. Undo the screws and remove the door. Use a screwdriver to remove the door lock cover and undo the screw on the door lock.
- Page 18 Installation and connection Undo the door hinge assembly (left) and the door latch assembly (right), switch their positions, and replace the screws (door hinge assembly to the right-hand side, door latch assembly to the left-hand side). INFORMATION! Use a screwdriver to remove the plastic part more easily.
- Page 19 Installation and connection Install the door to the front and screw the door. Evacuation of humid air Use the supplied air exhaust hose to convey the humid air from the dryer is through an opening (ventilation system, window etc.). Connecting the air exhaust hose to the dryer The dryer allows three possibilities for air evacuation: on the rear, on the right, and on the left side.
- Page 20 Installation and connection Table continued from last page Use a cap to close the opening on the back of the dryer. Connecting the air exhaust hose to a ventilation duct The air exhaust hose should be routed in shortest and straightest possible way to the ventilation system opening (air evacuation duct).
- Page 21 Installation and connection Selecting the room Place the appliance in a thoroughly ventilated room with a window or ventilation fan. If possible, connect the air exhaust hose so that it has no inclination, upwards (A) or downwards (C), but rather straight (B). Extra equipment If the air exhaust hose is connected to an opening in the wall, influx of cool air may be prevented by...
- Page 22 Installation and connection Table continued from last page If there is only one ventilation opening in the room, an air lock should be installed. This extra equipment can be purchased from your seller. INFORMATION! Please avoid: • excessively long ventilation systems; •...
- Page 23 Installation and connection Connecting to the power mains ELECTRIC SHOCK! After installation, the dryer should stand still for two hours before it is connected to the power mains. Connect the appliance to an earthed power outlet. After installation, the wall outlet should be freely accessible.
- Page 24 Installation and connection "Please pay to continue" appears on the display when the machine is started with the main power switch (by pressing on button Start).
-
Page 25: Advices Before Drying
Advices before drying This chapter includes several advices on how to prepare the laundry from drying. Laundry sorting Sort the laundry according to: • type, • fabric thickness. For the most even drying, make sure the laundry is made of a similar material. Clothing 1. - Page 26 Advices before drying Table continued from last page Hand wash only Do not wash Bleaching Bleaching in cool water Bleaching not allowed Dry cleaning Dry cleaning with all agents Perchloroethylene R11, R113, petroleum Dry cleaning in kerosene, pure alcohol, and R113 Dry cleaning not allowed Ironing Ironing with a hot iron with a maximum temperature of 200 °C...
- Page 27 Advices before drying INFORMATION! The dryer does not cause any considerable wear of the fabric. The lint collected in the lint filter consists of dust and fabric fragments collected during the use of the laundry. Materials (fabrics) that may not be dried in a tumble dryer This symbol means that the material is not suitable for drying in a tumble dryer.
-
Page 28: Drying Process, Step By Step
Drying process, step by step STEP 1: Sort the fabrics See chapter "Advices before drying" INFORMATION! Empty the pockets. Coins, nails etc. could damage the machine and the fabric. STEP 2: Turn on the main switch. Turning on Press the on/off button. - Page 29 Drying process, step by step Select the program based on the type and remaining moisture of the laundry you wish to dry. Anticipated program duration is indicated on the display. Choose between the following programs: (owner/distributor can change parameters and rename the program) Programe (factory M a x .
- Page 30 Drying process, step by step Table continued from last page Programe (factory M a x . Description default program) TIME 80 min Cycle will stop when set time is reached. The time program is suitable for small loads. TIME 60 min Cycle will stop when set time is reached.
- Page 31 Drying process, step by step STEP 6: Close the door and start the drying process. Close the dryer door and press the Start/Pause button. Start (pressed briefly start/resume) Pause (short press of the button - pause) Stop (press and hold for 3 seconds stop or cancel) Remaining time Depending on the selected program and load, anticipated drying time will be displayed in hours...
- Page 32 Drying process, step by step STEP 7: End of program After the end of the drying program, the display will indicate that the drying has been finished. If you have selected the "anti-crease" option, the dryer will continue to operate after the end of the drying cycle.
-
Page 33: Settings
Settings Only appliance owner/distributor may change the settings! (owner/distributor should check Service manual) On display Setting Description Cleaning the filter On/Off Cleaning the door filter in the 1 --> 10 door Cleaning of water condenser 10 --> 100 (step 10) Condensed water Drain/Tank Payment system... - Page 34 Settings Table continued from last page On display Setting Description Temporary language selection On/Off (from 0 to 5) You can select up to 5 languages, which will be available in the main menu. Sound setting 0 --> 5 Display settings: •...
-
Page 35: Cleaning And Maintenance
Cleaning and maintenance INFORMATION! Before cleaning, make sure to switch off the appliance and disconnect it from the power mains (unplug the power cord from the outlet). Cleaning the door net filter in the door Before cleaning, make sure to switch off the appliance and disconnect it from the power mains (unplug the power cord from the outlet). - Page 36 Cleaning and maintenance Table continued from last page If it is necessary to clean the net filter from the back, unscrew the screw and turn the filter from the locked to the unlocked position. Pull out the entire filter unit and clean it thoroughly, and return the filter unit to its original position after cleaning.
- Page 37 Cleaning and maintenance INFORMATION! Always disconnect the dryer from the power mains before cleaning. In the case of a 3 phase connection of the appliance, switch off the main socket switch.
-
Page 38: Errors What To Do
Errors what to do? Disturbances from the environment (e.g. the power grid) may result in various error reports (see Troubleshooting table). In such case: • Switch off the appliance, wait for 1 minute, switch the appliance back on, and repeat the drying program. - Page 39 Errors what to do? Table continued from last page Problem/error Cause What to do? • Filters are not clean. • Clean the filters (see chapter Laundry not "CLEANING AND MAINTENANCE"). dried or drying takes too long. • Dryer is placed in a closed room; •...
- Page 40 Errors what to do? Failure display In case of a failure while a program is in progress, the relevant Error X is indicated on the display unit. Press and hold the INFO button to display the error description. Switch off the dryer and turn it back on. Errors indicated on the display unit (depending on the model) may include the following: Problem/error Error indication on the display...
- Page 41 Errors what to do? INFORMATION before, during, and after the program (depending on the model) Error indication on the display What to do? EN: Please close the door before pressing start. Close the dryer door before starting or resuming the program. EN: Option not available at this phase of cycle.
-
Page 42: Service
Service Before calling a service technician See the chapters "Troubleshooting and "Cleaning and maintenance" and see if you can resolve the problem yourself. When you contact a service centre, please state the model (1), type (2), and serial number (3) of your dryer. -
Page 43: Technical Information
Technical information Technical information Height 850 mm Width 595 mm Depth 654 mm Weight (net) 40 kg Drum volume 117 l Maximum drying load See rating plate Rated power See rating plate Drum material Stainless steel Housing material Hot-dip galvanized and powder coated sheet metal, or stainless steel sheet. -
Page 44: Program Chart
Program chart The table indicates the power consumption and time values for drying of a test batch of laundry with various loads and after spinning at various rates, consistently with the EN61121. The following requirements apply to the consumption values specified below. Inlet air temperature room temperature Inlet air humidity... - Page 45 Program chart 7kg_60Hz_3kW Table continued from last page Program A m o u n t Spinning speed Power Program consumption, duration, (rpm) approximately approximately (kWh)* (min)* AUTO MACHINE IRON, 1400 2,35 Low temp MIX DRY 1200 1,70 MIX IRON 1000 1,35 TDC1773V 7kg_60Hz_3kW...
- Page 46 Program chart 7kg_60Hz_3kW Table continued from last page Program A m o u n t Spinning speed Power Program consumption, duration, (rpm) approximately approximately (kWh)* (min)* AUTO MACHINE IRON, 1000 3,05 Normal temp 1400 2,40 1600 2,10 AUTO MACHINE IRON, 1400 2,35 Low temp...
- Page 47 Program chart 7kg_60Hz_3kW Table continued from last page Program A m o u n t Spinning speed Power Program consumption, duration, (rpm) approximately approximately (kWh)* (min)* AUTO HAND IRON, 1400 3,10 Normal temp 1600 2,60 AUTO HAND IRON, 1400 3,10 Low temp AUTO MACHINE IRON, 1000...
-
Page 48: Removal
Removal Disposal / recycling of packaging Our product packaging is made of environmentally friendly materials that can be recycled, disposed of, or destroyed without any hazard to the environment. To this end, packaging materials are labelled appropriately. The symbol on the product or its packaging indicates that the product should not be treated as normal household waste. -
Page 49: Quick Guide
Quick guide Sort the fabrics Sort the fabric by type and by how heavily soiled the laundry is. Observe the drying symbols on the laundry labels. Close the zippers, hook-and-loop fasteners and buttons. Switch on the main ON/OFF switch Open the dryer door and insert the laundry. Before doing so, make sure the drum is empty. - Page 50 Gorenje, Partizanska 12, 3320 Velenje, Slovenija • www.asko.com 802239 -a11 We reserve the right to make changes.
Need help?
Do you have a question about the TDC177XV and is the answer not in the manual?
Questions and answers