Advertisement
Quick Links
Advertisement

Related Manuals for Tiger GARDEN STUDIO


Summary of Contents for Tiger GARDEN STUDIO
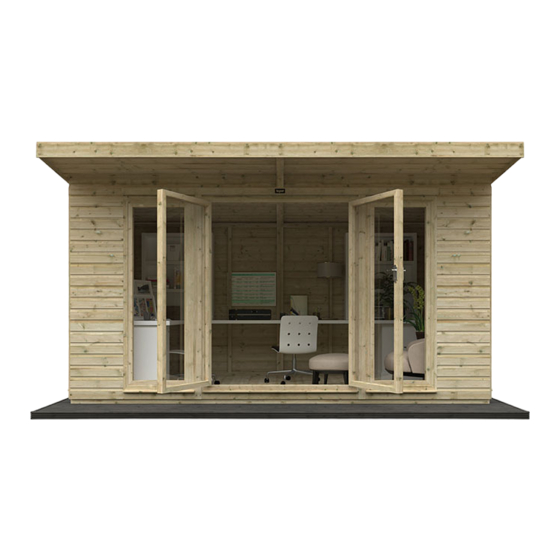
- Page 1 TIG/INS61 TIGER PRESSURE TREATED GARDEN STUDIO GENERAL ASSEMBLY INSTRUCTIONS...
-
Page 2: Before You Get Started
BEFORE YOU GET STARTED PLEASE READ INSTRUCTIONS CAREFULLY • Check the pack and make sure you have all the parts listed. • When you are ready to start, make sure you have the right tools at hand (not supplied). • Ensure there is plenty of space and a clean dry area for assembly. TIMBER As with all natural materials, timber can be affected during various weather conditions. - Page 3 Please retain instructions for future reference CAUTION: CAUTION: All buildings should be erected It is advisable to wear gloves by two competent adults. during building installation. MADE IN THE UK SINCE 1913. We have been making our high quality, great value garden buildings here in Britain for decades.
- Page 4 BEFORE YOU GET STARTED - PRE ASSEMBLY TOOLS REQUIRED: We recommend using the following tools (not supplied): HAMMER RUBBER MALLET DRILL LADDER TAPE MEASURE SHARP KNIFE SPIRIT LEVEL SCREWDRIVER + WOOD SAW SPANNER PAINT ROLLER BROOM FIXING KIT GUIDES: FX06 - NAIL KITS HEAVY DUTY For Heavy Duty Shed Products: CN13 Clout Nails...
- Page 5 Please retain instructions for future reference • Assembly is straightforward if you follow these step-by-step instructions. • We recommend getting everything aligned properly before screwing together and that screw holes should be pre-drilled to avoid splitting the timber. (Do not come pre-drilled). IMPORTANT •...
- Page 6 TIGER PRESSURE TREATED GARDEN STUDIO - GENERAL ASSEMBLY INSTRUCTIONS Step 1: LAYING THE FLOOR • Lay floors down in the desired position and butt together. (Detail A1) • Join using 4x N65 evenly spaced through floor bearers at an angle.
- Page 7 Please retain instructions for future reference Step 2b: INSTALLING SIDE AND GABLE PANELS • For blank side panels made of 2 or more sections, secure together using 5x N100 evenly spaced through internal framework. (Detail B3 & B4) • Secure door / window sides together through framing in centre using 2 x N100. DO NOT FIX TO FLOOR.
- Page 8 TIGER PRESSURE TREATED GARDEN STUDIO - GENERAL ASSEMBLY INSTRUCTIONS Step 3: SECURING SIDE AND GABLE PANELS • Locate pre-drilled holes in gable panels. (Detail C1) NOTE: THESE MAY HAVE COVERED OVER DURING PANEL COATING PROCESS. THEY MAY RESEMBLE NAIL HEADS.
- Page 9 Please retain instructions for future reference • Secure panels to the floor using 2x N100 per panel frame spacing. Ensure the N100 are driven through the panels and into the floor bearers. (Detail C4) • Tighten 8x CB100. (Detail C5) NOTE: CHECK THAT ALL SIDES ARE AT RIGHT ANGLES TO EACH OTHER AND THE FLOOR.
- Page 10 TIGER PRESSURE TREATED GARDEN STUDIO - GENERAL ASSEMBLY INSTRUCTIONS Step 4: BUILD DOOR FRAME • Build up door frame using the four door components provided. • Arrange the door framing onto a firm and level surface, with hinges to the ground. Slot the door sill (base) then the door head into place.
- Page 11 PP25 Step 6: INSTALLING DOORS AND WINDOWS FRAMES • Choose position of your doors and window frames on front of Garden Studio. See examples below. • Start from one corner, adding door or window as shown. • Carefully fix into place using N100 through window frame into panel framing at top, base and sides.
-
Page 12: Roof Installation
TIGER PRESSURE TREATED GARDEN STUDIO - GENERAL ASSEMBLY INSTRUCTIONS Step 7: ROOF INSTALLATION CAUTION! ROOF PANELS ARE VERY HEAVY. TAKE EXTRA CARE WHEN MOVING • Lift into place and butt together. Ensuring that the boarded overhang is to the high side. - Page 13 Please retain instructions for future reference N100 N100 N100 N100 N100...
- Page 14 TIGER PRESSURE TREATED GARDEN STUDIO - GENERAL ASSEMBLY INSTRUCTIONS Step 8: EPDM INSTALLATION • Place EPDM membrane over roof, ensuring you have full coverage. Allow to relax for 30 minutes. • Fold half the EPDM membrane back on itself and apply supplied water-based adhesive to the roof panel using roller, leaving approx.
- Page 15 Please retain instructions for future reference Step 9: FITTING FASCIA BOARDS & FINIAL (BARGEBOARDS) • Fit bargeboards to the roof panels, trapping overhanging end of the EPDM membrane in between the roof panel and bargeboard. • Secure using 4x N40 per bargeboard through roof panel. NOTE: THERE ARE NO BARGEBOARDS SUPPLIED FOR LOW SIDE OF ROOF AS THIS WILL PREVENT EFFECTIVE WATER DRAINAGE.
- Page 16 TIGER PRESSURE TREATED GARDEN STUDIO - GENERAL ASSEMBLY INSTRUCTIONS Step 10: FIT CORNER STRIPS AND COVER STRIPS - CERTAIN SIZES ONLY • Secure the corner strips at each corner of the shed with 4x N40 per corner strip. NOTE: THESE CORNER STRIPS MAY NEED CUTTING TO SIZE.
- Page 17 Please retain instructions for future reference Step 11: INSTALL COVER STRIPS • Secure door/window cover strips in the gaps between door and windows and also on the gable end corners. • Secure using 4x N40 per cover strip. NOTE: THESE COVER STRIPS MAY NEED TRIMMING. •...
- Page 18 TIGER PRESSURE TREATED GARDEN STUDIO - GENERAL ASSEMBLY INSTRUCTIONS Step 12: FIT HEADER FASCIAS • Fit front header fascia to the front of garden studio as shown. • Secure through fascia into front panel using 8x N40 per front header fascia. (Detail H) NOTE: ON LARGER GARDEN STUDIO, HEADER FASCIA MAY BE IN 2 PIECES.
- Page 19 Please retain instructions for future reference Step 13: INSTALL GLAZING • Glaze windows and doors by securing glass with PP25 supplied, from the inside. (Detail I) NOTE: ALL WINDOWS MUST BE SEALED INSIDE AND OUT WITH SILICONE, PUTTY, OR ANY OTHER WATER-TIGHT SOLUTION.
- Page 20 TIG/INS61 Display Agent Woodlands DIY Store Station Yard, Horsforth, Leeds, LS18 5NZ Telephone: 0113 205 4189 Website: tigersheds.com Email: customersupport@tigersheds.com...
Need help?
Do you have a question about the GARDEN STUDIO and is the answer not in the manual?
Questions and answers