Advertisement
Quick Links
Advertisement

Related Manuals for Tiger Lana


Summary of Contents for Tiger Lana
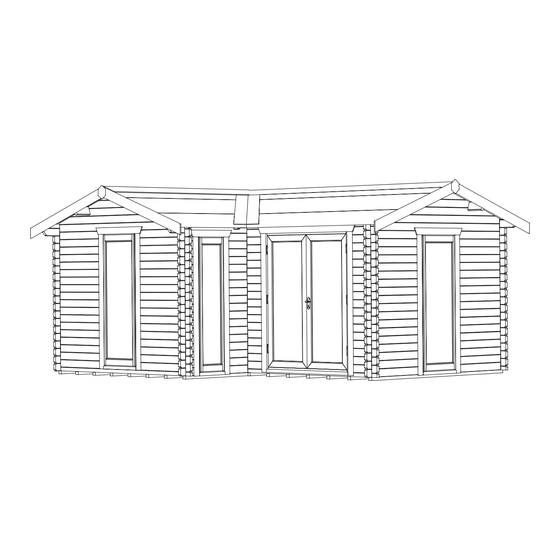
- Page 1 TIG/INS41 TIGER LANA LOG CABIN GENERAL ASSEMBLY INSTRUCTIONS...
-
Page 2: Before You Get Started
BEFORE YOU GET STARTED PLEASE READ INSTRUCTIONS CAREFULLY • Check the pack and make sure you have all the parts listed. • When you are ready to start, make sure you have the right tools at hand (not supplied). • Ensure there is plenty of space and a clean dry area for assembly. TIMBER As with all natural materials, timber can be affected during various weather conditions. - Page 3 We understand how busy life can be. Our Pro-Installation service can take the stress and strain out of assembling your quality Tiger building for you. We recommend using professional and dedicated installers to erect your building. With their knowledge and experience, they will ensure that your cabin is put properly in place ready for you to enjoy your space for years to come.
- Page 4 BEFORE YOU GET STARTED TOOLS REQUIRED We recommend using the following tools (not supplied): HAMMER RUBBER MALLET DRILL LADDER TAPE MEASURE SHARP KNIFE SPIRIT LEVEL SCREWDRIVER + WOOD SAW SPANNER FIXING KIT CONTENTS: Clout Nails (20mm Galvanised - QTY Screws (40mm - QTY 30) 300) Nails...
- Page 5 Please retain instructions for future reference BUILDING PACK CONTENTS: For full details of what should be included please see the Product Construct Diagram and itemised cutting list that is supplied with the delivery. They are also available on request in pdf form from our helpful Customer Support team –...
- Page 6 TIGER LANA LOG CABIN GENERAL INSTRUCTIONS Step 1: UNPACKING CABIN COMPONENTS: • Unpack all components from your supplied cabin pack(s) and place each individual component in the correct order using the supplied construct diagram and parts list as a guide. Ensure all components are present and in the correct position before beginning assembly.
- Page 7 Please retain instructions for future reference Step 2: DOUBLE DOOR ASSEMBLY • For cabins with double doors, build up door frame using the four door components provided. Remove supplied key. This is usually stapled over keyhole. • Arrange the door framing onto a firm and level surface, with hinges to the ground. Slot the door sill (base) then the door head into place.
- Page 8 TIGER LANA LOG CABIN GENERAL INSTRUCTIONS Step 3: LAY DOWN TANALISED BEARERS • Refer to the floor plan of your construct diagram, position the tanalised bearers on prepared base. • Spread out the tanalised bearers equally at approx. 400mm centres.
- Page 9 Please retain instructions for future reference Step 4: BEGIN BUILDING WALLS • Place 1st layer of logs on the edges of the bearers. Ensure half logs are put down first. See construct diagram for build order. • Use floorboard to mark off measuring point as shown. •...
- Page 10 TIGER LANA LOG CABIN GENERAL INSTRUCTIONS Step 5: SECURING FLOOR • Check floorboards are correct size. Do not mix up with roof boards. • Lay 5 longer & 3 shorter floorboards in position and tack in place. Leave approx. 2.5mm gap between the edge of the floorboards and the inside of external walls.
- Page 11 Please retain instructions for future reference Step 6: CONTINUE TO BUILD WALLS • Using construct diagram as a guide, begin to build up the walls by interlocking the logs layer by layer until 3 logs high. • At this point, store remaining floorboards inside the cabin ready for installation. You may not be able to fit floorboards through the door once cabin has been built.
- Page 12 TIGER LANA LOG CABIN GENERAL INSTRUCTIONS Step 7: INSTALL DOORS & WINDOWS • Take the assembled doors and frame and slide over the logs until fully inserted. • Position centrally within opening. This will leave a gap either side for settling.
- Page 13 Please retain instructions for future reference • Repeat process for fitting windows. (Detail F3) • Position centrally within opening. This will leave a gap either side for settling. NOTE: WINDOWS CAN BE VERY HEAVY, PLEASE TAKE CARE WHEN LIFTING INTO PLACE.
- Page 14 TO ALLOW FOR PURLIN JOINERS TO BE INSTALLED. PLEASE REFER TO YOUR CONSTRUCT DIAGRAM BEFORE INSTALLING. • Install Lana gable tops as shown. Place on top of the eaves height logs. NOTE: LANA GABLE TOPS ARE TALLER THAN STANDARD APEX GABLE TOPS. PLEASE REFER TO YOUR CONSTRUCT DIAGRAM BEFORE INSTALLING.
- Page 15 (Detail G1) notches in Lana gable tops. NOTE: DO NOT FIT LANA APEX PURLIN UNTIL STANDARD SECTION OF ROOF HAS BEEN FELTED. • Secure the purlins into the gable tops using 2x N65 per purlin per gable top. (Detail G2) •...
- Page 16 TIGER LANA LOG CABIN GENERAL INSTRUCTIONS Step 10: INSTALL ROOF BOARDS • Before installing the roof boards, check that the cabin is square both vertically & horizontally. Adjust if required. • Install roof boards on standard apex gable top section of roof.
- Page 17 Please retain instructions for future reference Step 11: INSTALL ROOF BATTEN AND SKIRTING • Fix roof batten onto the underside of roof boards on low side using 6x N40, evenly spaced along length. Finish with a piece of skirting, attached using 6x N40, evenly spaced along length.
- Page 18 INSTALL ROOF PANELS & BOARDS • Fit Lana apex purlin. Secure using method in step 9. • Install roof panels as shown. Butt against Lana gable top. Fix through gable top into roof panel framing using 2x S60 per panel.
- Page 19 Secure using 5x CN20 along each edge. These may need trimming at the apex of cabin and at lower edges. (Detail L2) • Measure and cut 0.5m side piece of felt to match the length of roof on Lana section at apex. Secure over apex and cover joins using CN20 at approx. 100mm intervals.
- Page 20 TIGER LANA LOG CABIN GENERAL INSTRUCTIONS Step 15: ATTACH ROOF FASCIA BOARDS (BARGEBOARDS) • Attach roof fascias using 4x N40 per fascia board. Nail through top purlin and bottom roof batten. Complete the look with finials over the join at apex. Secure using 2x N40 per finial.
- Page 21 Please retain instructions for future reference Step 17: FIXING DOORS AND WINDOWS • Check the doors are square and screw the fascia boards, both internally and externally, into the logs behind with 6x S40 evenly spaced as shown. (Detail M1) •...
- Page 22 TIGER LANA LOG CABIN GENERAL INSTRUCTIONS Step 18: INSTALL INTERNAL ROOF BATTENS • Fix internal roof battens to the top side logs using 4x S40 evenly spaced along the batten as shown. (Detail N) • These will seal roof and side walls.
- Page 23 Please retain instructions for future reference Step 20: ATTACH STORM BRACES • Fix storm braces to the inside of gables with 2x CB40 provided. Always leave the bottom CB40 slack enough to let the storm brace move as the cabin expands and contracts. (Detail P1 &...
- Page 24 TIG/INS41 Display Agent Woodlands DIY Store Station Yard, Horsforth, Leeds, LS18 5NZ Telephone: 0113 205 4189 Website: tigersheds.com Email: customersupport@tigersheds.com...
Need help?
Do you have a question about the Lana and is the answer not in the manual?
Questions and answers