Table of Contents
Advertisement
Quick Links
BIONIME CORPORATION
No. 100, Sec. 2, Daqing St., South Dist.,
Taichung City 40242, Taiwan
Tel: +886 4 2369 2388
Fax: +886 4 2261 7586
Email: info@bionime.com
http://www.bionime.com
Made in Taiwan
USA Customer Service Center:
Ontario, CA 91761, USA
Tel: +1 888 481 8485
Fax: +1 909 781-6970
http://www.bionimeusa.com
Service hour: Mon. to Fri.
8:00 AM to 5:00 PM PST.
For EMERGENCY, please contact the
healthcare professional.
Blood Glucose Monitoring System
GM700 Pro 2
Rx Only
User's Manual
Advertisement
Table of Contents

Related Manuals for Rightest GM700 Pro 2


Summary of Contents for Rightest GM700 Pro 2
- Page 1 Blood Glucose Monitoring System GM700 Pro 2 Rx Only USA Customer Service Center: BIONIME CORPORATION Ontario, CA 91761, USA No. 100, Sec. 2, Daqing St., South Dist., Tel: +1 888 481 8485 Taichung City 40242, Taiwan Fax: +1 909 781-6970 Tel: +886 4 2369 2388 http://www.bionimeusa.com...
- Page 2 Preface Thank you for choosing the RIGHTEST Blood Glucose Monitoring System GM700 Pro 2. This product is manufactured by Bionime Corporation and distributed by authorized dealers. Please read this manual carefully before use and follow the instructions. If you have any questions regarding this product, please call our customer service +1 888 481 8485 (Service hour: Mon.
- Page 3 This manual provides all necessary instructions for the routine operation and maintenance of the The system is intended for use at clinical environments (ie. genenral primary care centers, RIGHTEST Blood Glucose Meter GM700 Pro 2. Please read this manual carefully. It has been outpatient settings for endocrinology and metabolism).
-
Page 4: Table Of Contents
Table of Contents RIGHTEST Blood Glucose Monitoring System 3.3 User login 1.1 RIGHTEST Blood Glucose Monitoring System 3.4 Device information 1.2 RIGHTEST Blood Glucose Meter GM700 Pro 2 3.5 Bluetooth connection 1.3 RIGHTEST Charging Hub Blood Glucose Measurement 1.4 RIGHTEST Test Strips 4.1 Patient search... - Page 5 1.1 RIGHTEST Blood Glucose Monitoring System 5.7 Making a QC fail note Advanced Quality Control Your RIGHTEST Blood Glucose Monitoring System GM700 Pro 2 contains the following: 6.1 Linear quality control 1. RIGHTEST Meter GM700 Pro 2 (with built-in rechargeable lithium battery) 6.2 External quality control...
-
Page 6: Rightest Blood Glucose Monitoring System
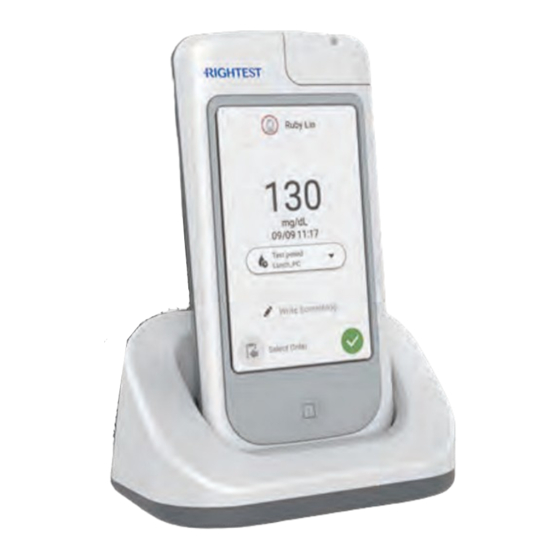
RIGHTEST Blood Glucose Monitoring System RIGHTEST Blood Glucose Monitoring System 1.2 RIGHTEST Blood Glucose Meter GM700 Pro 2 1.3 RIGHTEST Charging Hub Test Strip Port Insert test strips here. Auto-Code Holder LCD Display/ Touch Screen Displays information and Power Button support touching operation. -
Page 7: Rightest Test Strips
RIGHTEST Blood Glucose Monitoring System 1.4 RIGHTEST Test Strips The RIGHTEST Blood Glucose meter GM700 Pro 2 can only be used with RIGHTEST Blood Glucose Test Strip GS770 and the strip should be used with RIGHTEST Control Solution GC700. Sample Port Electrode Contact Apply a drop of blood or control solution. -
Page 8: Auto-Code Holder
(For detail indication about sample size, please refer to Blood replacement and installation. Glucose Test Strip GS770 Insert). 1.7 Interfering Substances Before use, please refer to the RIGHTEST Blood Glucose Test Strip GS770 Insert for information on interfering substances. Important information 1.8 Limitation - The auto-code holder automatically calibrates the strip when inserted into the device. -
Page 9: Product Safety And Important Information
RIGHTEST Blood Glucose Monitoring System RIGHTEST Blood Glucose Monitoring System 1.9 Product safety and important Information Warning 1.9.1 General safety information - Keep the device away from strong electromagnetic radiation to prevent interference Please carefully read the following sections to ensure safe use of the device. - Page 10 RIGHTEST Blood Glucose Monitoring System RIGHTEST Blood Glucose Monitoring System 1.9.4 Touch Screen - Users are responsible for information security over the Internet and the setup of a secure IT The touch screen is designed to be operated with a fingertip or stylus. Do not use any other kind environment.
-
Page 11: Installation
RIGHTEST Blood Glucose Monitoring System Installation 2.1 Installing RIGHTEST GM700 Pro 2 Important information The device should be initialized by our service engineer before the it could be regular use. - Please read the user's manual before use. All pictures shown are for illustration 2.2 Installing the Charging Hub... -
Page 12: Recharging The Battery
If the device does not recharge: service engineers will set up this function according to the needs of the - Please make sure the device is fully connected to the RIGHTEST Charging Hub. organization. - Check if the metal point at the bottom of the device or the metal pins of the charging hub are - The system will display a user login screen on startup. -
Page 13: Device Information
General Operation Blood Glucose Measurement 3.4 Device information This section is about the blood glucose test procedure and related important information. Press the button on the home screen to start the procedure. - Users can adjust the volume and brightness from the setup page. - Device version information can also be found in the setup page. -
Page 14: How To Enter Test Strip Information
Blood Glucose Measurement Blood Glucose Measurement 4.2 How to enter test strip information 4.3 Wait for the test strip to be detected Follow the instruction on display, to make sure to test successfully. With the vial of strip you are going to use for test, there are 3 ways you could do: 1. -
Page 15: Sample Collection
Palm Please use single-use, auto-disabling lancing devices, to collect fingertip capillary blood samples RIGHTEST Lancing Device GD500 (with clear cap), this device is for single patient for the patient. use only, and should be using with sterilized lancet (see 4.4.3 section for the The sample collection procedure brief described as follow: instruction of how to use lancing device). - Page 16 Blood Glucose Measurement Blood Glucose Measurement 4.4.3 Preparing the Lancing Device Important information 1. Hold the depth adjustable cap in one hand and hold the hub in the other hand. Bend the cap - Fingertip samples can show rapid changes in glucose faster than palm or forearm towards the down side, until a gap appears between the cap and hub.
-
Page 17: Checking Test Results
Blood Glucose Measurement Blood Glucose Measurement 4.5 Checking test results Warning - A successful test will show the test result and patient information. - Check the expiration date printed on the strip label and the opening date recorded on - Select the patient information. the label every time before using the test strip. -
Page 18: Making A Test Note
Blood Glucose Measurement Blood Glucose Measurement 4.7 Patient profile - If the blood glucose level is outside the measuring range, the system will display a message as follows: 4.7.1 Overall status HI: above the measuring range (600 mg/dL). - Multiple time periods. LO: below the measuring range (10 mg/dL). -
Page 19: Quality Control
Please perform a quality control test to ensure your blood glucose monitoring system works Select the control solution concentration to be tested. The applicable control solution for this device is properly. RIGHTEST Control Solution GC700. Warning Recommended Quality Control Frequency - Make sure to select the correct control solution level you are going to use. -
Page 20: Wait For The Test Strip To Be Detected
Quality Control Performing a Quality Control Test 5.4 Wait for the test strip to be detected 5.5 Prepare the control solution and take a measurement Open 1. Gently invert the bottle several times to ensure that the control solution is thoroughly mixed before use. -
Page 21: Check The Test Result
Quality Control Advanced Quality Control 5.6 Check the test result 6.1 Linear quality control Your organization may choose whether to activate this feature based on your requirements. The A Pass/Fail message will be displayed in accordance with the linear quality control test comprises two steps: (1) a control solution test and (2) linear analysis. acceptable concentration range for the selected control solution. -
Page 22: External Quality Control
Advanced Quality Control Maintenance and Care 6.1.2 Perform linear analysis 7.1 Maintenance The analysis can be performed after all the control solution tests are completed. Linear analysis Keep your meter free from dust, water or any other liquid. If your meter is dropped or will be displayed on the screen. - Page 23 Maintenance and Care Maintenance and Care Please see the following references for further information: Warning - FDA Public Health Notification: Use of Finger stick Devices on More than One Person - Users need to adhere to Standard Precautions when handling or using this device. All Poses Risk for Transmitting Bloodborne Pathogens: Initial Communication (2010).
-
Page 24: Cleaning And Disinfecting Procedure
Maintenance and Care Maintenance and Care 7.2 Cleaning and disinfecting procedure NOTE Cleaning and Disinfecting frequency: Every time before perform test for patient and after finished - Clean and disinfect the outside of the device only all test. - Do not drop liquid directly into the test strip port. To Cleaning Device/ Test Strip Port: - The Meter has been tested to ensure that there is no change in the performance Throughly wipe the entire surface of the meter with disinfecting wipes listed above to clean any... -
Page 25: Error Messages And Troubleshooting
Error Messages and Troubleshooting Error Messages and Troubleshooting Error code Descriptions Troubleshooting Error code Descriptions Troubleshooting Strip was used or Sample was applied before screen show the "Apply Blood Sample" 1001 Please try again with a new test strip Applied sample damp 1008 direction. -
Page 26: Specifications
Hematocrit Test Strip Storage / Transportation Conditions Screen Dimensions 4” Color TFT-LCD Screen * The RIGHTEST Blood Glucose Monitoring System GM700 Pro 2 complies with 2020 FDA -10 - 60°C(14°F to 140°F), 10 - 90% relative Device Storage/Shipping Conditions humidity POC guidance. -
Page 27: Customer Service/Warranty
Customer Service/Warranty Symbols Bionime wishes to provide complete, considerate service to our customers. Please review all the Description of symbols used instructions to ensure you know how to operate the device correctly. For in vitro diagnostic use Humidity limitation Biological risks If you have any questions or have issues with the device, please contact customer service. -
Page 28: Clia Waiver Study Results/System Accuracy Result
Table 1. represents samples for glucose results lower than GM700 Pro 2 device 75 mg/dL (by the GM700 Pro 2). Table 2. represents samples for glucose results greater than or The percent (and number) of equal to 75 mg/dL. -
Page 29: Federal Communications Commision (Fcc) Statement
FEDERAL COMMUNICATIONS COMMISION (FCC) STATEMENT FEDERAL COMMUNICATIONS COMMISION (FCC) STATEMENT Federal Communications Commission (FCC) Statement 15.21 You are cautioned that changes or modifications not expressly approved by the part responsible for 15.105(b) This equipment has been tested and found to comply with the limits for a Class B digital device, compliance could void the user’s authority to operate the equipment.
Need help?
Do you have a question about the GM700 Pro 2 and is the answer not in the manual?
Questions and answers