
Related Manuals for Zaber T-CON3


Summary of Contents for Zaber T-CON3
- Page 1 ZABER T-CON3 CONTROLLER USER’S MANUAL Firmware version 1.00 and Up Document Revision: 2006-07-06 Visit www.zaber.com for more recent updates. Zaber Technologies Inc. 2891 Steveston Hwy Richmond, BC, V7E 2J1 Canada...
-
Page 2: Table Of Contents
Hold Current ......................19 5.5.10 Micro Step......................19 Device Info........................19 5.6.1 Device ID ......................19 5.6.2 Version........................20 5.6.3 Voltage........................20 Troubleshooting ........................21 Warranty ..........................22 Technical Support and Contact Information................. 22 Copyright © Zaber Technologies Inc. Page 1 of 22... -
Page 3: Introduction
• Intuitive and powerful user interface saves time • Plug-and-play, no programming required 1.2 Compatibility The T-CON3 is designed specifically to control Zaber’s T-series motorized devices. At the time of writing, the T-CON3 is compatible with the following product lines: • T-LA series linear actuators •... -
Page 4: Applications
1.3 Applications Up to three devices (1 axis per device) may be daisy-chained with a single T-CON3 controller. While any number of Zaber T-series products may be connected directly to the serial port (RS- 232) of a personal computer, the T-CON3 controller can still replace the PC in many situations and offers some unique advantages. -
Page 5: Quick Start Guide
Plug the 12V power adaptor into a live power bar or live wall socket. Plug the power plug into the T-CON3 controller to power up the device. There is no separate power switch. The LCD backlight should be lit and the splash screen will be displayed. -
Page 6: Establish Connection
2.2 Establish Connection Now, connect one of Zaber’s T-series actuators to the controller. If the actuator has a knob on the end, make sure the knob is centered or it may interfere with the initialization process. In this example we assume that only one T-LA28A actuator is connected, though up to 3 actuators can be controlled. -
Page 7: Moving The Actuator
The available standard step sizes are: 50000, 20000, 10000, 5000, 2000, 1000, 500, 200, 100, 50, 20, 10, 5, 2, 1, and a user-defined step size. See section on Main Menu, User Step command for information on setting the user-defined step size. Copyright © Zaber Technologies Inc. Page 6 of 22... -
Page 8: Multiple Actuators
The power plug may be applied to the controller or to any of the devices connected to the controller. Multiple power adaptors may be necessary to meet the current requirement when a lot of devices are daisy-chained. Please see the data sheets for individual devices for more detail. Copyright © Zaber Technologies Inc. Page 7 of 22... -
Page 9: Controller Operation
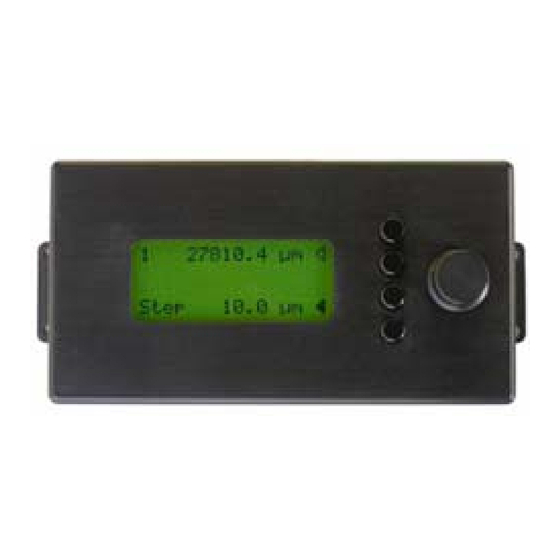
Controller Operation The main control screen of the T-CON3 enables the user to quickly and accurately select and move an actuator to the desired position. Select any actuator by pressing the button next to the clear arrow on the appropriate line. A selected line is indicated by a black arrow. -
Page 10: Main Menu
“Back” button that allows the user to back up to the previous level of menu, or back out to the main control screen. Pressing the rotary knob at any level of the menu jumps all the way back to the main control screen. Copyright © Zaber Technologies Inc. Page 9 of 22... -
Page 11: Actuator Menu
“Back” button that allows the user to back up to the previous level of menu, or back out to the main control screen. Pressing the rotary knob at any level of the menu jumps right back to the main control screen. Copyright © Zaber Technologies Inc. Page 10 of 22... -
Page 12: Main Menu
“User” instead of “Step”. Now, select one of the actuators and each click of the rotary knob will move the actuator by the user-specified amount shown on the bottom line. 4550 bit 1200 bit User 345 bit Copyright © Zaber Technologies Inc. Page 11 of 22... -
Page 13: Initialize
There is an optimal contrast setting for a specific viewing angle and temperature. The contrast setting also affects the response time of the LCD display. Copyright © Zaber Technologies Inc. Page 12 of 22... -
Page 14: Measurement
This command displays the splash screen, same screen displayed on power-up or reset. The controller model number (T-CON3) is on the left and the firmware version is display on the right. On the bottom line is the “Back” button to go back to the previous menu. -
Page 15: Actuator Menu
This section describes all of the functions and sub-menus under the Actuator Menu in detail. Functions in the Actuator Menu affect only the selected actuator device. Please refer to Zaber Technologies’ T-series user’s manuals and command reference for more detail description on the actual commands. -
Page 16: Home
Reset to default Settings? Back Pressing “Ok” restores the default and returns to the previous Settings menu. Pressing “Back” returns to the Settings menu without restoring factory default settings. Copyright © Zaber Technologies Inc. Page 15 of 22... -
Page 17: Start Speed
Pressing “Ok” sets the new value for the selected actuator, while “Back” cancels the operation without changing the value. Copyright © Zaber Technologies Inc. Page 16 of 22... -
Page 18: Acceleration
Mode Bits are binary switches that affect certain operations of the actuator. The Mode Bits command allows the user to turn features on or off for the selected actuator. The T-CON3 controller allows the user to change the following mode bits: •... -
Page 19: Range
The current position of the actuator may not exceed the maximum range setting of the actuator. Attempts to set the current position of the actuator beyond the maximum range will be ignored by the actuator. Copyright © Zaber Technologies Inc. Page 18 of 22... -
Page 20: Run Current
The Device ID command retrieves the ID of the currently selected actuator. Device ID: Back Pressing the “Back” key returns to the previous Device Info menu, and pressing the rotary knob escapes back to the main control screen. Copyright © Zaber Technologies Inc. Page 19 of 22... -
Page 21: Version
Voltage: 13.4V Back Pressing the “Back” key returns to the previous Device Info menu, and pressing the rotary knob escapes back to the main control screen. Copyright © Zaber Technologies Inc. Page 20 of 22... -
Page 22: Troubleshooting
It is possible the unit on a different screen. was removed, or miscommunicated. Reset the entire setup removing and reinserting the power plug. Copyright © Zaber Technologies Inc. Page 21 of 22... -
Page 23: Warranty
Warranty All Zaber’s products are backed by a one-month satisfaction guarantee. If for any reason you are not satisfied with your purchase, send it back to Zaber Technologies Inc. within one month of the purchase date for a complete refund.
Need help?
Do you have a question about the T-CON3 and is the answer not in the manual?
Questions and answers