Advertisement
Table of Contents
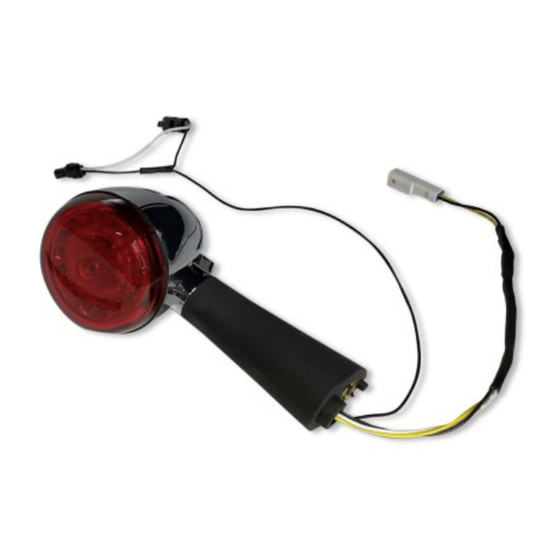
We thank you for purchasing the Custom Dynamics® ProBEAM® Scout Rear Turn Signals! Our LEDs offer maintenance free
service and higher visibility. Our ProBEAM® product line utilizes the latest technology and automotive grade components to
ensure the highest level of reliable service. Custom Dynamics® offers one of the best warranty programs and customer sup-
port in the industry. If you have any questions during the installation of this product please call us at 1(800) 382-1388.
Part Number: PB-SCOUT-RR-BR PB-SCOUT-RR-BS
PB-SCOUT-RR-CR PB-SCOUT-RR-CS
US Patents: D830,597 D830,596
Chinese Patents: ZL201830045649.4, ZL201830409102.8
Package Contents:
- ProBEAM® Scout Rear Turn Signals (Pair)
- Instructions
Fitment: 2015-2022 Indian® Scout & Scout Sixty (Does
NOT fit Scout Bobber models).
Custom Dynamics® ProBEAM® Scout Turn Signals can ONLY be used with
ProBEAM® Bullet Style Turn Signal Lenses. Bullet Bezel Turn Signal
Adapters are not compatible with ProBEAM® Scout Turn Signals.
ATTENTION
Please read all Information below before Installation
Warning:
Disconnect negative battery cable from battery; refer to owner's manual.
Failure to do so may result in electrical shock, injury, or fire. Secure negative
battery cable away from positive side of battery and all other positive voltage
sources on vehicle.
Safety First:
Always wear appropriate safety gear including safety glasses when
performing any electrical work. It is highly recommended that safety glasses be
worn throughout this installation process. Be sure vehicle is on level surface, se-
cure and cool.
NOTE: If installed with a GEN-SMART-TPU-SCOUT module, the turn signal run
function will need to be turn off on the GEN-SMART-TPU-SCOUT module. Refer to
the GEN-SMART-TPU-SCOUT module programming section of the GEN-SMART-TPU
-SCOUT module instructions.
NOTE: Turn Signals function as run and turn only.
Questions? Call us at: 1 (800) 382-1388 M-TH 8:30AM-5:30PM / FR 9:30AM-5:30PM EST
Custom Dynamics® ProBEAM®
Installation:
1. Remove motorcycle seat and disconnect the negative battery ca-
ble from the battery. Consult your owners manual if unsure of this
process.
2. Locate the rear lighting harnesses and connectors behind the rear
fender as shown in Photo 1. Cut the wire ties to free the rear
lighting wiring harnesses .
1
Scout Rear Turn Signal
Installation Instructions
12-2021
Advertisement
Table of Contents

Related Manuals for Custom Dynamics ProBEAM PB-SCOUT-RR-BR


Summary of Contents for Custom Dynamics ProBEAM PB-SCOUT-RR-BR
- Page 1 Our ProBEAM® product line utilizes the latest technology and automotive grade components to ensure the highest level of reliable service. Custom Dynamics® offers one of the best warranty programs and customer sup- port in the industry. If you have any questions during the installation of this product please call us at 1(800) 382-1388.
- Page 2 Installation Instructions - Page 2 Installation Continued: License Plate 3. Disconnect the Left and Right rear turn signal har- Light Female License Plate nesses. Connector Light Male Connector 4. Remove the left and Right rear turn signal mounting bolt and remove the turn signal housings from the bike.
Need help?
Do you have a question about the ProBEAM PB-SCOUT-RR-BR and is the answer not in the manual?
Questions and answers