Advertisement
Quick Links
Part Number:
CDTB-45-AW-3B, CDTB-45-AW-3C
Package Contents:
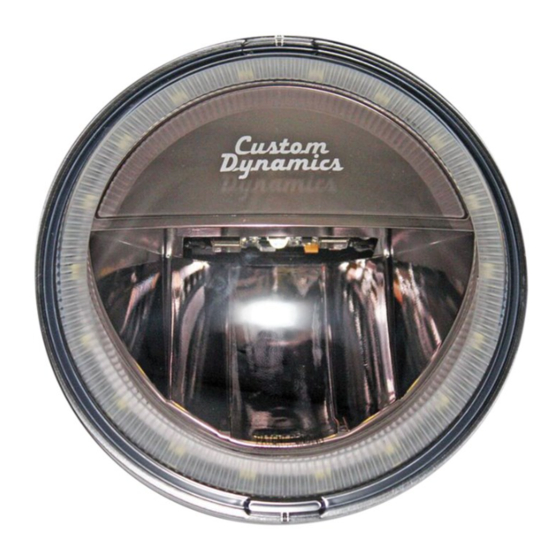
- LED Halo Passing Lamps(2)
- AW Converter Harness (2)
- 8" Chrome Wire Tie (4)
Fitment:
1996-2005 Harley-Davidson® Ultra Classic (FLHTC/
U), Ultra Limited (FLHTK), Electra Glide CVO™
(FLHTCSE) & Tri Glide® (FLHTCUTG); 1993- 2017
Harley-Davidson® Softail® Deluxe (FLSTN), Deluxe
CVO™ (FLSTNSE) and Heritage Softail® (FLST/C)
ATTENTION
Please read all Information below before Installation
Safety First: Make sure the bike is parked on a level sur-
face and bike 's mechanical components are cool to the
touch. To prevent electrical shock, disconnect the negative
battery terminal from the battery before beginning installa-
tion.
Note: You will have to remove the outer front fairing in
order to complete this installation. Please refer to your man-
ufacturer service manual if unsure of this procedure.
Notice: This product is designed and intended for use as
auxiliary lighting on motorcycles only. This product is NOT
intended to replace any original equipment lighting installed
on the motorcycle and should not be used for that pur-
pose. This product must be wired such that it does not
interfere with any original equipment lighting.
Questions? Call us at: 1 (800) 382-1388
Custom Dynamics® TruBEAM® Amber/White
LED Halo Passing Lamp
Installation Instructions
We thank you for purchasing the Custom Dynamics® Amber/White
LED Halo Passing Lamps. Our products utilize the latest technology
and high quality components to ensure you the most reliable service.
We offer one of the best warranty programs in the industry and we
back our products with excellent customer support, if you have ques-
tions before or during installation of this product please call Custom
Dynamics® at 1(800) 382-1388.
Installation:
1996- 2005 Harley-Davidson® Ultra Classic (FLHTC/U), Ultra
Limited (FLHTK), Electra Glide CVO™ (FLHTCSE) & Tri Glide® (FLHTCUTG)
1.
Carefully remove all components from the packaging. Un-ravel the wire
bundles on the passing lamps.
2.
Remove both of the stock passing lamp trim rings and passing lamps from
the passing lamp housings.
3.
Remove the 2 Turn Signal Housing mounting bolts and let the Turn signal
housing hang by the wire.
4.
Thread the Yellow and White wire from the passing lamp through the pass-
ing lamp housing mounting stud as shown in Picture 1.
1
5.
Install the new Amber/White LED Halo Passing Lamp on the passing lamp
housings.
6.
Slide the provided heat shrink over the Yellow and White wire and install the
wire pins into the connector as shown in Picture 2.
2
M-TH 8:30AM-5:30PM / FR 9:30AM-5:30PM EST
07-2019
Advertisement

Summary of Contents for Custom Dynamics TruBEAM CDTB-45-AW-3B
- Page 1 Custom Dynamics® TruBEAM® Amber/White LED Halo Passing Lamp Installation Instructions We thank you for purchasing the Custom Dynamics® Amber/White LED Halo Passing Lamps. Our products utilize the latest technology and high quality components to ensure you the most reliable service.
- Page 2 Installation Instructions - Page 2 Installation: Route the Passing Lamp harness through the notch in in the back of the Turn Signal housing along with the factory harness, refer to Picture 3. Reinstall the 2 Turn Signal Housing mounting screws. Use caution not to pinch the harnesses during this step.
- Page 3 Installation Instructions - Page 3 Installation: 1993- 2017 Harley-Davidson® Softail® Deluxe (FLSTN), Deluxe CVO™ (FLSTNSE) and Heritage Softail® (FLST/C) Carefully remove all components from the packaging. Un-ravel the wire bundles on the passing lamps. Remove both of the stock passing lamp trim rings and passing lamps from the passing lamp housings. Remove the 2 Turn Signal Housing mounting bolts and let the Turn signal housing hang by the wire.
- Page 4 Installation Instructions - Page 4 Installation Continued: Follow the manufacturers instructions on removing the gas tank. For this installation, it is not necessary to remove the gas tank completely, just remove all of the mounting hardware, then disconnect the main Factory Harness Connector supply &...


Need help?
Do you have a question about the TruBEAM CDTB-45-AW-3B and is the answer not in the manual?
Questions and answers