
Related Manuals for Whispbar K997W


Summary of Contents for Whispbar K997W
- Page 1 K997W Fitting Kit Fitting Instructions for Basic Carrier Instrukcja systemu montażu Revision No: 1A...
- Page 2 Fitting Kit K997W MAX kgs (lbs) Jeep Renegade Sport, 5dr SUV 15-+ 68 kgs (149 lbs) 68 kgs (149 lbs) Renegade Sport, 5dr SUV 15-+ 68 kgs (149 lbs) 68 kgs (149 lbs) Renegade Sport, 5dr SUV 16-+ 68 kgs (149 lbs)
- Page 3 Fitting Kit K997W Renegade Sport, 5dr SUV 15-+ (AU) 275mm 480mm 915mm 970mm 10 13/16ths" 18 7/8ths" 36" 38 3/16ths" Renegade Sport, 5dr SUV 15-+ (EU) 275mm 480mm 915mm 970mm 10 13/16ths" 18 7/8ths" 36" 38 3/16ths" Renegade Sport, 5dr SUV 16-+ (NZ)
-
Page 4: First Time Installation
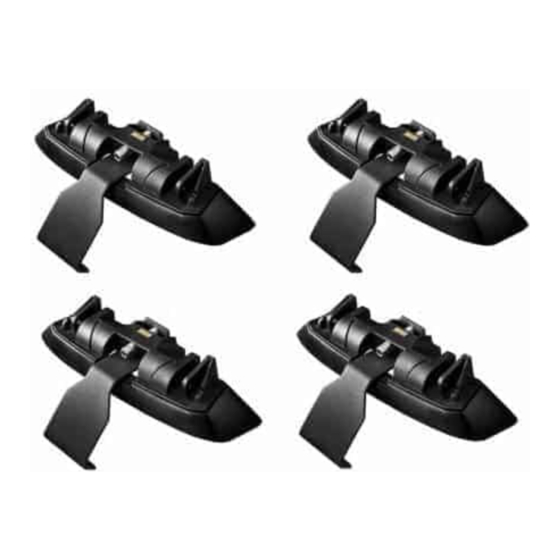
Fitting Kit K997W First Time Installation Remove parts from inside the package and check. Contact your dealer if any parts are missing or damaged. This kit fits type A, B, C and D. These instructions show type A crossbar fitted. They also apply to type B, C and D. - Page 5 Fitting Kit K997W Fitment FRONT ONLY Use hex screwdriver to reverse adjusting screw 10 turns. Press adjusting screw and pull crossbar legs out. Refer to the crossbar instructions for crossbar adjustment method. Ensure each end of the crossbar is adjusted equally.
- Page 6 Fitting Kit K997W Tighten adjusting screw to 3 Nm (2.2 ft lb) hand tight. Remove plastic clamp block by gripping bar leg with fingers and push firmly with thumbs until clamp block drops out behind leg. Select plastic internal block (from fitting kit)
- Page 7 Fitting Kit K997W Remove as shown. Mark as shown. Fitment Front Bar Only Use drill bit supplied, to drill holes in marked positions.
- Page 8 Fitting Kit K997W Re-install rubber ditch mould back into roof channel and click into place. Select grubscrews and screw into the vehicle's fixed points. Do not over tighten. Repeat for all items. Refer to the underside of the pad for the...
- Page 9 Fitting Kit K997W It is important to put the pads in the correct position on the vehicle. Letters refer to the pad part numbers and position. Pad Part Number: A = 224 B = 225 Place crossbars on pads ensuring the pads...
- Page 10 Fitting Kit K997W Ensure the plastic knob is in the position shown when fully tightened. Repeat at other end. Check crossbar is securely attached to the vehicle. Use keys to fit and lock covers If crossbars are removed, please install the...
- Page 11 Fitting Kit K997W Fitment REAR ONLY Use hex screwdriver to reverse adjusting screw 10 turns. Press adjusting screw and pull crossbar legs out. Refer to the crossbar instructions for crossbar adjustment method. Ensure each end of the crossbar is adjusted equally.
- Page 12 Fitting Kit K997W Refer to the underside of the pad for the part number. It is important to put the pads in the correct position on the vehicle. Letters refer to the pad part numbers and position. Pad Part Number:...
- Page 13 Fitting Kit K997W Make sure the pad fits into the holes underneath the foot. Place crossbar on vehicle. Minimum recommended spacing between the bars is 700mm (27 1/2") (unless otherwise stated). Apply protective strip as shown. Trim if required.
- Page 14 Fitting Kit K997W It is important to put the clamps in the correct position on the vehicle. Letters refer to the part numbers stamped on clamps. Clamp Part Number: A = A853 Attach clamp to each leg. Refit locking screw so that it goes through the hole in the clamp.
- Page 15 Fitting Kit K997W Adjust the legs on the crossbar so that they are positioned equally from the ends of the crossbar, and the clamps engage firmly on the body work of the vehicle. Clamps directly to edge of roof under the...
- Page 16 Fitting Kit K997W Tighten locking screw on both legs evenly, 2.5 Nm (1.8 ft lb). Check crossbar is securely attached to the vehicle. Use keys to fit and lock covers...
- Page 17 Fitting Kit K997W CAUTION: Recheck all fasteners immediately after a load is applied to the crossbars. Regularly check screws are tight.
-
Page 18: Maintenance
Fitting Kit K997W Maintenance Never drive into a car wash with the roof rack system fitted. Lubricate locks and adjusting screws at regular intervals. Remove the products from the vehicle when not in use. Make sure all loose parts are stored safely. - Page 19 Fitting Kit K997W Set crossbars a minimum distance of 700mm (27 1/2") apart where no other distance is specified in the fitting instructions. This is especially important when carrying long loads. Check unit is securely attached whenever you refit it to the vehicle. If the unit feels loose, refer to the fitting instructions and readjust.
- Page 20 Fitting Kit K997W Pierwszy montaż Sprawdź zawartość opakowania i upewnij się, czy zawiera wszystkie części znajdujące się na liście. Jeśli nie, skontaktuj się z odpowiednim sklepem. Kit pasuje do belek typu A, B, C oraz D. Instrukcja opisuje sposób montażu belek typu A.
- Page 21 Fitting Kit K997W Zdejmij osłony za pomocą klucza. Przyciśnij i usuń blokadę. Zamontuj stopy. Sprawdź czy oba końce belek mają taką samą długość. Czytać na z przodu instrukcji znajdziesz specyfikacje dla twojego samochodu. Wypośrodkuj równe odległości belek (patrz: instrukcja montażu belek)
- Page 22 Fitting Kit K997W Dokręć z siłą 3 Nm / 2.2 ft lb. Zdjąć blok zacisku z tworzywa sztucznego chwytając stopę poprzeczki palcami i mocno docisnąć kciukami aż blok zaciskowy wysunie się za stopę. Usuń wewnętrzną blokadę i umieść ją w...
- Page 23 Fitting Kit K997W Zdjąć jak pokazano. Zaznaczyć jak pokazano. Montaż Bar Tylko przednia Użyj dołączonego wiertła do wiercenia otworów w zaznaczonych pozycjach.
- Page 24 Fitting Kit K997W Ponownie zainstalować gumowa kształtkę rowkową w kanale na dachu i kliknij na miejsce. Wybierz śrubę z zestawu i skręć nią łapkę. Nie dokręcaj zbyt mocno Powtórzyć tę czynność dla wszystkich elementów. Zobacz numer pod spodem łapki.
- Page 25 Fitting Kit K997W Bardzo ważne jest aby umieścić podkładek w odpowiednich miejscach na dachu samochodu Litery oznaczają podkładki oraz sposób ich rozmieszczenia. Rozmieszczenie podkładek: A = 224 B = 225 Plasser takstativet på gummiputene og forsikre deg om at hullene på...
- Page 26 Fitting Kit K997W Sprawdź czy motylek znajduje się w pozycji jak na rysunku. Powyższe czynności należy powtórzyć z drugiej strony. Upewnij się, czy belka została poprawnie zamontowana Zamknij osłony za pomocą klucza. Jeżeli usuwane poprzeczki sa, należy zainstalować gumowe zatyczki do formy...
- Page 27 Fitting Kit K997W Zdejmij osłony za pomocą klucza. Przyciśnij i usuń blokadę. Zamontuj stopy. Sprawdź czy oba końce belek mają taką samą długość. Odręć śrubę zabezpieczającą.
- Page 28 Fitting Kit K997W Zobacz numer pod spodem łapki. Bardzo ważne jest aby umieścić podkładek w odpowiednich miejscach na dachu samochodu Litery oznaczają podkładki oraz sposób ich rozmieszczenia. Rozmieszczenie podkładek: A = 221 Gumowe podkładki Place (dostarczane z mocowaniem do zestawu) na dachu pojazdu.
- Page 29 Fitting Kit K997W Upewnij się, czy dobrałeś odpowiednią podkładkę. Umieść belki na dachu. Zalecana odległość między belkami wynosi 700mm. Nałożyć pasek ochronny, jak pokazano. Zabezpiecz tśmą.
- Page 30 Fitting Kit K997W Bardzo ważne jest aby umieścić łapy w odpowiednich miejscach na dachu samochodu Litery odnoszą się do oznakowań na łapkach Numer łapy: A = A853 Dołączyć łapki do kitu. Umieść śrubę w otworze łapki. Nie dokręcaj śruby zbyt mocno.
- Page 31 Fitting Kit K997W Zamontuj stopy w tych samych miejscach na obu końcach belki.Zamontuj łapki. Zamocuj łapy na samym brzegu dachu tuż pod drzwiami Czytać na z przodu instrukcji znajdziesz specyfikacje dla twojego samochodu. Wypośrodkuj równe odległości belek (patrz: instrukcja montażu belek)
- Page 32 Fitting Kit K997W Dokręć śruby na każdej stopie, 2.5 Nm / 1.8 ft lb. Upewnij się, czy belka została poprawnie zamontowana Zamknij osłony za pomocą klucza.
- Page 33 Fitting Kit K997W UWAGA: Sprawdź czy dokładnie dokręciłeś śruby...
-
Page 34: Zasady Użytkowania
Fitting Kit K997W Zasady użytkowania Nie korzystaj z myjni jeśli masz zamontowany bagażnik na dachu. Regularnie naoliwiaj zamki i zawiasy. Zdemotuj bagażnik dachowy jeśli go nie używasz. Upewnij się, że przewozony ładunek został zabezpieczony taśmami. Jazda samochodem z bagaznikiem na dachu zmienia zachowanie samochodu. - Page 35 Fitting Kit K997W Po założeniu produktu może nie być możliwy montaż pewnych typów szklanych dachów panoramicznych i anten radiowych. Yakima Products, Inc. Archimedesbaan 25 3439 ME Nieuwegein The Netherlands +31 (0)30 600 1070 www.whispbar.eu www.whispbar.pl Yakima Products, Inc. 15025 SW Koll Pkwy.
Need help?
Do you have a question about the K997W and is the answer not in the manual?
Questions and answers