
Related Manuals for Sonic Driver Modbus-UFM


Summary of Contents for Sonic Driver Modbus-UFM
- Page 1 Made in Britain MODBUS WALL-UFM Ultrasonic Flowmeter Operating Instructions Version 1.0 5th August 2022 Copyright Sonic Driver Ltd 2022...
-
Page 2: Table Of Contents
Contents 1.0 Introduction 1.1 General Precautions 2.0 Configuration Program Functionality 2.1 Quick Start 2.1.1 Transducer Type 2.1.2 Number of Passes (Transducer Mounting) 2.1.3 Pipe Material 2.1.4 Pipe Outer Diameter 2.1.5 Pipe Wall Thickness 2.1.6 Pipe Roughness 2.1.7 Fluid Type 2.1.8 Fluid Temperature 2.1.9 Min Flow Cutoff 2.1.10 Flow Damping 2.2 Display of Ultrasonic Signal, Transducer Positioning... -
Page 3: Introduction
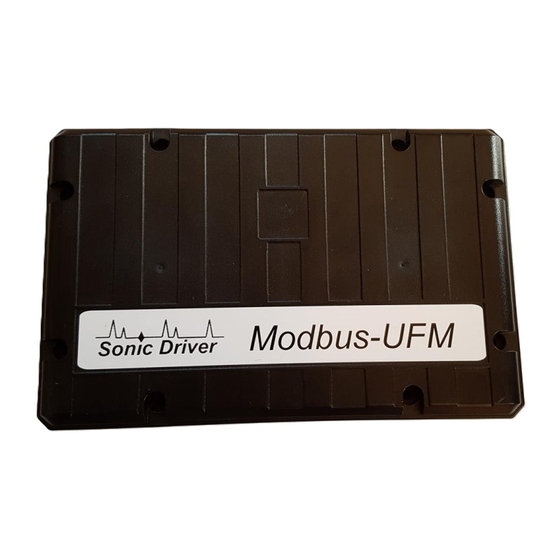
1.0 Introduction Congratulations on choosing the Sonic Driver MODBUS WALL-UFM wall or panel mounted clamp-on ultrasonic flowmeter, figure(1). Figure(1) The Sonic Driver MODBUS WALL-UFM. The ultrasonic flowmeter (UFM) uses advanced Digital Signal Processing (DSP) and transit time measurement techniques (Sonic Driver... -
Page 4: General Precautions
1.1 General Precautions The content of this manual has been carefully checked and is believed to be accurate. Sonic Driver Ltd assumes no responsibility for any inaccuracies that may be contained in this manual. In no event will Sonic Driver be liable for direct, indirect, special, incidental or consequential damages resulting from any defect or omission in this manual, even if we are advised of the possibility of such damages. -
Page 5: Configuration Program Functionality
2.0 Configuration Program Functionality The UFM is installed and commissioned using the Configuration Program installed and running on a PC (Windows). Read the Installation manual for instructions on installing the Configuration program. The Configuration program is basically a dashboard, see figure(2) which includes sections for; •... - Page 6 figure(3). Figure(3) Quick Start Section. Parameters and settings in the UFM can be edited by; • Selecting an item using a scrolling list • Ticking a Tick Box • Direct numerical entry It is important to note that after direct numerical entry of a parameter value it is important to press the named button next to the entry for it to be checked against limits, entered and saved.
-
Page 7: Transducer Type
• DN40 • DM10(Default) • DM20 DM sensors are Sonic Driver standard PEEK/stainless steel design. DN sensors are Sonic Driver small pipe design. 2.1.2 Number of Passes (Transducer Mounting) The user is prompted to select the sound path in the pipe from a list;... -
Page 8: Pipe Material
2.1.3 Pipe Material The user can select the pipe material from a list; • Carbon Steel (Default) • Stainless Steel • Copper • PVC The transverse speed of sound in the pipe material is read from a database held in the UFM. 2.1.4 Pipe Outer Diameter The user is prompted to enter a value for the pipe outer diameter. -
Page 9: Flow Damping
Generally, 0.025m/s is recommended as the low flow cutoff point. The low flow cutoff value has no relation to the measurement results once the velocity increases over the low flow cutoff value. The user is prompted to enter a value in m/s below which the meter reports flow as zero. Allowed values are ranged 0.000 to 1.000m/s, default 0.025m/s. -
Page 10: Display Of Ultrasonic Signal, Transducer Positioning
2.2 Display of Ultrasonic Signal, Transducer Positioning This section displays the received ultrasonic signal to aid transducer mounting and allows coupling optimization, see figure(5). Figure(5) Ultrasonic Signal, Transducer Positioning. To make a flow measurement and update this display press Read Meter Settings. The configuration program reads and displays the ultrasonic signal being measured. -
Page 11: Display Of Diagnostics
Figure(6) Display of Measurements. To just make flow measurements press the Read Meter Settings button. Flow velocity is a rolling average value (see flow damping), which is flow profile compensated, with zero flow cut off applied (see minimum flow cut-off). The other measured values are derived from this velocity. -
Page 12: Signal Based Diagnostics
2.4.1 Signal Based Diagnostics This section displays diagnostics related to the signal strength and SNR of the received sonic signal; • Gain • Signal • Noise • SNR Gain indicates the amount of electronic gain being used by the UFM receiver amplifier. Gain is indicated by numbers from typically 0.0 to 81.0, in dB. -
Page 13: Profile K
• Delta Time • Transit Time Up • Transit Time Down • dT Offset Delta Time is the difference in time between the two absolute transit times through the fluid. Delta Time is of the order of tens of nanoseconds because the absolute upstream and downstream times are so close together in value. -
Page 14: Error Code
It is acceptable to have to move one of the transducers up to ± 5mm to achieve a figure of 100%. If more movement is necessary then one of the pipe parameters is probably incorrect. This is most likely to be the value entered for pipe wall thickness as this is often taken from tables or it is an estimated value. -
Page 15: Set Zero Calibration
At extremely low flows the meter can mistakenly identify a flow from for example a real leak as an erroneous offset. To avoid the leak being tracked off turn zero tracking Off. 3.2 Set Zero Calibration The user is prompted to turn zero calibration On/Off. A zero calibration can be made before the meter proceeds to measurement mode by using this option. -
Page 16: Powering On
See relevant sections on Input/Output below for more detail of what tests are carried out. During connection the dashboard will display; • Company Name - Sonic Driver. • Model Code - Show model code of the UFM. • Serial No. - Show the unique serial number assigned to the UFM during manufacture. -
Page 17: Input/Output
5.0 Input/Output As soon as the UFM is switched on a self-diagnostic program will start. As part of this diagnostic the UFM polls to determine which if any optional plug-in IO modules are fitted in its expansion slots. Plug-in modules are slot number and position specific. 5.1 PT100 Input If a PT100 module is fitted in slot#3 then its value corresponds to Inlet temperature. -
Page 18: Heat Metering
6.0 Heat Metering Heat meters measure the energy necessary to provide hot water or cooling to a location such as a building or room. The meter measures the energy on the supply or return side of a heating (boiler) or cooling (chiller) device by measuring the flow rate of heat or cooling fluid and the temperature difference between the supply and return legs of the system. -
Page 19: Appendix A Error Codes
SPI2 bus error • 7 TOFM communications error • 8 UART error • 9 Spare • 10 Spare • 11 Spare • 12 Spare • 13 Spare • 14 Spare • 15 Spare Spare bits are always 0. Sonic Driver...
Need help?
Do you have a question about the Modbus-UFM and is the answer not in the manual?
Questions and answers