
Subscribe to Our Youtube Channel
Related Manuals for Dover Wilden Saniflo DUS Series


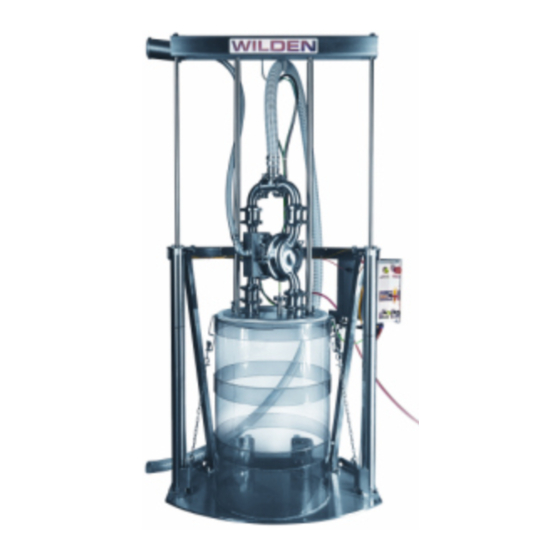
Summary of Contents for Dover Wilden Saniflo DUS Series
- Page 1 E n g i n e e r i n g O p e r a t i o n & ™ Sanifl o Series M a i n t e n a n c e R e f i n e y o u r p r o c e s s Drum Unloader System...
-
Page 2: Table Of Contents
T A B L E O F C O N T E N T S SECTION 1 CAUTIONS—READ FIRST! ..........1 SECTION 2 DESIGNATION SYSTEM . -
Page 3: Cautions-Read First
S e c t i o n 1 C A U T I O N S — R E A D F I R S T ! Drum Unloader System CAUTION: Always wear safety glasses and appropriate safety CAUTION: Moving - When moving the DUS unit, be sure that the gear when operating the Sanifl... -
Page 4: Drum Unloader System
S e c t i o n 2 W I L D E N D E S I G N A T I O N S Y S T E M DRUM UNLOADER LEGEND DUSXX / X XXX / XXX / XXXX SYSTEM MODEL... - Page 5 S e c t i o n 3 D I M E N S I O N A L D R A W I N G DIMENSIONS ITEM INCHES 1057 41.6 29.5 2503 98.5 1118 44.0 1402 55.2 1307 51.5 MOUNTING BASE DIMENSIONS 38.8 13.1...
- Page 6 S e c t i o n 4 T R O U B L E S H O O T I N G Uneven ram cylinder movement. Excessive drum contents leaking past gaskets. 1. Ensure that the ram cylinder down pressure is not 1.
- Page 7 S e c t i o n 7 A s s e m b l y / d i s a s s e m b l y S e c t i o n 5 A S S E M B L Y NOTE: It is also recommended that an appropriate anti-seize is used on all stainless To o l s R e q u i r e d : steel fasteners during assembly.
- Page 8 A S S E M B L Y Step 4: Step 5: Step 6: Make the remaining 4 connections If using a Wilden Hygienic Series Ensuring you have the correct as shown. NOTE: The labels on the pump, you may order it minus the pump for the ram plate is essential.
-
Page 9: Control Box
A S S E M B L Y Step 10: Step 11: Step 12 Install the air inlet reducer bushing Install the ram plate vent assembly Install the two (2) pieces of the main and fi tting to the air inlet of the onto the ram vent port behind the wiper seal assembly onto the bolts pump. - Page 10 A S S E M B L Y Step 16 Step 17 Step 18 Now that the drum is centered Install user supplied discharge Thread discharge hose through on the follower plate, adjust the hose on the pump using the support loop on the bottom of the alignment guides to match the drum necessary reducer, clamp band and...
- Page 11 S e c t i o n 5 A O P E R A T I O N CAUTION: Always read and familiarize yourself with these operation instructions S a f e t y E q u i p m e n t prior to using the Sanifl...
-
Page 12: Operation
O P E R A T I O N Step 4 Step 5 Step 6 Check to ensure the proper gasket set is Remove the drum lid to expose product Move drum into position under ram being pumped and hook drum retainer installed for the drum being unloaded. - Page 13 O P E R A T I O N Step 10 Step 11 Step 12 To move the ram plate down onto the Check RAM UP air supply and The pump can be started after the product surface, pull the red lever to the ensure that regulator is set for ram plate has come into contact down position.
- Page 14 O P E R A T I O N Step 16 Step 17 Step 18 To remove the ram plate from the Once the ram has cleared the upper Remove drum retention hooks drum, move the ram control lever edge of the drum, push in on the so that the empty drum can be to the up position.
-
Page 15: Cleaning
S e c t i o n 7 A s s e m b l y / d i s a s s e m b l y S e c t i o n 5 B C L E A N I N G CAUTION: Always read and familiarize yourself with these operation instructions S a f e t y E q u i p m e n t prior to using the Sanifl... - Page 16 C L E A N I N G Step 4 Step 5 Step 6 Remove ram vent assembly, then Lower ram plate with pump down Add water with cleaning solution clean and inspect. into clean, empty drum. Stop the to the drum and start pump by ram plate approximately 50 mm pulling black pump knob out on (2")-125 mm (5") from the bottom of...
- Page 17 C L E A N I N G Step 10 Step 11 Step 12 Raise the ram plate while the pump Reinstall the ram vent and gasket. If the unit will not be used on another continues to run. This will help product immediately, lower the ram remove any remaining water from plate to the fl...
- Page 18 S e c t i o n 6 A C O N T R O L B O X S C H E M A T I C S E-Stop Pump Main Reset Cylinders Pump Vent WILDEN PUMP & ENGINEERING, LLC WIL-12071-E-01...
- Page 19 S e c t i o n 8 A C O N T R O L B O X S C H E M A T I C S DUSHS CONTROL BOX COMPONETS ITEM DESCRIPTION QTY. PART NUMBER 1/2” TUBE X 1/2” NPT FEMALE BULKHEAD DUS-4025 1/2”...
-
Page 20: Hose Schematic
S e c t i o n 6 B H O S E S C H E M A T I C CAUTION: Prior to operating the DUS unit, ensure that the air hoses are connected and secured properly. CAUTION: Always wear safety glasses when operating the DUS unit. - Page 21 Finding Sleep easier with Spares Nightmare Spectrom is not your typical after market part supplier. We do not simply sell pump parts; we provide value added procurement solutions. PRODUCTS: AODDP Our unique network enables us to pur- (Air Operated Double Diaphragm Pumps) chase effectively, resulting in low cost •...
- Page 22 S e c t i o n 9 E X P L O D E D V I E W A N D P A R T S L I S T I N G DRUM UNLOADER SYSTEM E X P L O D E D V I E W WILDEN PUMP &...
- Page 23 E X P L O D E D V I E W A N D P A R T S L I S T I N G DRUM UNLOADER SYSTEM P A R T S L I S T I N G Item No.
- Page 24 N O T E S WILDEN PUMP & ENGINEERING, LLC WIL-12071-E-01...
- Page 25 N O T E S WILDEN PUMP & ENGINEERING, LLC WIL-12071-E-01...
- Page 26 N O T E S WILDEN PUMP & ENGINEERING, LLC WIL-12071-E-01...
- Page 27 W A R R A N T Y Each and every product manufactured by Wilden Pump and Engineering, LLC is built to meet the highest standards of quality. Every pump is functionally tested to insure integrity of operation. Wilden Pump and Engineering, LLC warrants that pumps, accessories and parts manufactured or supplied by it to be free from defects in material and workmanship for a period of five (5) years from date of installation or six (6) years from date of manufacture, whichever comes first.
Need help?
Do you have a question about the Wilden Saniflo DUS Series and is the answer not in the manual?
Questions and answers