Table of Contents
Advertisement
Quick Links
Advertisement
Table of Contents

Subscribe to Our Youtube Channel
Related Manuals for Dover WILDEN PRO-FLO P1 Series


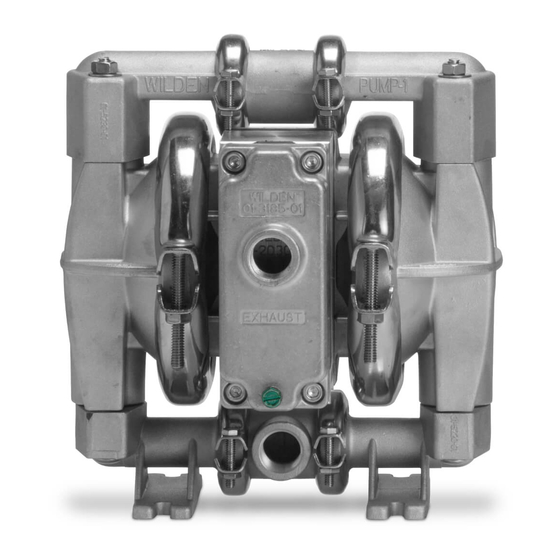
Summary of Contents for Dover WILDEN PRO-FLO P1 Series
- Page 1 EOM-P1P 10/03 TT4139 Replaced EOM-P1P 5/03...
-
Page 2: Table Of Contents
TABLE OF CONTENTS PAGE # SECTION 1 — PUMP DESIGNATION SYSTEM..........SECTION 2 — HOW IT WORKS (PUMP & AIR SYSTEMS)......SECTION 3 — CAUTIONS - READ FIRST ............. SECTION 4 — DIMENSIONAL DRAWINGS A. Model P1 PLASTIC ....................... B. Model P1 PLASTIC Carbon-Filled Acetal ................C. -
Page 3: Section 1 - Pump Designation System
SECTION 1 WILDEN PUMP DESIGNATION SYSTEM MODEL P1 PLASTIC MATERIAL CODES DIAPHRAGMS VALVE SEAT WETTED PARTS BN = BUNA-N (Red Dot) G = CARBON-FILLED ACETAL G = CARBON-FILLED ACETAL FG = SANIFLEX™ (Cream) = PVDF K = PVDF PU = POLYURETHANE (Clear) = TEFLON ®... -
Page 4: Section 2 - How It Works (Pump & Air Systems)
SECTION 2 THE WILDEN PUMP — HOW IT WORKS The Wilden diaphragm pump is an air-operated, positive displacement, self-priming pump. These drawings show the flow pattern through the pump upon its initial stroke. It is assumed the pump has no fluid in it prior to its initial stroke. FIGURE 2 When the pressurized diaphragm, FIGURE 3... -
Page 5: Section 3 - Cautions - Read First
SECTION 3 WILDEN MODEL P1 PLASTIC CAUTIONS – READ FIRST! TEMPERATURE LIMITS: CAUTION: Before any maintenance or repair is Polypropylene 0°C to 79°C 32°F to 175°F attempted, the compressed air line to the pump should PVDF –12°C to 107°C 10°F to 225°F be disconnected and all air pressure allowed to bleed Carbon-Filled from pump. -
Page 6: Model P1 Plastic
SECTION 4A DIMENSIONAL DRAWING WILDEN MODEL P1 PLASTIC 13 mm (1/2”) FNPT ULTRAPURE .615 I.D. [15.62] .844 O.D. [21.44] 13 mm (1/2”) FNPT AIR EXHAUST DIMENSIONS – P1 (PLASTIC) ITEM METRIC (mm) STANDARD (inch) 6 mm (1/4”) FNPT AIR INLET 13 mm (1/2”) FNPT ULTRAPURE .615 I.D. -
Page 7: Model P1 Plastic Ultrapure Iii
SECTION 4C DIMENSIONAL DRAWING WILDEN MODEL P1 PLASTIC ULTRAPURE III 13 mm (1/2”) FNPT 13 mm (1/2”) FNPT AIR EXHAUST 6 mm (1/4”) FNPT AIR INLET 13 mm (1/2”) FNPT DIMENSIONS – P1 (ULTRAPURE III) ITEM METRIC (mm) STANDARD (inch) All P1 Ultrapure pumps are assembled in a Class 10,000 cleanroom. -
Page 8: Model P1 Plastic Rubber-Fitted
SECTION 5A PERFORMANCE CURVES MODEL P1 PLASTIC RUBBER-FITTED Height ........218 mm (8.6") Width ........208 mm (8.2") Depth ........203 mm (8.0") Ship Weight ....Polypropylene 4 kg (9 lbs.) PVDF 5 kg (11 lbs.) Carbon-filled Acetal 5 kg (10 lbs.) Teflon ® PFA 6 kg (12 lbs.) Air Inlet.........6 mm ( ⁄... -
Page 9: Model P1 Plastic Teflon -Fitted
SECTION 5C PERFORMANCE CURVES MODEL P1 PLASTIC TEFLON ® -FITTED Height ........218 mm (8.6") Width ........208 mm (8.2") Depth ........203 mm (8.0") Ship Weight ....Polypropylene 4 kg (9 lbs.) PVDF 5 kg (11 lbs.) Carbon-filled Acetal 5 kg (10 lbs.) Teflon ®... -
Page 10: Model P1 Plastic Ultrapure Iii
SECTION 5E PERFORMANCE CURVES WILDEN MODEL P1 PLATIC ULTRAPURE III Height ........229 mm (9.0") Width ........226 mm (8.9") Depth ........201 mm (7.9") Ship Weight ........6 kg (12 lbs.) Air Inlet.........6 mm ( ⁄ ") Inlet ..........13 mm ( ⁄ ") Outlet..........13 mm ( ⁄... -
Page 11: Installation
¹⁄₂" SECTION 7A INSTALLATION ELEVATION: Selecting a site that is well within the pump’s The Pro-Flo™ model P1 has a 13 mm (¹⁄₂") inlet and 13 mm dynamic lift capability will assure that loss-of-prime troubles will (¹⁄₂") outlet and is designed for flows to 56.8 lpm (15 gpm). be eliminated. -
Page 12: Operation & Maintenance
SUGGESTED INSTALLATION ® AIR-OPERATED PUMPS: To stop the pump from operating in an emergency situation, simply close the “shut-off” valve (user supplied) installed in the air supply line. A properly functioning valve will stop the air supply to the pump, therefore stopping output. -
Page 13: Troubleshooting
SECTION 7C TROUBLESHOOTING Pump will not run or runs slowly. Verify that vacuum required to lift liquid is not greater than the vapor pressure of the material being pumped (cavitation). Ensure that the air inlet pressure is at least 0.4 bar (5 psig) Check for sticking ball check valves. -
Page 14: Model P1 Plastic Wetted Path - Tools Required, Torque Specs, Cautions
SECTION 8A MODEL P1 PLASTIC DIRECTIONS FOR DISASSEMBLY/REASSEMBLY CAUTION: Before any maintenance or repair is attempted, the compressed air line to the pump should be disconnected and all air pressure allowed to bleed from the pump. Disconnect all intake, discharge, and air lines. Drain the pump by turning it upside down and allowing any fluid to flow into a suitable container. - Page 15 Step 4. Figure 4 Step 5. Figure 5 Remove the discharge valve balls, seats and o-rings from Remove and inspect the ball retainer, retainer o-ring, and the discharge manifold and inspect for nicks, gouges, valve ball from the bottom of the liquid chamber. Check for chemical attack or abrasive wear.
- Page 16 Step 9. Figure 9 Step 10. Figure 10 Lift the liquid chamber away from the center section to Using an adjustable wrench, or by rotating the diaphragm by expose the diaphragm and outer piston. (Figure 9) hand, remove the diaphragm assembly from the center section.
-
Page 17: Section 8 - Directions For Disassembly/Reassembly
SECTION 8B – SINGLE-PIECE MANIFOLD PUMPS DIRECTIONS FOR DISASSEMBLY/REASSEMBLY CAUTION: Before any maintenance or repair is attempted, the compressed air line to the pump should be discon- nected and all air pressure allowed to bleed from pump. Disconnect all intake, discharge, and air lines. Drain the pump by turning it upside down and allowing any fluid to flow into a suitable container. - Page 18 Step 1. Figure 1 Step 2. Figure 2 Step 3. Figure 3 Using an appropriate sized Allen Remove discharge manifold. It is now Remove the o-ring, ball cage and ball wrench, remove clamp bands that hold possible to inspect the outboard o-rings. valve from the water chamber.
-
Page 19: Pro-Flo™ Air Valve/Center Section - Disassembly, Cleaning, Inspection
SECTION 8C PRO-FLO™ AIR VALVE/CENTER SECTION DISASSEMBLY, CLEANING, INSPECTION AIR VALVE DISASSEMBLY: CAUTION: Before any maintenance or repair is attempted, the compressed air line to the pump should be discon- nected and all air pressure allowed to bleed from the pump. - Page 20 Step 5. Figure 5 Step 6. Figure 6 Remove air valve spool from air valve body by threading one air Remove pilot spool sleeve retaining snap ring on both sides valve bolt into the end of the spool and gently sliding the spool of center section with snap ring pliers (Figure 6).
-
Page 21: Reassembly Hints & Tips
SECTION 8D REASSEMBLY HINTS & TIPS ASSEMBLY: Upon performing applicable maintenance to the air distribution system, the pump can now be reassembled. Please refer to the disassembly instructions for photos and parts placement. To reassemble the pump, follow the disassembly instructions in reverse order. -
Page 22: Gasket Kit Installation
SECTION 8E GASKET KIT INSTALLATION P1 PVDF and Ultrapure III pumps come standard with surfaces by removing all debris and foreign matter from expanded Teflon ® Gasket Kits (P/N 01-9501-99) for all seal- diaphragm bead and all mating surfaces. If necessary, ing surfaces. - Page 23 NOTES: WILDEN PUMP & ENGINEERING, LLC...
-
Page 24: Section 9 - Exploded View/Parts Listing
SECTION 9A EXPLODED VIEW/PARTS LISTING PLASTIC RUBBER- FITTED WILDEN PUMP & ENGINEERING, LLC... - Page 25 MODEL P1 PLASTIC RUBBER-FITTED Qty. PPPP KPPP Item Part Description Pump Pro-Flo™ Air Valve Assembly 01-2010-20 01-2010-20 End Cap 01-2332-20 01-2332-20 O-Ring, End Cap 01-2395-52 01-2395-52 Gasket, Air Valve 01-2615-52 01-2615-52 Screw, HSHC, Air Valve ¹⁄₄"-20 01-6001-03 01-6001-03 Nut, Hex, ¹⁄₂"-20 04-6400-03 04-6400-03 Center Section Assembly...
- Page 26 SECTION 9B EXPLODED VIEW/PARTS LISTING PLASTIC TEFLON ® FITTED WILDEN PUMP & ENGINEERING, LLC...
-
Page 27: Model P1 Plastic Teflon -Fitted
MODEL P1 PLASTIC TEFLON ® -FITTED Qty. PPPP PPPP-502 KPPP KPPP-502 TPPP-502 Item Part Description Pump Pro-Flo™ Air Valve Assembly 01-2010-20 01-2010-20 01-2010-20 01-2010-20 01-2010-20 End Cap 01-2332-20 01-2332-20 01-2332-20 01-2332-20 01-2332-20 O-Ring, End Cap 01-2395-52 01-2395-52 01-2395-52 01-2395-52 01-2395-52 Gasket, Air Valve 01-2615-52 01-2615-52... -
Page 28: Model P1 Plastic Ultrapure Iii And Carbon-Filled Acetal
SECTION 9C EXPLODED VIEW/PARTS LISTING PLASTIC ULTRAPURE WILDEN PUMP & ENGINEERING, LLC... - Page 29 MODEL P1 PLASTIC ULTRAPURE III & CARBON-FILLED ACETAL P1/GLLL P1/GLLL Qty. TPPP-521 TPPP-525 RUBBER TEFLON ® Item Part Description Pump Pro-Flo™ Air Valve Assembly 01-2010-20 01-2010-20 01-2010-13 01-2010-13 End Cap 01-2332-20 01-2332-20 01-2332-13 01-2332-13 O-Ring, End Cap 01-2395-52 01-2395-52 01-2395-52 01-2395-52 Gasket, Air Valve 01-2615-52...
-
Page 30: Section 10 - Elastomer Options
SECTION 10 ELASTOMER OPTIONS ELASTOMER OPTIONS FOR MODEL P1 PLASTIC PUMPS Diaphragm Valve Ball Valve Seat* Valve Seat O-Ring Manifold O-Ring Material Polyurethane 01-1010-50 01-1080-50 01-1200-50 01-1300-50 Buna-N 01-1010-52 01-1080-52 01-1200-52 01-1300-52 Viton ® 01-1010-53 01-1080-53 01-1120-53 Wil-Flex™ 01-1010-58 01-1080-58 01-1200-58 01-1300-58 Saniflex™... - Page 31 WARRANTY Each and every product manufactured by Wilden Pump and Engineering, LLC is built to meet the highest standards of quality. Every pump is functionally tested to insure integrity of operation. Wilden Pump and Engineering, LLC warrants that pumps, accessories and parts manufactured or supplied by it to be free from defects in material and workmanship for a period of one year from date of startup or two years from date of shipment, whichever comes first.
Need help?
Do you have a question about the WILDEN PRO-FLO P1 Series and is the answer not in the manual?
Questions and answers