Lifetime 60059 Owner's Manual
Hide thumbs
Also See for 60059:
- Assembly instructions manual (28 pages) ,
- Assembly instructions manual (28 pages) ,
- Assembly instructions manual (28 pages)

Related Manuals for Lifetime 60059


Summary of Contents for Lifetime 60059
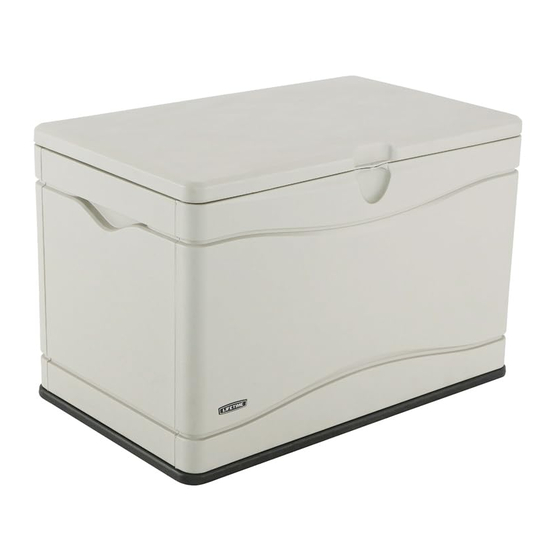
- Page 1 OUTDOOR STORAGE MODEL N° 60059 OWNER’S MANUAL Keep this Identification Number in case you must contact our Customer Service Department.
-
Page 2: Safety Instructions
REGISTER YOUR LIFETIME PRODUCT TODAY! There are benefi ts to registering your Lifetime product. With our new online product registration form, it’s fast and easy! Register with us at www.lifetime.com and enjoy these great benefi ts: LIFETIME’S PROMISE TO YOU: Maintaining your privacy is our long-standing policy at Lifetime. -
Page 3: Before Beginning Assembly
BEFORE BEGINNING ASSEMBLY *Two adults required to complete assembly* (+ one adult suggested as an instruction reader) Only adults should set up the product. Do not allow children in the setup area until assembly is complete. TOOLS REQUIRED FOR THIS ASSEMBLY Socket Wrench with 3/8”, 1/2”... - Page 4 ASSEMBLY GUIDES Refer to the following areas throughout the instructions to assist in the assembly process: This area is located at the top, left-hand TOOLS AND HARDWARE REQUIRED FOR THIS PAGE corner of the page and indicates which tools and hardware are needed to complete the assembly steps on a page.
-
Page 5: Parts List
PARTS LIST PARTS BOX Description Description Storage Box Hardware Bag PARTS & HARDWARE IDENTIFIER PARTS BOX Front Panel Floor Panel [CQR] STORAGE BOX HARDWARE BAG *CVY *AKF *BEP... - Page 6 BOX ASSEMBLY HARDWARE REQUIRED HARDWARE BAG REQUIRED: CQR PLASTIC PARTS REQUIRED Front Panel Floor Panel TOOLS REQUIRED Phillips Screwdriver Safety Glasses...
- Page 7 TOOLS AND HARDWARE REQUIRED FOR THIS PAGE NO HARDWARE REQUIRED FOR THIS PAGE BOX ASSEMBLY Floor Panel (ANC) Rear Panel (ANA)
- Page 8 TOOLS AND HARDWARE REQUIRED FOR THIS PAGE NO HARDWARE REQUIRED FOR THIS PAGE Front Panel (AMZ)
- Page 9 TOOLS AND HARDWARE REQUIRED FOR THIS PAGE NO HARDWARE REQUIRED FOR THIS PAGE SIDE PANEL INFORMATION Slots Tabs...
- Page 10 TOOLS AND HARDWARE REQUIRED FOR THIS PAGE NO HARDWARE REQUIRED FOR THIS PAGE Side Panel (ANB) Tabs Slots 2 ADULTS REQUIRED FOR THIS STEP Repeat steps 1.6 - 1.7 For second Side panel. Tabs Slits...
- Page 11 TOOLS AND HARDWARE REQUIRED FOR THIS PAGE #10 x 3/4” Pan-Head Screw (ADW) Repeat this step for each corner. Do not overtighten Screws.
- Page 12 TOOLS AND HARDWARE REQUIRED FOR THIS PAGE #10 x 1/2” Pan-Head Screws (ADX)
- Page 13 LID ASSEMBLY HARDWARE REQUIRED HARDWARE BAG REQUIRED: CQR *CVY *BEP *AKF METAL PARTS REQUIRED PLASTIC PARTS REQUIRED TOOLS REQUIRED 3/8”, 7/16”, & 1/2” Socket Wrench 7/16” Wrench 1/2” Wrench Safety Glasses...
- Page 14 TOOLS AND HARDWARE REQUIRED FOR THIS PAGE LID & HINGE ASSEMBLY Lid (AND) Lid Support Channel (BKV) Slot Slot 1/4” x 3/4” Hex- Head Screws (BKW). Note: Ignore the hole at each end. These are for Center notch over nub manufacturing purposes only.
- Page 15 TOOLS AND HARDWARE REQUIRED FOR THIS PAGE 1/2” 1/2” 5/16” Ball Studs (BET) Hinge (BEP) left-hand side Note: Both Hinges are the same, but the Ball Studs are attached only to the Hinge for the left side. Note: The upper hinge arm is on the inside of the lower hinge arm.
- Page 16 TOOLS AND HARDWARE REQUIRED FOR THIS PAGE NO HARDWARE REQUIRED FOR THIS PAGE Hinge Assembly Lid (AND) Left-Hand Side Hinge (from Step 2.3) Pilot Hole Pilot Hole Note: The upper hinge arm is on the inside of the lower hinge arm and the Ball Studs face inward.
- Page 17 TOOLS AND HARDWARE REQUIRED FOR THIS PAGE 3/8” Hinge Assembly #14 x 1 1/4” Hex-Head Screws (BEV). Repeat this step for the right Hinge.
- Page 18 TOOLS AND HARDWARE REQUIRED FOR THIS PAGE 7/16” 7/16” 2 ADULTS REQUIRED FOR THIS STEP Repeat this step for the right Hinge. Note: Place the notch in the lower arm over the Rear Panel.
- Page 19 TOOLS AND HARDWARE REQUIRED FOR THIS PAGE 2 ADULTS REQUIRED FOR THIS STEP Gas Spring (AKF) oriented in the direction shown. Note: Ensure you connect the Gas Spring (AKF) in the direction shown. WARNING...
- Page 20 TOOLS AND HARDWARE REQUIRED FOR THIS PAGE Locking Bracket (CVY)
-
Page 21: Cleaning And Care
CLEANING & CARE ® Cleaning and Care WARNING ADVERTENCIA AVERTISSEMENT... - Page 22 10-YEAR LIMITED LIFETIME WARRANTY THE MANUFACTURER RESERVES THE RIGHT TO MAKE SUBSTITUTIONS TO WARRANTY CLAIMS IF PARTS ARE UNAVAILABLE OR OBSOLETE. PLEASE INCLUDE YOUR DATED SALES RECEIPT AND PHOTOGRAPHS OF DAMAGED PARTS. REGISTER YOUR PRODUCT FOR QUICKER CUSTOMER SERVICE. FOR INTERNATIONAL WARRANTY CLAIMS:...
- Page 23 ® ENHANCE YOUR LIFETIME PURCHASE BY ADDING ACCESSORIES OR OTHER GREAT PRODUCTS To purchase accessories or other Lifetime Products, visit us at: www.lifetime.com Or call: 1-800-424-3865...
Need help?
Do you have a question about the 60059 and is the answer not in the manual?
Questions and answers