Table of Contents
Advertisement
Quick Links
Advertisement
Table of Contents

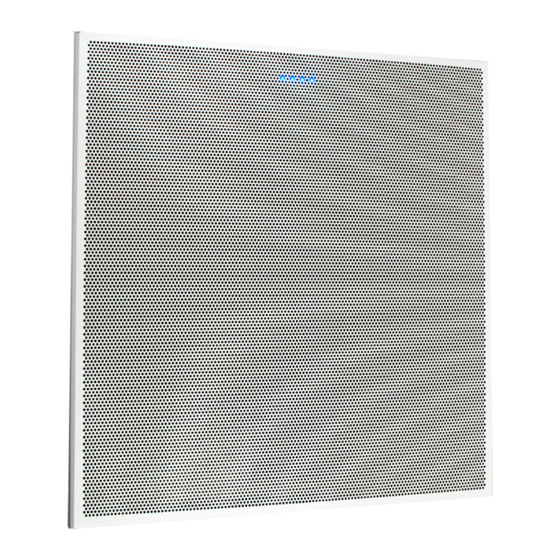
Summary of Contents for ClearOne BMA CT
- Page 1 BMA CT Beamforming Mic Array - Ceiling Tile Quick-Start Guide...
-
Page 2: Table Of Contents
Table of Contents IMPORTANT SAFETY INSTRUCTIONS ......... 1 THE BMA CT .................. 2 QUICK-START OVERVIEW ............3 CONNECTING THE ARRAYS ............4 I/O C ................4 OnneCtIOns ................6 OnneCtIOns UPDATING ARRAY FIRMWARE ............ 8 TESTING THE ARRAYS ..............8 &... -
Page 3: Important Safety Instructions
QUICK-START GUIDE IMPORTANT SAFETY INSTRUCTIONS Read these instructions. Keep these instructions. Heed all warnings. Follow all instructions. Do not use this apparatus near water. Clean only with dry cloth. Do not block any ventilation openings. Install in accordance with the manufacturer’s instructions. -
Page 4: The Bma Ct
The most recent versions of firmware and software are available on the ClearOne website at clearone.com/rl-search?combine=software. QUICK-START OVERVIEW Installing and using the BMA CT arrays in your CP2 site is subject to the following parameters: The arrays can only be used with CP2 systems. - Page 5 These steps must be done in the following order to use the BMA CT in your CONVERGE Pro 2 site: Update the CONVERGE Pro 2 firmware to the latest version using CONSOLE AI software.
-
Page 6: Connecting The Arrays
CONVERGE Pro 2 (CP2), or connect it to the BMA CT’s PoE+ port. • If you connect the PoE+ injector to the BMA CT’s PoE+ port, you must also connect the CP2’s P-Link Out port to the BMA CT’s P-Link... - Page 7 CONVERGE Pro 2 (CP2) P-Link Peripheral Products Application Note: https://www.clearone.com/sites/default/files/2019-09/AppNote_ PoE_P-link_Peripheral_Products.pdf Peaker Sage When a BMA CT drives speakers, it requires its own PoE injector. In this case, be sure to set the power-source-selection switch to the left (PoE+ port). ummary of onnectionS and Peaker...
-
Page 8: P-L Ink C Onnections
CONVERGE Pro 2 (Power, Audio, Control) 2 x 10W speakers P-Link Connecting 3 BMA CT units to one CP2 Unit. P-Link cables can vary in length up to 200 ft 2 x 10W speakers BMA CT requires its own PoE (IEEE 802.3at-compliant) - Page 9 QUICK-START GUIDE P-Link CONVERGE Pro 2 (Power, Audio, Control) Up to 200 ft. P-Link Connecting 3 BMA CT units and 3 P-Link Up to 200 ft. compatible devices to one CP2 unit. P-Link Up to 200 ft. P-Link Up to 200 ft.
-
Page 10: Updating Array Firmware
TESTING THE BMA CT UNITS The BMA CT must be added to the site using the CONSOLE AI software. This software also provides the capability of configuring the beams (enable/disable) and other characteristics available in Configuration mode. -
Page 11: Icrophone Rray Rientation
QUICK-START GUIDE QUICK-START GUIDE icroPhone rray rientation The LED indicators should be oriented in the room according to the beam selection needs for optimal coverage. The diagrams below show the orientation of the LED indicators toward the head of the conference table with the resulting room coverage and beam mapping shown below. -
Page 12: Mounting The Arrays
BMA CT MOUNTING THE ARRAYS Lenum hieLd with eiSmic abLeS If installing both the plenum shield and seismic cables, four slots of approximately 1” length should be cut diagonally in the plenum shielding to match the points of seismic cable attachment. Otherwise, skip this step and go to page 11 for installation of plenum shield only or page 12 for isntallation of seismic cables only. -
Page 13: P Lenum S Hield I Nstallation
QUICK-START GUIDE Lenum hieLd nStaLLation Remove the liner from adhesive in four places on underside of shielding, and thread cables through cut slots before attaching to ceiling. -
Page 14: S Eismic C Ables
(see Pg 10). eiLing ountS For non-tile ceilings, ClearOne offers both a recessed-mount kit and a surface mount kit. Installation guides are available on the ClearOne website as follows: • BMA Recessed-Mount Kit Installation Guide • BMA Surface-Mount Kit Installation Guide... -
Page 15: Compliance
QUICK-START GUIDE COMPLIANCE Details on compliance are available on the ClearOne website under “Resource Library”. Part Numbers Item Part No. White BMA CT 24in 910-3200-205 White BMA CT 600mm 910-3200-205-I BMA Recessed Mount Kit 24in 910-3200-212 BMA Recessed Mount Kit 600mm... -
Page 16: Isometric Diagrams
BMA CT ISOMETRIC DIAGRAMS Side ViewS back View... -
Page 17: Supported Converge Pro 2
Suite 500 Salt Lake City, UT 84116 International TechSupport Tel: +1.801.975.7200 Tel: 801.974.3760 Tel: 801.975.7200 e-mail: global@clearone.com e-mail: tech.support@clearone.com www.clearone.com © 2020 ClearOne, Inc. All rights reserved. Information in this document is subject to change without notice. QSG-0074-001v2.5 October 2020...


Need help?
Do you have a question about the BMA CT and is the answer not in the manual?
Questions and answers