
Related Manuals for Winny OPTIMUS PRO HJ3052


Summary of Contents for Winny OPTIMUS PRO HJ3052
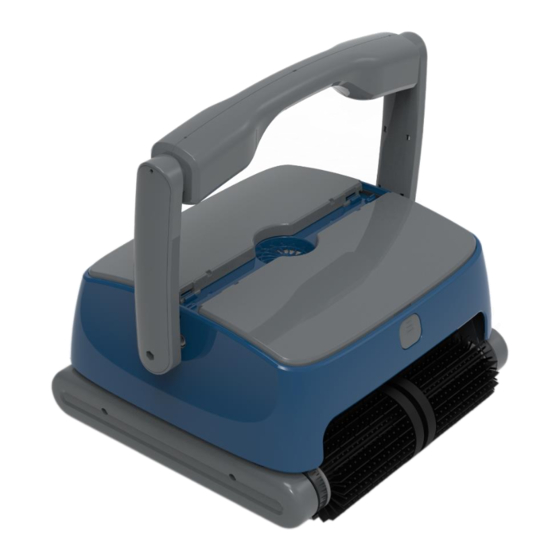
- Page 1 ROBOTIC POOL CLEANER OPTIMUS PRO© HJ3052 USER MANUAL Thank you for purchasing Winny Robotic Pool Cleaner. If you have any questions or issues, please contact your local dealer for customer service.
-
Page 2: Table Of Contents
Contents IMPORTANT PRECAUTIONS ............................1 INTRODUCTION ..............................3 SAFETY ................................3 III. SPECIFICATIONS .............................. 4 OPERATION INSTRUCTIONS ..........................4 4.1 I ..........................4 NSTRUCTIONS FOR OPERATION PANEL 4.3 A ......................... 9 PP CONTROL ON SMARTPHONE VIA LUETOOTH 4.4 F ................................12 ILTER CLEANING TRANSPORT CADDY (OPTIONAL)........................13 5.1 E... -
Page 3: Important Precautions
Important Precautions Please read the manual carefully, and use the cleaner according to the manual. We are not held liable for any loss or injury caused by improper use. Please do not allow children to ride on it or play with it as a toy. In order to prevent severe damage to the cleaner, never power on it when it is out of the swimming pool. - Page 4 Attention 1. Put into or lift out of the pool with the cleaner bottom towards the wall to avoid any possible scratches to the pool. Hold the top handle and put it into the pool. Let the cleaner immerse into the pool floor after emptying the air inside it (the air inside should be exhausted completely, otherwise its normal working will be affected).
-
Page 5: Introduction
I. Introduction The robotic pool cleaner HJ3052 is a new type of highly efficient and energy-saving swimming pool cleaning robot. Through its advanced computer-controlled program, it can clean the pool walls and bottom automatically. At the same time, it filters the pool water and gets rid of suspended particles without replacing the pool water. -
Page 6: Specifications
III. Specifications 1. Rated input voltage: 220VAC (230VAC)/110VAC (120VAC) 2. Frequency: 50Hz/60Hz 3. Output voltage: DC28V 4. Power: 140W 5. Cleaning cycle: 1/2/3h 6. Filter capacity: appr. 16m³/h 7. Filter density: 180μm 8. Moving speed: appr. 10.5m/min 9. IP grade: Cleaner IPX8; Power supply: IPX5 10. - Page 7 Table 4-1 Instructions for button and indicator Sign Instruction Function description Press this button, the cleaner is power-on. ON/OFF Power on/off Press a second time, the cleaner is off. ALL: to clean pool floor, walls and waterline (once floor, once wall) WALL: to clean the pool walls only MODE FLOOR: to clean the pool floor...
- Page 8 1H: cleaner running for 1 hour TIME 2H: cleaner running for 2 hours 3H: cleaner running for 3 hours Indicate the operation modes and cleaner status 2 or 3 indicators on Cleaner stopped “1H” flashes slowly Cleaner running for 1 hour “2H”...
- Page 9 flash in order “3H” >> “2H”>>”1H” flash in Manual: left turning order “1H” >> “2H”>>”3H” flash in Manual: right turning order All indicators flash slowly Auto-running finished Code Fault Suggestion Power All indicators flash quickly Stop using and supply is with buzz contact after-sales overloaded...
- Page 10 4.2.2 Build-in antenna version Work automatically Forward Left Backward Right Stop ◀ ▶ Note: Users have to press “ ” or ” ” all the time to achieve left or right turning. Remote Control Assembly: take the remote control apart when using it for the first time and install the battery correctly according to the direction indicated)
-
Page 11: App Control On Smartphone Via Bluetooth
4.3 App control on smartphone via Bluetooth 4.3.1 Initial interface Search Language icon icon Connection Status Open the app and connect with the cleaner 4.3.2 Interface of manual operation Indication Function ● Disconnected Connection status ● Connected Button “FORWARD” Manual -- Walk forward Button “BACKWARD”... - Page 12 4.3.3 Interface of automatic operation Indication Function ● Disconnected Connection status ● Connected ● Pool floor - cleaning floor only ● Pool wall - cleaning wall Auto mode only ● Once floor once wall ● Three times floor once walls ●...
- Page 13 Press this button to cancel the current Cancel reservation Periodic cleaning Cycle working Setting for periodic cleaning Range: 1 day – 10 days 4.3.5 Download address For Android: search “Winny” in Google Play For IOS: search “My Winny” in Apple Store...
-
Page 14: Filter Cleaning
4.4 Filter cleaning 4.4.1 Take out the filter baskets: a. Press the opening button (see Figure 1) b. The top cover will pop-up automatically (see Figure 2) c. Open the top cover (see Figure 3) d. Take out the filter basket (see Figure 4) Figure 1 Figure 2 Figure 3... -
Page 15: Transport Caddy (Optional)
4.4.2 Clean the filter baskets 4.4.3 Re-install the filter baskets Pay attention to the installation position and close the top cover. Wide side in the middle Press V. Transport caddy (Optional) 5.1 Exploded view... -
Page 16: Assembly Of Transport Caddy
5.2 Assembly of transport caddy 1. Open the package for assembling 2. Put the connection part onto the plate 3. Insert the wheel axle 4. Assemble the protecting cover and axle cover 5. Assemble wheels 6. Put on the nut 7. -
Page 17: Float Block
VI. Float block Please refer to following operation if it is difficult for the cleaner to climb the wall and clean the waterline. The following operation is not necessary if the cleaner climbs the wall well. Open the top cover and glue the float block at the position shown in the below picture. The other side is also glued. -
Page 18: Packing List
VII. Packing list Item Name Model QTY (pc) Application Remark Cleaner body HJ3052 In carton Power supply HJ3052 In carton Cleaner User manual, certificate & In plastic bag safety rope VIII. Warranty This product has passed all quality control and safety tests, conducted by the technical department of the factory.
Need help?
Do you have a question about the OPTIMUS PRO HJ3052 and is the answer not in the manual?
Questions and answers
I need the rubber belts for HJ 3052 Winny. The small one broke but I should get the two large ones also.
Need rubber bands