Abatron bdiGDB BDI2000 User Manual
Tag interface for gnu debugger
Hide thumbs
Also See for bdiGDB BDI2000:
- User manual (51 pages) ,
- User manuals (25 pages) ,
- Installation manual (22 pages)

Related Manuals for Abatron bdiGDB BDI2000


Summary of Contents for Abatron bdiGDB BDI2000
- Page 1 JTAG interface for GNU Debugger ARM7 / ARM9 User Manual Manual Version 1.17 for BDI2000 ©1997-2005 by Abatron AG...
-
Page 2: Table Of Contents
3.4.1 Command list ......................46 3.4.2 CP15 Registers ......................47 3.5 Multi-Core Support ......................49 4 Specifications ..........................50 5 Environmental notice ........................ 51 6 Declaration of Conformity (CE) ....................51 7 Warranty ............................. 52 © Copyright 1997-2005 by ABATRON AG Switzerland V 1.17... - Page 3 GNU Debugger, BDI2000 (ARM) User Manual 7 Appendices A Troubleshooting ........................53 B Maintenance ..........................54 C Trademarks ..........................56 © Copyright 1997-2005 by ABATRON AG Switzerland V 1.17...
-
Page 4: Introduction
BDI2000 can be updated by the user with a simple Windows / Linux config- uration program. The BDI2000 supports 1.8 – 5.0 Volts target systems (3.0 – 5.0 Volts target systems with Rev. A/B). © Copyright 1997-2005 by ABATRON AG Switzerland V 1.17... -
Page 5: Bdi Configuration
ERASE 0x04018000 ;erase sector 6 of flash ERASE 0x0401C000 ;erase sector 7 of flash Based on the information in the configuration file, the target is automatically initialized after every re- set. © Copyright 1997-2005 by ABATRON AG Switzerland V 1.17... -
Page 6: Installation
14 - NC 20 - NC The green LED «TRGT» marked light up when target is powered up For BDI MAIN / TARGET A connector signals see table on next page. © Copyright 1997-2005 by ABATRON AG Switzerland V 1.17... - Page 7 The BDI2000 works also with targets which have no dedicated TRST pin. For this kind of targets, the BDI cannot force the target to debug mode immediately after reset. The target always begins execu- tion of application code until the BDI has finished programming the Debug Control Register. © Copyright 1997-2005 by ABATRON AG Switzerland V 1.17...
-
Page 8: Changing Target Processor Type
(Rev. A) or via the POWER connector (Rev. B/C). For more information see chapter 2.2.1 «External Power Supply»). To avoid data line conflicts, the BDI2000 must be disconnected from the target system while programming the logic for an other target CPU. © Copyright 1997-2005 by ABATRON AG Switzerland V 1.17... -
Page 9: Adaptive Clocking
TCK (RTCK) to come back. BDI2000 does not progress to the next TCK until RTCK is received. For more information about adaptive clocking see ARM documentation. Note : Adaptive clocking is only supported with BDI2000 Rev.B/C and a special target cable. This special cable can be ordered separately from Abatron. Rev. B/C 20 pin Multi-ICE Connector... - Page 10 This output of the BDI2000 connects to the target TMS line. reserved reserved GROUND System Ground RESET System Reset This open-drain output of the BDI2000 is used to reset the target system. reseved reseved GROUND System Ground © Copyright 1997-2005 by ABATRON AG Switzerland V 1.17...
-
Page 11: Connecting The Bdi2000 To Power Supply
The BDI2000 needs to be supplied with 5 Volts (max. 1A) via the BDI OPTION connector (Rev. A) or via POWER connector (Rev. B/C). The available power supply from Abatron (option) or the en- closed power cable can be directly connected. In order to ensure reliable operation of the BDI2000, keep the power supply cable as short as possible. -
Page 12: Power Supply From Target System
POWER TX RX 10 BASE-T TRGT MODE TARGET A TARGET B The green LEDs «BDI» and «TRGT» marked light up when target is powered up and the jumper is inserted correctly © Copyright 1997-2005 by ABATRON AG Switzerland V 1.17... -
Page 13: Status Led "Mode
The BDI is ready for use, the firmware is already loaded. The power supply for the BDI2000 is < 4.75VDC. BLINK The BDI «loader mode» is active (an invalid firmware is loaded or loading firmware is active). © Copyright 1997-2005 by ABATRON AG Switzerland V 1.17... -
Page 14: Connecting The Bdi2000 To Host
S S S S w w w w i i i i s s s s s s s s M M M M a a a a d d d d e e e e RS232 © Copyright 1997-2005 by ABATRON AG Switzerland V 1.17... -
Page 15: Ethernet Communication
When this LED light BLINKS, data is being transmitted through the UTP port of the BDI2000 Receive When this LED light BLINKS, data is being received through the UTP port of the BDI2000 © Copyright 1997-2005 by ABATRON AG Switzerland V 1.17... -
Page 16: Installation Of The Configuration Software
The MAC address is derived from the serial number as follows: MAC: 00-0C-01-xx-xx-xx , repace the xx-xx-xx with the 6 left digits of the serial number Example: SN# 93123457 ==>> 00-0C-01-93-12-34 © Copyright 1997-2005 by ABATRON AG Switzerland V 1.17... -
Page 17: Configuration With A Linux / Unix Host
-d parameter. [root@LINUX_1 bdisetup]# ./bdisetup -u -p/dev/ttyS0 -b57 -aGDB -tARM Connecting to BDI loader Erasing CPLD Programming firmware with ./b20armgd.103 Programming CPLD with ./armjed21.102 © Copyright 1997-2005 by ABATRON AG Switzerland V 1.17... - Page 18 Gateway : 255.255.255.255 Host IP : 151.120.25.118 Config : eval7t.cnf The Mode LED should go off, and you can try to connect to the BDI via Telnet. [root@LINUX_1 bdisetup]# telnet 151.120.25.101 © Copyright 1997-2005 by ABATRON AG Switzerland V 1.17...
-
Page 19: Configuration With A Windows Host
This button is only active if there is a newer firmware or logic version present in the execution directory of the bdiGDB setup software. Press this button to write the new firmware and/or logic into the BDI2000 flash mem- ory / programmable logic. © Copyright 1997-2005 by ABATRON AG Switzerland V 1.17... -
Page 20: Recover Procedure
• Switch ON the power supply for the BDI again and wait until the LED «MODE» blinks fast DEFAULT • Turn the power supply OFF again • Return the jumper to the «DEFAULT» position • Reassemble the unit as described in Appendix «Maintenance» © Copyright 1997-2005 by ABATRON AG Switzerland V 1.17... -
Page 21: Testing The Bdi2000 To Host Connection
The bdiGDB system uses TFTP to access the configuration file and to load the application program. Because there is no TFTP server bundled with Windows NT, Abatron provides a TFTP server appli- cation tftpsrv.exe. This WIN32 console application runs as normal user application (not as a system service). -
Page 22: Using Bdigdb
Get configuration file via TFTP Power OFF Process target init list Load program code via TFTP and set the PC RUN selected? Start loaded program code Process GDB request Power OFF © Copyright 1997-2005 by ABATRON AG Switzerland V 1.17... -
Page 23: Configuration File
Numeric parameters can be entered as decimal (e.g. 700) or as hexadecimal (0x80000). The core# is optional. If not present the BDI assume core #0. See also chapter "Multi-Core Support". © Copyright 1997-2005 by ABATRON AG Switzerland V 1.17... -
Page 24: Part [Init]
Write a binary image to the selected memory place. The binary image is read via TFTP from the host. Up to 4 such entries are supported. address the memory address filename the filename including the full path Example: WBIN 0x4000 pagetable.bin © Copyright 1997-2005 by ABATRON AG Switzerland V 1.17... - Page 25 Example: MMAP 0xFFE00000 0xFFFFFFFF ;Boot ROM DELAY value Delay for the selected time. value the delay time in milliseconds (1...30000) Example: DELAY 500 ; delay for 0.5 seconds © Copyright 1997-2005 by ABATRON AG Switzerland V 1.17...
- Page 26 Therefore it is possible first to enable some RAM with the init list before the startup code is loaded and executed. [INIT] WM32 0x0B000020 0x00000000 ;Clear Reset Map FILE d:\gdb\bdi\startup.hex FORMAT SREC START 0x100 © Copyright 1997-2005 by ABATRON AG Switzerland V 1.17...
-
Page 27: Part [Target]
JTAG debugging is impossible. In that case, the TRST driver type can be changed to push-pull. Then the BDI actively drives also high level. type OPENDRAIN (default) PUSHPULL Example: TRST PUSHPULL ; Drive TRST also high © Copyright 1997-2005 by ABATRON AG Switzerland V 1.17... - Page 28 Do not define a mask for ARM7 targets. mask ARM9 only, selects the exceptions to catch Example: VECTOR CATCH ; catch all unhandled exception VECTOR CATCH 0x1F ;catch Abort, SWI, Undef, Reset © Copyright 1997-2005 by ABATRON AG Switzerland V 1.17...
- Page 29 DCC. If the helper code on the target executes to slow, this download mode may fail and you have to disable it. address the address of the RAM area Example: WORKSPACE 0x00000020 © Copyright 1997-2005 by ABATRON AG Switzerland V 1.17...
- Page 30 The number of succeeding devices irlen The sum of the length of all succeeding instruction reg- isters (IR). Example: SCANSUCC 2 12 ; two device with an IR length of 8+4 © Copyright 1997-2005 by ABATRON AG Switzerland V 1.17...
-
Page 31: Part [Host]
If it should not send echoes and let the Telnet client in "line mode", add this entry to the configuration file. mode ECHO (default), NOECHO or LINE Example: TELNET NOECHO ; use old line mode © Copyright 1997-2005 by ABATRON AG Switzerland V 1.17... -
Page 32: Part [Flash]
BDI. The workspace is used for a 1kByte data buffer and to store the algorithm code. There must be at least 2kBytes of RAM avail- able for this purpose. address the address of the RAM area Example: WORKSPACE 0x00000000 © Copyright 1997-2005 by ABATRON AG Switzerland V 1.17... - Page 33 0x04008000 ;erase sector 2 of flash SIMM ERASE 0x0400C000 ;erase sector 3 of flash SIMM ERASE 0x04010000 ;erase sector 4 of flash SIMM ERASE 0x04014000 ;erase sector 5 of flash SIMM © Copyright 1997-2005 by ABATRON AG Switzerland V 1.17...
- Page 34 ;select LPC2100 flash, fsys = 14.745MHz CHIPSIZE 0x20000 ;128k internal flash WORKSPACE 0x40001000 ;internal SRAM for buffer, code and stack FILE E:\cygwin\home\bdidemo\arm\lpc2100.bin FORMAT BIN 0x00000000 ERASE 0x00007FFF BLANK ;erase sector 0...14 with blank check © Copyright 1997-2005 by ABATRON AG Switzerland V 1.17...
- Page 35 ;64k internal program flash BUSWIDTH ;select 16 for this flash FILE E:\temp\aduc8k.bin FORMAT BIN 0x00080000 ERASE 0x88000 ;erase page ERASE 0x88200 ;erase page ERASE 0x88400 ;erase page ERASE 0x88600 ;erase page © Copyright 1997-2005 by ABATRON AG Switzerland V 1.17...
- Page 36 PAGE (default) or CHIP can be used. A page is erased by program- ming it with all 0xFF. Following an example how to erase the complete flash via Telnet: BDI> erase 0x00100000 chip © Copyright 1997-2005 by ABATRON AG Switzerland V 1.17...
- Page 37 0x01000000 Intel 28F032B3 I28BX8 0x400000 Intel 28F640J3A STRATAX8 STRATAX16 0x800000 Intel 28F320C3 I28BX16 0x400000 AT49BV040 AT49 0x080000 AT49BV1614 AT49X8 AT49X16 0x200000 M58BW016BT M58X32 0x200000 SST39VF160 AT49X16 0x200000 Am29LV320M MIRRORX8 MIRRORX16 0x400000 © Copyright 1997-2005 by ABATRON AG Switzerland V 1.17...
- Page 38 The following example unlocks all 256 sectors of an Intel Strata flash ( 28F256K3) that is mapped to 0x00000000. In case there are two flash chips to get a 32bit system, double the "step" parameter. BDI> unlock 0x00000000 0x20000 256 © Copyright 1997-2005 by ABATRON AG Switzerland V 1.17...
-
Page 39: Part [Regs]
first written to "addr" and then the register value is access using "data" as address. addr the address of the Address register data the address of the Data register Example: DMM1 0x04700000 © Copyright 1997-2005 by ABATRON AG Switzerland V 1.17... - Page 40 0x0001 CP15 0x0002 CP15 0x0003 CP15 0x0005 CP15 0x0006 iidc CP15 0x0007 ;invalidate ID cache itlb CP15 0x0008 ;invalidate TLB itlbs CP15 0x2008 ;invalidate TLB single entry CP15 0x000d ;process identifier © Copyright 1997-2005 by ABATRON AG Switzerland V 1.17...
-
Page 41: Debugging With Gdb
GDB sometimes fails to connect to the target after a reset because it tries to read an invalid stack frame. With the following init list entries you can work around this GDB startup problem: WGPR 0x00000020 ;set frame pointer to free RAM WM32 0x00000020 0x00000028 ;dummy stack frame © Copyright 1997-2005 by ABATRON AG Switzerland V 1.17... -
Page 42: Breakpoint Handling
The BDI supports the GDB V5.x "monitor" command. Telnet commands are executed and the Telnet output is returned to GDB. (gdb) target remote bdi2000:2001 Remote debugging using bdi2000:2001 0x10b2 in start () (gdb) monitor md 0 1 00000000 : 0xe59ff018 - 442503144 © Copyright 1997-2005 by ABATRON AG Switzerland V 1.17... -
Page 43: Target Serial I/O Via Bdi
Once SIO is enabled, connecting with the setup tool to update the firmware will fail. In this case either disable SIO first or disconnect the BDI from the LAN while updating the firmware. © Copyright 1997-2005 by ABATRON AG Switzerland V 1.17... -
Page 44: Target Dcc I/O Via Bdi
"mrc p14,0, %0, c0, c0\n" : "=r" (ret)); return ret; void write_dcc_char(unsigned int c) { while(poll_dcc() & DCC_OUTPUT_BUSY); write_dcc(c); unsigned int read_dcc_char(void) { while(!(poll_dcc() & DCC_INPUT_READY)); return read_dcc(); void write_dcc_string(const char* s) while (*s) write_dcc_char(*s++); © Copyright 1997-2005 by ABATRON AG Switzerland V 1.17... -
Page 45: Telnet Interface
The DUMP command uses TFTP to write a binary image to a host file. Writing via TFTP on a Linux/ Unix system is only possible if the file already exists and has public write access. Use "man tftpd" to get more information about the TFTP server on your host. © Copyright 1997-2005 by ABATRON AG Switzerland V 1.17... -
Page 46: Command List
IP address of program file host", "PROMPT <string> defines a new prompt string", "CONFIG display or update BDI configuration", "CONFIG <file> [<hostIP> [<bdiIP> [<gateway> [<mask>]]]]", "HELP display command list", "QUIT terminate the Telnet session" © Copyright 1997-2005 by ABATRON AG Switzerland V 1.17... -
Page 47: Cp15 Registers
The bit "i" selects the instruction cache (scan chain bit 32), the bit "x" extends access to register 6 (scan chain bit 37). In the register definition file "reg940t.def" you will find some examples. © Copyright 1997-2005 by ABATRON AG Switzerland V 1.17... - Page 48 0x29 : Clean + Flush D cache entry index 0x2a : Clean D cache 0x2b : Drain Write buffer 0x37 : I cache TLB Lock-Down 0x3a : D cache TLB Lock-Down © Copyright 1997-2005 by ABATRON AG Switzerland V 1.17...
-
Page 49: Multi-Core Support
#1 DCC ;DCC I/O via TCP port 7 For a complete configuration example see "eb63_eval7t.cfg" on the diskette. This configuration was used to debug an AT91EB63 daisy chained with an Evaluator-7T board. © Copyright 1997-2005 by ABATRON AG Switzerland V 1.17... -
Page 50: Specifications
-20 °C ... +65 °C Relative Humidity (noncondensing) <90 %rF Size 190 x 110 x 35 mm Weight (without cables) 420 g Host Cable length (RS232) 2.5 m Specifications subject to change without notice © Copyright 1997-2005 by ABATRON AG Switzerland V 1.17... -
Page 51: Environmental Notice
GNU Debugger, BDI2000 (ARM) User Manual 5 Environmental notice Disposal of the equipment must be carried out at a designated disposal site. 6 Declaration of Conformity (CE) © Copyright 1997-2005 by ABATRON AG Switzerland V 1.17... -
Page 52: Warranty
In no event shall ABATRON be liable for any loss of profit or any other commercial damage, including but not limited to special, incidental, consequential, or other damages. - Page 53 Network processes do not function (loading the firmware was successful) Possible reasons • The BDI2000 is not connected or not correctly connected to the network (LAN cable or media converter) • An incorrect IP address was entered (BDI2000 configuration) © Copyright 1997-2005 by ABATRON AG Switzerland V 1.17...
- Page 54 2.2 Remove the two screws that hold the front panel TRGT MODE BDI MAIN BDI OPTION 3.1 While holding the casing, remove the front panel and the red elastig sealing casing elastic sealing front panel © Copyright 1997-2005 by ABATRON AG Switzerland V 1.17...
- Page 55 5.4 Mount the two plastic caps that cover the screws 5.5 Plug the cables Observe precautions for handling (Electrostatic sensitive device) Unplug the cables before opening the cover. Use exact fuse replacement (Microfuse MSF 1.6 AF). © Copyright 1997-2005 by ABATRON AG Switzerland V 1.17...
- Page 56 GNU Debugger, BDI2000 (ARM) User Manual C Trademarks All trademarks are property of their respective holders. © Copyright 1997-2005 by ABATRON AG Switzerland V 1.17...
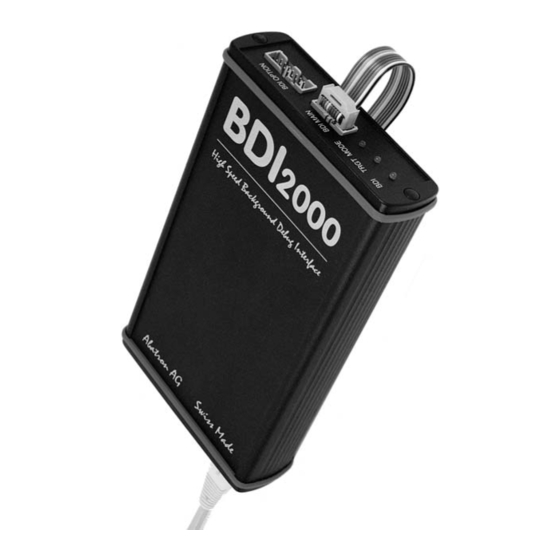
- Page 57 2000 High-speed BDM/JTAG Debug Interface • BDM Support for CPU16/32/32+, PowerPC 5xx/8xx. ColdFire • JTAG Support for ARM, M-CORE, PowerPC 4xx/6xx/7xx/74xx, PowerPC 82xx/83xx/85xx, 5100, 5200, XScale, MIPS32, MIPS64 • Host communication via RS232 and Ethernet • Program download speed up to 320 Kbytes/s •...
- Page 58 Electromagnetic Compatibility (EMC) EN 50081-2, EN 50082-2 ©1998-2005 by Abatron AG. All rights reserved. Specification subject to change without notice. All trademarks are property of their respective holders. Ultimate Solutions, Inc. • Visit us at: www.ultsol.com 10 Clever Lane • Tewksbury, MA 01876 • Tel: 978-455-3383• Fax: 978-926-3091...
Need help?
Do you have a question about the bdiGDB BDI2000 and is the answer not in the manual?
Questions and answers