Table of Contents
Advertisement
Quick Links
Advertisement
Table of Contents

Related Manuals for HITEC ELAPOR Sky Scout


Summary of Contents for HITEC ELAPOR Sky Scout
- Page 1 Instruction Manual Ver 1.0...
-
Page 2: Table Of Contents
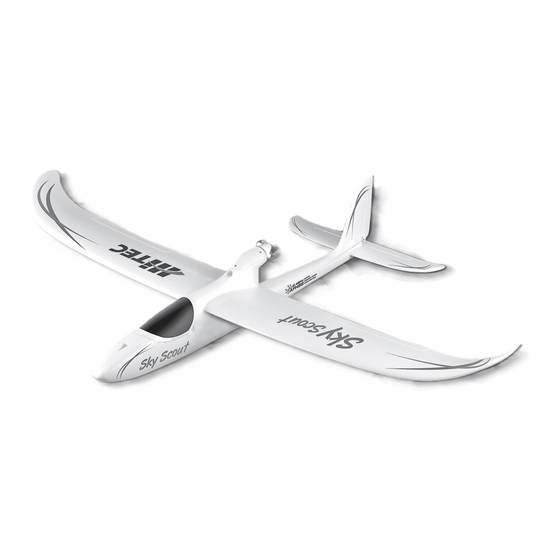
Thank you for purchasing Hitec’s Sky Scout. Developed and engineered by Multiplex, manufactured by Hitec, the Sky Scout is an ideal model for all users interested in model flying, regardless of age or gender. The Sky Scout is easy to fly, even for beginners. This instruction manual includes the model specifications, safety precautions and assembly instructions for the KIT version of the Sky Scout. -
Page 3: Section One
(HITEC TO GO) stock# 13209 This version allows you to fly your Sky Scout with the Hitec radio you already have or may wish to purchase. Any of Hitec’s AFHSS 2.4GHz radios, or radios using a Spectra 2.4GHz module, can be linked with the Minima 6S included in the H2GO set. -
Page 4: Safety Precautions
Do not store the Sky Scout Be sure to use official Hitec products or accessories in humid, and components. Altered products closed areas, in high may negatively affect the model’s temperatures or in direct performance. -
Page 5: Section Two: Model Assembly
Experienced pilots may choose to install the optional ailerons for additional flight performance. While the necessary hardware is included with your Sky Scout, two additional sub-micro servos, such as the Hitec HS-55, and two servo extensions are required. The mechanical installation of the servos and aileron controls are detailed in the assembly instructions on page 8, steps 8 &... -
Page 6: Parts Layout And Listing
Fly high with Hitec Section Two: Parts Layout and Listing 1. Before You Start Building Verify you have all the contents of your kit using the image below and the parts list on page 7. If any parts are missing contact... - Page 7 Fly high with Hitec Section Two: Parts Layout and Listing Part No. Qty. Description Material Dimensions Building instructions, KIT Complaints form, models Decal sheet A Printed self-adhesive film 200 x 820 mm Decal sheet B Printed self-adhesive film 200 x 700 mm L.H.
-
Page 8: Assembly Instructions
Fly high with Hitec Section Two: Assembly Instructions 2. Prepare Snake Sleeves Cut Parts #52 & #53 to lengths as shown using a razor knife. 5. Inserting the tailplane slider 3. Reinforcing the motor pod Allow the glue to set hard, then insert the tailplane slider 48 to ensure that Glue the 31 mm length of snake outer sleeve inside the motor pod using the parts are accurately aligned. - Page 9 Fly high with Hitec Section Two: Assembly Instructions 7. Reinforcing the fuselage nose Cut the sleeves to a length of 247 mm, and glue them in the upper part ofthe two fuselage shells 3 + 4. Cut the sleeve to a length of 290 mm and glue it in the underside of the right-hand fuselage shell 4.
- Page 10 Fly high with Hitec Section Two: Assembly Instructions 12. Preparing the servos for installation Before installing the servos, set all of them to neutral (center) from the transmitter: this is accomplished by connecting the servo to a receiver, switching the system on, and centring the stick at the transmitter; check that the transmitter trims are also at the neutral position.
- Page 11 Fly high with Hitec Section Two: Assembly Instructions 18. Installing the tailplane frame To guarantee a secure seating, the tailplane frame 47 must be glued in 21. Releasing the control surfaces the recess of the tailplane 6. Use a sharp razor knife to remove the foam at the lateral ends of the con- trol surfaces, cutting along the moulded-in end channels only.
- Page 12 Fly high with Hitec Section Two: Assembly Instructions 24. Attaching the (optional) aileron horns 28. Installing the cable sleeves Assemble the “Twin” horns 22, and glue them in the recesses in both To avoid kinking the aileron servo leads, glue 18 mm lengths of snake ailerons (wing panels 7 + 8) using CA Glue and activator, as described outer sleeve (3.2mm OD) in the recess where the cables exit the wing.
- Page 13 Fly high with Hitec Section Two: Assembly Instructions Slip the tapered collet through the driver 58 and place this assembly in the propeller boss 55. The washer 59 and the shakeproof washer 64 are 31. Installing the motor fitted from the other side.
- Page 14 Fly high with Hitec Section Two: Assembly Instructions 34. Completing the canopy Glue the latch tongues 28 in the recesses in the canopy 5. 36. Installing the flight battery and receiver Use thick CA glue initially, and fit the canopy on the model immediately, so that the latch components align themselves automatically.
-
Page 15: Section Three: Preparing Your Model For Flight
Appendix B: Transmitter Control Surface Movements. If you have any questions about this consult with a local experienced flier or your local RC Hobby Retailer or contact Hitec Customer Support. 2. Setting the control surface travels It is important to set the correct control surface travels, otherwise your model will not respond to your control commands smoothly and evenly. -
Page 16: Section Four: Flying Your Model
Fly high with Hitec Section Four: Flying Your Model Pre-Flight Inspections and Cautionary Notes The following is based on common safety precautions for flying RC models. Please read the following information before attempting to fly your model. Check all safety aspects of your model before flying for a safe flight. -
Page 17: Taking Off
Fly high with Hitec Section Four: Flying Your Model 1. Taking Off Hold the plane facing into the wind and keep it level as you apply the throttle. Now throw it smoothly forward with the nose level or angled up no more than 30-degrees. -
Page 18: Section Five
Fly high with Hitec Section Five: Replacement Parts and Components #72 4607 Decal Sheet #22 4239 Fuselage shells + snakes #22 4240 Canopy #22 4241 Tailplane #22 4242 Wings #22 4243 Small items set... - Page 19 Fly high with Hitec Section Five: Replacement Parts and Components #22 4244 Injected parts #70 3457 Twin control surface horn and pushrod connector, 2 pcs. #72 3193 Spar tube #72 5136 Canopy-Lock (2 pair) #73 3194 Driver, propeller boss and spinner...
-
Page 20: Customer Service Information
Fly high with Hitec Section Five: Customer Service... -
Page 21: Appendix A: The Basics Of Model Flying
Fly high with Hitec Appendix A: The Basics of Model Flying The basics of model flying Any aircraft - whether model or “man-carrying” - can be controlled around three primary axes: the vertical axis, lateral axis and longitudinal axis. Operating the elevator produces a change in the aeroplane’s flight attitude around the lateral axis (pitch). - Page 22 Fly high with Hitec Appendix A: The Basics of Model Flying Centre of Gravity Like any other aircraft, your model aeroplane must be balanced at a particular point if it is to have stable flying characteristics. It is absolutely essential to balance the model correctly before its first flight.
-
Page 23: Appendix B: Transmitter Control Surface Movements
Fly high with Hitec Appendix B: Transmitter Control Surface Movements ELEVON CH1C H2 CH3C H4 Link V-TAIL 2.4GHz 4 Channel Aircraft Radi o First, check the rudder movement. This control causes the nose of the model to “yaw” or move left and right in a horizontal direction. Confirm that the rudder moves to the right when moving the right transmitter stick to the right as shown. - Page 24 Fly high with Hitec Appendix B: Transmitter Control Surface Movements ELEVON CH1C H2 CH3C H4 Link V-TAIL 2.4GHz 4 Channel Aircraft Radi o First, check the rudder movement. This control causes the nose of the model to “yaw” or move left and right in a horizontal direction. Confirm that the rudder moves to the right when moving the right transmitter stick to the right as shown.
- Page 25 Fly high with Hitec Appendix B: Transmitter Control Surface Movements The Sky Scout is designed for success in a “3-channel” configuration using rudder, elevator and throttle control. This basic configuration is well suited to beginners and relaxing flying. More experienced pilots may prefer to increase the performance of their Sky Scout by adding the optional aileron controls.
- Page 26 Fly high with Hitec Control Surface Movements with Mode 1 Transmitters and Optional Ailerons ELEVON CH1C H2 CH3C H4 Link V-TAIL 2.4GHz 4 Channel Aircraft Radi o Now, it’s time to check the throttle or motor control. Be extremely careful to avoid contact with the propeller. Move the right stick up just enough to con- firm that the propeller rotates.
- Page 27 Fly high with Hitec Control Surface Movements with Mode 2 Transmitters (US Standard) and Optional Ailerons ELEVON CH1C H2 CH3C H4 Link V-TAIL 2.4GHz 4 Channel Aircraft Radi o Next, check the elevator movement. This control “pitches” the nose of the model up and down. Move the right stick down as shown and confirm the elevator goes up.
- Page 28 Perfect for anyone who loves to fly Fly high with Hitec’s easy-to-fly Sky Scout! Build and Fly in just 2 hours!
Need help?
Do you have a question about the ELAPOR Sky Scout and is the answer not in the manual?
Questions and answers