elero TempoTel 2 Operating Instructions Manual
Hide thumbs
Also See for TempoTel 2:
- Operating instructions manual (56 pages) ,
- Operating instructions manual (21 pages) ,
- Operating instructions manual (20 pages)

Related Manuals for elero TempoTel 2


Summary of Contents for elero TempoTel 2
- Page 1 TempoTel 2 867/868/915 MHz 28265.0001, 28266.0001, 28267.0001, 28265.0901, 28266.0901, 28267.0901 0682 Operating instructions (translation) 18 202.0001/0911 EN...
-
Page 2: Table Of Contents
Combio JA Pulse ......30 Deleting positions/deleting transmitters ..31 DE-2 www.elero.com... - Page 3 EC Declaration of conformity ....37 Address ........38 www.elero.com DE-3...
-
Page 4: Safety Instructions
• The device contains small parts which can be swallowed. Transport • Should you receive the device in a damaged condition despite proper packaging, you must not put it into operation. Complain about any damage to the transport company immediately. Installation • Observe the regulations during installation. DE-4 www.elero.com... -
Page 5: Safety Instructions For Radio Operation
• The range of the radio signal is limited by legislation and the structural conditions. Intended use The TempoTel 2 is a multi-channel transmitter. It can be used unidirectionally (compatible with the existing ProLine program) or bidirectionally. The hand-held transmitter should only be used for controlling roller shutters, venetian blinds and sun protection systems which are fi... -
Page 6: Exclusion Of Liability
The hand-held transmitter is referred to as "device" in this manual. Exclusion of liability elero GmbH assumes no liability for personal injuries, property damage and fi nancial losses which arise from use other than mentioned above, modifi cations to the device, improper use and failure to observe the operating instructions. -
Page 7: Mounting Of Wall Bracket
• Before installing the unit in the required position, check that the transmitter and receiver are functioning perfectly. • Attach the bracket to the wall with the wall plugs and screws provided. The top part of the wall bracket can be moved. www.elero.com DE-7... -
Page 8: Device Explanation
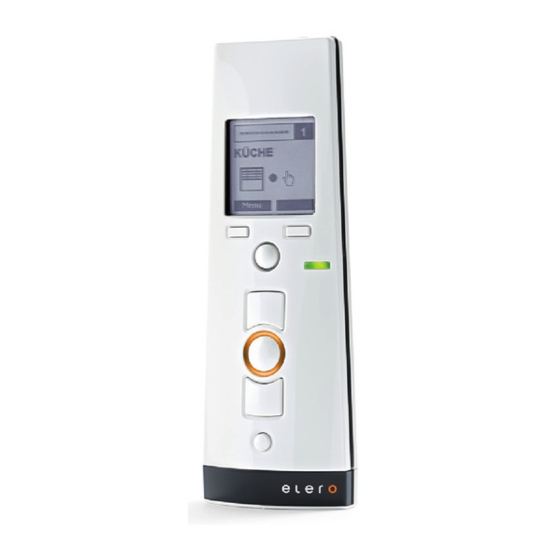
4 Joystick 5 Operating mode indicator 6 UP button 7 STOP button 8 Status indicator 9 DOWN button 10 Select button Back of device 11 Learn button P Only for experts: 12 DIP switch 1 13 DIP switch 2 DE-8 www.elero.com... -
Page 9: Explanation Of Functions
In order to restore the starting condition, press the STOP and P buttons simultaneously for 6 seconds until the status display lights. Select the required language by navigating the menu during initial operation. www.elero.com DE-9... -
Page 10: Factory Settings
End position (for timed switching com- mand DOWN) Program position ↑ End position (for timed switching com- mand UP) Priority Off (automatic switching commands not prioritised) Shading Off (automatic shading system not deactivated with automatic timed switching command DOWN) Product selection Roller shutter DE-10 www.elero.com... - Page 11 (“Settings”, “Program”) except the setting for deleting the channel. Status display A radio signal is displayed by the illumination of the status display (LED ring around the STOP button). The different colours of the status display mean: www.elero.com DE-11...
- Page 12 The transmitting power or the radio range will be reduced by the reduction in the performance of the battery. Weak batteries are indicated on the display using BAT. If the voltage drops below 2 V, functions are no longer executed and nothing is displayed. DE-12 www.elero.com...
- Page 13 MANUAL mode in the display. → The receiver now only carries out manual travel commands and does not respond to automatic travel commands. Note In the case of unidirectional channels only the automatic system for timed switching functions in the transmitter is www.elero.com DE-13...
-
Page 14: Operating Mode
Activating a switching time function for a channel displays the type of switching time function and the next automatic switching time. Room allocation is also shown in the display if the channel is allocated to a room in the editing menu. DE-14 www.elero.com... - Page 15 Channel-related activation or deactivation of the automatic shad- ing system when automatic timed switching command is activated Travel up Stop status Travel down Wind interlock End position top Individual switching time ON End position bottom Astro switching time ON www.elero.com DE-15...
-
Page 16: Menu Structure
Setting travel on time switching Program – Position ↑ command UP Priority Priority automatic commands On/Off Shading Activate auto shading for clock UP On/Off Reset all settings to factory settings Factory setting Function (without changing channel assignment) Version Version details DE-16 www.elero.com... -
Page 17: Menu Mode
90 seconds, the menu is automatically changed back to operating mode without saving the changes. DATE/TIME menu Setting the date and time. Using the automatic switching commands requires a current setting. www.elero.com DE-17... -
Page 18: Program Menu
This can be supplemented with an individual Astro offset (see settings). Astro evening This controls the up movement according to the set switching time and the down movement according to the Astro function. The DE-18 www.elero.com... -
Page 19: Administration Menu
Once you have designated individual rooms, you can allocate channels or groups to selected rooms and change the room designations. However, no functions can be assigned. Groups You can select two groups, allocate individual channels or rooms to them and change their group designation. www.elero.com DE-19... -
Page 20: Settings Menu
The direct input of geographic data for the Astro function is possible using the "Longitude", "Latitude" and "UTC" input fi elds. When a town is selected, the geographic data of the selected town are displayed. If data are entered directly which are different from the DE-20 www.elero.com... - Page 21 An activated Summer time is indicated in the function bar of the display with "DST" (daylight saving time). Note If the automatic Summer time changeover cannot be selected, a possibly necessary manual Summer time setting must www.elero.com DE-21...
-
Page 22: Settings For Specifi C Channels
Maximum running time 180 seconds Intermediate position or intermediate position 1 The transmitter can store a run time for the intermediate position for each channel. A common run time for the intermediate position can be set for unidirectional channels. DE-22 www.elero.com... - Page 23 Roller shutter, awning or venetian blind moves to intermediate posi- the programmed position tion 1 Intermediate position Roller shutter, awning, venetian blind or interior 2/ventilation/tilting/ shading moves to the bottom end position and fabric tautening then to the programmed position position www.elero.com DE-23...
- Page 24 "Automatic ON". The shading setting is set to “Automatic OFF” at the factory. The activated automatic shading system is indicated in the function bar of the display by an "S". In unidirectional channels only a common setting is possible. DE-24 www.elero.com...
-
Page 25: Function Menu
The blind stops briefl y, starts moving again, stops and then moves in the Down direction. 4. Immediately (within maximum 1 second) after starting down travel, press the DOWN button. The status display lights briefl y. The blind stops. The transmitter channel is programmed. www.elero.com DE-25... -
Page 26: Programming Additional Transmitters
The receiver is now in programming mode. 2. Press the programming button P on the transmitter to be programmed until the status display lights briefl y. The receiver is now in programming mode (up/down movements). DE-26 www.elero.com... -
Page 27: Synchronous Programming Mode
3. Press the UP button as soon as the blind starts moving in open direction (within 1 second at the most). The status display lights briefl y. The blinds stop briefl y, start moving again, stop and then move downwards. www.elero.com DE-27... -
Page 28: Stopping Programming Mode (Bidirectional)
Press the UP button briefl y. The blind approaches the upper end position/the awning retracts. Approaching the upper end position (venetian blind) Press the UP button until the status display lights briefl y. The blind approaches the upper end position. DE-28 www.elero.com... - Page 29 The intermediate position is programmed. Programming the ventilation/tilting position in the receiver Requirement The transmitter/transmitter channel is programmed. The end positions of the drive have been set. The blind is at its lower end position. www.elero.com DE-29...
-
Page 30: Operation Of The Transmitter Using
Operation of the transmitter using Combio JA Pulse A Combio 867/868/915 JA Pulse can be used for the precise adjustment of the slats for venetian blind drives. The preset pulse time of Combio Pulse is cycled by pressing the UP or DOWN button. DE-30 www.elero.com... -
Page 31: Deleting Positions/Deleting Transmitters
1. Press the STOP button and also the programming button P (on the back of the device) + UP button + DOWN button. 2. Hold down this button combination for approx. 6 seconds. The status display lights orange/green briefl y twice, followed by red (bidirectional). www.elero.com DE-31... -
Page 32: Battery Replacement
Dispose of used batteries properly. Cleaning Clean the device with a damp cloth. Do not use a detergent. This may attack the plastic. Disposal After the end of its service life, dispose of the device in accordance with the applicable regulations. DE-32 www.elero.com... -
Page 33: Towns For The Selection
Florence Italy Berlin Germany Roma Italy Cologne Germany Naples Italy Dresden Germany Zagreb Croatia Frankfurt Germany Bucharest Romania Nuremberg Germany Istanbul Turkey Stuttgart Germany Athens Greece Munich Germany Corunna Spain Warsaw Poland Madrid Spain Krakow Poland Barcelona Spain www.elero.com DE-33... - Page 34 Denver Mexico City Mexico SOUTH AMERICA Town Country Town Country Medellin Colombia Sao Paulo Brazil Lima Peru Buenos Aires Argentina Santiago DC Chile AFRICA Town Country Town Country Casablanca Morocco Cairo Egypt Tunis Tunisia Cape Town South Africa DE-34 www.elero.com...
-
Page 35: Troubleshooting
3. Program receiver 3. Receiver not yet programmed Drive operates in the Directions are incor- Delete transmitter and wrong direction rectly allocated reprogram Required drive does Incorrect group or Select correct group not run channel selected or channel www.elero.com DE-35... -
Page 36: Repair
Repair Please contact your dealer if you have any questions. Please always provide the following information: • Item number and name on the type plate • Type of fault DE-36 www.elero.com... -
Page 37: Ec Declaration Of Conformity
EMC-Directive 2004/108/EC EN 61000-6-2:2005, EN 61000-6-3:2001 EN 60730-1:2000, EN 60730-2-7:1991 R&TTE-Directives 1999/5/EC ETSI EN 301 489-3 V1.4.1 ETSI EN 300 220-2 V2.1.2 RoHS Directive 2002/95/EC Beuren, 08.06.2011 Ulrich Seeker -CE Officer-, -Representative- www.elero.com DE-37... -
Page 38: Address
Address Address elero GmbH Please visit our website if Antriebstechnik you require a contact outside Linsenhofer Straße 59-63 Germany. 72660 Beuren Deutschland / Germany Tel: +49 (0) 7025 13-01 Fax: +49 (0) 7025 13-212 info@elero.de www.elero.com DE-38 www.elero.com...
Need help?
Do you have a question about the TempoTel 2 and is the answer not in the manual?
Questions and answers