Advertisement
Quick Links
Baby Trend, Inc.
13048 Valley Blvd.
Fontana CA 92335
1-800-328-7363
(8:00 a.m. ~ 4:30 p.m. PST)
www.babytrend.com
WG01_2L_040423.1_Tour
Read all instructions BEFORE assembly and USE of product.
KEEP INSTRUCTIONS FOR FUTURE USE.
Lea todas las instrucciones ANTES de armar y USAR el
producto. CONSERVE LAS INSTRUCCIONES PARA USO FUTURO.
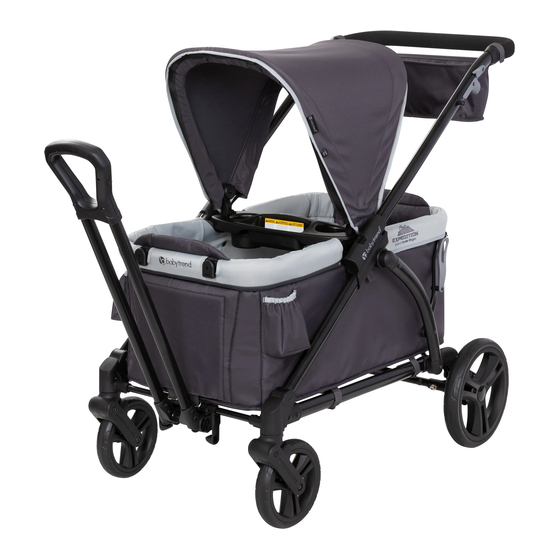
Tour ™ 2-in-1 Stroller Wagon
Instruction Manual
Manual de Instrucciones
WG01XXXB
Advertisement

Related Manuals for BABYTREND Tour WG01 B Series


Summary of Contents for BABYTREND Tour WG01 B Series
- Page 1 Lea todas las instrucciones ANTES de armar y USAR el producto. CONSERVE LAS INSTRUCCIONES PARA USO FUTURO. Tour ™ 2-in-1 Stroller Wagon Instruction Manual WG01XXXB Manual de Instrucciones Baby Trend, Inc. 1-800-328-7363 13048 Valley Blvd. (8:00 a.m. ~ 4:30 p.m. PST) Fontana CA 92335 www.babytrend.com WG01_2L_040423.1_Tour...
- Page 2 Customer Service Department can be contacted at 1 (800) 328-7363 Monday through Friday between 8:00 a.m. and 4:30 p.m. (PST). Return Authorizations are required prior to returning product(s) to Baby Trend®. Please visit http://babytrend.com/pages/ ¡IMPORTANTE! Para asegurar el limited-warranty for complete warranty details.
- Page 3 Organizador flexible para padres Car seat adapter- fabric cover (visit babytrend.com for compatibility chart) Adaptador de la sillita para el automóvil - Cubierta de tela (visite babytrend.com para ver la tabla de compatibilidad) Front Wheels Rear Axle and (2) Wheels Wagon Frame...
- Page 4 WARNING ADVERTENCIA WARNING: ADVERTENCIA: Please follow all of these Por favor, siga todas estas instrucciones para garantizar la seguridad de su hijo. instructions to ensure the safety of your child. Keep Conserve estas instrucciones para referencia futura. these instructions for future reference. WARNING: ADVERTENCIA: El incumplimiento de estas...
- Page 5 ASSEMBLY MONTAJE ASSEMBLY MONTAJE FRAME SETUP INSTALACIÓN DE MARCO To attach the wheels, unfold stroller as described in the following section: WARNING: Para colocar las ruedas, despliegue el carrito como se describe en la siguiente sección: Care must be taken when unfolding the stroller to prevent finger entrapment.
- Page 6 ASSEMBLY MONTAJE ASSEMBLY MONTAJE FRONT WHEELS NOTE: NEVER use stroller if wheels do not lock into place. If you need assistance, please contact our customer service department at 1-800-328-7363, RUEDA DELANTERA M-F, between 8am and 4:30pm, PST. 2) • Insert front wheel axle pin into the wheel NOTA: NUNCA use el carrito si las ruedas no se traban correctamente.
- Page 7 ASSEMBLY MONTAJE ASSEMBLY MONTAJE CHILD TRAY SOFT PARENT ORGANIZER ORGANIZADOR FLEXIBLE PARA PADRES BANDEJA PARA NIÑOS WARNING: WARNING: Do not place hot liquids or more Do not place hot liquids or more than 2 lb. (0.90kg) pounds in the parent tray. Serious than 5 pounds in the child tray.
- Page 8 ASSEMBLY MONTAJE ASSEMBLY MONTAJE Mosquito net CANOPY Mosquitera DOSEL • To install the canopy: Add the canopy frame into the designated slots located on the child tray (Fig. 6a). • To open the canopy: Behind the main fold mechanism use the strap and snap closure to anchor the canopy.
- Page 9 ASSEMBLY MONTAJE ASSEMBLY MONTAJE • Para instalar el dosel: agregue el PULL HANDLE STORAGE marco del dosel en las aberturas ALMACENAMIENTO DE LA MANIJA designadas ubicadas en la bandeja para niños (Fig. 6a). • TO USE THE HANDLE: Locate the •...
- Page 10 FOLD PLEGAR ASSEMBLY MONTAJE TO FOLD STROLLER • TO PUT IT AWAY: Reverse step (Fig. 7a) PARA PLEGAR EL CARRITO ensure to push the handle completely in until it clicks into position. NOTE: Ensure the handle is resting on the storage hooks WARNING: (Fig.
- Page 11 FOLD PLEGAR UNFOLD DESPLEGAR UNFOLD DESPLEGAR • Empuje hacia abajo el manubrio TO UNFOLD STROLLER PARA DESPLEGAR EL CARRITO del carrito hasta que el carrito esté completamente plegado. Asegúrese de que el pestillo para plegar haga clic y asegure el carrito (Fig. 8b). 9) •...
- Page 12 SAFETY SEGURIDAD SAFETY SEGURIDAD TO USE THE SAFETY HARNESS • La bandeja para niños no está diseñada para contener al niño PARA USAR EL CINTURON DE SEGURIDAD en el carrito. Manténgase CERCA y vigile al niño durante su uso. WARNING: NUNCA deje al nino solo.
- Page 13 SAFETY SEGURIDAD SAFETY SEGURIDAD WARNING: BRAKES For maximum weight used FRENOS in the adapter refer to the manual of the car seat it will attach to. Prevent serious injury WARNING: or death from falls, ensure car seat adapter is Always set brakes when the stroller securely attached to the stroller frame before is not being pushed so that the stroller will not roll use.
-
Page 14: Accessories Accesorios
CAR SEAT ADAPTER ADAPTADOR DE LA SILLITA PARA EL AUTOMÓVIL (visit babytrend.com for compatibility chart) (visite babytrend.com para ver la tabla de compatibilidad) Always remove the child tray and canopy from the wagon to install the adapter. See pages 11 to 13. - Page 15 ACCESSORIES ACCESORIOS ACCESSORIES ACCESORIOS • Open the clips on both sides of the adapter, open the flaps on the wagon cover to expose the bar connection (Fig. 13e). Face the front of the adapter to the front of the wagon. Align the clips to the bar as you press them into place (Fig.
-
Page 16: Sillita Para El Automóvil
ACCESSORIES ACCESORIOS ACCESSORIES ACCESORIOS 14) • REMOVAL: To remove the adapter wrap your thumbs over the wagon frame INFANT CAR SEAT Sold separately and use all your other fingers to apply pressure on the clip to release it from SILLITA PARA EL AUTOMÓVIL Se vende por separado the bar (Fig. - Page 17 MAINTENANCE MANTENIMIENTO ACCESSORIES ACCESORIOS MAINTENANCE MANTENIMIENTO NOTE: The Safety Belt MUST • WAGON FABRIC ALWAYS be installed through the Belt TELA DE LA VAGON Path before using this product. REMOVAL: Release the safety strap Press 16) • To detach the fabric: for cleaning or (Fig.
- Page 18 MAINTENANCE MANTENIMIENTO MAINTENANCE MANTENIMIENTO • Para retirar la tela: para limpiar o reemplazo, desabroche desde la parte • Para garantizar que la tela esté bien sujetada, los cierres deben estar delantera y trasera del marco del vagón (Fig. 16a). comprimidos y el gancho y los sujetadores de bucle están unidos (Fig.
-
Page 19: Care And Maintenance
MAINTENANCE MANTENIMIENTO MAINTENANCE MANTENIMIENTO ADAPTER FABRIC NOTE: NEVER use stroller if wheels do not lock into place. If you need assistance, TELA DE ADAPTADOR please contact our customer service department at 1-800-328-7363, M-F, between 8am and 4:30pm, PST. Press pin to Separate Presione el pasador para NOTA: NUNCA use el carrito si las ruedas no se traban correctamente. -
Page 20: Cuidado Y Mantenimiento
MAINTENANCE MANTENIMIENTO CUIDADO Y MANTENIMIENTO • Limpieza del cojín del asiento: Para limpiar manchas - Limpie las pequeñas manchas pasando un paño por la superficie con una solución suave de agua y jabón. Enjuague con agua para eliminar la solución de jabón. Seque con un paño o al aire libre.
Need help?
Do you have a question about the Tour WG01 B Series and is the answer not in the manual?
Questions and answers