Table of Contents
Advertisement
Quick Links
Operations & Maintenance Manual
and
Parts Bulletin
WARNING: FOR YOUR SAFETY READ AND UNDERSTAND THIS MANUAL
PRIOR TO USING THE SAW. REVIEW ALL SAFETY RULES AND OPERATING
INSTRUCTIONS FREQUENTLY.
This manual is provided for your convenience in the use
and care of your saw. These instructions include opera-
tion, precautions, preventative maintenance and other
pertinent data to assist you in assuring long life and de-
pendable service from your saw.
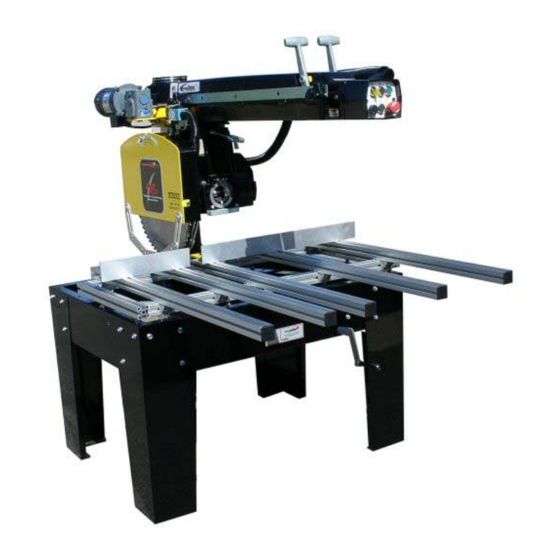
16" Metal Cutting Radial Arm Saw
TYPE 7
MODELS 3579-16M, 3579-16L
20" Metal Cutting Radial Arm Saw
TYPE 7
MODELS 3579-20M, 3579-20L
For s/n 20110911387 (12/2011) forward
Original Saw Company
465 Third Ave SE
Britt, IA 50423 USA
PH 641-843-3868
800-733-4063
customerservice@originalsaw.com
www.originalsaw.com
Advertisement
Table of Contents

Subscribe to Our Youtube Channel
Related Manuals for Original Saw Company 3579-16L


Summary of Contents for Original Saw Company 3579-16L
- Page 1 16” Metal Cutting Radial Arm Saw TYPE 7 MODELS 3579-16M, 3579-16L 20” Metal Cutting Radial Arm Saw TYPE 7 MODELS 3579-20M, 3579-20L For s/n 20110911387 (12/2011) forward...
-
Page 2: Service Record
Service Record Serial Number_____________________ Date Purchased ______________ Date Service Performed... - Page 3 INDEX General Safety Precautions/Specifications . . Parts Diagram and Listings ....17-25 Unpacking and Assembly....Setting Thermal Overload Relay/Changing Voltage 26-27 Operating Cautions/Alternative Setup .
- Page 4 GUARD SIZE ARM LENGTH 3579-16M Type 7 7.5 hp 3 phase 208/230/460 V 50/60 Hz 16” 44” 3579-16L Type 7 7.5 hp 3 phase 208/230/460 V 50/60 Hz 16” 52” 3579-20M Type 7 7.5 hp 3 phase 208/230/460 V 50/60 Hz 20”...
-
Page 5: Electrical Hookup
Unpacking The box included in your shipment contains the legs, hardware and wrenches. Please use the following procedure to remove the box: Remove the elevating handle from the hardware bag fastened to the carton top. Install handle on shaft located at the lower right side of saw frame. -
Page 6: Overload Protection
Overload Protection Your saw is equipped with automatic reset thermal overload protection. To restart after thermals have tripped, wait until the motor cools, then press the saw start button. If overloads continue to trip the machine is being overloaded. Do not continue to operate under these conditions. -
Page 7: General Safety Precautions
General Safety Precautions Be sure the blade rotates clockwise when facing the saw from the left side. Blade must rotate to the front of the saw. Be sure all clamp handles are tight before turning motor on. Keep the blade sharp and properly set. Hold material firmly against the guide strip when cutting. -
Page 8: Control Locations
Operating Instructions !!! CAUTION !!! FOR ILLUSTRATION PURPOSES ONLY ,THE LOWER GUARD HAS BEEN REMOVED FOR THE PHOTOS USED IN THIS MANUAL. IN ACTUAL USE BOTH UPPER AND LOWER GUARDS MUST REMAIN IN PLACE FOR SAFE CUTTING OPERATION. Control Locations On / Off Switch Miter Controls Miter Scale... - Page 9 !!! CAUTION !!! FOR ILLUSTRATION PURPOSES ONLY ,THE LOWER GUARD HAS BEEN REMOVED FOR THE PHOTOS USED IN THIS MANUAL. IN ACTUAL USE BOTH UPPER AND LOWER GUARDS MUST REMAIN IN PLACE FOR SAFE CUTTING OPERATION. Revolving the Motor Vertically in the Yoke Raise the arm to allow the saw blade sufficient clearance above the table top.
-
Page 10: Bevel Cutting
Bevel Cutting Lock the arm in the cross cutting position. Raise the motor by rotating the elevation crank. Release the bevel clamp and the bevel latch and tilt the motor in the yoke. The bevel angle is shown on the bevel scale. Lock the bevel latch and clamp. - Page 11 Maintenance Adjustments and Alignments Caution! Disconnect and lockout power supply before making any adjustments or alignments. Your saw has been completely assembled, aligned and tested at the factory...then partially disassembled for shipment. Han- dling during shipment may cause some misalignment and the following information will enable you to correct any cutting inaccuracy you discover.
- Page 12 Adjustment of the Rollerhead to Arm (cont’d) Retighten the locking set screw securely to a required torque of 90-100 inch/lbs., after adjusting each eccen- tric. Replace the end cap If any of the top rollers do not revolve when in contact with the top track it will be necessary to remove the entire carriage to closely check each roller bearing.
- Page 13 To Square Saw Blade with the Table Top Make sure the tabletop is level and place a steel square against the side of the blade; the square should be against the gullets and not the teeth of the blade. If the blade is not square to the tabletop: Release the bevel clamp handle (A) and bevel latch (B).
- Page 14 To Adjust for “Heel” (Saw Blade Not Parallel to Arm) (cont’d) Second - Adjust at the 0 Bevel Position Put the motor into 0 bevel position. Engage bevel latch (A, Fig. 7) and bevel clamp (B). Cross cut a piece of material and determine the side of the cut on which the teeth are heeling.
- Page 15 Bevel Stop Rod The bevel stop rod (A) is a device mounted on the roller- head to prevent the blade from contacting the base when the bevel cuts are being made; particularly with 20” blades. A socket head cap screw (B) locks the rod into position. BEFORE MAKING BEVEL CUTS ALWAYS BE CERTAIN THE BEVEL STOP ROD IS POSITIONED SO THE BLADE CLEARS THE BASE WITH THE MOTOR IN ITS REAR POSITION.
- Page 16 Parts List and Ordering Instructions Order only genuine replacement parts from your Original Saw Company Dealer. When ordering parts be sure to include: Name of manufacturer—Original Saw Company Complete machine identification data found on name plate on front of frame ...
-
Page 17: Arm Assembly
Arm Assembly 52”- 800420-02 44”- 800410 NOTE: When replacing arm clamp stud (#15, the distance from the outer face of washer (#17) to the end of the stud should be 11/16” to 3/4”. Index Part Description Index Part Description 068545-01 Arm (52”) 099264-06 1/4-20 x 3/8 Panhd Screw (52”) - Page 18 Manual Chain Feed Assembly Manual Chain Feed Assembly 52”- 040022 52”- 040022 44”-040021 44”-040021 Part Part Description Description 071252 Retaining Ring 14 068259 Turnbuckle 068955 Spacer Bushing 15 099364-07 5/16-18 Hex Nut 085182 Crank Shaft 16 068256 Left Hand Clevis 084145 Collar 18 068258...
- Page 19 Rollerhead Assembly 800500-02 Index Part Description Index Part Description 068632 Rollerhead 070270 Stop Plate not on metal cutting series 058529 Retaining Ring not on metal cutting series 068263 Bevel Stop Rod 116406 Concentric Shaft 068653 Bumper 081476-01 Ball Bearing 099264-06 1/4-20 x 3/8 Panhd Screw 068703 5/16-18 x 1/2 Set Screw...
- Page 20 Yoke and Trunion Assembly 800300 Areas marked “G” need lubrication Important: 1. Bevel clamp #7 should be adjusted flush to 1/8” inside bottom of Bevel Clamp Handle #9 2. Turn front trunion #14 counterclockwise as far as it will go before tightening screws #11. Index Part Description...
-
Page 21: Base And Column Assembly
Base and Column Assembly 800200-02 Areas marked “G” require lubrication. Important: Do not overtighten nut # 22 or bearing could be destroyed. Gear # 21 should have slight radial play after adjustment. No grease on gear teeth After tightening screws #18 slightly, seat key #17 against shoulder of column #11 and tighten screws to required torque. - Page 22 Table & Frame Assembly Index Part Description Index Part Description 080674 3/8 Flat washer 090524 Elevating Handle 082102 3/8-16 x 1 flanges cap screw 012122 Drive Screw 083165-01 123459 Nameplate 080674 3/8 Flat Washer 082104 5/16-18 x 1 HHB 084180 3/8 heavy hex nut 099358-08 5/16 Flat Washer 061382...
- Page 23 Motor Assembly - Metal Cutting 5 HP 1 PHASE 230 V - 123504-04 7.5 HP 3 PHASE 230/460 V - 123505-04 7.5 HP 3 PHASE 575 V - 123505-05 7.5 HP 3 PHASE 208 V - 123505-07 7.5 HP 3 PHASE 380 V - 123505-06 Each motor assembly includes items 1 through 61 depending on the phase of the motor.
- Page 24 Motor Assembly - Metal Cutting 5 HP 1 PHASE 230 V - 123504-04 7.5 HP 3 PHASE 230/460 V - 123505-04 7.5 HP 3 PHASE 575 V - 123505-05 7.5 HP 3 PHASE 208 V - 123505-07 7.5 HP 3 PHASE 380 V - 123505-06 5 HP 1 PH 7.5 HP Description...
- Page 25 Magnetic Starter Assembly (telemecanique starter) 5 HP 1 PHASE 208/230 V - 700750-01 7.5 HP 3 PHASE 208/230 V - 700748-01 Index Description 7.5 HP 3 Phase 5 HP 1 Phase Transformer 208/230/460 volt 122105-60 122105-60 380/575 volt 122105-51 Enclosure 096759-04 096759-04 Magnetic Starter...
- Page 26 Changing the Motor Voltage 3 phase units WARNING—DISCONNECT AND LOCKOUT POWER BEFORE SERVICING If your machine requires a different voltage, follow the instructions below. The motor will need to be rewired according to the diagrams below. The thermal overloads must be reset or replaced with the proper pieces to maintain thermal motor protection.
- Page 27 1 phase wiring diagram WARNING—DISCONNECT AND LOCKOUT POWER BEFORE SERVICING If your machine requires a different voltage, follow the instructions below. The motor will need to be rewired according to the diagrams below. The thermal overloads must be reset or replaced with the proper pieces to maintain thermal motor protection. Motor lead wiring diagram...
- Page 28 Alignment Guide for Accurate Cutting The following guide is provided for your convenience. A saw that is not properly adjusted will not yield the desired accuracy and quality of cut. It should be noted any adjustment made will effect another, therefore it is best to perform all of the adjustments when correcting any one problem. PROBLEM POSSIBLE CAUSE SOLUTION...
- Page 29 PROBLEM POSSIBLE CAUSE SOLUTION Saw blade or dado blades tend to Saw blade is heeling Make heel adjustment (p. 14) push lumber to one side when cross Column too loose in base Make proper adjustment (p. 12) cutting ...
- Page 30 ELECTRICAL TROUBLE-SHOOTING GUIDE CAUTION—HIGH VOLTAGES ARE DANGEROUS—BE SURE POWER IS OFF AND LOCKED OUT WHEN INSPECTING OR REPAIRING MOTOR OR CONTROLS TROUBLE POSSIBLE SUGGESTED REMEDY CAUSE Power line not connected to Correct power wiring. See wiring diagram inside mag- cable. netic starter box.
-
Page 31: Preventive Maintenance
ACCESSORIES Manual Chain Feed Blades— —Provides full control of saw carriage for heavy production work. Use for heavy sawing, dado cutting and rafter notching. T1613-00 16” x 100 tooth x 1” bore Standard on metal cutting radial arm saws. non-ferrous cutting, Negative hook 40021 Chain feed for 44”... - Page 32 For parts or service please contact the manufacturer for the dealer nearest you. Printed in the USA © The Original Saw Company 6/2006 (revised 3/2007, 10/30/2007 (magnetic starter)) logo update 11.2008 (revised 4.09 motor page added 380 volt stator, brake coil, and thermal for 380 volt on mag starter)(June 14. 2008 revision added MC shaft part # and MC motor # on motor breakdown page) (update 11.2010 wiring diagrams, cover and back page) (update 5.2011 removed parts not associated with metal cutting series, updated guard page with remova-...
Need help?
Do you have a question about the 3579-16L and is the answer not in the manual?
Questions and answers