
Summary of Contents for Seaga Intelligent Inventory Control IQ24
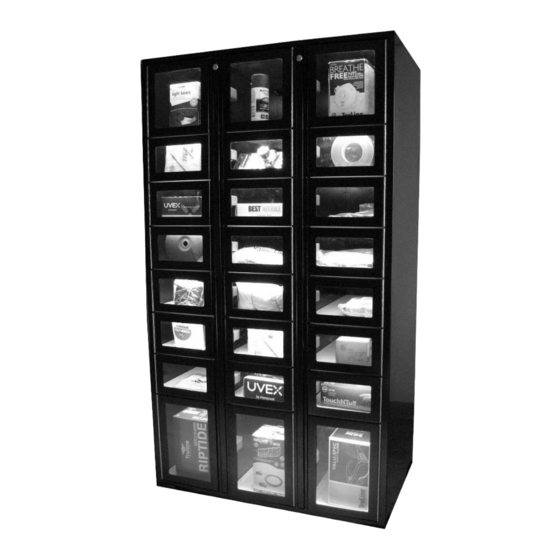
- Page 1 Intelligent Inventory Control A Division of Locker Model IQ24 Service and Parts Manual visit: intelligentinventorycontrol.com email: iic@seaga.com Revision 1 03.2017...
-
Page 2: Introduction
Once you have your vendor located, we suggest that you keep this manual for future reference, or you can view this manual online at seaga.com or intelligentinventorycontrol.com. Should any problems occur, refer to the section entitled “TROUBLESHOOTING”. It is designed to help you quickly identify a problem and correct it. -
Page 3: Table Of Contents
Table of Contents INTRODUCTION ..............................2 LOCKER DETAILS ..............................4 STANDARD CONFIGURATION..........................5 CAUTIONS ................................6 MACHINE OVERVIEW ............................7 LEGS AND LEVELERS ............................8 SERVICE DOORS ..............................8 CHARGER KNOCK-OUTS ............................9 ... -
Page 4: Locker Details
LOCKER DETAILS Domestic (115 V) Specifications Height 72” Width 40” Depth 24” Floor Space 6.67 Sq. Ft. Packing Size 40 Cu. Ft. Voltage (AC) 115V Hertz 60Hz Running Amperes 2.6 Amp Watts 115 Watts International (230 V) Specifications Height 184 cm Width 102 cm Depth... -
Page 5: Standard Configuration
STANDARD CONFIGURATION The maximum size for each compartment is shown below. Note: For proper operation, do not overload the compartment in a way that the door cannot be secured. Note: Selection numbers are for Stand Alone configuration; numbers for Auxiliary lockers may begin with 2, 3, etc. On the IQ23 model, Door 122 is used for the keypad and display and cannot be filled with product. -
Page 6: Cautions
CAUTIONS Your locker is intended for indoor use only. Excessive heat, cold or humidity levels will void your warranty; install only in climate controlled, indoor environments. The temperature range must be no higher than 32°C/90°F and no lower than 10°C/50°F with a relative humidity (Rh) level of no greater than 40%. Your vendor must be set on a level, well-supported location. -
Page 7: Machine Overview
MACHINE OVERVIEW CAUTION: Certain procedures described in this manual require electrical power to the vending machine. Only trained personnel should perform these functions. Use extreme caution. CAUTION: Certain procedures described in this manual require a qualified, trained technician to perform the particular task at hand. Fig. -
Page 8: Legs And Levelers
LEGS AND LEVELERS Protective shipping guards (Fig. 3) were installed on the leveling legs at the factory. Once the machine is placed near its final location the protective shipping guards should be removed. To remove the shipping guard, unscrew the leveling leg from the bottom until the guard is loose –... -
Page 9: Charger Knock-Outs
Locate the Solenoid Triggers and insert the Solenoid Tool until the compartment door opens (Fig. 5): Fig. 5 – Open Service Doors Right Service Door Shown Open Left Service Door Shown Open Solenoid Trigger Solenoid Trigger CHARGER KNOCK-OUTS On the back of the machine, located behind each compartment, there are knock-outs in case of items that need to be plugged in to AC power supplies (Fig. -
Page 10: Multiple Locker Configuration
MULTIPLE LOCKER CONFIGURATION To install a third locker, use the Auxiliary Cable on the back of the main unit Auxiliary Connection (Fig. 2). Fig. 6 – Auxiliary Cable Locker 2 Main Locker Locker 3 Revision 1 03.2017... -
Page 11: Cabinet Assembly
CABINET ASSEMBLY ITEM PART NO. DESCRIPTION SAI86002 CABINET SAI86008 LARGE COMPARTMENT DOOR SAI86006 SMALL COMPARTMENT DOOR SAI86007 MEDIUM COMPARTMENT DOOR STI87038 SOLENOID STI86016 SHELF HAI100 LOCK STI86014 SERVICE DOOR, TOP STI86015 SERVICE DOOR, BOTTOM STI86020 PANEL, ELECTRICAL STI86021 COVER, ELECTRICAL PANEL HAI2053 PLUG STI86022... - Page 12 LARGE DOOR ASSEMBLY ITEM PART NO. DESCRIPTION STI86019 LARGE DOOR HAI2052 LARGE HINGE PLI86003 LARGE WINDOW STI630 LOCK BRACKET Revision 1 03.2017...
-
Page 13: Medium Door Assembly
MEDIUM DOOR ASSEMBLY ITEM PART NO. DESCRIPTION STI86018 MEDIUM DOOR HAI2051 MEDIUM HINGE PLI86002 MEDIUM WINDOW STI630 LOCK BRACKET Revision 1 03.2017... -
Page 14: Small Door Assembly
SMALL DOOR ASSEMBLY ITEM PART NO. DESCRIPTION STI86017 SMALL DOOR HAI2050 SMALL HINGE PLI86001 SMALL WINDOW STI630 LOCK BRACKET Revision 1 03.2017... -
Page 15: Shelf Assembly
SHELF ASSEMBLY ITEM PART NO. DESCRIPTION STI86016 SHELF ELI696 LED LIGHT HAI990 LED DEFLECTOR PLI2082 Revision 1 03.2017... -
Page 16: Electrical Panel Assembly
ELECTRICAL PANEL ASSEMBLY ITEM PART NO. DESCRIPTION STI86020 ELECTRICAL PANEL ELI2253 RELAY BOARD ELI950 EL528 POWER SUPPLY Revision 1 03.2017... - Page 17 LIMITED WARRANTY Seaga warrants to the original purchaser that the equipment is free from defects in material and factory workmanship for a period of one (1) year from date of shipment. This warranty applies only if the equipment has been serviced and maintained in strict accordance with the instructions presented in the Operator’s Manual and no unauthorized service, repair, alteration or disassembly has been performed.
Need help?
Do you have a question about the Intelligent Inventory Control IQ24 and is the answer not in the manual?
Questions and answers