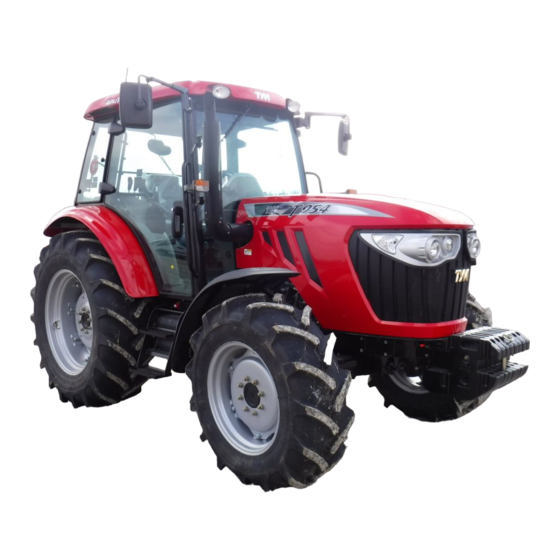
Page 1
FOREWORD FOREWORD ▐ Thank you very much for purchasing our tractor which will give you many years of reliable service. ▐ The introduction in this manual sets out the correct manner of operating, maintaining and checking the tractor to ensure long-term durability. ▐...
Page 2
WARNING SIGNS WARNING SIGNS IN THIS MANUAL The following warning signs in this manual draw additional attention to items of importance for the safe and correct operation of the tractor. SIGNS MEANING OF THE SIGN This indicates that a condition may result in harm, serious injury or death to you or other persons if the warning is not heeded.
Page 3
TABLE OF CONTENTS GENERAL INFORMATION SAFETY PRECAUTIONS TRACTOR INSTRUMENTS OPERATION MAINTENANCE TROUBLESHOOTING STANDARD FOR FARMWORK APPENDIX INDEX...
GENERAL INFORMATION 1. EXTERIOR VIEW ▶ RIGHT SIDE OF THE TRACTOR WORKING LAMP REARVIEW MIRROR MUFFLER HOOD DOOR HEAD LIGHT STEP FRONT TIRE...
Page 9
GENERAL INFORMATION ▶ LEFT SIDE OF THE TRACTOR WORKING LAMP REARVIEW MIRROR DOOR HEAD LIGHT STEP FRONT TIRE...
Page 10
GENERAL INFORMATION ▶ BACK SIDE OF THE TRACTOR WORKING LAMP WINDOW WIPER REARVIEW MIRROR TURN SIGNAL LAMP BRAKE/POSITION REAR REFLECTOR LAMP TRAILER POWER TOP LINK SOCKET REMOTE CONTROL VALVE LIFT ROD PTO SHAFT CHECK LINK TRAILER HITCH LOWER LINK...
▶ SERVICE & PARTS CHASSIS The manufacturer warrants this product SERVICE • and full details of the warranty are Service is available from any TYM ENGINE TYPE OR provided on a separate warranty dealer in the country. NUMBER schedule. PARTS •...
TYM dealer / distributor. maintenance of your new TYM CO., LTD If at any time you require advice tractor. concerning your tractor, do not hesitate to contact your authorized TYM dealer / Your tractor has been designed and distributor.
This will facilitate faster delivery and with the TYM dealer / distributor in your help ensure that the correct parts for locality. your particular tractor is received.
Page 14
HYDRAULIC SYSTEM & LINKAGES • • Tractor with IPTO(Independent Power TYM tractors are fitted with Live (i.e. The front wheel drive mechanism is Take Off) are fitted with hydraulic clutch system is in operation even when clutch incorporated as a part of the axle.
GENERAL INFORMATION 5. OWNER ASSISTANCE ELECTRICAL SYSTEM We at TYM CO., LTD and your TYM dealer If you cannot obtain satisfaction by • A 12 volt lead acid propylene battery is / distributor wants you to be completely doing used to activate the engine through the satisfied with your investment.
Such a unit must meet all of the test protect the operator, the seat belt provided must be worn in order to keep Each TYM ROPS frame or cab structure is criteria of the original unit. operators within the ROPS protected...
Page 17
GENERAL INFORMATION ▶ DAMAGE OF ROPS CABIN TYPE If the tractor has rolled over or the ROPS has damaged (such as striking an WARNING overhead object during transport), it If the ROPS is removed or replaced, must be replaced to provide the original make certain that the proper hardware protection.
GENERAL INFORMATION 7. SEAT ADJUSTMENT ▶ SEAT SLIDING ▶ SEAT BACK ANGLE, CUSHION To select seat position, move adjusting STRENGTH ADJUSTMENT lever and slide seat closer to or away from dash panel and controls. SEAT BACK ANGLE ADJUSTMENT LEVER SEAT SLIDING DANGER ADJUSTMENT LEVER ...
SAFETY PRECAUTIONS 1. SAFETY INSTRUCTIONS ▶ ENSURE SAFETY INFORMATION ▶ SIGNAL SIGNS ▶ READ SAFETY INSTRUCTION DANGER WARNING CAUTION This symbol means A signal signs Carefully read all safety instructions given in this manual for your safety. ‘Attention! Your safety is involved.’ ‘DANGER, WARNING or CAUTION’...
Page 21
SAFETY PRECAUTIONS ▶ PROTECT CHILDREN ▶ USE OF ROPS AND SEAT BELT The seat belt must be worn during machine operation when the machine is equipped with a certified ROPS. Failure to do so will reduce or eliminate protection for the operator in the event of a roll-over.
Page 22
SAFETY PRECAUTIONS ▶ PRECAUTION TO AVOID TIPPING ▶ PARK TRACTOR SAFELY ▶ KEEP RIDERS OFF TRACTOR Do not drive where the tractor could slip Before working on the tractor: Do not allow riders on the tractor. or tip. Lower all equipment to the ground. •...
Page 23
SAFETY PRECAUTIONS ▶ HANDLE FUEL SAFELY AVODING ▶ STAY CLEAR OF ROTATING ▶ ALWAYS USE SAFETY LIGHTS FIRES SHAFTS AND DEVICES Handle fuel with care. Entanglement in rotating shaft can Use of hazard warning lights and turn It is highly flammable. cause serious injury or death.
Page 24
SAFETY PRECAUTIONS ▶ PRACTICE SAFE MAINTENANCE ▶ AVOID HIGH PRESSURE FLUIDS Keep all parts in good condition and • properly installed. Replace worn or broken parts. • Replace damaged / missing decals. • Remove any build-up of grease or oil •...
Page 25
SAFETY PRECAUTIONS ▶ PREVENT BATTERY EXPLOSION ▶ PREVENT ACID BURNS If you spill acid on yourself: Flush your skin or eyes with water for 10 ~ 15 minutes. Get medical attention immediately. Keep sparks, lighted matches and open Sulfuric acid in battery electrolyte is flame away from the top of battery.
Page 26
SAFETY PRECAUTIONS ▶ BATTERY DISCONNECTION ▶ SERVICE TRACTOR SAFELY ▶ WORK IN VENTILATED AREA When working with your tractor Do not wear a necktie, scarf or loose Do not start the tractor in an enclosed electrical components, you must first clothing when you work near moving building unless the doors &...
Page 27
SAFETY PRECAUTIONS ▶ TRACTOR RUNAWAY ▶ SAFETY START ▶ EMERGENCY EXITS Engine start with transmission engaged Safety Starter switch for starting is can cause tractor to runaway resulting provided on transmission main or sub serious injury to the people standing shift lever and in PTO shift lever.
Page 28
SAFETY PRECAUTIONS ▶ SAFETY PRECAUTIONS WHEN USING LOADER Never let anyone get in the loader and Do not stand under the lifted loader or When attaching or detaching the loader, use the loader as a workbench. get close to it. fix all parts which are connected to the Otherwise, it may lead to a fatal injury Also, lower the loader arm onto the...
Page 29
SAFETY PRECAUTIONS Be careful of objects falling from loader. Do not allow loader arms or attachment Never carry a big object with the loader to contact electrical power lines. unless a proper implement is attached. Electrocution will cause serious injury or IMPORTANT death.
Page 30
SAFETY PRECAUTIONS ▶ TOWING SAFELY ▶ TRANSPORT TRACTOR BY For the maximum towable loads, refer TRUCK to the ‘TIRE AND MASS’ section in Always secure the tractor to the loader CAUTION appendix chapter if available. bed with chains. Before you leave the driving seat when a trailers is hitched to the tractor, Maintain a suitable speed taking into remember to put all the controls in...
Page 31
SAFETY PRECAUTIONS ▶ FALLING OBJECT PROTECTIVE ▶ OPERATOR PROTECTIVE ▶ USE OF HAZARDOUS STRUCTURE (FOPS) STRUCTURE (OPS) SUBSTANCES The term FOPS refers to structure The term OPS refers to a protective European standard EN 15695-1 is installed on the tractor intended to structure installed on a tractor in order applicable to the cabs of agricultural or reduce the risk to the operator of injury...
Page 32
SAFETY PRECAUTIONS The following terms and definitions are If the manufacturer's instructions for The classification category, as applied: using these substances recommend stipulated Hazardous substances: personal protective equipment, wear by ISO 14269-5, of the cab installed on • substances such as dust, vapours the equipment even in the cab.
SAFETY PRECAUTIONS 2. SAFE OPERATION OF YOUR TRACTOR The manufacturer of your tractor has When spraying or using chemicals, In summary, ensure at all times that the made every effort to make it as safe as is please ensure that clothing and safety of the operator and any other humanly possible.
Page 34
SAFETY PRECAUTIONS ▶ SAFETY TIPS DURING MAINTENANCE At least on a daily basis check all oil wheels choked. Ensure to turn off Engine before levels. Water level in the radiator Where a tractor is started in a refueling. and electrolyte level in the battery confined area, ensure that the area and perform services according to is well ventilated as exhaust gases...
Page 35
SAFETY PRECAUTIONS ▶ MOUNTING AND DEMOUNTING IMPLEMENTS Ensure that all mounting and While operating the implements Never start the tractor unless the removal of implements is done on with the PTO keep all bystanders transmission is out of gear, the safe flat ground.
Page 36
SAFETY PRECAUTIONS ▶ THE FOLLOWING PRECAUTIONS ARE SUGGESTED TO HELP PREVENT comes first. ACCIDENTS Never drive down-hill at high speed A careful operator is the best operator. protection. or with the transmission in neutral. Most accidents can be avoided by To prevent falls, keep steps and Use of the braking capacity of the observing certain precautions.
Page 37
10. Pull only from the swinging draw completing the starting circuit. Do bar or the lower link drawbar in the not bypass the safety switch. down position. Use only a drawbar Consult your TYM tractor pin that locks in place.
SAFETY PRECAUTIONS Pulling from the tractor rear axle during both day and night time, Lock the tractor brake pedals carriers or any point above the rear unless prohibited by law. together when transporting on axle may cause the tractor’s front 15.
Page 39
SAFETY PRECAUTIONS <OPERATING THE PTO> <DIESEL FUEL> 10. Do not drive equipment near open When operating PTO driven Keep the equipment clean and fire. equipment, shut off the engine and properly maintained. 11. Never use fuel for cleaning purpose. wait until the PTO stops before Under no circumstances should 12.
SAFETY PRECAUTIONS 3. DOs & DON’Ts ▶ DOs – FOR BETTER PERFORMANCE DO - Ensure that safety shields are in DO - Keep the radiator filled with clean DO - Latch the brake pedals together place and in good condition. water and in cold weather use anti- when driving on a highway.
Page 41
SAFETY PRECAUTIONS ▶ DON’Ts – FOR SAFE OPERATION DON’T - Run the engine with the air DON’T - Ride the brake. DON’T - Move the hydraulic levers cleaner disconnected. This will result in excessive wear of rearward. the brake lining. DON’T - Start the tractor in an enclosed building unless the doors and DON’T - Use the independent brakes for...
SAFETY PRECAUTIONS 4. SAFETY DECALS ▶ GENERAL INFORMATION OF DECALS ▌ In order to work with the machine safely, safety decals should be placed on the machine. ▌ Make sure to read and follow the following directions. ▐ KEEP THE WARNING LABELS CLEAN AND NOT DAMAGED AT ALL TIMES. If a decal on the machine is dirty, wash it with soapy water and wipe it off with a soft cloth.
SAFETY PRECAUTIONS 5. UNIVERSAL SYMBOLS Some of the universal symbols have been shown below with an indication of their meaning. DESCRIPTION SYMBOL DESCRIPTION SYMBOL DESCRIPTION SYMBOL ENGINE SPEED (REV/MIN X 100) PRESSURED, OPEN SLOWLY CORROSIVE SUBSTANCE HOURES, RECORED CONTINUOUS VARIABLE SLOW OR MINIMUM SETTING ENGINE COOLANT TEMPERATURE DANGER, WARNING, CAUTION...
TRACTOR INSTRUMENTS 1. SWITCHES AND INSTRUMENT PANEL ▶ FIGURE OF DASHBOARD STEERING WHEEL SHUTTLE SHIFT LEVER INSTRUMENT COLUMN SWITCH PANEL LEVER MAIN SWITCH DeSOx HAZARD FLASHER REGENERATION SWITCH...
Page 49
TRACTOR INSTRUMENTS ▶ MAIN SWITCH ▶ DeSOx SWITCH AND OPERATING DESCRIPTION IMPORTANT To start the engine, set the PTO switch KEY SWITCH in the OFF position, the shuttle shift lever in the neutral position and depress OFF ON the clutch pedal fully in advance. It is used to start and stop the engine.
Page 50
TRACTOR INSTRUMENTS or work to be performed needs high When the forced DeSOx operation is power. activated, indicator on the instrument CAUTION Then on the instrument cluster comes on and the engine speed Operating DeSOx cluster is illuminated. automatically increases. This process is 1.
Page 51
TRACTOR INSTRUMENTS ▶ HAZARD FLASHER STATUS DESCRIPTION SYMBOL INDICATOR HAZARD FLASHER DeSOx operation (Passive Automatic DeSOx or Forced) < Automatic operation activated or DeSOx operation Exhaust gas temp. > (Automatically activated 600 degrees for every 200 hours)> Press the hazard flasher switch in Forced DeSOx emergency to warn other vehicles in operation...
Page 52
TRACTOR INSTRUMENTS ▶ SHUTTLE SHIFT LEVER ▶ COLUMN SWITCH LEVER WARNING Before starting the engine, set the shuttle shift lever in the neutral position and depress the clutch pedal fully to avoid an accident by abrupt starting off. IMPORTANT This device is used to select the driving (1) Lamp selection lever ...
Page 53
TRACTOR INSTRUMENTS <Headlamp> (2) Turn signal lamp operation Low beam The turn signal lamps can be operated • Turn the lever (A) from the position with the main switch in the "ON" (2) to (3). position regardless of the position of the High beam column lever.
Page 54
TRACTOR INSTRUMENTS ▶ INSTRUMENT PANEL 1. TACHO METER 2. HOURMETER 3. SPEEDO METER 4. ERROR DISPLAY 5. FUEL GAUGE 6. COOLANT TEMPERATURE GAUGE 7. LEFT TURN SIGNAL INDICATOR 8. RIGHT TURN SIGNAL INDICATOR 9. HIGH GEAR INDICATOR 10. LOW GEAR INDICATOR 11.
Page 55
TRACTOR INSTRUMENTS TACHOMETER SPEEDOMETER (1) Tachometer (2) Hourmeter (3) Speedometer It indicates the engine RPM (Rotation It indicates the total time of use. It indicates the driving speed (km/h) of Per Minute), The green arrow indicates Black digits - Whole number for the tractor.
Page 56
TRACTOR INSTRUMENTS FUEL GAUGE COOLANT TEMPERATURE GAGE (4) Error display (5) Fuel gauge (6) Coolant temperature gauge This indicates malfunction of the tractor. This indicates the amount of fuel while This indicates the temperature of When an error code is shown on the the main switch is in the "ON"...
Page 57
TRACTOR INSTRUMENTS CHARGE WARNING LAMP DIFFERENTIAL LOCK INDICATOR PARKING INDICATOR REVERSE DRIVING LIFT INDICATOR (7) Tractor left turn signal indicator (11) Charge warning lamp (13) Parking indicator This indicates the turn signal lamp This comes on when the main switch is This comes on when the parking brake operation with the column lever.
Page 58
TRACTOR INSTRUMENTS TURNING-LIFTING INDICATOR PREHEAT INDICATOR HEADLAMP HIGH BEAM INDICATOR DeSOx ACTIVATION DeSOx DEACTIVATION INDICATOR INDICATOR (15) Turning-lifting indicator (17) Headlamp indicator (18) DeSOx activation indicator This comes on when the turning lifting This comes on with the high beam This lamp illuminates when the DeSOx function is selected with its button.
Page 59
TRACTOR INSTRUMENTS ENGINE WARNING LAMP PTO INDICATOR FUEL LEVEL WARNING LAMP TRAILER BRAKE INDICATOR (20) Engine warning lamp (21) PTO indicator (23) Trailer brake indicator It comes on when the engine is This indicates the operating condition This comes on when the brake is malfunctioning.
Page 60
TRACTOR INSTRUMENTS ENGINE OIL PRESSURE HYDRAULIC CLUTCH LOW WARNING LAMP PRESSURE WARNING LAMP/ STRAINER CLOGGING TRAILER TURN SIGNAL TRAILER TURN SIGNAL 4WD INDICATOR QUICK TURN INDICATOR INDICATOR INDICATOR WARNING LAMP (24) 1st trailer turn signal indicator (26) 4WD indicator (28) Engine oil pressure warning lamp This comes on when the trailer is This comes on when the 4WD is The lamp comes on when an engine oil...
Page 61
TRACTOR INSTRUMENTS (29) Hydraulic clutch low pressure warning lamp/strainer clogging warning lamp This comes on when the pressure of the hydraulic clutch is excessively low or the clutch oil level is low. Also, it is illuminated when the strainer is clogged UREA LEVEL LAMP AIR CLEANER FILTER CONTAMINATION WARNING LAMP by foreign materials.
Page 62
TRACTOR INSTRUMENTS (34) Automatic DeSOx activated or Exhaust gas warning lamp Automatic DeSOx operation activated or Exhaust gas temp. 600 degrees. (35) water in fuel warning lamp When a certain amount of water is UREA LEVEL WARNING LAMP SCR WARNING LAMP collected in the fuel filter, this lamp comes on.
Page 63
TRACTOR INSTRUMENTS WARNING UREA LEVEL ITEM LEVELS VALUES TIME ENGINE WARNING WARNING (US) LAMP LAMP WARNING < 25% WARNING REDUCING LEVEL 1 < 10% TORQUE TO 25% UREA REDUCING BLINKING LEVEL LEVEL 2 < 5% TORQUE TO 50% SLOWLY AND RPM TO 60% BLINKING FINAL <...
TRACTOR INSTRUMENTS 2. CONTROLS SHUTTLE SHIFT LEVER JOYSTICK LEVER COLUMN SWITCH JOYSTICK LEVER THROTTLE LEVER EXTERNAL HYDRAULIC CONTROL LEVER TILT LEVER CLUTCH PEDAL ELECTRONIC LIFT CONTROL BRAKE PEDALS PARKING BRAKE RANGE SHIFT LEVER PTO SWITCH PTO SHIFT LEVER TCU SWITCH PANEL EXTERNAL POWER CONNECTOR...
Page 65
TRACTOR INSTRUMENTS ▶ CLUTCH PEDAL ▶ BRAKE PEDALS Depressing the clutch pedal disengages The brake is to stop the machine There is an engaging hook for the clutch. forcibly. connecting the left and right brake With the clutch pedal depressed, move Unlike general automobiles, this tractor pedals.
Page 66
TRACTOR INSTRUMENTS ▶ THROTTLE PEDAL ▶ PARKING BRAKE LEVER ▶ MAIN SHIFT LEVER It has the same function to the throttle Pull the parking brake lever upward to The lever can be shifted among 4 speed lever to control the engine speed. apply the parking brake.
Page 67
TRACTOR INSTRUMENTS < Power shift button> The transmission can be shifted to the IMPORTANT IMPORTANT high speed or low speed gear with the To operate the range shift lever, depress Cautions for position C of range shift power shift button pressed even when the clutch pedal and wait till the tractor lever the clutch pedal is released.
Page 68
TRACTOR INSTRUMENTS ▶ JOYSTICK LEVER OPERATING ▶ JOYSTICK LEVER SAFETY ▶ LOADER VALVE AND JOYSTICK DIRECTION DEVICE LEVER This lever is used to control a loader There is a switch to lock the operation The loader valve is installed under the (when equipped).
Page 69
TRACTOR INSTRUMENTS ▶ THROTTLE LEVER ▶ EXTERNAL HYDRAULIC ▶ REMOTE HYDRAULIC VALVE CONTROL LEVER COUPLER DRAIN PORT Like the throttle pedal, it is used to control the engine speed. This lever is When using an attachment for an 1) how to connect coupler operated with a hand and can be used implement (rotavator, hydraulic plow, Clean the couplers on the tractor...
Page 70
TRACTOR INSTRUMENTS ▶ PTO SHIFT LEVER 2) how to disconnect coupler Lower the implement on the ground PTO SHIFT LEVER to release pressure in the hydraulic hose. Stop the engine and operate the remote hydraulic lever for 2 to 3 times to remove any residual pressure in the hose.
Page 71
TRACTOR INSTRUMENTS ELECTRONIC LIFT SYSTEM CONTROL PANEL TCU SWITCH PANEL PTO SWITCH...
Page 72
TRACTOR INSTRUMENTS ▶ PTO BUTTON ▶ ELECTRONIC LIFT SYSTEM CONTROL PANEL < Overview > The electronically controlled lift system CAUTION can provide various functions through To prevent damage to electronic PTO OFF simple switch operations, unlike the components, keep the following mechanical type, to enhance the instructions when arc welding the tractor equipped with the electronic lift...
Page 73
TRACTOR INSTRUMENTS < Electronic lift control > Control lever (Lifting/Lowering) Attenuation function ON button Attenuation function ON indicator Diagnosis indicator Lift arm upper position limit control knob Lift arm lowering speed control knob Position/Draft sensitivity control knob Working depth control knob Arm lifting indicator 10.
Page 74
TRACTOR INSTRUMENTS ▶ EXTERNAL LIFTING/LOWERING SWITCH < Operation of interior controls > 3. Lift arm lowering speed control knob 1. Control lever - Turning the knob toward the rabbit <External lifting/lowering switch A. Lift lift arm symbol increases the lift arm lowering operation>...
Page 75
TRACTOR INSTRUMENTS < Swing attenuation device > This device is to protect the hydraulic system against impact from an implement when driving the tractor equipped with an implement. To activate this device, set the lever (1) to the lifting position (A) and press the switch (2).
Page 76
TRACTOR INSTRUMENTS Position control • Turning the position/draft sensitivity control knob (7) clockwise increases the priority of the position control. Turning it clockwise to its end activates only the position control. Lower the implement with the lever (1) and adjust the lowering speed <...
Page 78
TRACTOR INSTRUMENTS Examples of useful conditions of • differential lock One wheel slips or tractor cannot be driven forward when moving into/out of a field. A wheel slips during work requiring traction, such as plowing. MANUAL DIFFERENTIAL LOCK MODE AUTOMATIC 4WD MANUAL 4WD One wheel is stuck into a soft field and can't escape.
Page 79
TRACTOR INSTRUMENTS Manual mode Examples of useful conditions of • It is possible to control the 4WD function manually by a driver for The 4WD can be useful under the easier operation. following conditions: Pressing the button once turns on When cultivating in a field the lamp and activates the manual When traction is required on a slope,...
Page 80
TRACTOR INSTRUMENTS IMPORTANT CAUTION Do not activate the reverse driving- The PTO shaft is not stopped when lifting function or turning-lifting depressing the driving clutch pedal function while driving on a road. while the PTO (AUTO) button is pressed OFF.
TRACTOR INSTRUMENTS 3. THREE POINT LINKAGE TOP LINK HYDRAULIC CONTROL VALVE LIFT ARM UPPER LINK BRACKET LIFT ROD PTO SHAFT ADJUSTING LINK TOWING HITCH LOWERING LINK...
Page 82
TRACTOR INSTRUMENTS ▶ TOP LINK ADJUSTMENT ▶ LIFT ROD ADJUSTMENT ▶ LOWER LINK CONNECTING HOLE LIFT ROD ADJUSTING HANDLE TOP LINK FIXING BAR AND ADJUSTING HANDLE LOWER LINK CONNECTING HOLE The angle of an implement can be Turn the handle clockwise to extend the C: for rotary tiller and other types of •...
Page 83
TRACTOR INSTRUMENTS ▶ ADJUSTING LINK ▶ LOWER LINK ▶ TOWING HITCH TOWING HITCH ADJUSTING HANDLE LIFT ROD MOUNTING HOLE The adjusting link can be adjusted to An implement can be attached to this. Install only an implement applicable to relieve vibration and shock. The installation type is Category Il.
Page 84
TRACTOR INSTRUMENTS ▶ DRAWBAR ADJUSTMENT ▶ PTO SHAFT CAP DANGER If caught by the PTO shaft, a severe injury or even death can occur. Stay out of the PTO shaft while it is rotating. PTO SHAFT When the PTO shaft is not in use, fit a cap to it.
TRACTOR INSTRUMENTS 4. CABIN WORKING LAMP REARVIEW MIRROR DOOR LEVER HEAD LIGHT STEP...
Page 86
TRACTOR INSTRUMENTS WORKING LAMP REARVIEW MIRROR POSITION/BRAKE LAMP REAR WINDOW LOCK LEVER TURN SIGNAL LAMP WASHER FLUID TANK...
Page 87
TRACTOR INSTRUMENTS ▶ DOOR LEVER ▶ REAR WINDOW LEVER ▶ SIDE WINDOW HANDLE Press the button on the lever to open To open the window, push the lever on Hold the handle and push it outward to the door from outside. the center of the rear window in the open the window.
Page 88
TRACTOR INSTRUMENTS ▶ WORKING LAMP ▶ OUTSIDE REARVIEW MIRROR WORKING LAMP REARVIEW MIRROR WORKING LAMP To avoid a collision with an obstacle The switches for the windshield/rear outside, adjust their positions to suit the wipers/washers and work lamps are driver. located on the right side from the driver's seat.
Page 89
TRACTOR INSTRUMENTS ▶ HANGER ▶ 12V POWER SOCKET (OPTIONAL) ▶ SUN VISOR Clothes and small bag can be hung on it. It is possible to use 12v 120w accessory Use this to protect the driver's view by connecting it to the power from sunlight.
Page 90
TRACTOR INSTRUMENTS ▶ INSIDE OF CABIN INTERIOR AIR INLET INTERIOR AIR INLET AUDIO SYSTEM INTERIOR LAMP AIR CONDITIONER/HEATER CONTROL PANEL AIR CONDITIONER/HEATER AIR VENT...
Page 91
TRACTOR INSTRUMENTS ▶ SUN ROOF ▶ FAN SPEED CONTROL DIAL ON/OFF SWITCH TEMPERATURE FAN SPEED CONTROL Use it to ventilate the cabin. The fan speed can be adjusted in four < Heater > To open the sunroof, turn the lever steps for the air conditioner and heater.
Page 92
TRACTOR INSTRUMENTS < Air conditioner > Cautions for using air conditioner • how to use This air conditioner uses new • To use the A/C, turn the refrigerant, R134-a. Make sure to temperature control dial check the refrigerant type before counterclockwise.
Page 93
TRACTOR INSTRUMENTS ▶ AUDIO SYSTEM ▶ FRESH AIR SUCTION FILTER IMPORTANT If operating the A/C without refrigerant, AUDIO SYSTEM the compressor is not sufficiently lubricated, resulting in mechanical failure. Make sure to check the refrigerant level frequently. Avoid using the A/C for an extended period of time with the tractor stopped.
Page 94
TRACTOR INSTRUMENTS ▶ FRESH AIR MODE AND ▶ DRIVER’S SEAT RECIRCULATION MODE WARNING If the cabin needs to be ventilated, select the fresh air mode. Then, fresh air is drawn into the cabin from outside through the filter. The air suction filter can be clogged by dirt and foreign materials during work.
Page 95
TRACTOR INSTRUMENTS Seat belt Before driving, adjust the length of the seat belt properly and fit its tongue into the receptacle until it clicks. Headrest The headrest position can be adjusted to fit to the driver. Its height can be adjusted by pressing Seat height adjustment the lock on the seatback and Pull up or push down the height...
Page 96
TRACTOR INSTRUMENTS ▶ TILT LEVER ▶ SECONDARY SEAT - When trying to adjust the seat The secondary seat is only for an from the position (b) to the position instructor or inspector. (c) or vice versa, the seat is returned to the position (d).
Page 97
TRACTOR INSTRUMENTS ▶ INTAKE/EXHAUST SYSTEM <General Information> general Information • Our new engine applies all applicable advanced technologies to satisfy the tightened restrictions exhaust, while also improving fuel efficiency and reducing exhaust gas. The exhaust reduction system features a diesel oxidation catalyst (DOC) device to reduce soot particles and an exhaust gas recirculation (EGR) system and (SCR) system to...
OPERATION 1. START & STOP OF ENGINE ▶ HOW TO START ENGINE ▶ PRINCIPLE OF AUTO PREHEATING SYSTEM IMPORTANT Never turn the key to「start」position while engine is running as this can cause serious damage to starter and engine flywheel. ...
Page 101
OPERATION ▶ STOPPING ENGINE ▶ ENGINE IDLING ▶ IDLING IN COLD WEATHER Hydraulic oil in this vehicle is also used After starting engine, idle engine for 5 ~ 10 minute so that oil is delivered to each as transmission fluid. STOP part of engine.
OPERATION 2. OPERATING TRACTOR ▶ STARTING OFF ▶ SHIFTING AND DRIVING ▶ TURNING IN FIELD To shift during driving, depress the brake pedal to stop the vehicle in advance. BRAKE BRAKE CONNECT CONNECT WARNING The driving speed in the reverse direction is almost the same to the speed in the forward direction.
Page 103
OPERATION ▶ PARKING THE TRACTOR ▶ START ON STEEP SLOPE ▶ TIPS FOR DRIVING ON SLOPE Depress the brake pedals. Set range shift lever in low speed Place sub shift lever in the low position on a slope to prevent speed position.
Page 104
OPERATION ▶ CAUTIONS FOR DRIVING INTO ▶ LOADING TO OR UNLOAD FROM ▶ CAUTIONS FOR DRIVING ON OR OUT OF FIELD TRUCK ROAD Check that left and right brake When loading the tractor onto a When changing the direction on a pedals are connected.
OPERATION 3. OPERATION OF PTO ▶ OPERATING PTO ▶ PTO MONITOR LAMP PTO OFF PTO ON Rear PTO is provided for variable utility. The engine will not start if PTO switch is ON position. The engine will shut-off if the operator leaves the seat with parking brake released and PTO engaged.
Page 106
OPERATION ▶ PTO ROTATION TABLE N/A : not applicable WARNING PTO ON/OFF PTO SHIFT PTO MODE POSITION PTO MONITOR PTO SHAFT When the PTO mode switch is in manual SWITCH LEVER SWITCH LEVER LAMP ROTATING position the PTO does not stop rotating. If working on hard soils, pavements with a rotary implement the PTO ON/OFF switch must be put to the OFF position...
OPERATION 4. IMPLEMENTS ▶ CONNECTION TO IMPLEMENTS ▶ DISCONNECTION FROM ▶ MOUNTING IMPLEMENTS Make sure to stop the engine before IMPLEMENTS If the PTO is used, remove the safety connecting the implements. cover off the PTO shaft. Make sure to stop the engine before Move the double acting valve lever Adjust the yoke rod on the lower links to disconnecting it.
OPERATION 5. TOWING THE TRACTOR ▶ TOWING THE TRACTOR ▶ TOWING WITH ENGINE RUNNING Towing with the engine running can be performed if forced gearbox lubrication is ensured: Engine speed between 1,200 ~ 1,300 • rpm. Maximum towing speed 8km/h •...
Page 109
OPERATION ▶ TOWING WITH ENGINE OFF Set the shuttle control lever and gear Travel speed must always be such as With engine stopped and with forced • • lever to neutral; to allow complete control and gearbox lubrication system inoperative Move the range lever to the「FAST」...
OPERATION 6. CHECKS DURING DRIVING ▶ CHECK DURING DRIVING ▶ OIL PRESSURE ▶ BATTERY CHARGING Constantly monitor the warning lamps on the monitor panel and if any comes on, stop the tractor to determine the cause. If the oil pressure lamp comes on check If the alternator warning lamp comes on the oil level first of all.
Page 111
OPERATION ▶ FUEL GAUGE ▶ COOLANT TEMPERATURE ▶ TRAILER SOCKET TRAILER SOCKET To avoid excessive condensation in the If the needle of the coolant gauge points The socket is ready to operate the fuel tank refill at the end of each day’s at "H,"...
OPERATION 7. WORK PROCEDURES ▶ PRECAUTIONS FOR HANDLING IMPLEMENTS ▶ GENERAL IMPLEMENT When driving the tractor to attach <Safety precautions for rotavator> or detach an implement, make sure Never remove the safety cover of the WARNING that there is no one in between or rotavator.
Page 113
OPERATION Sequential returning plowing pattern This pattern can be useful in a well- • planned field in a good condition. The border shown in the figure is the • effective plowing width of the rotavator and should be set a little narrower than three times of one plowing width.
Page 114
OPERATION Alternating returning plowing pattern This pattern is useful for narrow or • short fields or poorly planned fields in which are not easy to turn. In the figure, the plowing width for • (1), (2), (3) and (4) should be overlapped with the one for (5), (6) and (7) for approx.
Page 115
OPERATION Land leveling pattern The land leveling work may be • performed after crushing soil or not. The vehicle speed can be set faster • when performing the land leveling work with soil crushed already. When working in a wet field, fill the •...
Page 116
OPERATION ▶ FRONT LOADER VALVE ▶ FOR SAFE LOADER WORK FRONT LOADER VALVE When installing for loader, the loader Keep the balance between the front and When transporting things with a loader, should be facing up, but a loader the left rear by installing a weight to the back of lower the loader and keep the driving when not installed.
Page 117
OPERATION Do not lift anything only with one side of Keep the clearance between the rear the tractor. If so, the tractor may fall on wheels as large as possible for safety of WARNING its side. the tractor. Do not let anyone ride a loader for work, Make sure to distribute the load evenly.
OPERATION 8. OPERATION TIPS ▶ AIR CLEANING SYSTEM ▶ ENGINE To save fuel & oil in your tractor, Clean the air cleaner regularly so Put the engine oil on load after the following things should always be kept that dust does not settle down. engine is heated &...
Page 119
OPERATION ▶ BRAKE ▶ OIL SYSTEM ▶ LUBRICATING OIL If the tractor has to be stopped for a Always use recommended grade of GENERAL • long period, it is advisable to bring oil. Modern diesel engines place very high the transmission in neutral position. Every day before starting the engine, demands on the lubricating oil to be Do not override the brake pedals.
Page 120
OPERATION product, e.g. with regard to thermal Always use filtered diesel for the load capacity. In principle, all engine fuel system. oils of the same specification can be At the end of the day’s working, it is mixed. However, mixing of engine oils preferable to fill the diesel tank so should be avoided because the worst that it may prevent condensation.
Page 121
OPERATION ▶ WINTER OPERATION WITH ▶ COOLING SYSTEM ▶ OTHERS DIESEL FUEL Check the fan belt tension regularly. In liquid-cooled engines, the coolant Adjust, If required. must be conditioned and monitored, Special demands are placed on the cold Check the coolant level in the otherwise the engine could be damaged behavior (temperature limit value of the radiator fins always clean.
MAINTENANCE 1. OPENING COVERS ▶ OPENING HOOD Push the hood opening handle Lift the hood with hands slightly. under the hood front grill to the left Then, the hood is automatically as shown in the figure to unlock the opened by its damper. hood.
MAINTENANCE 2. INSPECTION ITEMS ▶ INSPECTION ITEMS To prevent any possible failure, some Inspect each part in the following order: Sit on the driver's seat, turn the items should be checked daily. main switch to the "ON“ position Make sure to perform inspection before Check the items that were faulty and check: driving.
MAINTENANCE 3. SERVICING EACH PART ▶ INSPECTING AND CHANGING ▶ ANTI-FREEZE ENGINE COOLANT If coolant freezes, the engine can be damaged. Clean the radiator thoroughly before • adding antifreeze. COOLANT DRAIN PLUG The mixture ratio of antifreeze is • different by manufacturers and temperature.
Page 127
MAINTENANCE ▶ CLEANING RADIATOR GRILL ▶ CLEANING CONDENSER GRILL ▶ CHECKING AND CHANGING AND CONDENSER GRILL AND OIL COOLER ENGINE OIL RADIATOR SCREEN ENGINE OIL DIPSTICK OPENING LEVER OIL FILLING HOLE When working in a grassy field or Turn the opening lever to access to the (1) Inspection working at night, the radiator or condenser and oil cooler.
Page 128
MAINTENANCE ▶ CHECKING AND CHANGING TRANSMISSION FLUID CAUTION If engine oil gets on your skin, it can irritate the skin and cause a skin condition. Make sure to clean your skin ENGINE OIL with soap and water or hand cleaner DRAIN PLUG TRANSMISSION FLUID FILLER HOLE thoroughly.
Page 129
MAINTENANCE TRANSMISSION FLUID DRAIN PLUG CAUTION If transmission fluid gets on your skin, it UPPER LIMIT can irritate the skin and cause a skin condition. LOWER LIMIT Make sure to clean your skin with soap and water or hand cleaner thoroughly. (2) Changing IMPORTANT Unscrew the drain plug on the...
Page 130
MAINTENANCE ▶ INSPECTING AND CHANGING FRONT AXLE OIL FRONT AXLE OIL GAUGE & CAUTION FRONT AXLE OIL FILLER HOLE If oil gets on your skin, it can irritate the skin and cause a skin condition. Make sure to clean your skin with soap and water or hand cleaner thoroughly.
Page 131
MAINTENANCE CAUTION UPPER LIMIT Avoid to run the start motor for over 5 consecutive seconds, but run it several times at shorter intervals. LOWER LIMIT IMPORTANT If filling the port with fuel before Make sure that the amount of fuel in installing the fuel port, it is not the fuel tank is sufficient.
Page 132
MAINTENANCE ▶ REPLACING TRANSMISSION ▶ REPLACING AND SERVICING ▶ REPLACING ENGINE OIL FILTER HYDRAULIC OIL FILTER HIGH PRESSURE FILTER CARTRIDGE HYDRAULIC OIL FILTER INDICATOR HIGH PRESSURE FILTER ENGINE OIL FILTER CARTRIDGE Remove the hydraulic oil filter When the indicator is turned on in Remove the engine oil filter element by turning it red after the engine is started, the...
Page 133
MAINTENANCE ▶ FUEL Run the engine for approx. 5 CONNECTOR minutes and check for proper operation through the engine oil FUEL FILTER PORT warning lamp on the instrument cluster. PRIMING PUMP Then, stop the engine. (This warning lamp should be turned off while the engine is running.) Check the oil level with the dipstick Use only low sulfur or ultra low sulfur...
Page 134
MAINTENANCE ▶ FUEL FILTER DRAINING CAUTION Periodically check the fuel filter and drain the water from it. Otherwise, moisture may flow into the fuel unit of the engine, resulting in critical faults in the fuel injection pump, the fuel injection pipe, the common rail, and injectors.
Page 135
MAINTENANCE ▶ CLEANING FUEL FILTER ▶ REPLACING FUEL FILTER Drain water and remove foreign ELEMENT materials from the fuel filter at every 100 hours of operation. Remove the plug (1) on the bottom of the filter. It can be removed by unscrewing it.
Page 136
MAINTENANCE ▶ UREA TANK FILLER PORT ▶ UREA FILTER REPLACEMENT CAUTION The engine power is limited when driving only with 10% of the full urea capacity. Never add any fluid, such as diesel fuel, UREA TANK FILLER PORT gasoline and alcohol, into the urea tank other than the recommended urea (complying with ISO22241 or DIN70070).
Page 137
MAINTENANCE Insert the tool till it clips on guide. Remove the filter cover required. Remove the equalizing element. Tool : 27mm (1.06 inch) Wrench • with 20 + 5N·m Torque...
Page 138
MAINTENANCE PULL OUT INSERT POSITION POSITION Distance of the tool from SM when in • pull out position : ca.27mm. (1.06 inch) Then rotate in clockwise direction When no further rotation possible as shown in front view. (after ca. 45°), then pull out the filter.
Page 139
MAINTENANCE ITEM INGREDIENT UNIT TEST METHOD MIN. MAX. ISO 22241-2 Annex B Urea concentration %(m/m) 31.8 33.2 ISO 22241-2 Annex C Density (at 20°C kg/m3 1,087 1,093 ISO 3675 or ISO 12185 Refractive index (at 20°C 1.3814 1.3843 ISO 22241 2 Annex C Ammonia alkalinity %(m/m) ISO 22241 2 Annex D...
Page 140
MAINTENANCE It is necessary to add a tracer element to <Urea Crystallization issue during long AUS 32. Make sure that the SCR system storage> IMPORTANT is not damaged by the quality of AUS 32 Following recommissioning procedure The condition of ISO 4259 within the specified in the table and tracer element.
Page 141
MAINTENANCE ▶ AIR CLEANER SERVICING ELEMENT (INNER/OUTER) Never drive the vehicle with the element removed. CAUTION If the change schedule is overdue, the <Cleaning element> urea can be degraded or diluted, Blow compressed air from the inside causing a problem. Therefore, perform the following toward the outside of the element.
Page 142
MAINTENANCE ▶ ADJUSTING TREAD ▶ STANDARD FOR TREAD ADJUSTMENT <Adjusting front wheel tread> The tread can be adjusted by switching the rims and discs on the left and right sides. (STANDARD) <Adjusting rear wheel tread> The tread can be adjusted by switching the rims and discs on the left and right sides.
Page 143
MAINTENANCE ▶ GREASING POINTS ▶ CHECKING HOSES ▶ CHECKING AND CHARGING For general greasing points, refer to the Rubber parts, such as the fuel hose and BATTERY fuel, oil and fluid specification chart. radiator hose, are aged by time even DANGER However, add grease before work if the when the tractor is not in use.
Page 144
MAINTENANCE CHARGE INDICATOR < Checking > NEGATIVE (-) Checking battery charging level If the battery is not used for over • two weeks, it may become hard to start the engine. Charge the battery in this case. POSITIVE (+) The exact charging level can be •...
Page 145
MAINTENANCE ▶ JUMP START ▶ CHECKING ELECTRIC WIRING Charge the discharged battery for Loose wiring terminals can cause approx. 30 minutes after the engine contact failure and damaged is started. wirings can lead to performance deterioration of electric devices, short circuit and fire. WARNING Replace or repair aged and ...
Page 146
MAINTENANCE ▶ DISCONNECTING BATTERY The function of the battery disconnect Turn the knob to “OFF” to disconnect <Refitting the knob> switch is to disconnect the power the battery and back to “ON” to resume Press and turn the knob clockwise, supply to the electrical system by normal operation.
Page 147
MAINTENANCE ▶ CHECKING AND REPLACING FUSE Remove the cover of the fuse box. Remove the blown fuse. BODY FUSE BOX Fit a new fuse with the same capacity. The function and capacity of each fuse are indicated on the cover of the fuse box.
Page 148
MAINTENANCE ▶ CABIN RELAY BOX ▶ REPLACING LAMP BULB ▶ REPLACING TURN SIGNAL If a lamp does not come on by operating LAMP/POSITION LAMP the corresponding switch: Check the corresponding fuse. If the fuse is intact, remove the bulb socket from the lamp. Remove the bulb from the socket and check for blown filament.
Page 149
MAINTENANCE ▶ ADJUSTING PEDAL PLAY COVER POSITION LAMP (12V 8W) Remove the bulb by pressing it and Install the lamp lens by pressing it <Adjusting clutch pedal inching cable> turning it counterclockwise. against the cover from one side. After prolonged use of clutch pedal, Fit a new bulb by pressing it turning play of its inching cable can become it clockwise.
Page 150
MAINTENANCE ▶ CHECKING AND ADJUSTING ▶ CHECKING AND ADJUSTING A/C ▶ CHECKING AND ADJUSTING FAN WATER PUMP BELT COMPRESSOR BELT BELT BOLT ADJUSTING ADJUSTING BOLT ADJUSTING BOLT BOLT BOLT 7 ~ 9mm 7 ~ 9mm Unscrew the Water pump mounting Check and adjust the tension of the A/C Unscrew the alternator mounting bolts slightly and move the water...
Page 151
MAINTENANCE ▶ TIRE INFLATION PRESSURE MODEL ITEM SPECIFICATIONS AIR PRESSURE FRONT 13.6-24 1.6(kg/cm T854, T954, T1004 REAR 16.9-34 1.6(kg/cm2) FRONT 13.6-24 1.6(kg/cm2) T1104 REAR 18.4-34 10PR 1.6(kg/cm2) Check if the inflation pressure of the front and rear tires is correct.
MAINTENANCE 4. MAINTENANCE AND ADJUSTMENT SCHEDULE ▶ PERIODICAL CHECK AND SERVICE TABLE ○ : Check·Add·Adjust ● : Replace ▌ Check or adjust each part only when engine is stopped. ★ : Service by work shop △ : Clean ▌ When any hot part should be serviced, wait until it is cooled down. SERVICE INTERVAL (HOUR METER, MARK) ITEM 100 150 200 250 300 350 400 450 500 550 600...
Page 153
MAINTENANCE ○ : Check·Add·Adjust ● : Replace ▌ Check or adjust each part only when engine is stopped. ★ : Service by work shop △ : Clean ▌ When any hot part should be serviced, wait until it is cooled down. SERVICE INTERVAL (HOUR METER, MARK) ITEM 100 150 200 250 300 350 400 450 500 550 600...
Page 154
MAINTENANCE ▶ FUEL, OIL AND FLUID SPECIFICATION CHART ℓ TYPE SPEC. (gallon) 13.7ℓ COOLANT ANTI-FREEZE (3.61) ENGINE OIL 15ℓ ENGINE API CJ-4 (3.96) SAE 15W/40 API GL-4 - BELOW -20°C 75ℓ TRANSMISSION ISO VG32 (19.81) - ABOVE -20°C ISO VG46 GEAR OIL 17.5ℓ...
MAINTENANCE 5. INSPECTING ELECTROHYDRAULIC SYSTEM ▶ CALIBRATION FOR REPLACEMENT OF POSITION Step 9: Press the external hitch lowering SENSOR/EHR-B (BOSCH ECU) EXTERNAL HITCH button to lower the 3-point hitch. LIFTING SWITCH Step 10: Press and hold the external STATUS LED hitch lowering button even after the 3-point hitch is fully lowered.
Page 156
MAINTENANCE ▶ ERROR CODE DISPLAY FOR ▶ ERROR CODE DISPLAY OF HYDRAULIC SYSTEM CONTROL PANEL STATUS LED Step 3: After delivering the first digit, it stops blinking for approx. 1 If an error is occurred in the hydraulic STATUS LED (INDICATOR 1) second.
Page 157
MAINTENANCE ▶ LED BLINKING BY ERROR CODE If there is an error in the system, the status LED indicates this error by blinking in the specified setting. ● : ON ○ : OFF 1 PHASE 2 PHASE 3 PHASE 4 PHASE FAULTS DESCRIPTION CODE...
Page 158
MAINTENANCE ▶ ERROR CODE IS DISPLAYED THROUGH THE INDICATOR ON METER PANEL SIMULTANEOUSLY Error codes are displayed for 3P device and other devices' failure. Find the cause and take any necessary action. FAULT CODE DESCRIPTION Indicates Circuit Fault of the Lift Arm solenoid for Raising Indicates Circuit Fault of the Lift Arm solenoid for Lowering Indicates Short Fault of the Lift Solenoid for Raising/Lowering Indicates Connecting Fault of the Exterior (raise and Lower) control button for Raising...
TROUBLESHOOTING 1. ENGINE TROULESHOOTING ▶ ENGINE ISSUE CAUSE ACTION Clutch pedal is released Depress clutch pedal • • PTO switch is on「ON」position Set PTO switch into「OFF」position • • Defective safety switch Have it repaired or replaced by workshop • • The start motor does not rotate when Battery discharged Charge battery...
Page 161
TROUBLESHOOTING ISSUE CAUSE ACTION Clogged governor by foreign material or Have it repaired or replaced by workshop • The engine overruns dust • Have it repaired or replaced by workshop Oil increased • • Insufficient fuel Add more fuel and bleed the system •...
Page 162
TROUBLESHOOTING ISSUE CAUSE ACTION Clogged or carbon on nozzle tip Have it repaired or replaced by workshop • • Insufficient compression or gas leak from Have it repaired or replaced by workshop • • valve seat The engine power is insufficient Incorrectly adjusted valve clearance Have it repaired or replaced by workshop •...
Page 163
TROUBLESHOOTING 2. BRAKE, CLUTCH TROULESHOOTING ▶ BRAKE ISSUE CAUSE ACTION Excessive brake pedal free play Adjust the free play Brake does not operate or brake on one • • Worn or seized liner Have it repaired by workshop side operates only •...
Page 164
TROUBLESHOOTING 3. STEERING WHEEL & HYDRAULIC SYSTEM TROULESHOOTING ▶ STEERING WHEEL ISSUE CAUSE ACTION Improper toe-in Adjust toe-in • • The steering wheel feels heavy or Incorrect tire inflation pressure Set left and right tires to same specified • • The steering wheel vibrates pressure Vibration from each connection...
Page 165
TROUBLESHOOTING 4. ELECTRIC SYSTEM TROULESHOOTING ▶ ELECTRIC SYSTEM ISSUE CAUSE ACTION Blown fusible link Check the wiring and replace the fusible link • • Defective wiring Check for loose or missing terminal, short • • circuit and poor ground and repair as necessary The battery won’t be charged Defective alternator...
STANDARD FOR FARMWORK TO ENSURE SAFE AGRICULTURAL WORK, SAFETY PRECAUTIONS FOR USE OF AGRICULTURAL MACHINERY ARE SET BY THE NATIONAL INSTITUTE OF AGRICULTURAL ENGINEERING. READ THIS INFORMATION THOROUGHLY ALONG WITH THE USER MANUAL TO ENSURE SAFE WORK.
Page 168
STANDARD FOR FARMWORK 1. STANDARD FOR FARMWORK ▶ SAFETY MARK ▶ INSTRUCTION BEFORE USE Always make sure to check the Operator must attend his/her health Protective measures to prevent any • operating condition of the safety lamp and should get enough rest. injury on foot or slipping - Put on an (such as turn signal lamp) before appropriate non-slippery shoes to...
Page 169
STANDARD FOR FARMWORK ▶ CHECKUP LIST FOR OPERATION ▶ CAUTIONS DURING THE WORK Also, put a signal that there is a broken Before using the machine, check it and Do not load anything that can interfere car, 100m behind and 200m at night in repair if there is a malfunction.
Page 170
STANDARD FOR FARMWORK ▶ CAUTIONS WHEN DRIVING ON Never let any passenger mount on Safety in inspection, adjustment, etc. FARM ROAD • the machine. Make sure to stop the motor and Driving on roads • Also, do not put any object on the carry out the work in a safe Drive safely observing the relevant •...
Page 171
STANDARD FOR FARMWORK ▶ INSTRUCTION AFTER USE ▶ CAUTIONS FOR INSPECTION & When loading/unloading the machine When the work is completed, stop the MAINTENANCE Choose a place with a leveled and engine on a leveled ground, check the Do not refuel either when the engine is •...
Page 172
STANDARD FOR FARMWORK ▶ TRACTOR When getting off the cab, turn off the Manage PTO If the safety frame was removed for • engine, lock the parking brake and Stop PTO before stopping the engine. specialized work, restore it • remove the ignition key.
Page 173
STANDARD FOR FARMWORK ▶ OTHER PRECAUTIONS Do not ride on the rotary. The following items can affect the • When driving backward or turning tractor performance and safety. • quickly with the rotary raised up, Therefore, Repair of these items should make sure to check behind the be done by your workshop.
Catalyst or Thermal Reactor Where a warrantable condition exists, regulations of the EPA and of the System TYM-USA (hereafter “TYM”) will repair California ARB. In California, new heavy- Diesel Oxidation Catalyst (DOC), your heavy-duty off-road engine at no duty off-road engines must be designed,...
Page 182
The warranty period shall begin on the INFRACORE and TYM cannot deny engine to a TYM dealer as soon as a date the machine is delivered to the first warranty solely for the lack of receipts problem exists.
Page 187
INDEX THE FOLLOWING PRECAUTIONS ARE USE OF ROPS AND SEAT BELT · · · · · · · B-3 SUGGESTED TO HELP PREVENT USE OF TRACTOR WITH ROPS ACCIDENTS · · · · · · · · · · · · · · · · · B-18 LOWERED CAN CAUSE FATAL INJURIES ·...
Page 189
T954, T1054, T1104 (US) T854, T954, T1004, T1054, T1104(EU) OPERATOR’S MANUAL TYM TRACTORS ⚠ ALL INFORMATION, ILLUSTRATIONS AND SPECIFICATIONS IN THIS MANUAL ARE BASED ON LASTEST INFORMATION AVAILABLE AT THE TIME OF PUBLICATION. THE RIGHT IS RESERVED TO MAKE CHANGES AT ANY TIME WITOUT A NOTICE.
Need help?
Do you have a question about the T954 and is the answer not in the manual?
Questions and answers