
Related Manuals for STILLA Hampton


Summary of Contents for STILLA Hampton
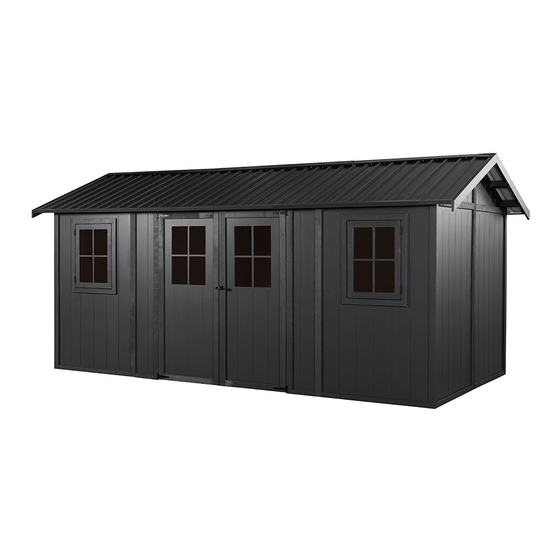
- Page 1 HAMPTON [16x8] USER MANUAL IMPORTANT Read carefully. Retain for future refence HAMPTON [1x86] V2—Jan 2023...
- Page 2 & roofing. Please fully unpack all the parts & check against the parts checklist before con- tac ng customer service about anything you believe may be missing or damaged. Thank-you Protect Painted surfaces when laid down for processing. HAMPTON [1x86] V2—Jan 2023...
- Page 3 Light coloured crayon/chinagraph pencil white/yellow. Phillips Bit (PH2), Ba en Screw Bit, Phillips Bit #2, 5/16” Hex driver, Drill Bits 3mm & 4mm, Countersink Bit (or Combina- on.) This product requires a minimum of 2 persons to assemble. HAMPTON [1x86] V2—Jan 2023...
- Page 4 DG1217A1 Pine, 70mm x 45mm x 1217mm, Double Groove, Apex Angle top. SG1926A1 Pine 70 x 45 x 1926mm, Single Groove. Miter Top [350] DG1926 Pine 70x45x1926mm, Double Groove Plain ends PS32CSK, Phillips Screw #6 x 32mm, Countersunk. Panel Fixing to Frame HAMPTON [1x86] V2—Jan 2023...
- Page 5 P1130x1824, Window Panel 1130 x 1824 x 9.5mm, P295x1824, Weathertex Panel x 1824 x 9.5mm, Grooved Grooved 295 x 1824 x 9.5mm, Grooved OPENING WINDOW FRAME [1] [24] BH20 MO/SM, Fix WF Assy to WP1130 Opening WF-Assy, Painted Window frame [assembled] HAMPTON [1x86] V2—Jan 2023...
- Page 6 FB189, Painted Block 70 x 45 PS32, BS100, Bugle Ba en Screw Phillips Csk Screw #6 Degree. x 189mm, Facia Spacing Block x 32mm Treated Pine, Fix 100mm Galvanized, Fix F1500 to FB145 . FB140 to Gable. HAMPTON [1x86] V2—Jan 2023...
- Page 7 [**Not issued if Heavy Floor is op oned] [13] [13] [26] BKT6040G, Bracket 60mm x 40mm wide, CS650, Concrete screw 6mm x 50mm. RS25, Roofing Screw 25mm Electro-Galvanised. MISCELLANEOUS TU MO/SM, Paint Touchup Sil-MO/SM, Silicone sealant 300ml – coloured Monument / Surfmist 500ml HAMPTON [1x86] V2—Jan 2023...
- Page 8 finished shed. PRE-DRILL - 3mm CP1926 [4] DG1926 [5] SG1926A [2] Drill internal webs only DG1130 [2] DG1217A [2] SG1740A2 [1] Drill opposite side to engraving SG1130T2 [6] DG1130T2 [4] SG295T2 [2] HAMPTON [1x86] V2—Jan 2023...
- Page 9 Plain 1130 panels. Window posi on will determine Top Plate configura- If to be on the Back wall [Opposite doors]. SG1130T2 should be fi ed. Back If to be placed in side walls DG1130T2 is required HAMPTON [1x86] V2—Jan 2023...
- Page 10 PS32CSK, 8 x 2 18mm 6 x Single Groove Top plate [Back Wall] 4 x Double Groove Top plate [Side Walls] HAMPTON [1x86] V2—Jan 2023...
- Page 11 Wall Panel Prepara on SG295T2 FS295T2 FB20 MO/SM P295x1824 PS32CSK PS32CSK Note: Front Panel Groove is offset. Check Orienta on before fixing Top Plates. FB20 MO/SM HAMPTON [1x86] V2—Jan 2023...
- Page 12 Panel Assy Or WP Assy CP1924 PS32CSK 2mm Gap 18mm Note: Layout Lines Construct a panel with Corner post on Right Rear face [as per image >] With SG top Rail [for Side wall] HAMPTON [1x86] V2—Jan 2023...
- Page 13 Panel Assy + DG Top PS32CSK Panel Assy + SG Top SG Top Plate DG Top Plate HAMPTON [1x86] V2—Jan 2023...
- Page 14 DG1130 DG1217A1 PS32CSK Angle cut to TOP FB32CSK [4] HAMPTON [1x86] V2—Jan 2023...
- Page 15 Side Wall Construc on Panel Assy [DG Top] CP1924 PS32CSK PS32CSK [4] HAMPTON [1x86] V2—Jan 2023...
- Page 16 Back Wall Assembly [14] Panel Assy [SG Top] DG1926 CP1924 PS32CSK [Alt WP Assy] PS32CSK [8] PS32CSK [6] Once Back wall is assembled. REPEAT step 12 & 13 for assembly of opposite Gable Wall. HAMPTON [1x86] V2—Jan 2023...
- Page 17 Front [Door] Side Panels WPA1130 PA295 [16] SG1924A1 PS32CSK [8] REPEAT above steps for the other side [L/H in this case]. HAMPTON [1x86] V2—Jan 2023...
- Page 18 HAMPTON [1x86] V2—Jan 2023...
- Page 19 Door Head [14] SG1740A2 FB20MO/SM DST1800-63 FB20MO/SM [13] HAMPTON [1x86] V2—Jan 2023...
- Page 20 CHECK structure for Square, once confirmed, fit remaining Screws to panels FB20MO/SM x 30 PS32CSK x 177 HAMPTON [1x86] V2—Jan 2023...
- Page 21 GABLES—Prepara on SG1299A2 DG451A1 [12] FB189 BS100 PRE-DRILL - SG1299A2 GABLE Angle—Addi onal Drilling for Facia Block DRILL —Through Hole required SG1299A2 [4] HAMPTON [1x86] V2—Jan 2023...
- Page 22 GABLE Angle—Addi onal Drilling for Facia Block DRILL 4mm—Minimum Depth 50mm FB189 [12] BS100 [3] HAMPTON [1x86] V2—Jan 2023...
- Page 23 GABLES [2] —Assembly [48] PS32CSK SG1299A2 HAMPTON [1x86] V2—Jan 2023...
- Page 24 Check Gable posi on is correct before Fixing in place with screws. PS32CSK REPEAT above steps for the other gable side. HAMPTON [1x86] V2—Jan 2023...
- Page 25 ROOF— Half Roof assembly [2] [12] [12] RF1544 RF1125 LP872 [14] CH1800 MO / SM RS1400 MO / SM [140] [70] [28] RS50 MO / SM BS75 RD-AS2 MO / SM BS75 [8] Pre-drilling will prevent spli ng! HAMPTON [1x86] V2—Jan 2023...
- Page 26 BS75 [8] HAMPTON [1x86] V2—Jan 2023...
- Page 27 BS75 [4] BS75 [4] BS75 [4] BS75 [4] HAMPTON [1x86] V2—Jan 2023...
- Page 28 Top of Roof sheet has material folded upwards. Underside of Roof frame—Distance from sheet to frame edge. Roof sheet Top flush with top of frame. HAMPTON [1x86] V2—Jan 2023...
- Page 29 Lay Shee ng on Frame Sheets 2,3,4,5 &6 Single overlap Sheets 1/2 overlap 1. Sheets 6/7 overlap 2 Overlap 2 HAMPTON [1x86] V2—Jan 2023...
- Page 30 RS50 MO/SM [4] HAMPTON [1x86] V2—Jan 2023...
- Page 31 HAMPTON [1x86] V2—Jan 2023...
- Page 32 End Frame Fixings RS50 MO/SM [3] x2 Lower Roof Screws placed in Peaks of Sheet. Do not Over ghten. End Fixings placed in Valley nearest to end of Frame. HAMPTON [1x86] V2—Jan 2023...
- Page 33 RD-AS2 MO / SM [14] Drill and rivet channel to 1st & 2nd peaks then spaced @ 3 peak spaces then penul mate and last Peak. HAMPTON [1x86] V2—Jan 2023...
- Page 34 Roof Assembly—Installa on [28] BS75 [12] Half roof Assembly CT-A PS50CSK BS75 [3] Align Base of Roof frame with Bo om of Gable Frame HAMPTON [1x86] V2—Jan 2023...
- Page 35 Roof Side Fixings BS75 [3] BS75 [2] BS75 [3] Collar Ties Collar Tie PS50 [4] HAMPTON [1x86] V2—Jan 2023...
- Page 36 Gable assembly [24] F1500 PS32CSK PS32CSK HAMPTON [1x86] V2—Jan 2023...
- Page 37 Make sure peak of ridge cap is in line with peak of fascia's. Screw through ridge cap into 3rd and 10th Ribs, from each end of the roof. Drive these screws through and into roof frame. RS50 MO/SM [8] 10th HAMPTON [1x86] V2—Jan 2023...
- Page 38 Door Hanging 2mm > Le Hand shown—Right Mirrored. HAMPTON [1x86] V2—Jan 2023...
- Page 39 Hinge Screws [3] Top Hinge Shown—Bo om similar. HAMPTON [1x86] V2—Jan 2023...
- Page 40 HAMPTON [1x86] V2—Jan 2023...
- Page 41 Door Furniture BB100S DS1820x90 THB [Fixings Kit] FB20 MO/SM HAMPTON [1x86] V2—Jan 2023...
- Page 42 BH20 MO/SM [5] HAMPTON [1x86] V2—Jan 2023...
- Page 43 Lock Posi on 12mm and 2 x 6mm Note—Clearance Hole in Door Stop required HAMPTON [1x86] V2—Jan 2023...
- Page 44 HAMPTON [1x86] V2—Jan 2023...
- Page 45 Op onal: Trim excess length off Lock Square sha . HAMPTON [1x86] V2—Jan 2023...
- Page 46 Lower Drop Bolt HAMPTON [1x86] V2—Jan 2023...
-
Page 47: Anchor Kit
Anchor Kit [not supplied if Heavy floor is op oned] [13] [13] [26] BKT6040G SB650 RS25 Bracket Posi ons HAMPTON [1x86] V2—Jan 2023... - Page 48 Masonry Drill 5mm, 50mm Deep HAMPTON [1x86] V2—Jan 2023...
- Page 49 Insert Opening Window Frame [24] Opening Window Assembly FB20 MO/SM BH20 [12] HAMPTON [1x86] V2—Jan 2023...
-
Page 50: Finishing Touches
Once paint is dry, seal bo om and sides of panels with supplied Silicone sealant. TO REGISTER YOUR WARRANTY Thank-you for purchasing a STILLA product. To register your 10 year product warranty, please go to www.s lla.com.au/warranty and complete the online form. - Page 51 Brighton/Hampton INSTALLATION GUIDE HEAVY FLOOR [8x16][16X8] 8x16 - 16x8 Floor V5—Jan 2023...
- Page 52 SAFETY & CARE GUIDELINES Take care when li ing and moving components. Flooring sheets and assembled frames require a minimum of 2 per- sons to li safely. Team li ing of heavy items is recommended to avoid injury. Ensure you fully understand the use of power tools recommended for use in assembling this floor. Eye protec on should be worn when necessary, when opera ng power tools.
- Page 53 Floor Frame Dimensions 8x16 has door opening on the short [2400mm]side; 16x8 has door opening on long side 8x16 - 16x8 Floor V5—Jan 2023...
-
Page 54: Kit Contents
Kit Contents [12] [18] L750 SJ1499 Log 100x100x750mm,H4 Suitable for uneven ground. It is recommended that the Single Joist 140x38x17499mm posts are concreted 400-500mm in the ground. [12] DJ1499 EP1200 Double Joist 140x38x1499mm End Plate [Drilled] 140x38x1200mm YT505631 YT1798631 Floorboard 1798 x 631mm Floorboard 505 x 631mm. - Page 55 Assemble Quarter Frames [6] Qty listed per Frame [Qty] DJ1499 EP1200 [18] BS100 SJ1499 Assemble Frames: Assemble individual frames first. Screw through predrilled holes in End Plate (EP) into Single and Dou- ble Joists DJ & SJ) using 100mm ba en screws (100BS). Assemble the frames. The frames are used to mark out the post loca ons for the floor.
- Page 56 BS100 [3] BS100 [2] 8x16 - 16x8 Floor V5—Jan 2023...
- Page 57 BS100 [8] 8x16 - 16x8 Floor V5—Jan 2023...
- Page 58 Quarter Frame Spacings Floor Nogs [F350] are ideal for use as Joist spacer. Quarter Frame [6] 8x16 - 16x8 Floor V5—Jan 2023...
- Page 59 Posi on and 1st Quarter frame Qty listed per Frame [Qty] L750 [16] BS100 Sub. Frame Lay Frame in installa on loca on. Mark inside of frame posi ons, on ground. [Red do ed circle on diagram below]. Remove material to achieve level frame It is recommended that the posts are concreted 400-500mm in the ground.
- Page 60 Secure Posts to Frame: Predrill [post] screw posi on prior to fi ng screws, four per post. Stagger the alignment of the Screw to avoid interference of the screws Posts and fixings arrangement. NOTE: L750 sits under DJ extension 8x16 - 16x8 Floor V5—Jan 2023...
- Page 61 Levelling and filling in: Once posts are fi ed and secured, move frame to prepared loca on, level the posts and frames. A level frame is essen al Concrete / Backfill each post into loca on, Check and adjust level and square before concrete sets up / Tamping in.
- Page 62 Posi on 2nd Quarter frame Qtr. Frame L750 BS65 BS100 Note: DJ’s to outside edge of frame assembly. Lay Frame in installa on loca on. Mark inside of frame posi ons, on ground. [Red do ed circle on diagram above]. Remove sufficient material to achieve level frame 8x16 - 16x8 Floor V5—Jan 2023...
- Page 63 BS65 [4] Fix Frames together BS100 [8] 8x16 - 16x8 Floor V5—Jan 2023...
- Page 64 Repeat fixing and levelling process as in step 2. Fasten Frames with BS65 prior to fixing Logs. Levelling and filling in: Once posts are fi ed and secured, level the posts and frames. A level frame is essen al Concrete / Backfill each post into loca on, Check and adjust level and square before concrete sets up / Tamping in.
- Page 65 8x16 - 16x8 Floor V5—Jan 2023...
- Page 66 BS65 [6] Fix Frames together 8x16 - 16x8 Floor V5—Jan 2023...
- Page 67 Floor Nogs [10] [40] FN350 BS100 8x16 - 16x8 Floor V5—Jan 2023...
- Page 68 [4] BS100 per Nog. Fixing the top of Nog flush with top of the frame will assist with floor level. Final check for frame/s level should be made before Flooring is fi ed. Please ensure posts and frames are level before finalizing Concre ng or Tamping in of posts. This final check is made more difficult if not checked [and any issues rec fied] at this stage.
- Page 69 Flooring YT1798800 YT1798631 YT505800 [125] YT505631 PS50CSK 8x16 - 16x8 Floor V5—Jan 2023...
- Page 70 Note: There are crosses printed on the Floorboard surface. These are used for manu- facturing control and not alignment points for fixings. PS50CSK—[2] covering Nogs PS50CSK—[3] per Joist 8x16 - 16x8 Floor V5—Jan 2023...
- Page 71 8x16 - 16x8 Floor V5—Jan 2023...
- Page 72 Con nue Placing and Fixing the flooring un l Frame is covered as shown below. 8x16 - 16x8 Floor V5—Jan 2023...
- Page 73 Floor Anchor [14] PS75CSK 85˚ Pre drill towards center of frame sill 8x16 - 16x8 Floor V5—Jan 2023...
- Page 74 8x16 - 16x8 Floor V5—Jan 2023...
- Page 75 TO REGISTER YOUR WARRANTY Thank-you for purchasing a STILLA product. To register your 10 year product warranty, please go to www.s lla.com.au/warranty and com- plete the online form. We recommend that you complete this step once you have finished installing your product.
Need help?
Do you have a question about the Hampton and is the answer not in the manual?
Questions and answers