Table of Contents
Advertisement
Advertisement
Table of Contents
Troubleshooting

Subscribe to Our Youtube Channel
Related Manuals for Deye SUN Series


Summary of Contents for Deye SUN Series
- Page 1 User manual DEYE SUN microinverter Installation / User Manual Photovoltaics Grid-connected micro- inverters (with built-in WIFI-G3) About us contact Onlineshop Offgridtec GmbH Tel +49 8721 91994-00 www.offgridtec.com Im Gewerbepark11 Mail info@offgridtec.com 84307 Eggenfelden...
-
Page 2: Table Of Contents
User manual DEYE SUN microinverter Important safety instructions 01-03 Safety information Explanation of radio interference suppression Meaning of symbols Introduction to the microinverter system 03-05 Microinverters maximise PV energy production More reliable than central or string inverters Easy to install... -
Page 3: Important Safety Instructions
User Manual DEYE SUN microinverter Important safety instructions This manual contains important instructions to follow when installing and maintaining the grid- connected photovoltaic inverter (microinverter). To avoid the risk of electric shock and to ensure the safe installation and operation of the microinverter, the following symbols are used in this document to indicate hazardous conditions and important safety instructions. -
Page 4: Explanation Of Radio Interference Suppression
User manual DEYE SUN microinverter √ Under no circumstances connect the DC input when the AC plug is disconnected. √ Install disconnecting devices on the AC side of the inverter. Explanation of radio interference suppression CE EMC Compliance: The unit complies with the requirements of the CE EMC Directive, which is designed to protect against harmful interference when installed in a residential area. -
Page 5: Introduction To The Microinverter System
User manual DEYE SUN microinverter The CE mark is affixed to the solar inverter to confirm that the device complies with the provisions of the European Low Voltage and EMC Directives. Follow the operating instructions Person who is adequately advised or supervised by a qualified electrician to identify risks and avoid hazards that may arise from electricity. -
Page 6: Microinverters Maximise Pv Energy Production
User Manual DEYE SUN microinverter module counter junction box micro inverter WIFI-amplifier Neutral conductor Grounding monitoring system Router NOTE If the WLAN signal in the area of the micro inverter is weak, a WLAN signal booster must be placed at a suitable location between the router and the micro inverter. -
Page 7: Easy To Install
User manual DEYE SUN microinverter Easy to install You can install individual PV modules in any combination of module number, orientation, different types and power rates. The earth wire (PE) of the AC cable is connected to the enclosure inside the microinverter, which may eliminate the need to install an earth wire (check local regulations). -
Page 8: The Microinverter System
User manual DEYE SUN microinverter Installation of the micro inverter system A PV system with microinverters is easy to install. Each microinverter can be easily mounted on the PV frame directly under the PV module(s). The low voltage DC cables are connected directly from the PV module to the microinverter, avoiding the risk of high DC voltage. -
Page 9: Parts List
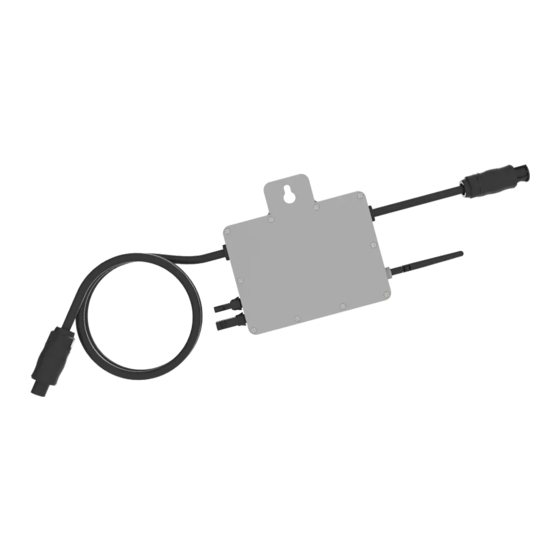
User manual DEYE SUN microinverter Parts list Please use the following chart to check if all parts are included in the package: User manual x1 Microinverter x1 AC-Plug (optional) x1 Antenna x1* * This antenna is for micro inverters with built-in WiFi module. -
Page 10: Installation Procedure
User manual DEYE SUN microinverter Installation procedure Step 1 - Installing the AC junction box a. Install a suitable junction box at a suitable location on the PV racking system (usually at the end of a module branch). b. Connect the open wire end of the AC cable to the junction box with a suitable gland or strain relief. - Page 11 User manual DEYE SUN microinverter CAUTION : Before installing a microinverter, check that the mains voltage at the common connection point matches the rated voltage on the microinverter label. CAUTION : Do not place the inverters (including the DC and AC connections) in locations exposed to the sun, rain or snow, including in the spaces between the modules.
-
Page 12: Operating Instructions For The Micro Inverter
User manual DEYE SUN microinverter Step 4 - Fitting an AC cable protection cap to the end of the AC cable Step 5 - Connecting the Microinverter to the PV modules NOTE: If AC power is already present when the DC cables are plugged in, the microinverter should immediately flash red and start working within the set time (standard 60 seconds). -
Page 13: System Troubleshooting
User manual DEYE SUN microinverter he units should flash red one minute after the AC circuit breaker is switched on. Then the blue LED flashes. This means that the units are generating power normally. The faster the blue LED flashes, the more power is being generated. -
Page 14: Troubleshooting A Malfunctioning Microinverter
User manual DEYE SUN microinverter GFDI-Error A red LED flashing four times indicates that the micro inverter has detected a GFDI (Ground Fault Detector Interrupter) fault in the PV system. As long as the GFDI fault has not been rectified, the LED continues to flash four times. - Page 15 User manual DEYE SUN microinverter 2. diagnosis via the network: a. No data display: The website and the APP do not display any data, check the network configuration. b. It only shows that the micro inverter is online, but no data. This may be because the server is being updated.
-
Page 16: Replace
User manual DEYE SUN microinverter Replace Proceed as follows to replace a failed micro inverter A. Disconnect the microinverter from the PV module in the order shown below: 1. Disconnect the alternating current (AC) by switching off the circuit breaker. -
Page 17: Connection Diagram
User manual DEYE SUN microinverter Connection diagram Sample wiring diagram, three-phase red L black N yellow PE junction box counter WIFI-amplifier MAX 17 SUN300G3-EU-230 per Branch MAX 10 SUN500G3-EU-230 per Branch MAX 8 SUN600G3-EU-230 per Branch MAX 6 SUN800G3-EU-230 per Branch... - Page 18 User manual DEYE SUN microinverter Sample wiring diagram single-phase red L black N yellow PE junction box counter WIFI amplifier MAX 17 SUN300G3-EU-230 per Phase MAX 10 SUN500G3-EU-230 per Phase MAX 8 SUN600G3-EU-230 per Phase MAX 6 SUN800G3-EU-230 per Phase...
- Page 19 User manual DEYE SUN microinverter Sample wiring diagram, three-phase red L black N yellow PE junction box counter MAX 4 SUN1300G3-EU-230 per Phase MAX 3 SUN1600G3-EU-230 per Phase WIFI-amplifier Router monitoring system MAX 2 SUN2000G3-EU-230 per Phase grounding - 17...
- Page 20 User manual DEYE SUN microinverter Sample wiring diagram single-phase red L black N yellow PE junction box counter WIFI-amplifier MAX 4 SUN1300G3-EU-230 per Phase MAX 3 SUN1600G3-EU-230 per Phase Router MAX 2 SUN2000G3-EU-230 per Phase monitoring system grounding - 18...
-
Page 21: Monitoring Platform
User manual DEYE SUN microinverter Monitoring platform This series of microinverters has a built-in WIFI module that can communicate directly with a WLAN router. For WIFI configuration, please refer to the manual " Integrated WIFI Module WIFI Configuration Manual". Web monitoring address: https://pro.solarmanpv.com (for Solarman merchant account);... -
Page 22: How Is The Microinverter Configured For The Router Via The Internet
User Manual DEYE SUN Microinverter How is the microinverter configured for the router via the Internet? 1. Open a wireless network. 2. Select the logger network (network name: AP+SN) and establish a connection. The default password is 12345678. Safe Safe... - Page 23 User Manual DEYE SUN Microinverter 5. Go to the Setup Guide, click Update and locate the wireless network. Select the destination network and connect. 6. Enter the password and click Next. - 21...
- Page 24 User Manual DEYE SUN Microinverter You can select the following options to increase security and click Next 8. After successful setup, the following page is displayed; confirm with OK to restart the module. - 22...
- Page 25 User Manual DEYE SUN Microinverter Connect to the AP network of the Microinverter, log in again at 10.10.100.254 and check the system information here. After the network settings are made, the STA mode of the wireless network is activated. The information about the...
-
Page 26: How To Connect In The App
User Manual DEYE SUN microinverter How to connect in the App Registration Go to SOLARMAN Smart and register. Click on "Register" and create your account here. Registrate SOLARMAN Smart E-Mail Rufnummer E-Mail Username Phoneno. E-Mail E-Mail E-Mail E-Mail Passwort passwort... - Page 27 User Manual DEYE SUN Microinverter Add a logger (recording device) Option 1: Enter the logger SN manually. Option 2: Click the icon on the right and scan the logger SN. You will find the logger SN on the packaging or the logger housing.
- Page 28 User Manual DEYE SUN Microinverter Step 1: Confirm WiFi Info Ensure that your mobile phone is connected to the correct WiFi network. Click on "Start". Notice: 5GHz WiFi is not supported. Special characters (e.g. ,;= ) in router name and password are not supported.
- Page 29 User Manual DEYE SUN Mikroinverter WLAN settings Go to WLAN Setting and connect the following network manually WLAN Android MY NETWORKS ChinaNet AP_622602179 Android HYH123 IGWN-5G ChinaNet IGWN-HILINK AP_622602179 HYH123 AP_622602179 IGWN-5G Password OTHER NETWORKS Show advanced options act-blue ChinaNet-igen Step 3:Automatic configuration...
- Page 30 User Manual DEYE SUN Microinverter Device Configuration Configurtion succeeded Device data will be displayed in 10 mins.After that, you can check device status status in device list. Please shorten the distance between the device, router and phone. Connect to device...
Need help?
Do you have a question about the SUN Series and is the answer not in the manual?
Questions and answers