Table of Contents
Advertisement
Available languages
Available languages
CLIMATE CONTROL
Rooftop air conditioner (air
EN
distribution box, wall thermostat
controls)
Installation manual . . . . . . . . . . . . . . . . . . . . . . 3
Climatiseur de toit (caisson de
FR
distribution d'air, commandes de
thermostat murales)
Instructions de montage . . . . . . . . . . . . . . . . 27
WARNING
Cancer and Reproductive Harm
www.P65Warnings.ca.gov
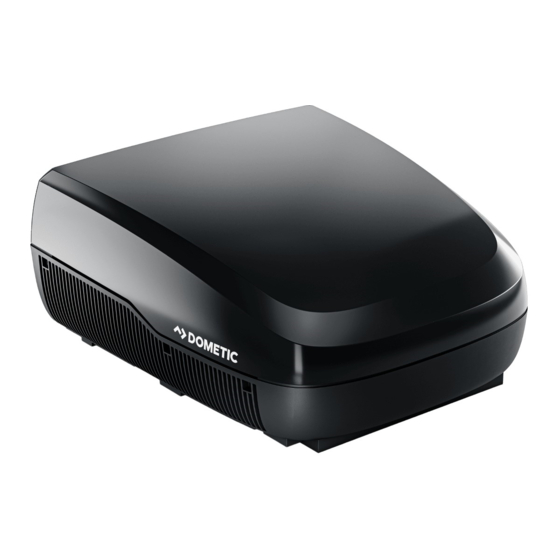
FRESHJET
FreshJet3 Series and FreshJet4 Series
3317883.000 2023-03-10 | ©2023 Dometic Corporation
Advertisement
Chapters
Table of Contents

Related Manuals for Dometic FreshJet3 Series


Summary of Contents for Dometic FreshJet3 Series
- Page 1 CLIMATE CONTROL FRESHJET FreshJet3 Series and FreshJet4 Series Rooftop air conditioner (air distribution box, wall thermostat controls) Installation manual ..... . 3 Climatiseur de toit (caisson de distribution d’air, commandes de...
- Page 2 Rooftop air conditioner (air distribution box, wall thermostat controls) Copyright © 2023 Dometic Group. The visual appearance of the contents of this manual is protected by copyright and design law. The underlying technical design and the products contained herein may be protected by design, patent or be patent...
-
Page 3: Table Of Contents
8 System check . . . . . . . . . . . . . . . . . . . . . . . . . . 23 date product information, please visit www.dometic.com. -
Page 4: Understand Signal Words
DANGER! • Use only Dometic replacement parts and Indicates a hazardous situation that, if not avoided, components that are specifically approved for use will result in death or serious injury. -
Page 5: General Information
Have this information ready before contacting • Use for purposes other than those described in this Dometic for service. manual Dometic reserves the right to change product 3 .3 ADB components appearance and product specifications. This section identifies the main ADB components. -
Page 6: Thermostat Compatibility
General information Rooftop air conditioner (air distribution box, wall thermostat controls) 3 .4 Thermostat compatibility 3 .6 ADB component dimensions This section identifies the thermostat displays This section provides the internal dimensions of the ADB compatible with this ADB. component. Display Model Interact LED display... -
Page 7: Placement Requirements
The proper location of the thermostat is important to ensure the unit provides a comfortable RV temperature. Tilt allowance To determine where to place the thermostat, consider Model number Maximum tilt (all directions) these items: FreshJet3 series 15° FreshJet4 series... -
Page 8: Specifications
Circuit protection: a time delay fuse or circuit breaker is required. Dometic Corporation gives general guidelines for generator requirements. These guidelines come from experiences people have had in actual applications. When sizing the generator, the total power usage of your RV must be considered. Generators may lose power at high altitudes and from lack of maintenance. -
Page 9: Wiring Diagrams
CN9 FOR 12V DC OUTPUT * INDOOR TEMP SENSOR IS OPTIONAL CN1 TO BATTERY * OUTDOOR TEMP SENSOR IS OPTIONAL 4 FreshJet3 Series CN11 TO ADB FOR COMMUNICATION * COMP START ASSIST IS OPTIONAL CN9 FOR 12V DC OUTPUT * INDOOR TEMP SENSOR IS OPTIONAL... -
Page 10: Pre-Installation
Pre-installation Rooftop air conditioner (air distribution box, wall thermostat controls) 6 Pre-installation 6 .2 Preparing the thermostat opening WARNING: FIRE OR ELECTRICAL SHOCK HAZARD . Failure to obey these warnings 1. Confirm the gas supply is shut off, and the 115 VAC could result in death or serious injury . - Page 11 Rooftop air conditioner (air distribution box, wall thermostat controls) Pre-installation 6 .3 .1 Using an existing roof vent opening 6 .3 .2 Making a new roof opening If the roof does not have an existing roof vent, go to If the roof has an existing roof vent, see “Using an “Making a new roof opening”...
- Page 12 Pre-installation Rooftop air conditioner (air distribution box, wall thermostat controls) 6 .4 .1 Routing the VAC power supply wire 1. Route the 115 VAC power supply wire, with ground, from the time-delay fuse or circuit breaker box to the roof opening. Use a listed/certified non-metallic sheathed single strand cable.
- Page 13 Rooftop air conditioner (air distribution box, wall thermostat controls) Pre-installation 6 .4 .4 Routing the furnace wire Use of furnace 12 V wire for the 12 V supply of the AC control board is not approved. If your system includes a gas furnace, you must complete the following steps: 1.
-
Page 14: Positioning The Rooftop Component
Pre-installation Rooftop air conditioner (air distribution box, wall thermostat controls) 6 .4 .7 Routing an automatic generator start (AGS) feature via RV-C (optional) If installing an AGS feature, you must complete one of the following actions: • If the generator is equipped with RV-C communication capabilities and an AGS device: 1. -
Page 15: Installation
Rooftop air conditioner (air distribution box, wall thermostat controls) Installation • “Using Independent RJ-45 Wire to Supply Communication to the Thermostat” on page 15, • “Using RV-C BUS and Multiplexer to Supply CAN Communication to the AC” on page 16. 7 .1 .1 Using Independent RJ-45 Wire to Supply Communication to the Thermostat If installing non-RJ-45 wiring, go to “Using RV-C BUS and Multiplexer to Supply CAN Communication to... - Page 16 Installation Rooftop air conditioner (air distribution box, wall thermostat controls) 1. Cut back the outer cable shield 3.0 in. (76 mm) and strip 0.3 in. (7.6 mm) of insulation from each wire. 14 Wiring to the thermostat 16 Connecting the thermostat communication cable plug to the 2.
-
Page 17: Installing The Electronic Control Box
Connect the previously run (–) 12 VDC supply wire protruding from the roof opening to the 3. Applying pressure over the Dometic logo, push the (–) 12 VDC black wire at the electronic control bottom edge of the display until the entire display is box. - Page 18 Installation Rooftop air conditioner (air distribution box, wall thermostat controls) 7 .3 .1 Locating the DIP switches DIP switch setting configuration DIP location Description Each thermostat can have up to four Zone 2 zones. If only one rooftop component is Zone 3 installed, it becomes zone 1 by default and DIP switch settings for zones 2, 3, or...
-
Page 19: Installing The Foam Dividers
Rooftop air conditioner (air distribution box, wall thermostat controls) Installation 7 .4 Installing the foam dividers Roof thicknesses vary among RVs and the ADB installation may require additional foam to fill any gaps in thicker roofs. This section describes how to determine if additional foam dividers are required, the number required, and the installation method. - Page 20 Installation Rooftop air conditioner (air distribution box, wall thermostat controls) 22 Confirming the foam divider height measurement Flat surface of the ADB Full height measurement (equal to the roof thickness) Stack of foam dividers 5. Place the ADB face down on a stable, protected, flat surface.
- Page 21 Rooftop air conditioner (air distribution box, wall thermostat controls) Installation Roof thickness 1 .25 to 5 .5 in . (32 to 140 mm) All models 1.25 in. 1.5 in. 2.0 in. 2.5 in. 3.0 in. 3.5 in. 4.0 in. 4.5 in. 5.0 in. 5.5 in. Roof (32 mm) (38 mm) (51 mm) (64 mm)
-
Page 22: Securing The Adb
Installation Rooftop air conditioner (air distribution box, wall thermostat controls) 7 .5 Securing the ADB Roof thickness 6 .0 to 7 .5 in . (152 to 191 mm) NOTICE: Overtightening could damage the base pan All models or ceiling template. Not enough torque will cause an 6.0 in. -
Page 23: System Check
Rooftop air conditioner (air distribution box, wall thermostat controls) System check 8 System check This section describes how to reset and/or complete a final check of the system. 8 .1 Resetting the system During a system initialization, the factory default settings are restored. -
Page 24: Checking Out The System
Operation Rooftop air conditioner (air distribution box, wall thermostat controls) 10 .2 Cleaning the ADB e. Continue to “Checking out the system” on page 24). NOTICE: Never use furniture polish or scouring powders to clean the outside shell of the ADB. 8 .2 Checking out the system Clean the outside shell of the ADB with a soft cloth See the thermostat operating instructions for... -
Page 25: Troubleshooting
For a more permanent solution to high heat gain, accessories like the Dometic outdoor patio or window awnings reduce the effects of direct sunlight. During normal operation, this product is designed to remove a certain amount of moisture from the air, depending on the size of the space being conditioned. -
Page 26: Disposal
WARRANTY LIMITED TWO WARRANTY AVAILABLE AT DOMETIC.COM/EN-US/TERMS-AND-CONDITIONS- CONSUMER/WARRANTY. IF YOU HAVE QUESTIONS, OR TO OBTAIN A COPY OF THE LIMITED WARRANTY FREE OF CHARGE, CONTACT: DOMETIC CORPORATION CUSTOMER SUPPORT CENTER 5155 VERDANT DRIVE ELKHART, INDIANA, USA 46516 1-800-544-4881 OPT 1... -
Page 27: Sécurité
......40 Rendez-vous sur : www.dometic.com Veuillez lire et suivre attentivement l’ensemble des instructions, directives Installation . -
Page 28: Comprendre Les Mots De Signalement
Indique une situation dangereuse qui, si elle • Utilisez uniquement des pièces et composants de n’est pas évitée, est susceptible d’entraîner des rechange Dometic spécifiquement approuvés pour blessures graves, voire mortelles. une utilisation avec ce produit. PRUDENCE •... -
Page 29: Usage Conforme
• d’usages différents de ceux décrits dans ce manuel. • Les numéros de modèle et de série du caisson de distribution d’air se trouvent sur la plaque Dometic se réserve le droit de modifier l’apparence et signalétique située sur le gabarit de plafond. Pour les spécifications produit. -
Page 30: Compatibilité Du Thermostat
Climatiseur de toit (caisson de distribution d’air, commandes de thermostat murales) 1 Composants du caisson de distribution d’air Intercalaires en Boulons longs mousse Gabarit de plafond Filtre à air 2 FreshJet (séries FJX3 et FJX4) Capot du caisson de 13,8 po. (351 mm) Ligne centrale de distribution d’air l’unité... -
Page 31: Dimensions Du Caisson De Distribution D'air
Climatiseur de toit (caisson de distribution d’air, commandes de thermostat murales) 3 .6 Dimensions du caisson de 3 .7 Exigences de positionnement distribution d’air Cette section décrit les facteurs à prendre en compte lors de la mise en place du rooftop component et du Cette section fournit les dimensions internes du caisson thermostat. - Page 32 Climatiseur de toit (caisson de distribution d’air, commandes de thermostat murales) 3 .7 .2 Planification de l’emplacement du 1. Prenez toutes les mesures pendant que le véhicule de plaisance est stationné sur une surface plane. thermostat 2. Installez le rooftop component sur une section de toit Le positionnement correct du thermostat est important plane.
-
Page 33: Spécifications
Protection du circuit : un fusible temporisé ou un disjoncteur est nécessaire. Dometic Corporation fournit des directives générales concernant les exigences du générateur. Ces directives sont issues de l’expérience d’utilisateurs lors d’applications réelles. Lors du dimensionnement du générateur, la consommation d’énergie totale de votre véhicule de plaisance doit être prise en compte. Les générateurs peuvent perdre de la puissance à... -
Page 34: Plans De Raccordement
Climatiseur de toit (caisson de distribution d’air, commandes de thermostat murales) 5 Plans de raccordement Cette section fournit les schémas de câblage pour le produit. Définitions des schémas de câblage ; 115 VCA ; 60 Hz 1 pH ; utilisez uniquement des conducteurs en cuivre - - - - - - Câblage de terrain ---------- Câblage d’usine... -
Page 35: Pré-Installation
Climatiseur de toit (caisson de distribution d’air, commandes de thermostat murales) 6 Pré-installation 6 .1 Détermination de vos besoins en refroidissement AVERTISSEMENT : RISQUE D’INCENDIE OU DE CHOC ÉLECTRIQUE . Le non-respect de ces Pour déterminer vos besoins en refroidissement, tenez mises en garde peut entraîner des blessures compte des éléments suivants : graves, voire mortelles . -
Page 36: Préparation De L'ouverture De Toit Sur Le Véhicule De Plaisance
Climatiseur de toit (caisson de distribution d’air, commandes de thermostat murales) Cette section décrit comment préparer le toit du véhicule de plaisance lorsqu’il dispose déjà d’une ventilation. 1. Coupez l’alimentation en gaz, déconnectez l’alimentation 115 VCA du véhicule de plaisance et débranchez la borne positive (+) 12 VCC de la batterie. -
Page 37: Acheminement Du Câblage D'alimentation Vers L'ouverture Du Toit
Climatiseur de toit (caisson de distribution d’air, commandes de thermostat murales) 8 Coffrage structurel pour une nouvelle ouverture de toit 7 Structure pour une nouvelle ouverture de toit 0,8 po. (20 mm) 15 po (381 mm) Incorrecte Correcte Largeur minimum du Longueur coffrage exposée du câble Correcte d’alimentation 0,3 po. - Page 38 Climatiseur de toit (caisson de distribution d’air, commandes de thermostat murales) 6 .4 .1 Acheminement du câble 2. Assurez-vous qu’un segment minimum de 15 po. (381 mm) de câble dépasse de l’ouverture du toit d’alimentation CA et qu’un segment de 6 po. (152 mm) dépasse de la 1.
-
Page 39: Positionnement Du Composant De Toit
Climatiseur de toit (caisson de distribution d’air, commandes de thermostat murales) 4. Protégez tous les câbles à l’endroit où ils passent Le signal normalement requis pour cette fonction dans l’ouverture, conformément aux normes locales est un contact de relais ouvert. Lorsque l’EMS et nationales. -
Page 40: Étapes Préliminaires À L'intérieur Du Véhicule De Plaisance
Climatiseur de toit (caisson de distribution d’air, commandes de thermostat murales) 2. Placez le contenu du kit de caisson de distribution d’air (ADB) dans le véhicule de plaisance. Le kit ADB comprend le matériel de montage du caisson de distribution d’air qui sera installé dans le véhicule de plaisance. -
Page 41: Installation
Climatiseur de toit (caisson de distribution d’air, commandes de thermostat murales) 7 Installation AVERTISSEMENT : RISQUE D’INCENDIE OU DE CHOC ÉLECTRIQUE . Le non-respect de ces mises en garde peut entraîner des blessures graves, voire mortelles . • Coupez l’alimentation en gaz, déconnectez l’alimentation 115 VCA du véhicule de plaisance T-568B T-568B... - Page 42 Climatiseur de toit (caisson de distribution d’air, commandes de thermostat murales) 7 .1 .2 Utilisation du BUS RV-C et du multiplexeur pour assurer la communication CAN vers le climatiseur Si vous installez un câblage RJ-45, passez à la section «Utilisation d’un câble RJ-45 indépendant pour assurer la communication avec le thermostat»...
-
Page 43: Installation Du Boîtier De Commande Électronique
Dans le cas contraire, 2. Insérez le bord supérieur de l’écran dans l’ouverture. l’unité peut être endommagée. 3. En appliquant une pression sur le logo Dometic, 1. Si vous utilisez un câble RJ-45 indépendant : poussez le bord inférieur de l’écran jusqu’à ce que l’ensemble de l’écran soit aligné... -
Page 44: Configuration Du Boîtier De Commande Électronique
Climatiseur de toit (caisson de distribution d’air, commandes de thermostat murales) 7 .3 .2 Réglage des commutateurs DIP 5. Branchez le câble du capteur de température intérieure (le cas échéant) sur la prise à 2 broches Cette section décrit les réglages appropriés pour indiquant ROOM SENSOR (CAPTEUR DE PIÈCE) du les commutateurs DIP du boîtier de commande boîtier de commande électronique. -
Page 45: Installation Des Intercalaires En Mousse
Climatiseur de toit (caisson de distribution d’air, commandes de thermostat murales) La déshumidification n’est pas Configuration des réglages de commutateur DIP Déshumidification utilisée sur ce rooftop component. Emplacement du Description Laissez ce commutateur DIP commutateur DIP en position Désactivé, sauf Chaque thermostat peut avoir Zone 2 s’il est nécessaire pour la... - Page 46 Climatiseur de toit (caisson de distribution d’air, commandes de thermostat murales) 1. Inspectez le caisson de distribution d’air et le Épaisseur du toit Intercalaire en matériel de fixation placés à l’intérieur du véhicule de mousse - Mousse supérieure - plaisance au début de la procédure «Positionnement 1,2 po.
- Page 47 Climatiseur de toit (caisson de distribution d’air, commandes de thermostat murales) 7. Mesurez la hauteur totale, depuis la surface plane du caisson de distribution d’air jusqu’à la partie supérieure des intercalaires en mousse pour confirmer qu’elle correspond à l’épaisseur du toit déterminée auparavant.
- Page 48 Climatiseur de toit (caisson de distribution d’air, commandes de thermostat murales) Épaisseur de toit de 1,25 à 5,5 po . (32 à 140 mm) Tous les modèles 1,25 po. 1,5 po. 2 po. 2,5 po. 3 po. 3,5 po. 4 po. 4,5 po. 5 po. 5,5 po. Épaisseur du (32 mm) (38 mm) (51 mm) (64 mm) (76 mm) (90 mm)
-
Page 49: Fixation Du Caisson De Distribution D'air
Climatiseur de toit (caisson de distribution d’air, commandes de thermostat murales) Épaisseur de toit de 6 à 7,5 po . (152 à 191 mm) Intercalaire en mousse Tous les modèles rechange 6 po. 6,5 po. 7 po. 7,5 po. Épaisseur du 1,2 po . (152 mm) (165 mm) (178 mm) (191 mm) toit (30 mm) -
Page 50: Vérification Du Système
Climatiseur de toit (caisson de distribution d’air, commandes de thermostat murales) 24 Disposition des boulons de fixation 26 Fixation du capot central Capot central Patte 5. Fixez le cache central sur l’ADB. 6. Rebranchez les alimentations 12 VCC et 120 VCA et mettez l’appareil sous tension. -
Page 51: Vérification Du Système
Climatiseur de toit (caisson de distribution d’air, commandes de thermostat murales) 1. Commencez par configurer les réglages de 2. Vérifiez le fonctionnement de tous les modes commutateurs DIP en suivant les instructions de applicables, y compris : Auto, Cool (Refroidissement), la section «Réglage des commutateurs DIP» on Fan (Ventilateur) et Heat (Chauffage). -
Page 52: Maintenance
Climatiseur de toit (caisson de distribution d’air, commandes de thermostat murales) 10 Maintenance Cette section décrit les opérations de routine permettant d’entretenir les composants de votre système pour assurer son bon fonctionnement. 10 .1 Nettoyage du filtre à graisses NOTICE: Ne faites jamais fonctionner l’unité sans avoir installé... -
Page 53: 11 Dépannage
Pour pallier plus durablement un gain de chaleur élevé, des accessoires tels que le patio extérieur ou les stores de fenêtre Dometic réduisent les effets de la lumière directe du soleil. -
Page 54: Mise Au Rebut
GARANTIE LIMITÉE DE DEUX GARANTIE LIMITÉE DE DEUX ANS DISPONIBLE SUR DOMETIC.COM/EN-US/TERMS-AND-CONDITIONS- CONSUMER/WARRANTY. POUR TOUTE QUESTION OU POUR OBTENIR UNE COPIE GRATUITE DE LA GARANTIE LIMITÉE, CONTACTEZ : DOMETIC CORPORATION CUSTOMER SUPPORT CENTER 5155 VERDANT DRIVE ELKHART, INDIANA, USA 46516 1-800-544-4881 OPT 1... - Page 55 Climatiseur de toit (caisson de distribution d’air, commandes de thermostat murales)
- Page 56 .com YOUR LOCAL YOUR LOCAL YOUR LOCAL DEALER SUPPORT SALES OFFICE dometic .com/dealer dometic .com/contact dometic .com/sales-offices...
Need help?
Do you have a question about the FreshJet3 Series and is the answer not in the manual?
Questions and answers