Macurco CM-6 User Instructions
Carbon monoxide detector, controller and transducer
Hide thumbs
Also See for CM-6:
- User instructions (16 pages) ,
- User instructions (72 pages) ,
- Application manual (16 pages)

Related Manuals for Macurco CM-6


Summary of Contents for Macurco CM-6
- Page 1 Macurco™ CM-6, CM-12 Carbon Monoxide Detector, Controller and Transducer User Instructions IMPORTANT: Keep these user instructions for reference.
-
Page 2: Table Of Contents
Macurco CM-xx Operation Manual Table of Contents General Safety Information ................................ 4 General Description................................4 List of warnings and Cautions............................4 Use Instructions and Limitations ..............................5 Use For ....................................5 Do NOT use for .................................. 5 Features ..................................... 6 Specifications .................................. - Page 3 Select Test Menu “tst” ..............................40 Calibration Menu “CAL” ..............................41 Sensor Reset Menu “SEn” ............................... 42 Macurco Gas Detection Product limited warranty ........................43 Technical Support Contact Information .................... Error! Bookmark not defined. General Contact Information ......................Error! Bookmark not defined.
-
Page 4: General Safety Information
1 General Safety Information The following instructions are intended to serve as a guideline for the use of the Macurco CM-6 and CM-12 Carbon Monoxide Detector. This manual will refer to these devices as CM-xx unless content is specific to a model. This manual is not to be considered all-inclusive, nor is it intended to replace the policy and procedures for your facility. -
Page 5: Use Instructions And Limitations
The CM-xx meets the requirements of the Uniform Building Code for enclosed garages and meets OSHA standards for CO exposure. CM-xx can be used stand alone, with the Macurco DVP-120 Detection and Ventilation Control Panel, other 12 VAC or 24 VDC fire/security panels or building automation systems. -
Page 6: Features
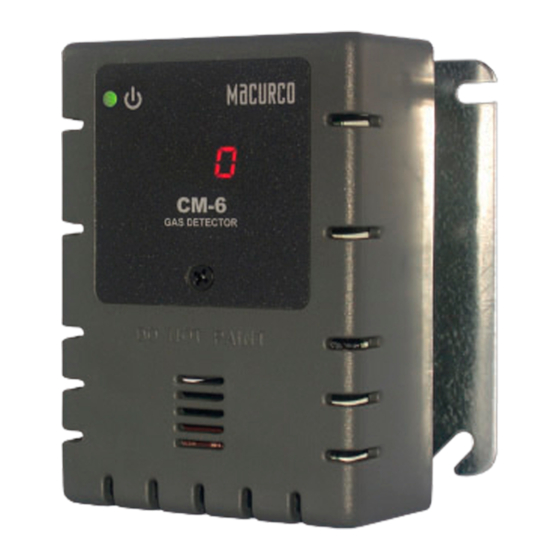
Calibration kit is available. One screw allows access for calibration or gas test Where required by federal, state, local regulations or the Authority Having Jurisdiction, CM-6 and CM-12 are required to be used with Listed Horn/Strobe model 78-2900-0211-X* to meet the 85dB(A) Audibility requirements of Standards UL 2075. -
Page 7: Installation Instructions
2. Connect the CM-6 to Class 2 power supply only. It is suggested to use a separate transformer for powering the unit or units because of possible interferences from other devices on the same power supply. - Page 8 Macurco CM-xx Operation Manual 8. The Fan Relay can be configured for latching or non-latching (default) when activated (when the gas concentration exceeds fan relay set point). Once latched in, power will need to be interrupted or the “TEST” button pressed to un- latch the relay condition.
- Page 9 Macurco CM-xx Operation Manual Figure 3-2 6-Series Rear View Figure 3-3 6-Series Alarm Control Panel diagram REV – 1.2.1 [34-2900-0511-6 ] P a g e...
- Page 10 Macurco CM-xx Operation Manual Figure 3-4 6-Series DVP-120 Control Panel diagram 10 | REV – 1.2.1 [34-2900-0511-6 ] P a g e...
- Page 11 In this application (above) the Fan or primary relay is used as a low-level alarm relay. The Alarm or secondary relay is used as a supervisory relay when utilized in the normally closed configuration. The CM-6 monitors all critical functions of the unit through software diagnostics that continually test and verify its operations.
-
Page 12: 12-Series Line Voltage
Figure 3-8 6-Series Horn & Strobe Combo Wiring Macurco External Horn/Strobe model number is 78-2900-0211-X, where X represents lens color, R for red lens cover, G for green lens cover, B for blue lens cover, O for amber lens cover, C for clear lens cover. Sound pressure for Horn/Strobe model is at least 85dB at 10 feet. - Page 13 Macurco CM-xx Operation Manual 7. The Current Loop is 4 mA in clean air and 4-20 mA for 0-200ppm CO. NOTE: 22 to 12 AWG wire shall be used. Wire used shall meet the temperature range of the detector i.e. 0°F to 125° F (-18°C to 52°C).
- Page 14 Macurco CM-xx Operation Manual Figure 3-11 12-Series Stand Alone Diagram 14 | REV – 1.2.1 [34-2900-0511-6 ] P a g e...
- Page 15 Macurco CM-xx Operation Manual Figure 3-12 12-Series Multiple Device Diagram Figure 3-13 12-Series Alarm Control Panel Diagram Figure 3-14 12-Series DVP-120 Control Panel Diagram 15 | REV – 1.2.1 [34-2900-0511-6 ] P a g e...
- Page 16 Macurco CM-xx Operation Manual Figure 3-15 12-Series Alternate Alarm Panel In this application (above) the Fan or primary relay is used as a low-level alarm relay. The Alarm or secondary relay is used as a supervisory relay when utilized in the normally closed configuration. The CM-12 monitors all critical functions of the unit through software diagnostics that continually test and verify its operations.
-
Page 17: Terminal Connection
Mains Power Connection Connect the CM-6 to Class 2 power supply only. It is suggested to use a separate transformer for powering the unit or units because of possible interferences from other devices on the same power supply. Connect the CM-6 to the control cables with terminal plugs. -
Page 18: Operations
Mains connections should be done in accordance with National and Local Electrical Codes. Only qualified personnel should connect Mains power to any device. Macurco recommends a minimum wire size of AWG18 and the wire insulator must be rated for 140°F (60°C) service. The modular connector will accept wire from 12 to 22 AWG. -
Page 19: Display Turned "Off
Macurco CM-xx Operation Manual Alarm level – With the display function turned “On” and the CO concentration reaching the Alarm Relay setting, (200 ppm, for example) the display will flash back and forth between “ALr” and “200” or current concentration of gas. The buzzer will sound indicating “Alarm”... -
Page 20: Default - Factory Settings
Calibration due dIS (disabled) To change settings, remove the Philips screw on the front of the CM-6. Pull off the front cover of the unit. Figure 4-1 Board View To reset the device to factory settings, see section 4.5.1 Selecting Default Configuration – “dEF 4.5.1 Selecting Default Configuration –... -
Page 21: Power-Up Test Setting - "Put
Macurco CM-xx Operation Manual change it to “YES” (flashing) then push Enter to confirm the change (solid) and push Enter again to return to “dEF” in the con menu. Push Next until “End” is displayed then push Enter to get back to normal operation. -
Page 22: Fan Relay Minimum Runtime Setting - "Frr
Push Next until “End” is displayed then push Enter to get back to normal operation. NOTE: CM-XX will transmit information about calibration period to Macurco Control Panel (via 4-20 mA output) only when 4- 20mA output setting is set to ‘EnH’. -
Page 23: Troubleshooting
Macurco CM-xx Operation Manual 5 Troubleshooting 5.1 On-Board Diagnostics The CM-xx monitors all critical functions of the unit through software diagnostics that continuously test and verify unit operations. If a problem is found, the unit will switch to a fail-safe/error mode or trouble condition. In this error mode, the Alarm relay will be activated, the 4-20 mA current loop will go to 24 mA, the unit will display the error code, the green status indicator LED light will flash, and the buzzer will chirp intermittently. -
Page 24: Sensor Poisons
6 Maintenance The CM-6 is low maintenance. The unit uses a long-life electrochemical sensor that has a 10-year life expectancy (in normal conditions). The detector’s performance should be tested regularly by using gas as detailed in the Testing and Field Calibration sections. -
Page 25: Cleaning
1-844-325-3050. All CM-6 units are factory calibrated, 100% tested for proper operation and accuracy of ±10%*. During normal operation the green status indicator LED light will be on steady, the fan & alarm relay will be in standby mode and the 4-20 mA output will be at 4mA (in clean air). -
Page 26: Testing
7.1.1 Operation Test Check that the green CM-6 status indicator LED light is illuminated continuously. If not, do not proceed with the tests. If the unit is in error mode, contact your local representative or Macurco technical service representative for information on resolving the problem. -
Page 27: Calibration And Test Kits
A Field Calibration Kit, Cal-Kit 1, and one bottle of calibration gas is needed to complete gas test. These are available through local distribution or from Macurco. NOTE: CM-xx must be tested or calibrated at regular intervals in accordance with the requirements of the National Fire Protection Association (NFPA) 720 or local code requirements. -
Page 28: Gas Testing
5. Turn on the regulator to start the gas flow and wait with the gas applied continuously. 6. With the display function turned “On”, the CM-6 will show the current concentration of CO or “0” (zero) in clean air. When the CO concentration reaches the Fan Relay setting (35 ppm, for example) the display will flash back and forth between “FAn”... -
Page 29: Testing The 4-20Ma Loop
4. The display option should be set to “On” and reading 0 ppm in clean air. 5. With the CM-6 cover on, aim the nozzle of the aerosol can into the sensor grate area (under DO NOT PAINT) and press for 2 to 3 seconds. - Page 30 Macurco CM-xx Operation Manual CM-xx has “CAL” top level menu that can be used to perform field calibration. ‘tSC’, ‘Spn’ and ‘End’ are sub-menu within “CAL” menu. ‘tSC’ is read only menu and represents the time since last calibration. If you enter this sub-menu, it will display value in format Y.MM.
-
Page 31: Appendix A - Table Of Images
Macurco CM-xx Operation Manual 8 Appendix A – Table of Images Figure 3-1 6-Series 4-20 mA Output diagram ............................. 8 Figure 3-2 6-Series Rear View ................................9 Figure 3-3 6-Series Alarm Control Panel diagram ..........................9 Figure 3-4 6-Series DVP-120 Control Panel diagram ........................10 Figure 3-5 6-Series Multiple Device diagram ............................ -
Page 32: Appendix B - Menu Structure
Macurco CM-xx Operation Manual 9 Appendix B – Menu Structure 9.1 Main Menu 32 | REV – 1.2.1 [34-2900-0511-6 ] P a g e... -
Page 33: Auto Test Menu "Buz
Macurco CM-xx Operation Manual 9.2 Auto Test Menu “bUZ” 33 | REV – 1.2.1 [34-2900-0511-6 ] P a g e... - Page 34 Macurco CM-xx Operation Manual Configuration Menu “CON” 34 | REV – 1.2.1 [34-2900-0511-6 ] P a g e...
- Page 35 Macurco CM-xx Operation Manual 35 | REV – 1.2.1 [34-2900-0511-6 ] P a g e...
- Page 36 Macurco CM-xx Operation Manual 36 | REV – 1.2.1 [34-2900-0511-6 ] P a g e...
- Page 37 Macurco CM-xx Operation Manual 37 | REV – 1.2.1 [34-2900-0511-6 ] P a g e...
- Page 38 Macurco CM-xx Operation Manual 38 | REV – 1.2.1 [34-2900-0511-6 ] P a g e...
- Page 39 Macurco CM-xx Operation Manual 39 | REV – 1.2.1 [34-2900-0511-6 ] P a g e...
-
Page 40: Select Test Menu "Tst
Macurco CM-xx Operation Manual 9.3 Select Test Menu “tst” 40 | REV – 1.2.1 [34-2900-0511-6 ] P a g e... -
Page 41: Calibration Menu "Cal
Macurco CM-xx Operation Manual 9.4 Calibration Menu “CAL” 41 | REV – 1.2.1 [34-2900-0511-6 ] P a g e... -
Page 42: Sensor Reset Menu "Sen
Macurco CM-xx Operation Manual 9.5 Sensor Reset Menu “SEn” 42 | REV – 1.2.1 [34-2900-0511-6 ] P a g e... -
Page 43: Macurco Gas Detection Product Limited Warranty
11 Macurco Gas Detection Product limited warranty Macurco warrants the CM-6 gas detector will be free from defective materials and workmanship for a period of two (2) years from date of manufacture (indicated on the inside cover of the CM-6), provided it is maintained and used in accordance with Macurco instructions and/or recommendations.
Need help?
Do you have a question about the CM-6 and is the answer not in the manual?
Questions and answers