
Related Manuals for Caroma Urbane II 300071W


Summary of Contents for Caroma Urbane II 300071W
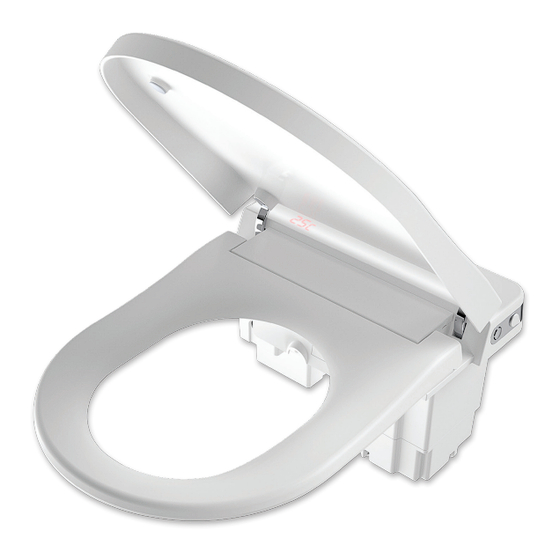
- Page 1 Installation and Operating Instructions Installation and Operating Instructions 300070W Livewell Electronic Bidet Seat 300071W Urbane II Electronic Bidet Seat...
-
Page 2: Safety Precautions
BING CODE OF AUSTRALIA. the battery has been swallowed or placed any part of the body. Caroma will not be liable for any loss arising from failure to comply with the following: LLATION MUST BE IN ACCORDANCE WITH AS/NZS 3500. 2 THIS TOILET DOUCHE SEAT IS SUPPLIED WITH DUAL CHECK VALVES AND IT ALSO •... -
Page 3: Bill Of Material
Bill of Material 300070W Livewell Electronic Bidet Seat Bidet seat Bill of Material Installation and Operating Instructions Installation and Operating Instructions 300070W Livewell Electronic Bidet Seat Bidet seat Installation and Operating Instructions Bidet Seat Filter Installation and Operating Instructions Urbane II Bidet Seat Remote Control Bidet Seat Ball Valve Part Number: 300077... -
Page 4: Technical Specification
Technical Specification 300071W 300071W r Wash r Wash 5 Steps (Default 3rd) 5 Steps (Default 3rd) 5 Steps (Default 3rd) 5 Steps (Default 3rd) e Flow Rate e Flow Rate 5 Steps (Default 5th) 5 Steps (Default 5th) r Drying r Drying e Air Rate e Air Rate... - Page 5 Bidet Dimensions Unit : mm...
-
Page 6: Installation Steps
Installation Steps • Before installation, Make sure the inlet hose is installed and the area is equipped to supply power These operations should be performed by qualified service personnel Unit : mm Unit : mm Power connector Mark centre line for bidet seat Pan Centreline 1/2”... - Page 7 Installation Steps Reset Align male end of power cable connector with female end, push it in and turn the nut all the way, as shown above Fit the elbow end of hose to the inlet connection of the seat and hand tighten the nut. Ensure the elbow is pointing Turn the water mains ON, check for leakage.
- Page 8 Install the Remote Control Install the Remote Control Recommended Installation Area Recommended Installation Area Recommended i stallation area This side up...
- Page 9 Overview Night Detector LED Status Program Entry Stop/Dry Rear Wash Female Wash...
-
Page 10: Remote Control
Remote Control Rear Wash Female Wash Massage Dryer / Stop Open / Close Cover Open / Close Increase Flow and Decrease Flow and Air Volume Air Volume Increase Position Decrease Position Increase Water and Decrease Water and Air Temperature Air Temperature 300071W Urbane II Electronic Bidet Seat Remote Control... -
Page 11: Function Introduction
Function Introduction Initialization After connection to the power and water supply, please wait for about 2 minutes for the Bidet to initialize. Do not operate during this period. User needs to be seated for the bidet functions to operate ● Wash Operation Press the “Wash”... - Page 12 Function Introduction Stop Operation In the process of Rear washing , Female washing or drying Press the "Stop" button on the remote control it will stop washing or drying..OR Press the “Dry / Stop” side button on seat to stop washing or drying. Adjusting Water Flow Rate In the process of rear washing or female washing, press the “flow adjustment”...
-
Page 13: Adjusting Temperature
Function Introduction Adjusting Temperature Adjusting Seat Temperature Press and hold “+” or “–” and press “Seat Open/Close” for temperature button and 5 seat settings press seat button to adjust the seat temperature. C 1 led There are 6 modes (including turning off seat heating mode), C 2 led every time the seat button is pressed, the mode will change. -
Page 14: Manual Mode
Function Introduction Function Introduction Cover / Seat Open or Close Cover / Seat Open or Close Automatic mode Automatic mode The function of automatic lid open/close, the lid will open automatically when the user detection The function of automatic lid open/close, the lid will open automatically when the user detection sensor detects movement within the sensor range. - Page 15 Function Introduction Deodorise Setting Smart mode for the deodorization by default. It is on when the user sits down and it will be off after one minute when the user leaves. If there is no operation of washing or drying during being seated, this mode will cancel after 15 minutes.
- Page 16 lid and seat under normal condition, the lid/seat will open or close automatically against he lid and seat under normal condition, the lid/seat will open or close automatically against trend of motion. The user should not use force. Once being stopped by any obstacle during he trend of motion.
-
Page 17: Nozzle Cleaning
Nozzle Cleaning The nozzle will be automatically cleaned before washing and after washing. The operation of manual cleaning is as follows Open the cover and seat, press the "Stop" and "Female Wash" side buttons at the same time, or press and hold the “Stop” + press “Decrease” on the remote control, the nozzle will come out with water and the nozzle head can be removed and cleaned manually. -
Page 18: Care And Maintenance
Care and Maintenance Maintenance interval Maintenance activity Weekly Clean all surfaces and corners. Clean the spray nozzle if required. See “Nozzle cleaning” Every half year Replace the filter if required. Every year Descal the device. See “Descaling the device” C C l l e e a a n n i i n n g g a a g g e e n n t t s s a a n n d d t t o o o o l l s s ●... - Page 19 D D a a m m a a g g e e t t o o h h u u m m a a n n b b o o a a g g e e n n t t s s . . Descaling the Device ●...
-
Page 20: Draining The Water Tank
ain the water tank Draining the Water Tank Drain the water tank 1. The water and power must be turned off before you disassemble the E-Bidet Drain the water tank 1. The water and power must be cut before you disassemble the E-Bidet 2. -
Page 21: Safety Precautions
NOTE: LOCAL AUTHORITIES MAY HAVE VARYING REQUIREMENTS. CHECK TO CONFIRM IF A RPZ VAULVE IS REQUIRED. Caroma will not be liable for any loss arising from failure to comply with the following: This product is an “I”type electrical appliance and must be safely connected to the grounding system. -
Page 22: Troubleshooting
Troubleshooting Troubleshooting Problem Potential cause Suggested action The power supply may not be ON. Turn ON the power. The water supply may not be opened. Open the water inlet valve to ensure there is a water supply. The filter (if used) may be blocked. Replace with a new filter. - Page 23 Notes...
- Page 24 NOTE: LOCAL AUTHORITIES MAY HAVE VARYING REQUIREMENTS. CHECK TO CONFIRM IF A RPZ VAULVE IS REQUIRED. Caroma will not be liable for any loss arising from failure to comply with the following: This product is an “I”type electrical appliance and must be safely connected to the grounding system.
Need help?
Do you have a question about the Urbane II 300071W and is the answer not in the manual?
Questions and answers
How do I access the power reset switch?
Our bidet toilet was working last night but this morning has no power. What do we check or do?