Advertisement
Overview

Getting started
Thank you for purchasing this Tristar product. This product has been designed and assembled with utmost care for you and the environment. Because we at Tristar like to think of the future of our planet and our children, we aim to do our best to help saving the environment. This is why we decided to reduce the number of pages of our user guides and product manuals. If you keep in mind that it takes up to 24 trees to produce 1 ton of paper, publishing product manuals in many languages costs our planet a lot of trees.

In this short manual provided with your Tristar device you can find a brief explanation of how to install and use your Tristar device.If you would still like to discover all the features of your new Tristar device, please visit our website (www.Tristar.net) where you can download the complete user manual in your language. By doing this Tristar hopes to do its share to make our planet a better place, but we can only succeed with your help!
Installation
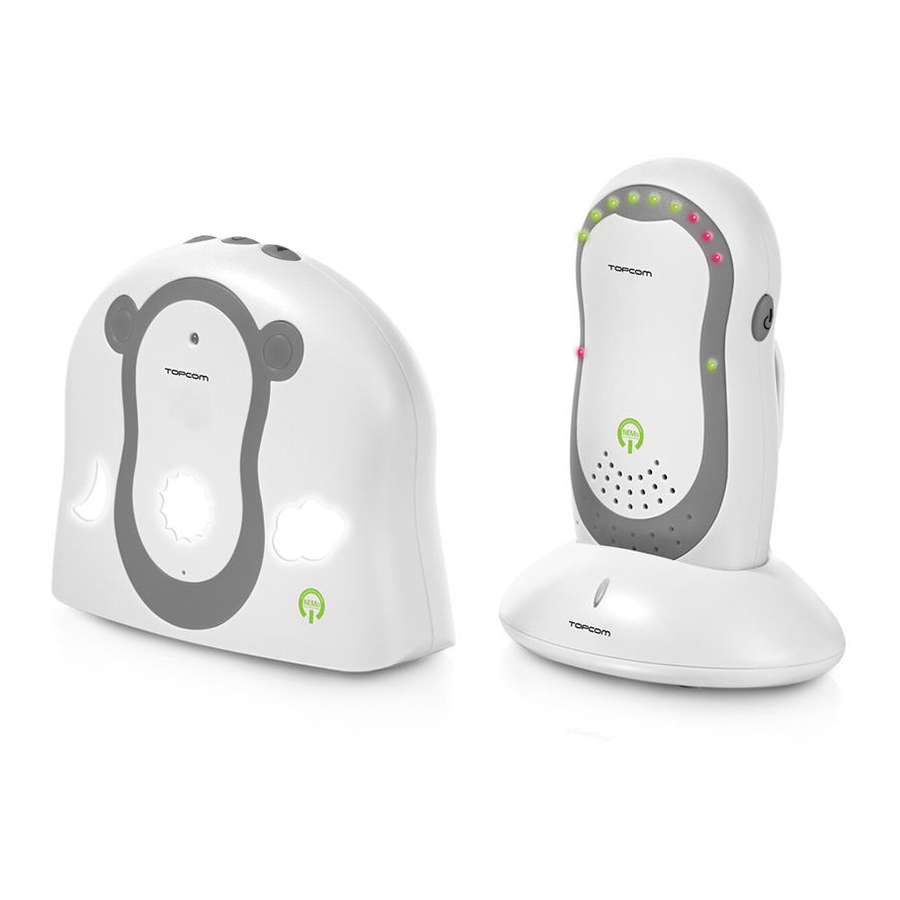
Baby unit battery Installation

The baby unit can be used either with 3 AA - Size batteries (alkaline batteries recommended) or the household AC current. The Baby unit has no charging function! It is recommended to add the batteries. It will automatic backup when there is a main power interruption.
- Turn the screw 90° of the battery cover (20) on the backside of the baby unit in a counter clockwise direction using a screw driver. Remove the battery cover (21). Do not try to rotate the screw further than the position 'open'.
- Install 3 AA alkaline batteries following the polarity as shown.
- Close the battery compartment.
- Press the On/Off button (14). The power (16) LED will illuminate.
- Press and hold the On/Off button (14) to switch off the baby unit.
Baby unit power supply
(see Figure E)
- Connect the small plug of the AC adaptor to the power connector of the baby unit and the other end of the adapter cable to the electric socket (230V/50Hz). Only use the enclosed adapter (6V DC / 500mA).
- Press the On/Off button (14). The power (16) LED will illuminate.
- Press and hold the On/Off button (14) to switch off the baby unit.
Parent unit battery Installation

- Turn the belt clip facing upwards.
- Turn the screw 90° of the battery cover (11) on the backside of the parent unit in a counter clockwise direction using a screw driver. Remove the battery cover (12). Do not try to rotate the screw further than the position 'open'.
- Place the NiMH battery pack in the battery compartment. Ensure that the connector of the battery pack (A) is connected and that the polarity matches the figure (B). The red wire = positive (+) polarity.
Do not install alkaline batteries! - Close the battery compartment.
- Press the On/Off button (2). The power LED (7) will illuminate.
- Press and hold the On/Off button (2) to switch off the parent unit.
Parent unit power supply

- Connect the power adapter cable to the main power socket (230V/ 50Hz). Only use the enclosed adapter (7V DC / 420mA).
- Slide the Parent Unit into the charger. The red charging light (6) illuminates.
- It takes about 13 hours to charge the unit.
- Press the On/Off button (2). The power LED (7) will illuminate.
- Press and hold the On/Off button (2) to switch off the patent unit. When the battery level is low, the power LED (7) will blink.
Link
Do not place the baby unit or cables in the crib or within the arm reach of the baby (at least 1 meter away).
When using the Babytalker the first time, it is adviced to test the connection.
- Install the parent unit in the same room as the baby unit, but have at least 1 meter between the 2 units.
- When both units are switched on, the parent unit will search for the baby unit.
- The green link LED (3) on Parent Units will flash until they communicate. Once the link is established, the LED (3) will light continuously. After a while, when the baby unit doesn't capture any sound, the LED (3) will flash every 5 seconds because the baby unit stops the transmission.
- The voice captured by the microphone will be audible on the parent unit.
- The level of the detected speech is represented by the LED's (1) on top of the parent unit.
- When the speech reached the maximum level, a beep will be audible.
- When the connection is established, move the parent unit to the monitor room, but within the operation range.
- Test the range again by pressing shortly the power (2) key. When there is no connection, an alert signal (double beep) will be audible (out of range warning) and the green connection LED will blink.
- Move the parent unit closer until the link is re-established. If there is connection, a long beep will be audile and the green connection led will light continuously.
Using the Babytalker KS-4221
Volume adjustment
There are 5 volume levels on the parent unit.
- Press the volume up (9) button to increase the volume level.
- Press the volume down (8) button to decrease the volume level.
Night Light
- Press the Night Light button (13) on the baby unit. The night light (17) will illuminate.
- Press the Night Light button (13) again to switch the light off.
Sound alert
The babies voice detection level is indicated by the number of volume indicator LED's (1) on top of the parent unit.
Only when the volume of the parent unit is set to 'Off', a beep can inform you when the voice level reached the red led zone.
Paging
When your parent unit is lost, you can track it by pressing the paging button on the baby unit for 2 seconds. The parent unit will emit a high beep tone for 30 seconds which helps you to find it very easiliy. Press the on/off button briefly to stop the beep.
Registration
When the baby unit night lights are flashing and/or no communication can be established between the baby- and parent unit (the green link LED on the parent unit will flash), the parent unit needs to be registered to the baby unit:
- When baby unit is in power off state, press and hold the On/Off button (14) on the baby unit, while connecting the power adaptor.
- The baby unit will power on and enter registration mode.
- Release the On/Off button. Under baby unit registration mode, the night light will flash for 60 seconds.
- During registration mode, press and hold the On/Off button on the parent unit while inserting charged batteries.
- The parent unit will power on and 3 LED's (7) (1) (3) will flash.
- If the registration is success, the baby unit night light will stop flashing and exit registration mode.
- The 3 LED's (7) (1) (3) on the parent unit will go out and exit registration mode with confirmation tone (1 long beep).
- If the registration is unsuccessful or the registration mode time is elapsed, the baby unit night light will stop flashing and exit registration mode.
- The 3 LED's (7) (1) (3) on the parent unit indication will go out and exit registration mode with an error tone (3 short beeps).
Retry the procedure.
To verify the linkage between parent unit and baby unit:
- Pressing the paging button on the baby unit for 2 seconds.
- The parent unit will emit a high beep tone for 30 seconds.
- Press any button on the parent unit briefly to stop the beep.
Documents / ResourcesDownload manual
Here you can download full pdf version of manual, it may contain additional safety instructions, warranty information, FCC rules, etc.
Advertisement


Need help?
Do you have a question about the babytalker KS-4221 and is the answer not in the manual?
Questions and answers